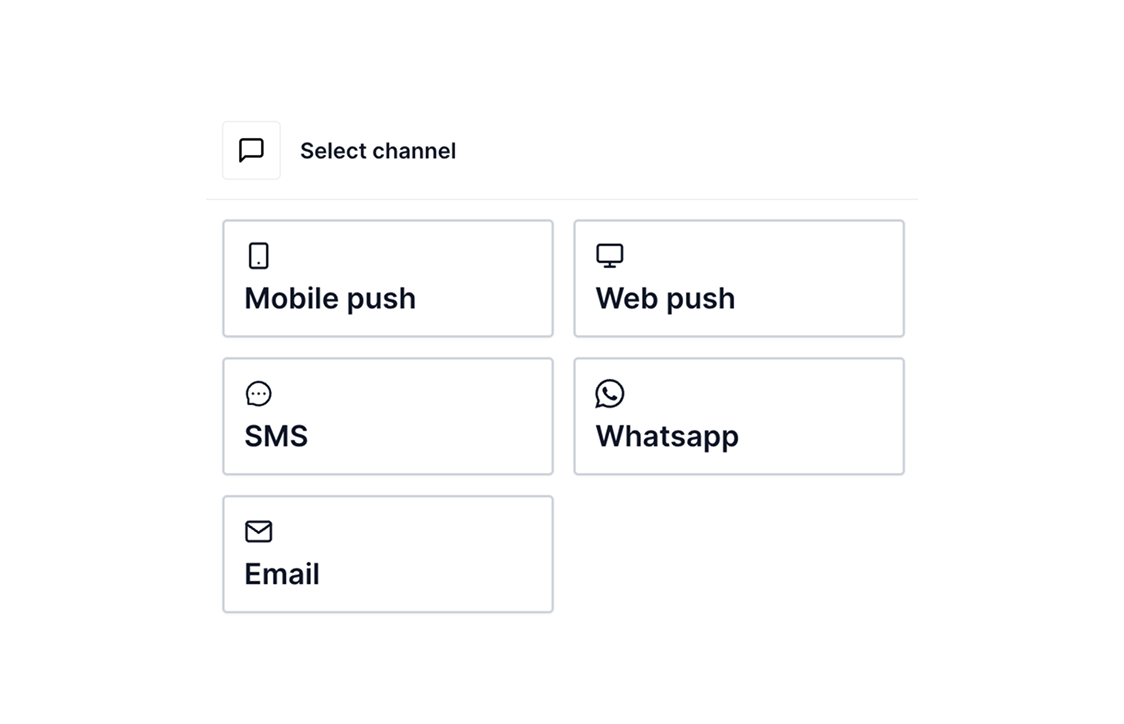
Step 1: Choose Your Message Channel
Decide which communication channel you’ll be using. Aampe supports multiple channels including:- Push Notifications — Short, attention-grabbing updates
- Email — Rich content with lots of space to work with
- SMS — Short-form communication
- Product Surfaces — Contextual content embedded in the product experience
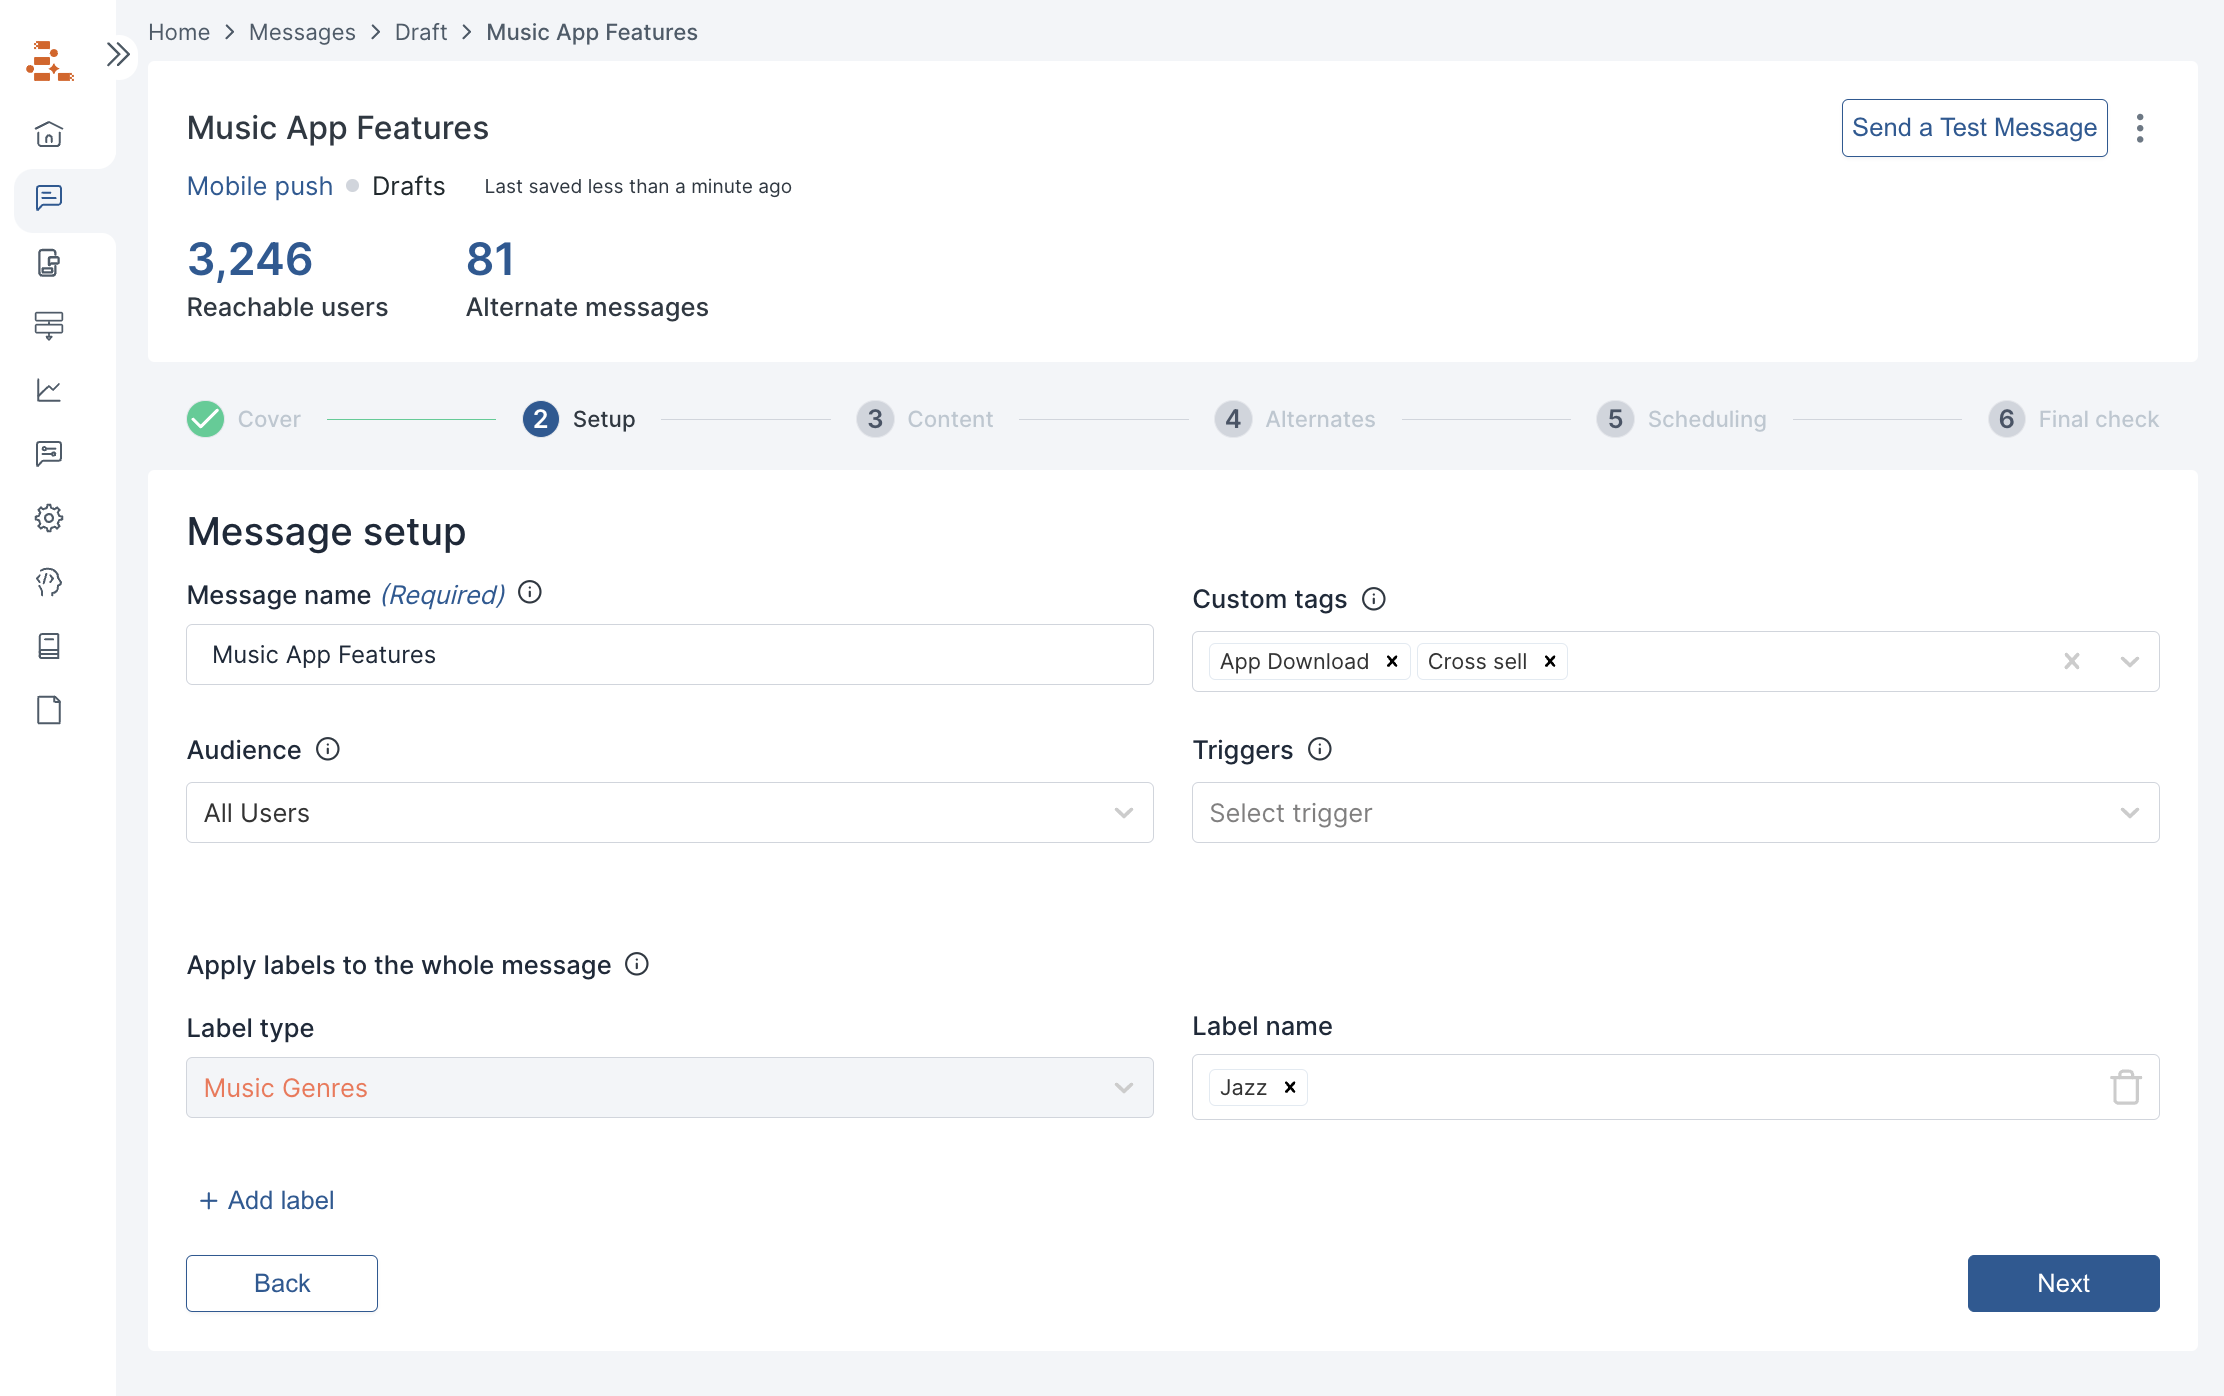
Step 2: Message Setup
To create your message, complete the Message Setup form. Required fields include:- Message name - ideally something that’s easy to understand
- Audiences - specify which users are eligible for the message
- Triggers
- Custom tags
- Message-level labels
Step 3: Define a Message Structure
The next step is to decide how your message will be assembled. This means defining a message structure—the layout of components that make up your message. Think of this as creating a flexible template. You’re not writing a fixed message; you’re designing the slots your agent will use to dynamically assemble personalized messages.What do we mean by structure?
A structure is the sequence of components used in a message, such as:- Greeting
- Value Proposition
- Offering
- Incentive
- Call to Action
- (Optional) Custom Components like Sub-feature, Music Genre, Cuisine Type etc
Structure Examples
Push- Header: [Value Proposition]
- Body: [Greeting] + [CTA]
- Subject Line: [Value Proposition]
- Pre-header: [Greeting]
- Title: [Value Proposition]
- Body: [Offering]
- Button: [CTA]
- Body: [Greeting] + [Value Proposition] + [CTA]
Tips for Defining a Good Structure
- Start simple. Use 2–3 components per message to keep it modular and testable.
- Always include an Offering and Value Proposition in your early structures—they’re essential for agent learning.
- Choose components that make sense for the channel. For example, Push notifications often use:
- Header → [Value Proposition]
- Body → [Greeting] + [CTA]
- Skip what you don’t need. Not every message needs an Incentive or Greeting. You can leave them out entirely, or test structures with and without them.
- No repeats. Don’t use the same component type twice in one message (e.g., two Value Propositions). It makes it harder for agents to learn what worked.
Step 4: Create Alternates & Labels
Now it’s time to write content for each component in your message structure. Instead of writing full messages, you’ll create alternates—modular versions of each component—and tag them with labels. This is what enables your agent to learn, test, and personalize at scale.How to Write Alternates
- Write at least 3 alternates per label for each component
- Make each alternate single-focused—it should express one clear idea only
- For example: Instead of writing “Fast, easy, and cheap” (which spans 3 ideas), write separate alternates like “Fast delivery,” “Easy to use,” or “Best value”
- Keep the tone and sentence structure simple and natural
- Make sure each alternate can stand alone and combine cleanly with others
How to Apply Labels
- Labels describe the meaning or value behind an alternate (e.g., Convenience, Trust)
- Use distinct, non-overlapping labels
- Assign only one label per alternate
- Reuse labels across different messages and offerings to help your agent learn faster
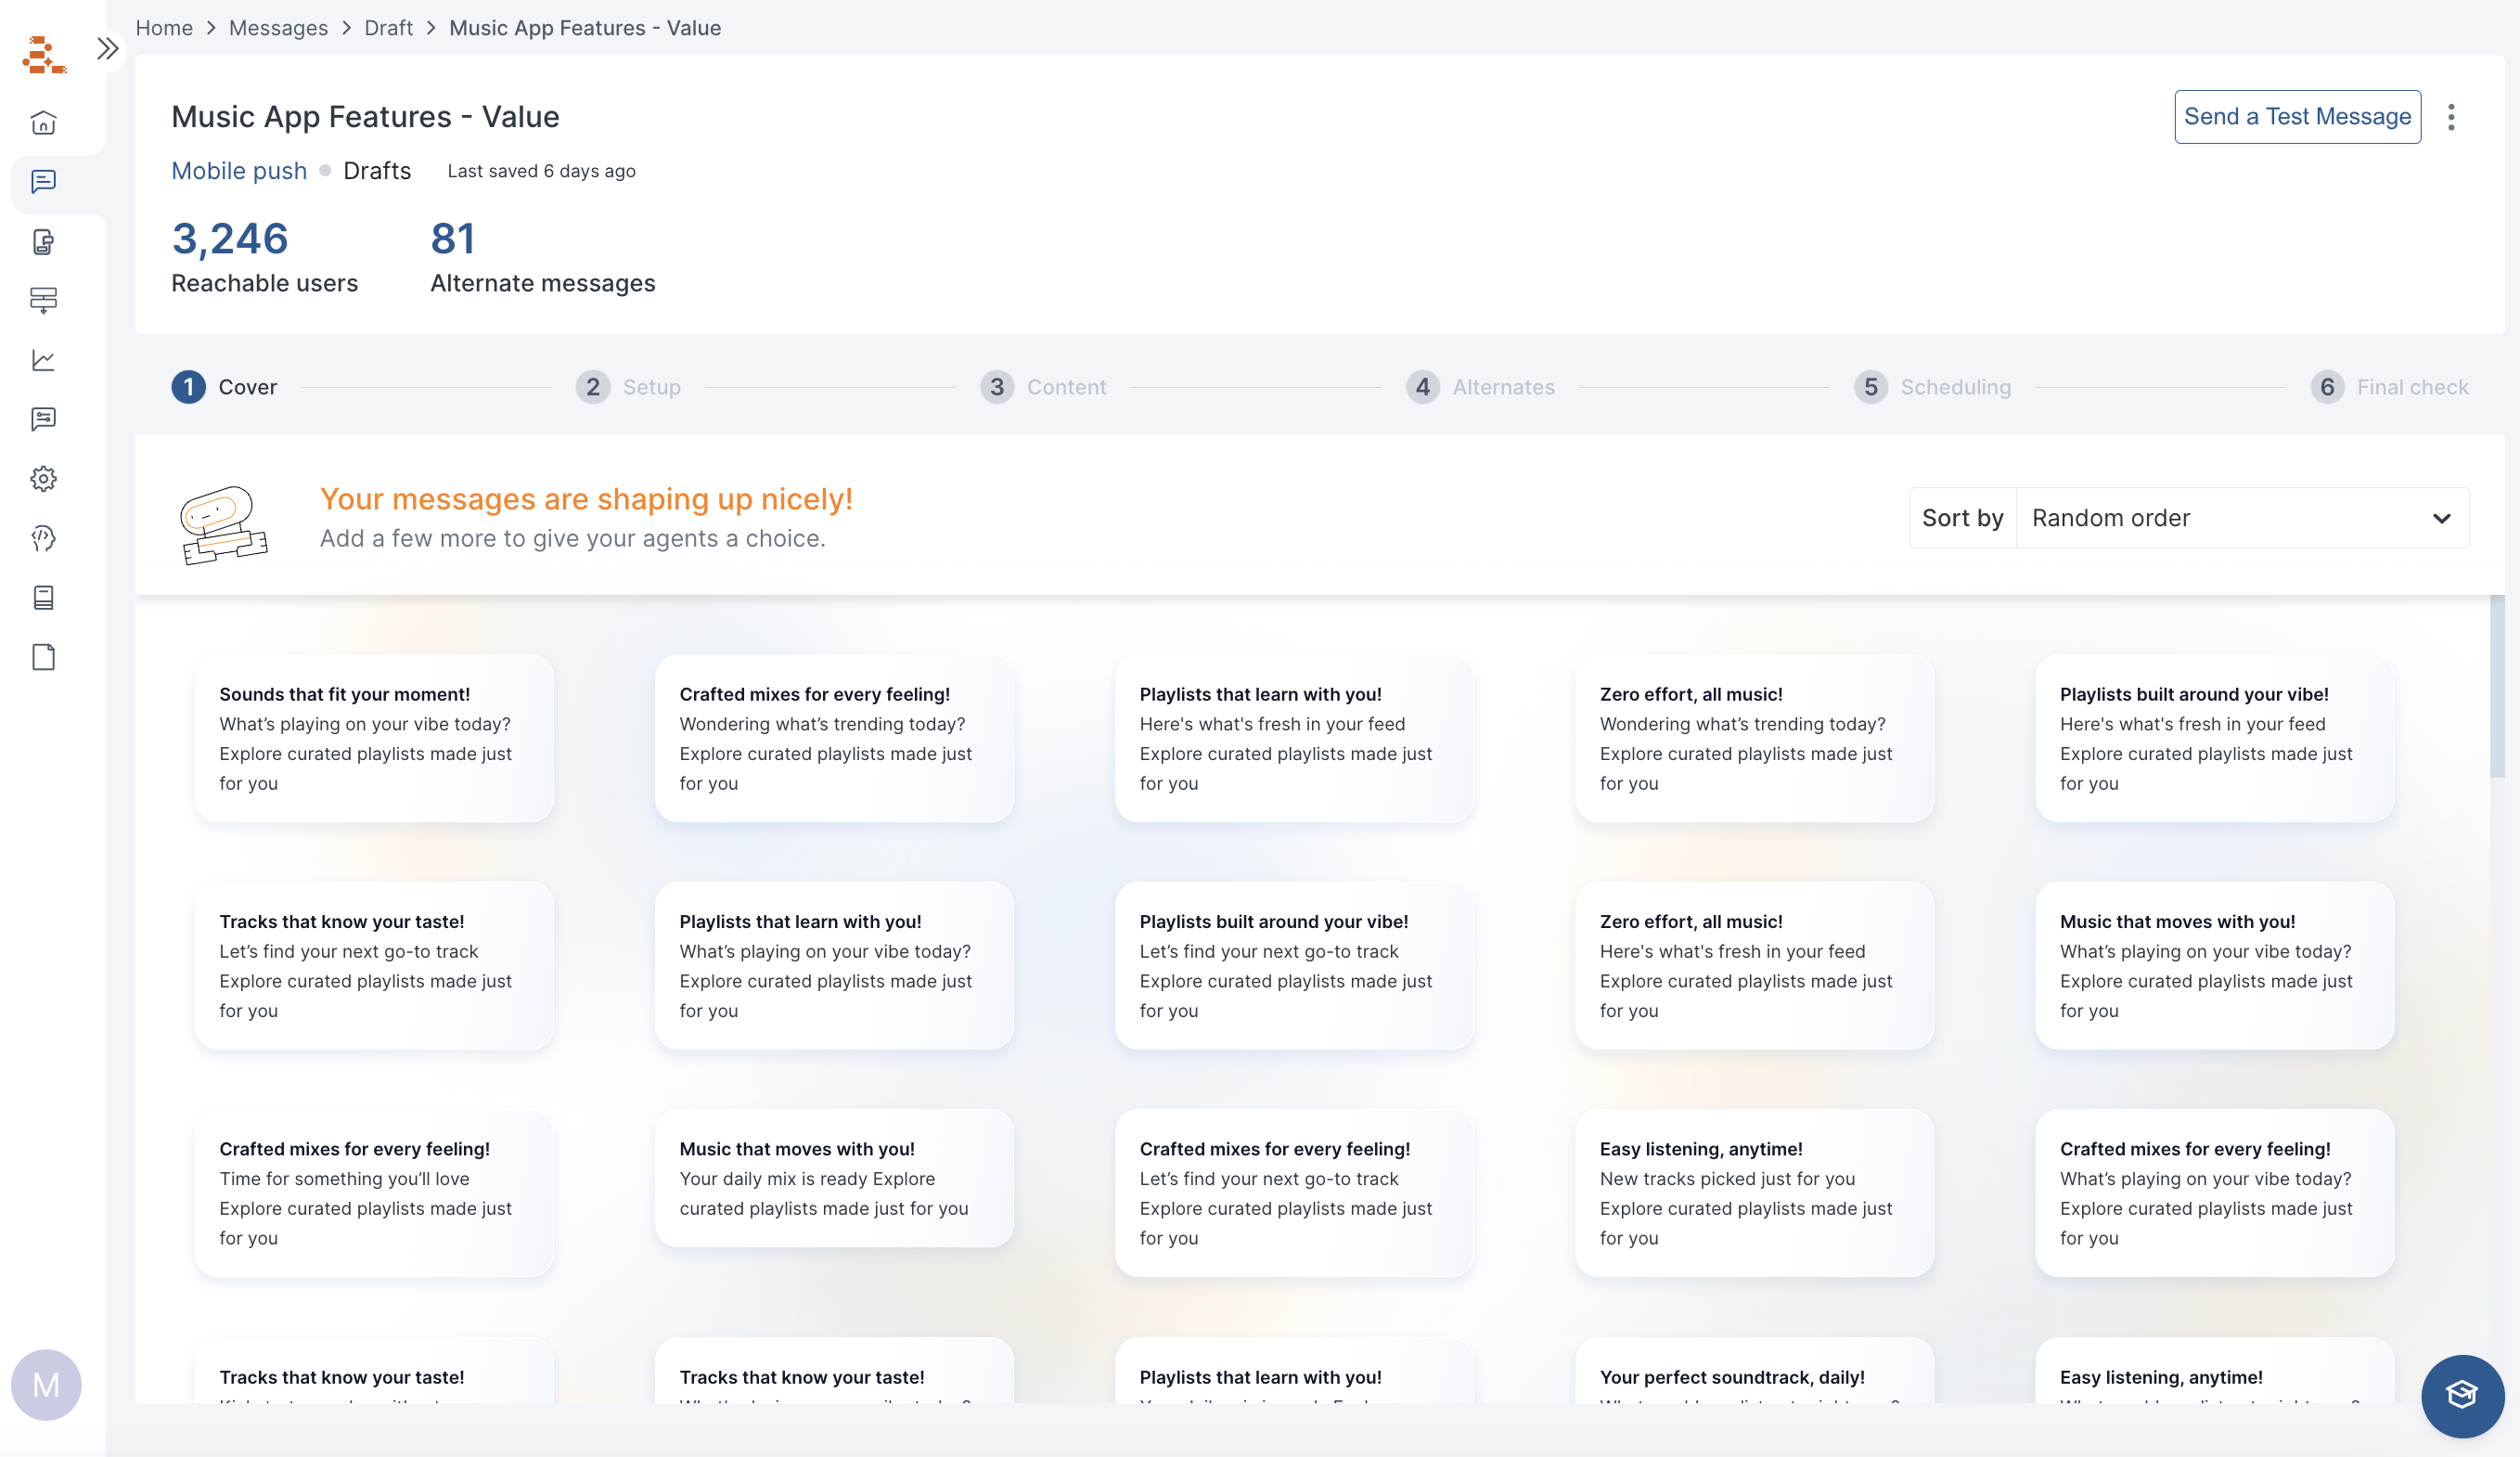
Step 5: Preview and Test
Before sending your message to all users, it’s important to preview and test it:- Preview your message to ensure it looks good. You can use the Cover page to see all combinations and variants.
- Send a test message to yourself or a group.
- Check all links and interactive elements to make sure they work correctly
- Review the message for any typos or errors
Message FAQs
Does Aampe support multiple languages?
Does Aampe support multiple languages?
Yes, Aampe has features that make it easy to manage content in multiple languages. Read more about how Aampe manages multiple languages.Aampe, however, does not offer a feature to translate content from one language into another. Our customer success team has experience in this area, however, and can offer guidance on any language translation projects.
How can I limit the number of messages sent to my customers?
How can I limit the number of messages sent to my customers?
You can set daily and weekly caps on the number of messages
Read more about Aampe’s frequency settings.
- globally
- by channel
- by trigger
Read more about Aampe’s frequency settings.
How many message variants do I need?
How many message variants do I need?
Agents do their best work when they have many message groups to choose from, and many message variants within each message group. It’s easy to wear out a customer relationship when you only talk about one thing.
How much is enough? It depends on how often agents interact with your users. To make this easier, we designed our content coverage map which highlights the messages in need of additional variants.
How much is enough? It depends on how often agents interact with your users. To make this easier, we designed our content coverage map which highlights the messages in need of additional variants.
How can I ensure certain components appear together?
How can I ensure certain components appear together?
It doesn’t always make sense to mix-and-match message components. You may have an image that accompanies a specific offering, or components for city and state that need to appear together.
There are two ways to link components together.
There are two ways to link components together.
- Syncing labels - specifically for labels and message components
- Datasets - can link labels, deeplinks, and any other message element