Create application
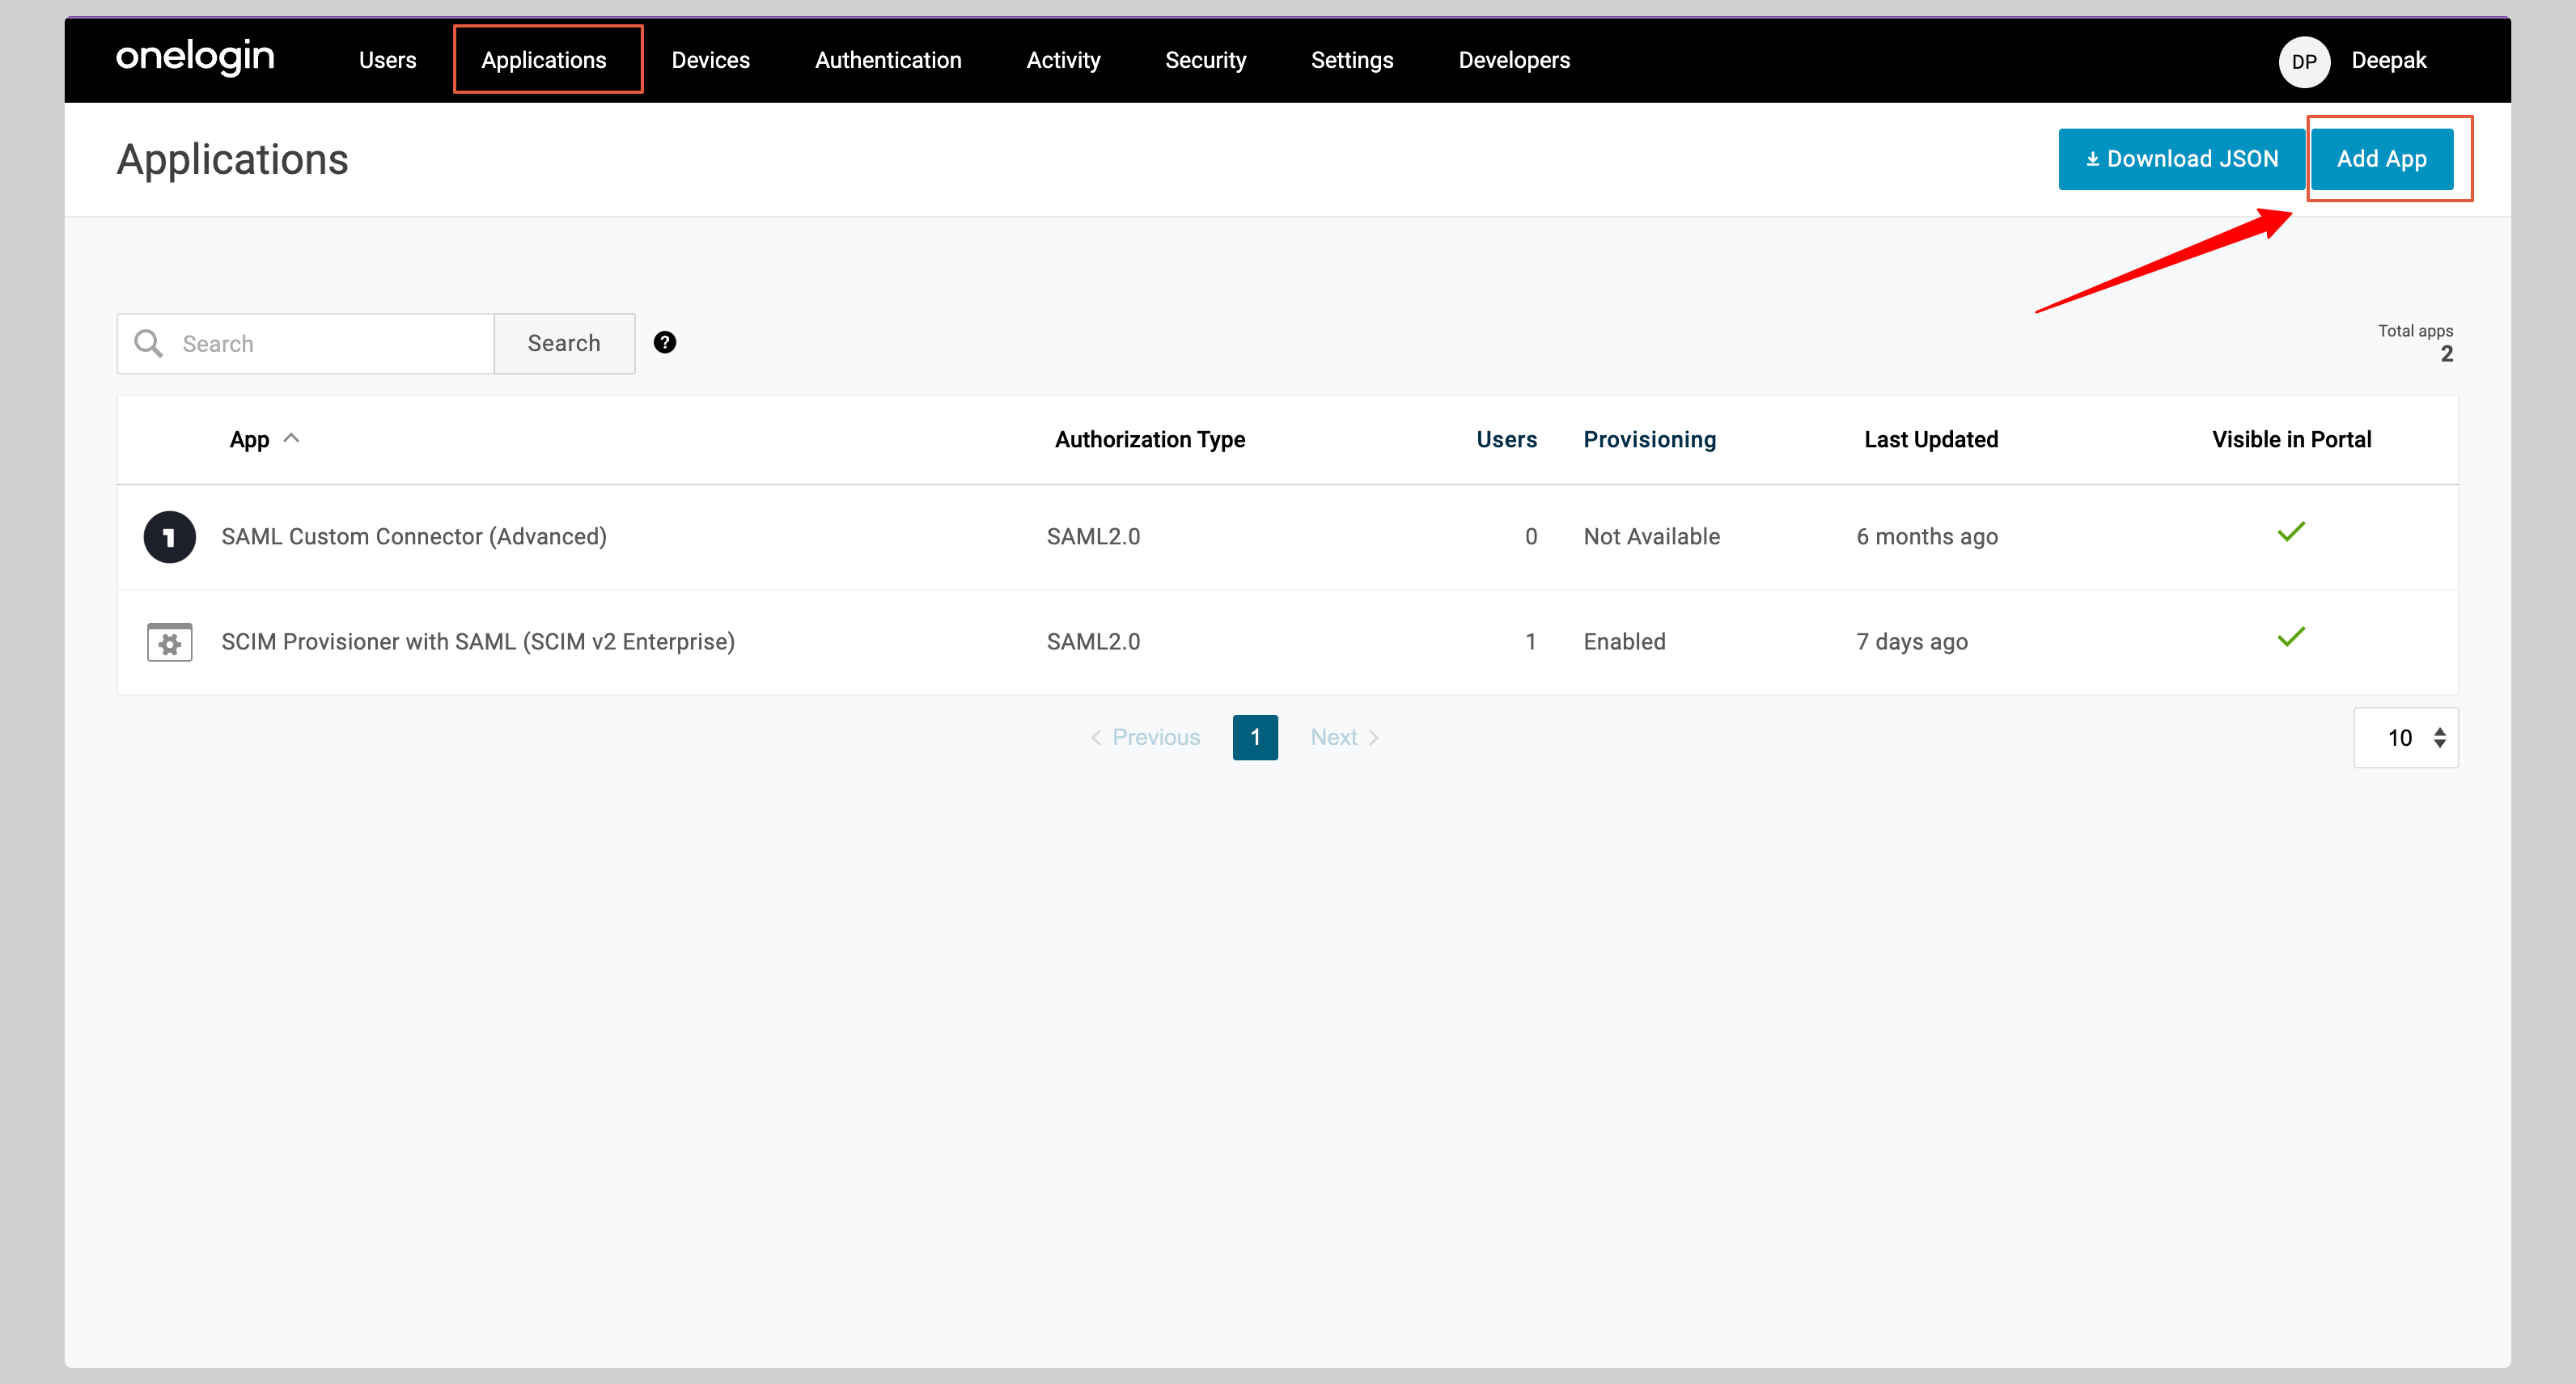
- From your OneLogin account, click Applications from the top navigation menu.
- If your application is already created, choose it from the list and move to the section Configure Application
-
If you haven’t created a SAML application, click the Add App button to create a new application.
-
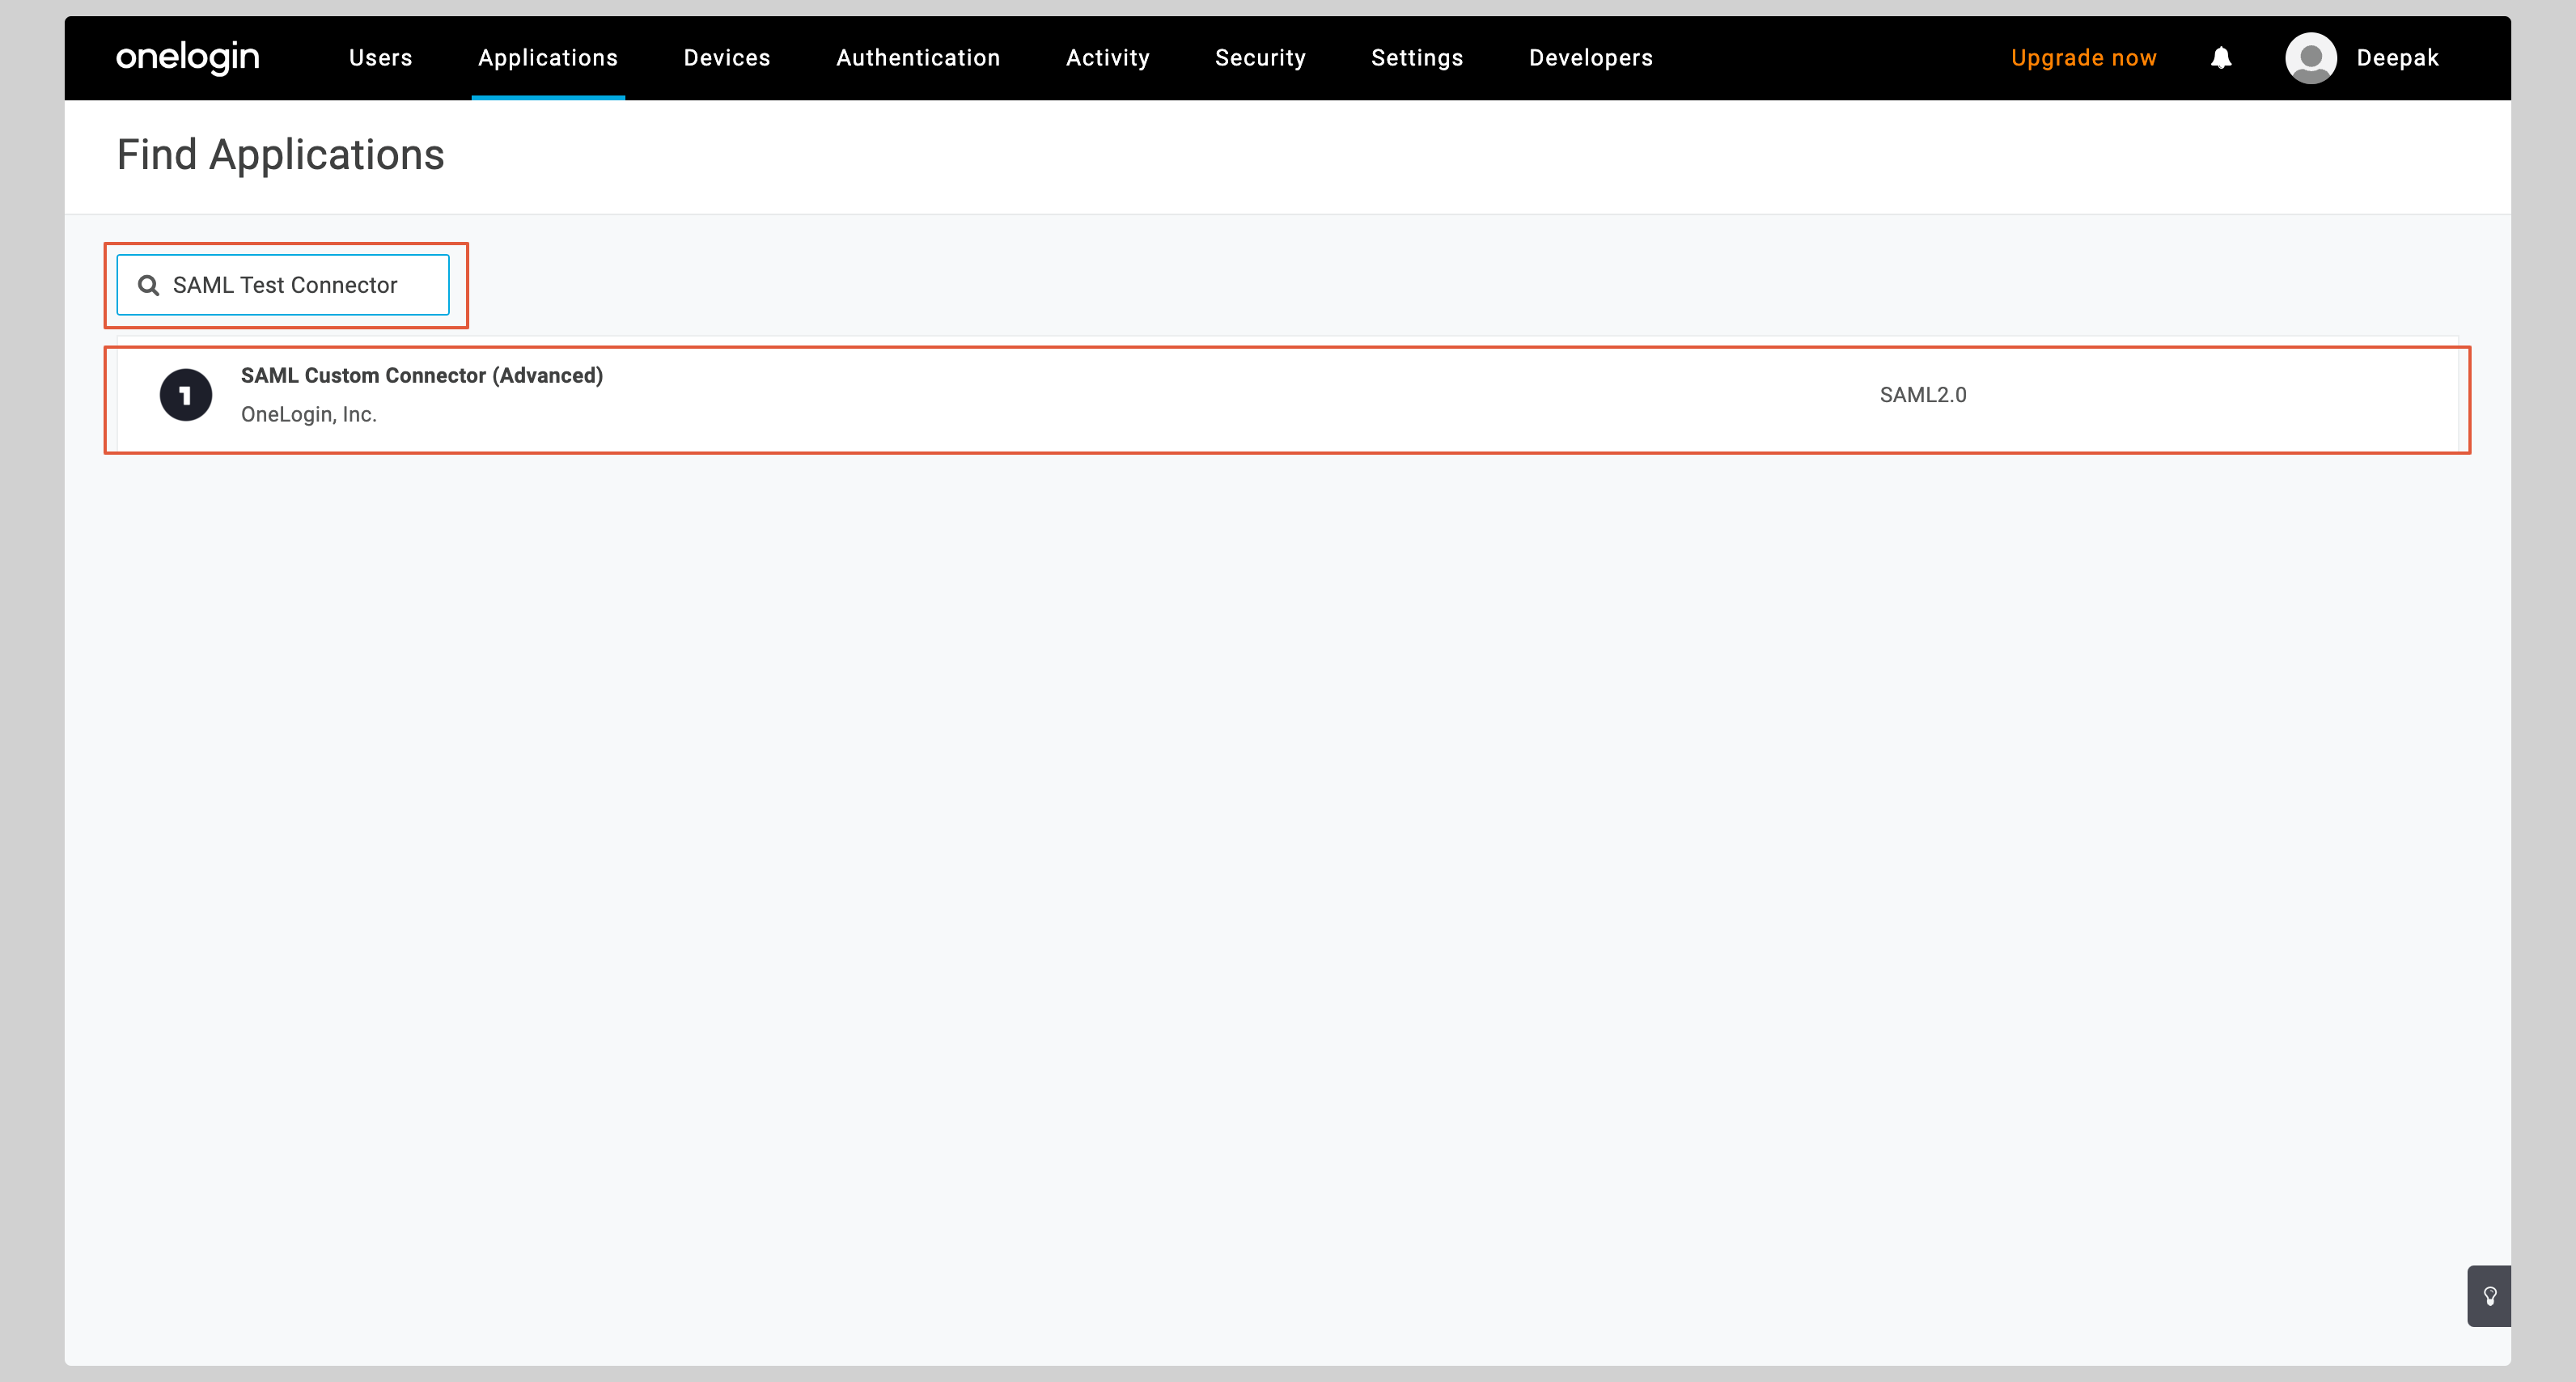
Search for SAML Test Connector in the Find Applications section. Select SAML Custom Connector (Advanced) from the search results.
-
Give your application a Display Name and click Save.

Configure application
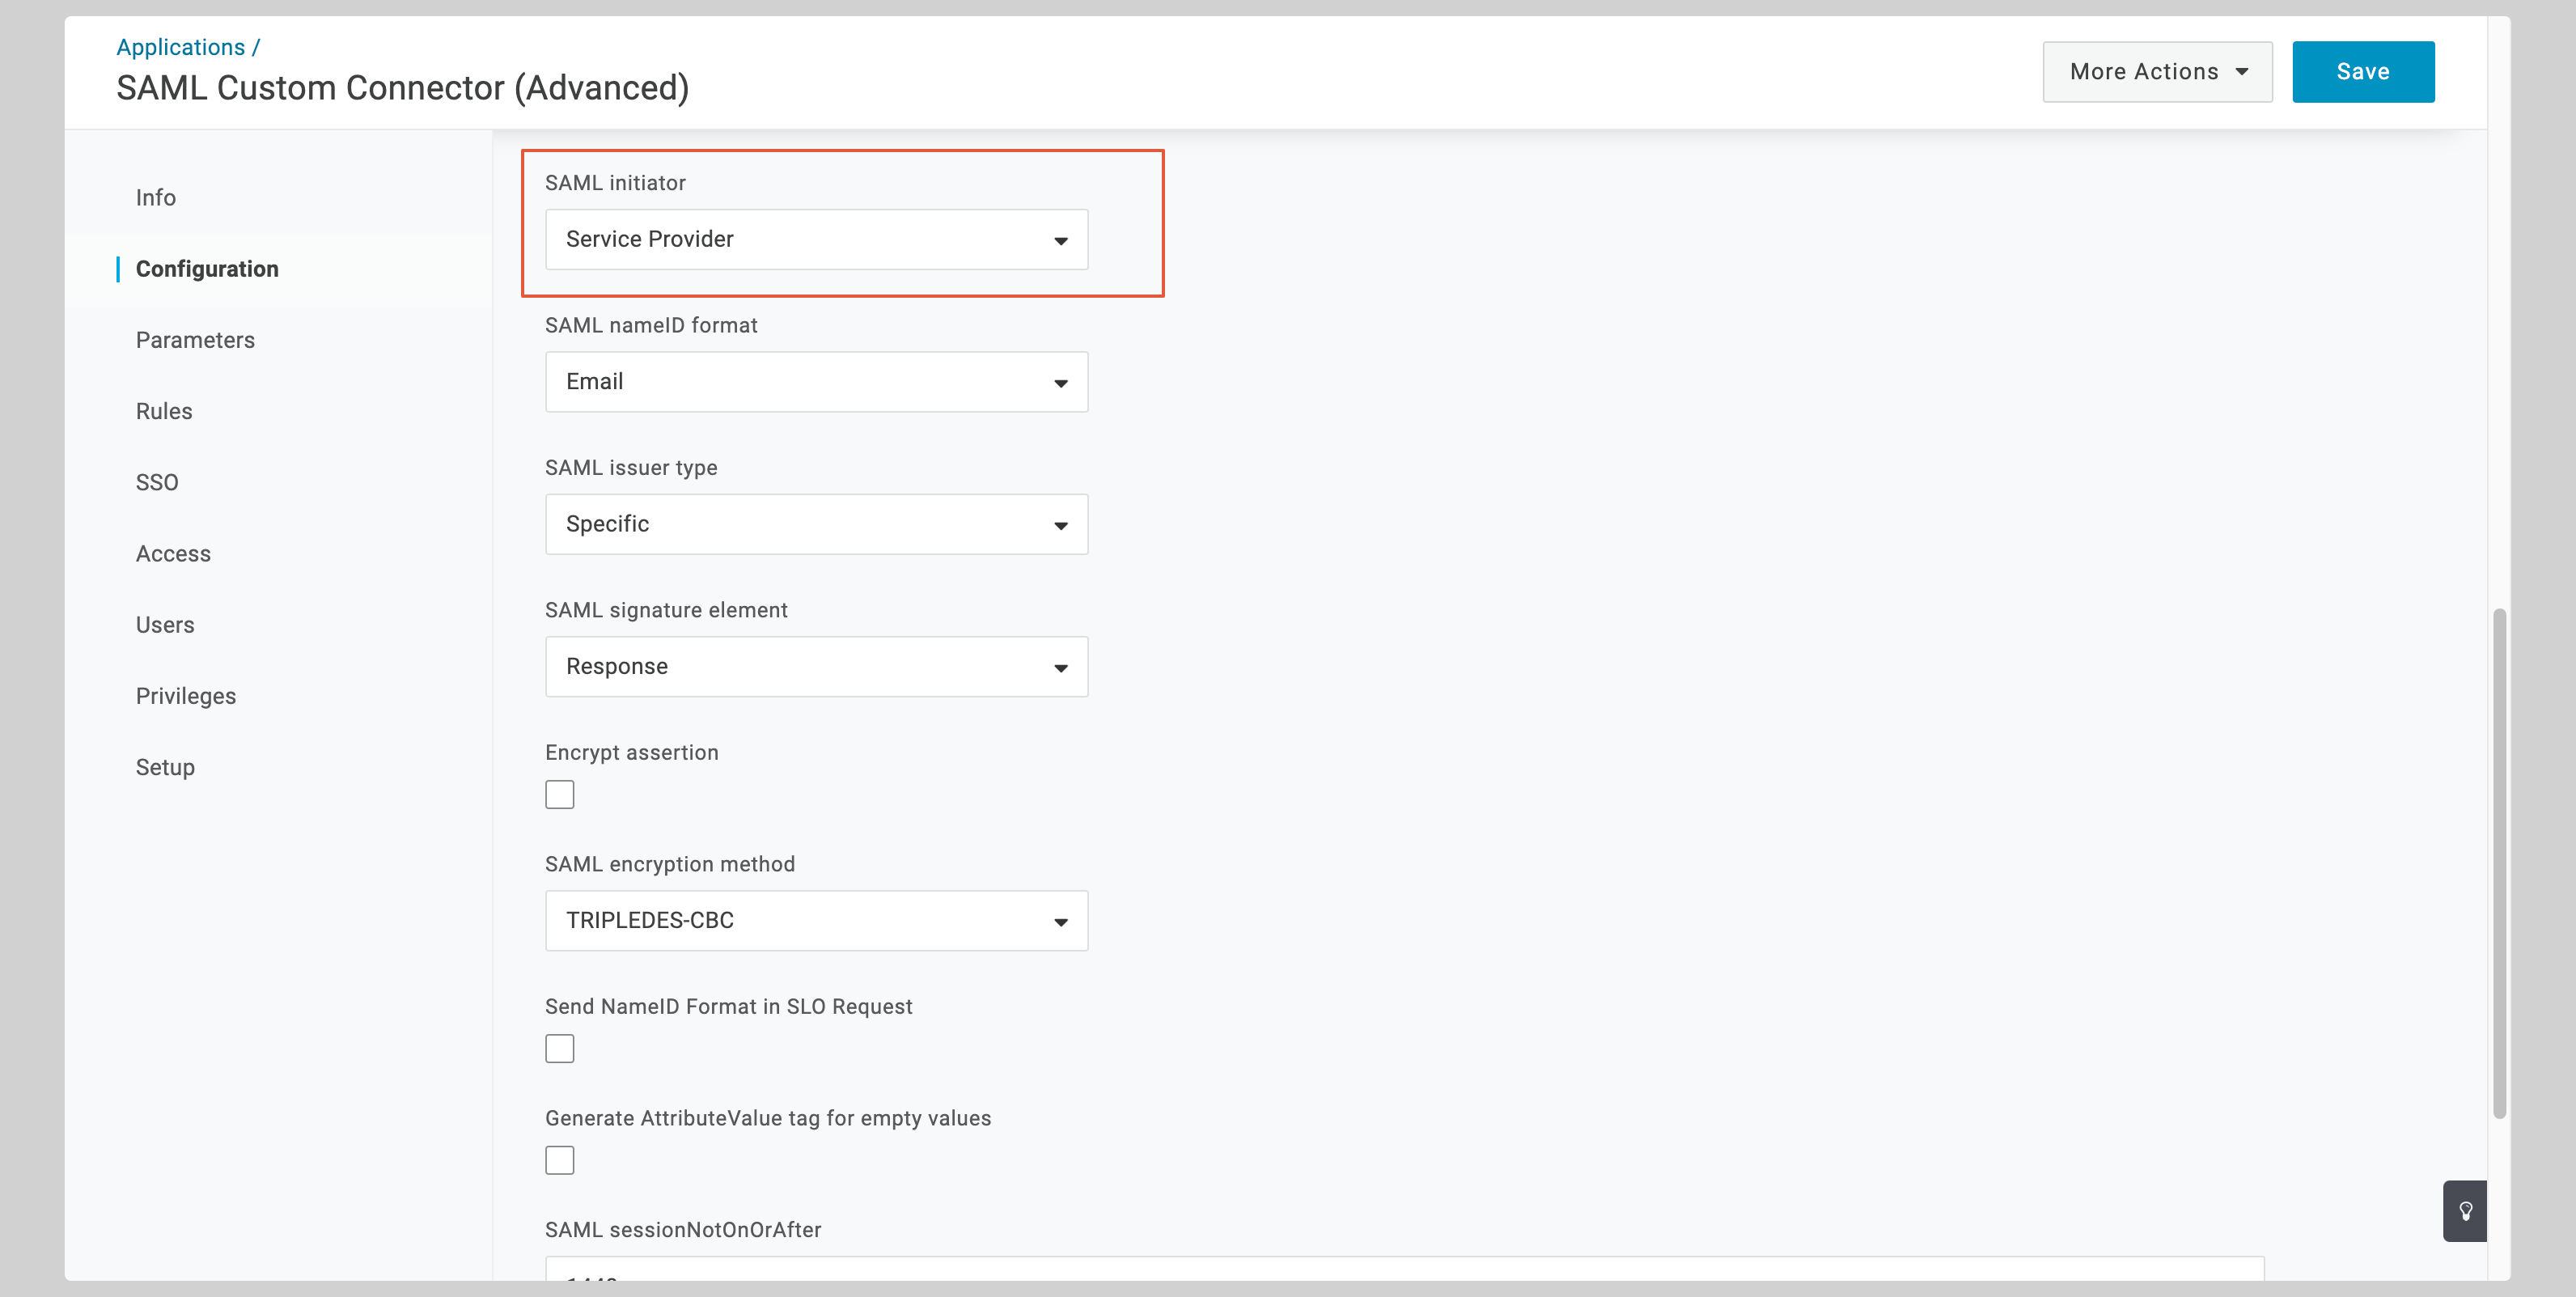
- From your application, click the Configuration tab on the left to configure the application.
-
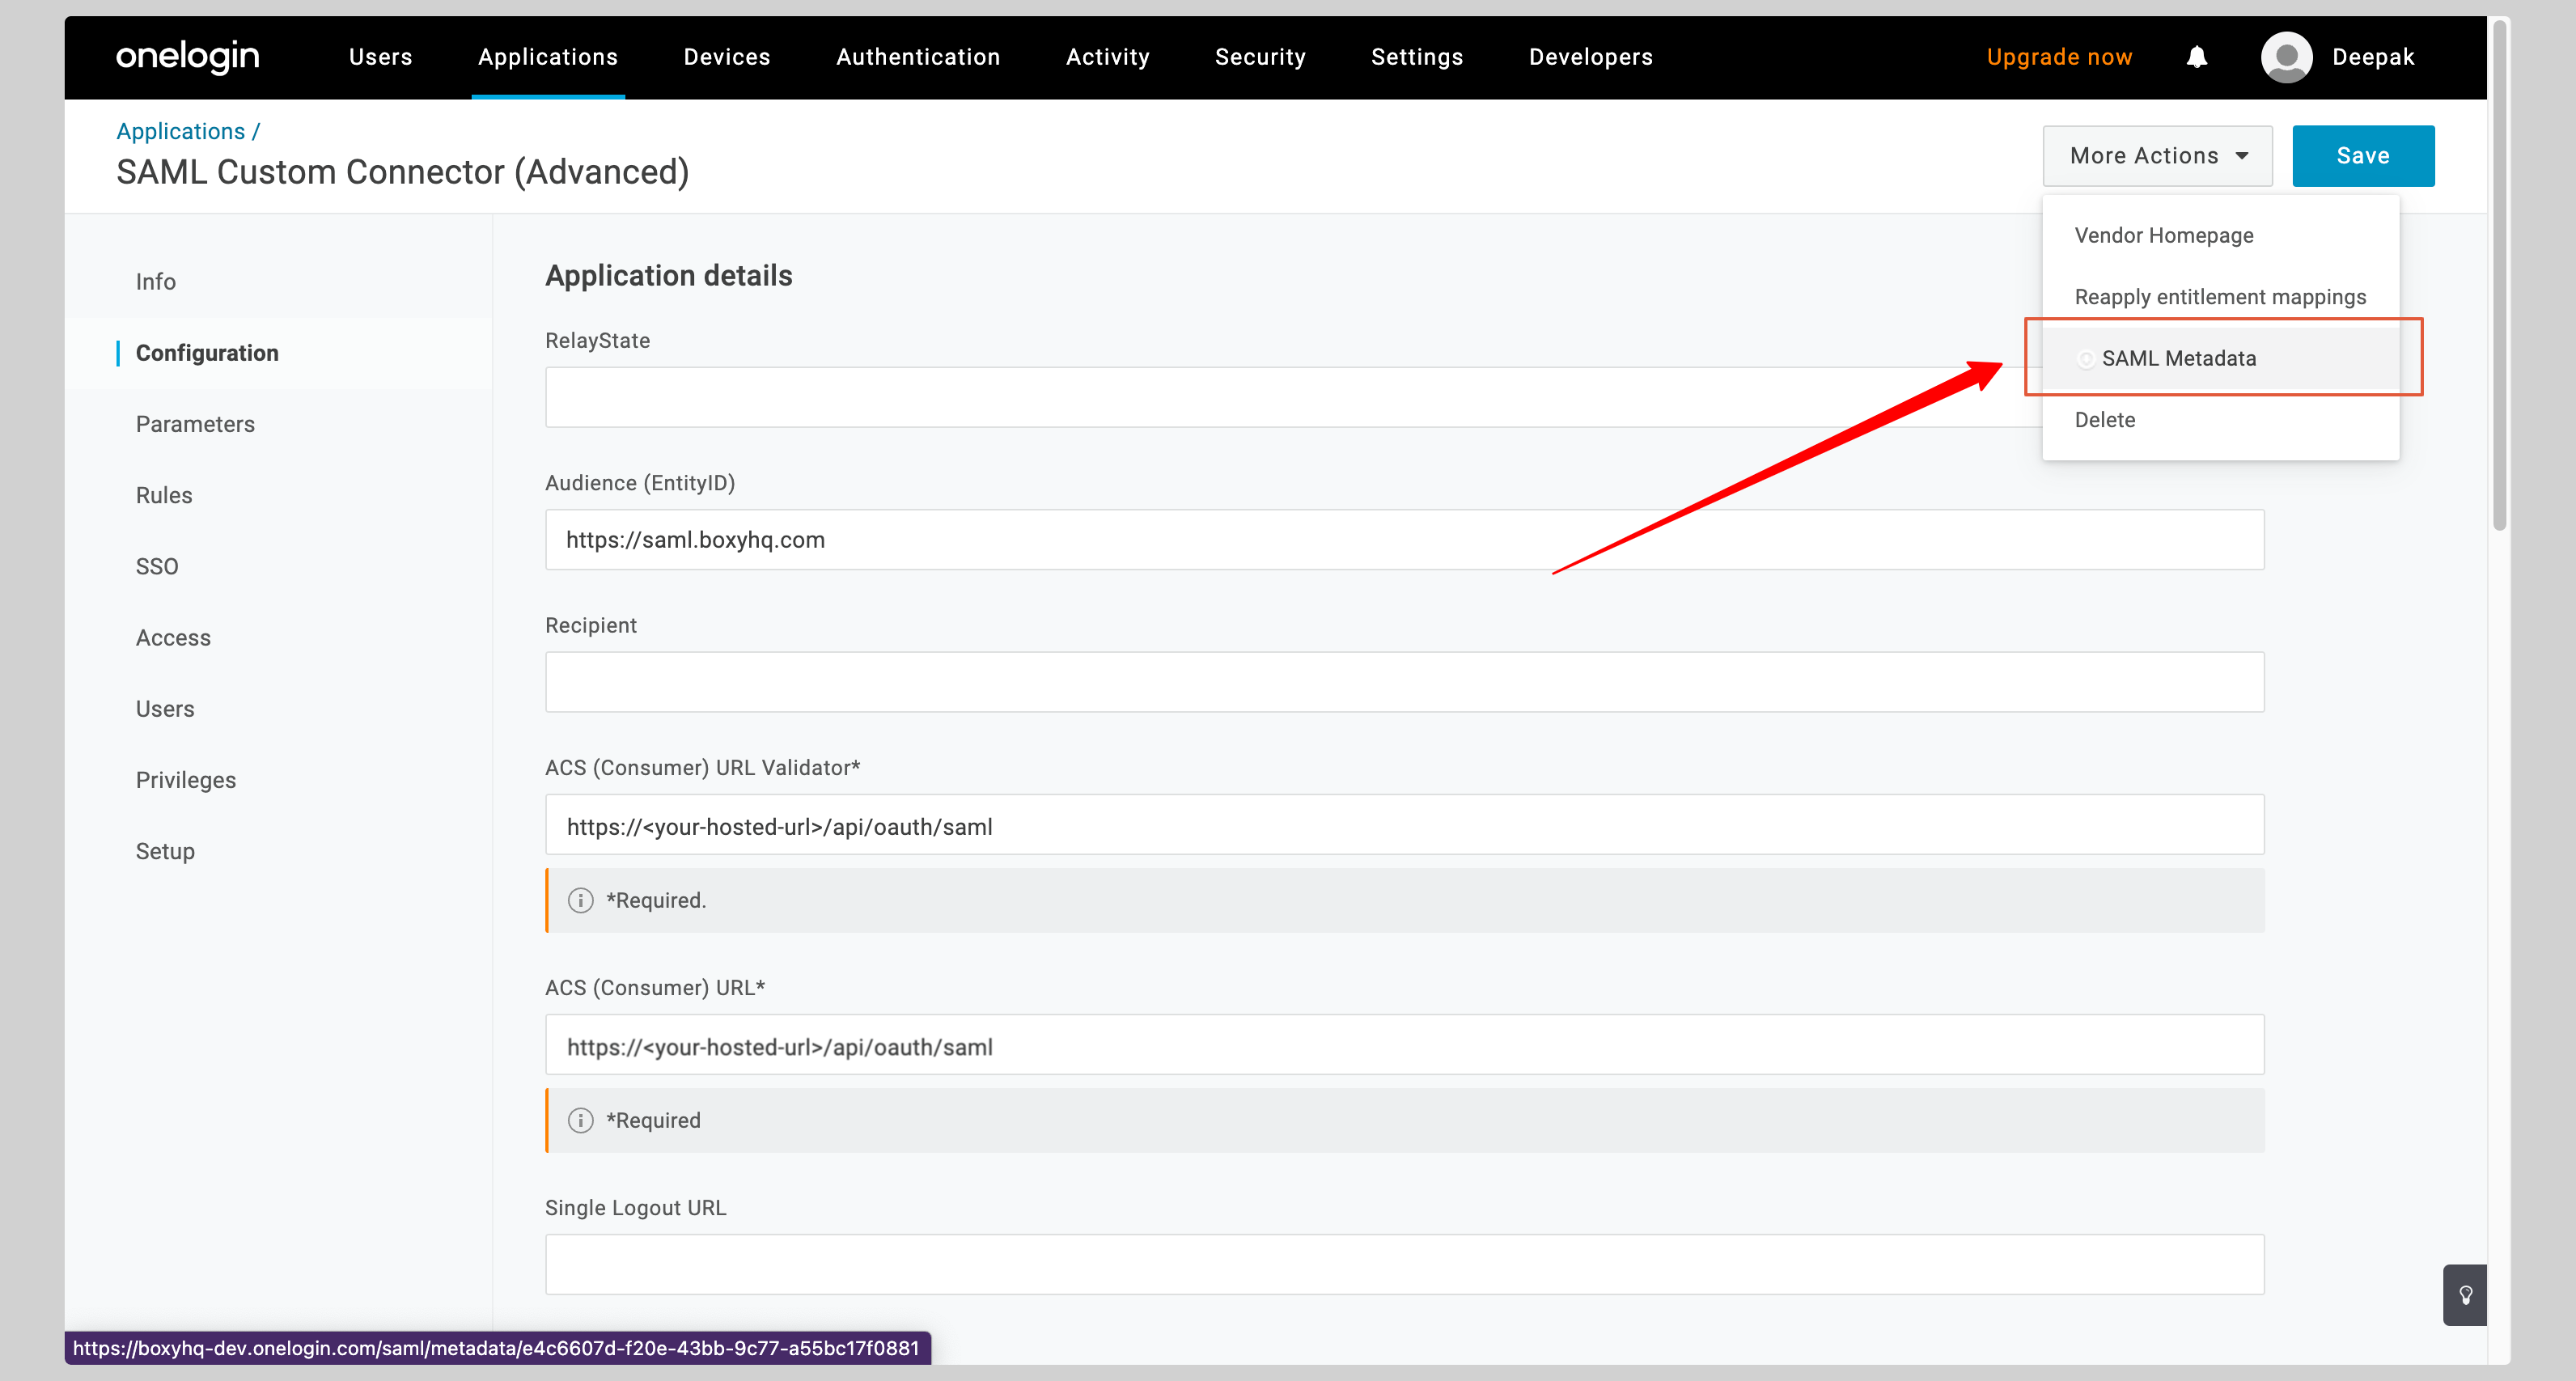
You have to enter the following values in the Application details section:
- Audience (Entity ID)
- ACS (Consumer) URL Validator
- ACS (Consumer) URL
-
Select the Service Provider from the SAML initiator dropdown.
-
Click Save to save the configuration.

-
Click the dropdown menu More Actions from the top right corner and click SAML Metadata to download the metadata XML file.
Attribute mapping
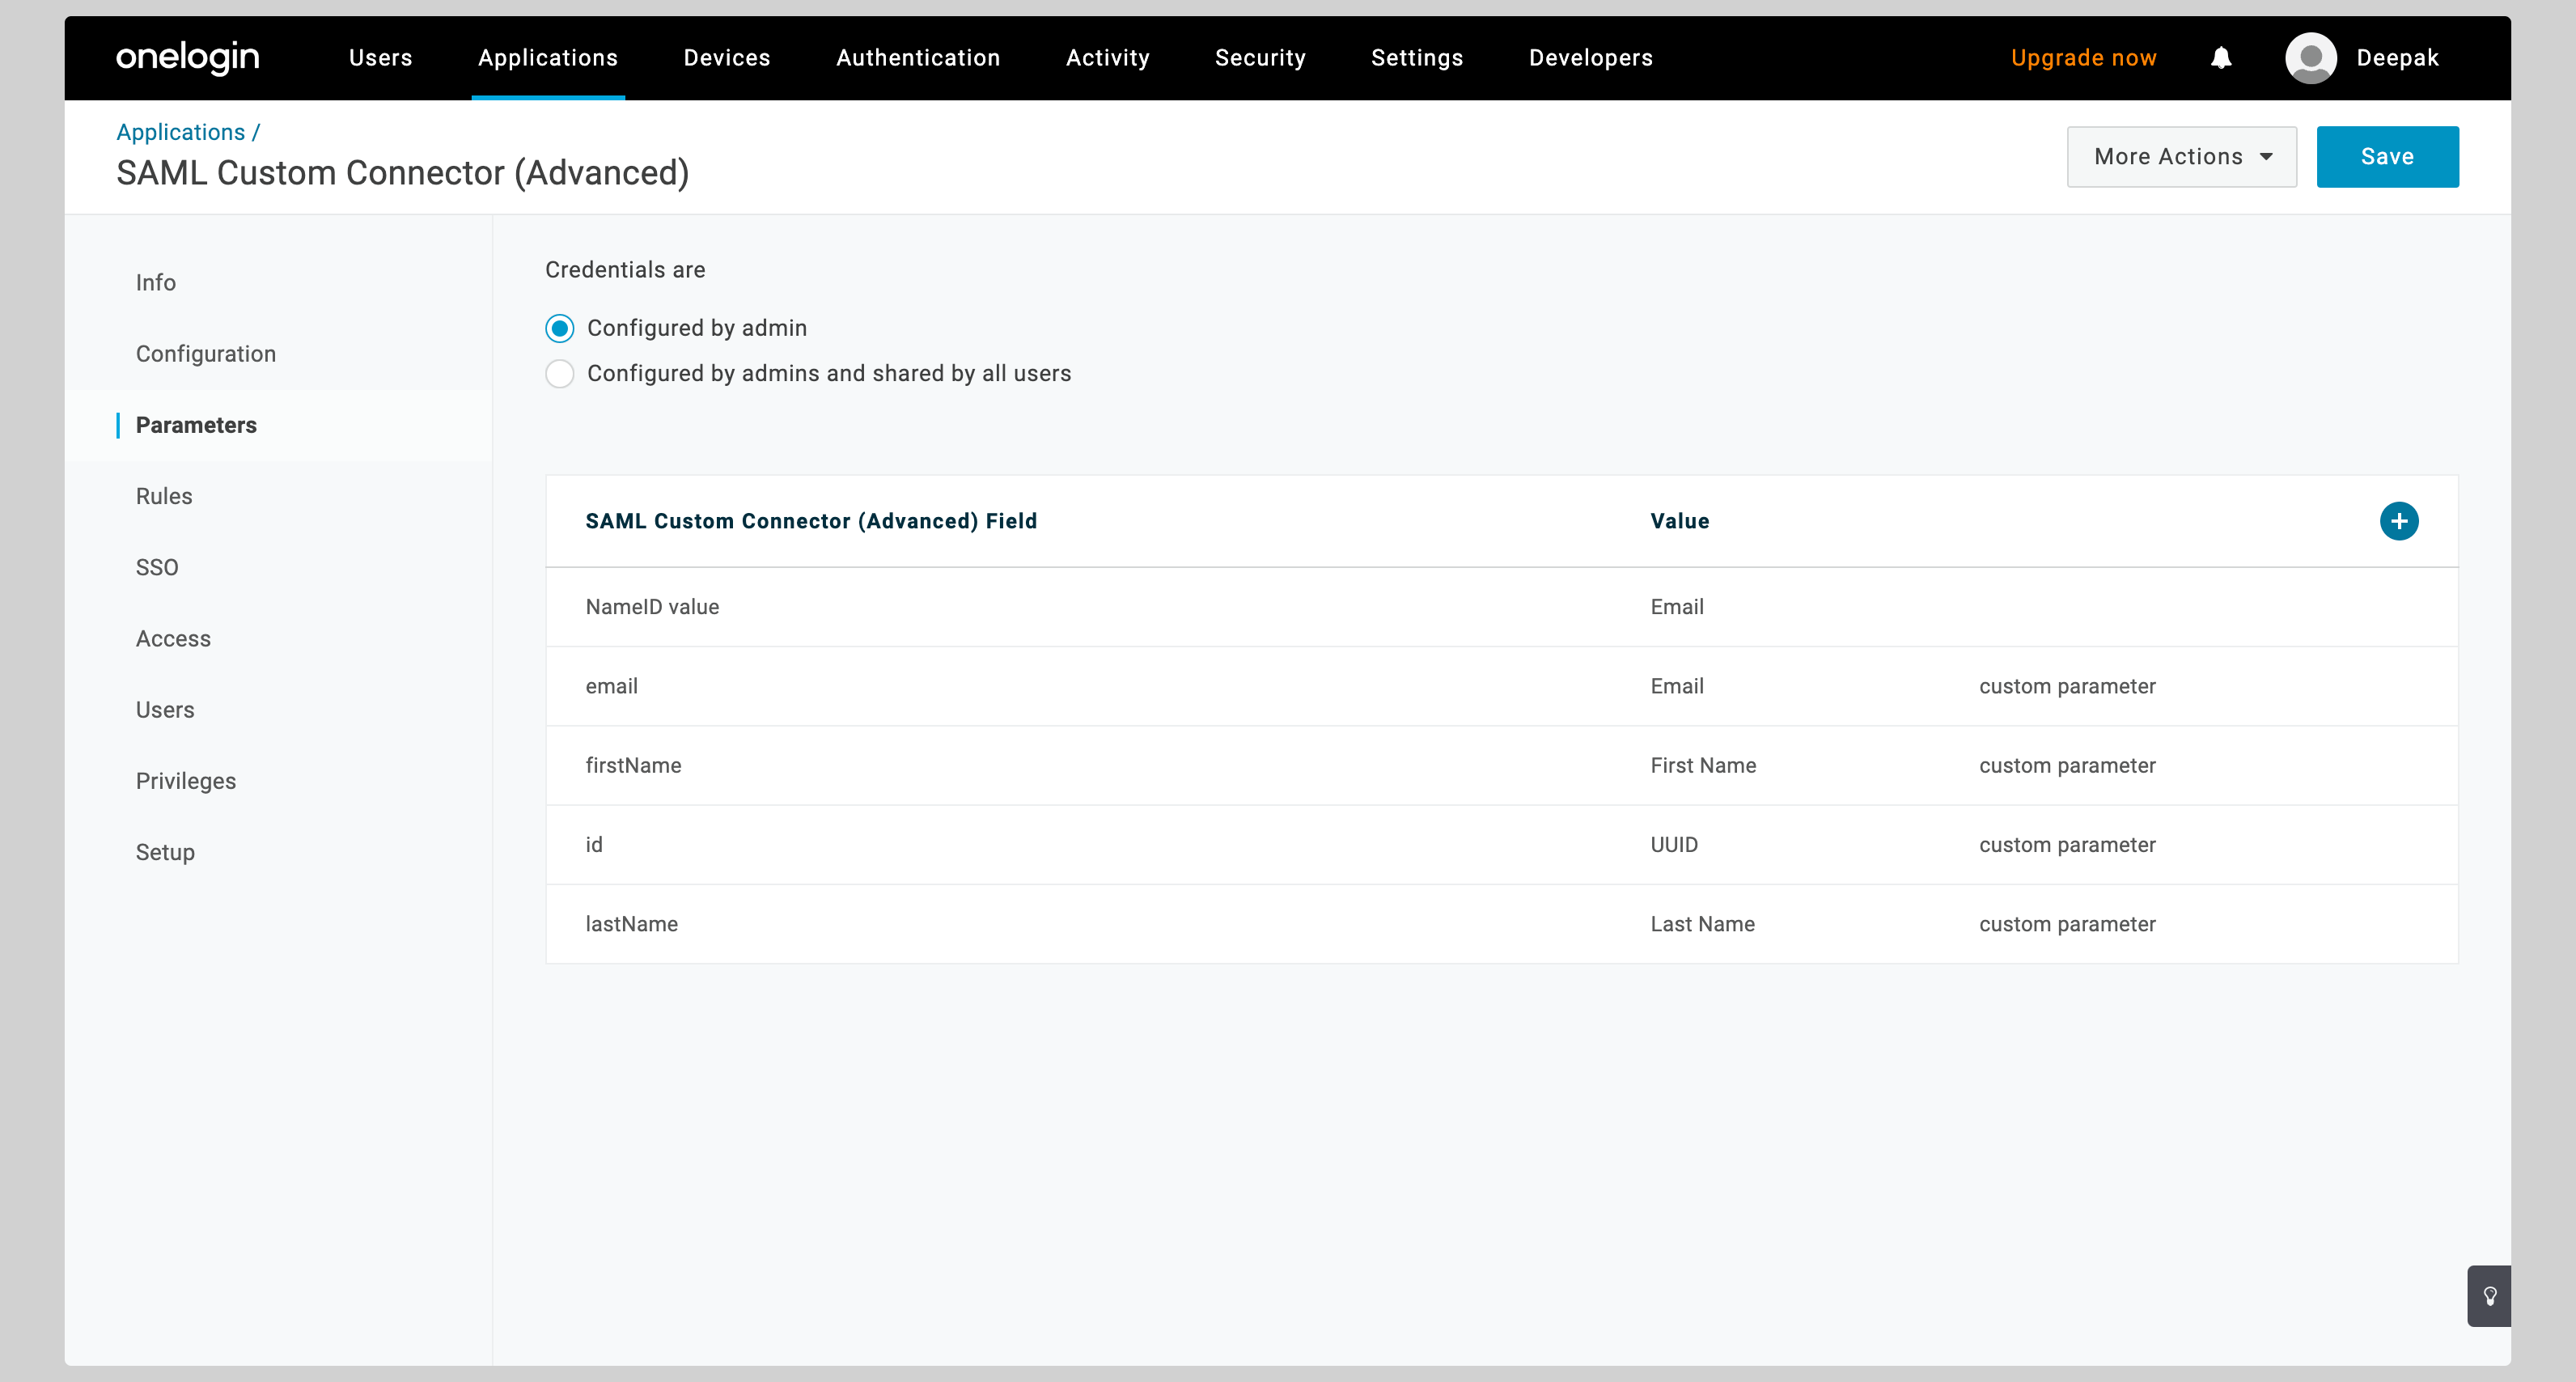
- From your application, click the Parameters tab on the left.
- You have to configure the following attributes:
| SAML Custom Connector Field | Value |
|---|---|
id | UUID |
firstName | First Name |
lastName | Last Name |
-
Enter
idin the Field name input and check the Include in SAML assertion checkbox. Click Save to continue.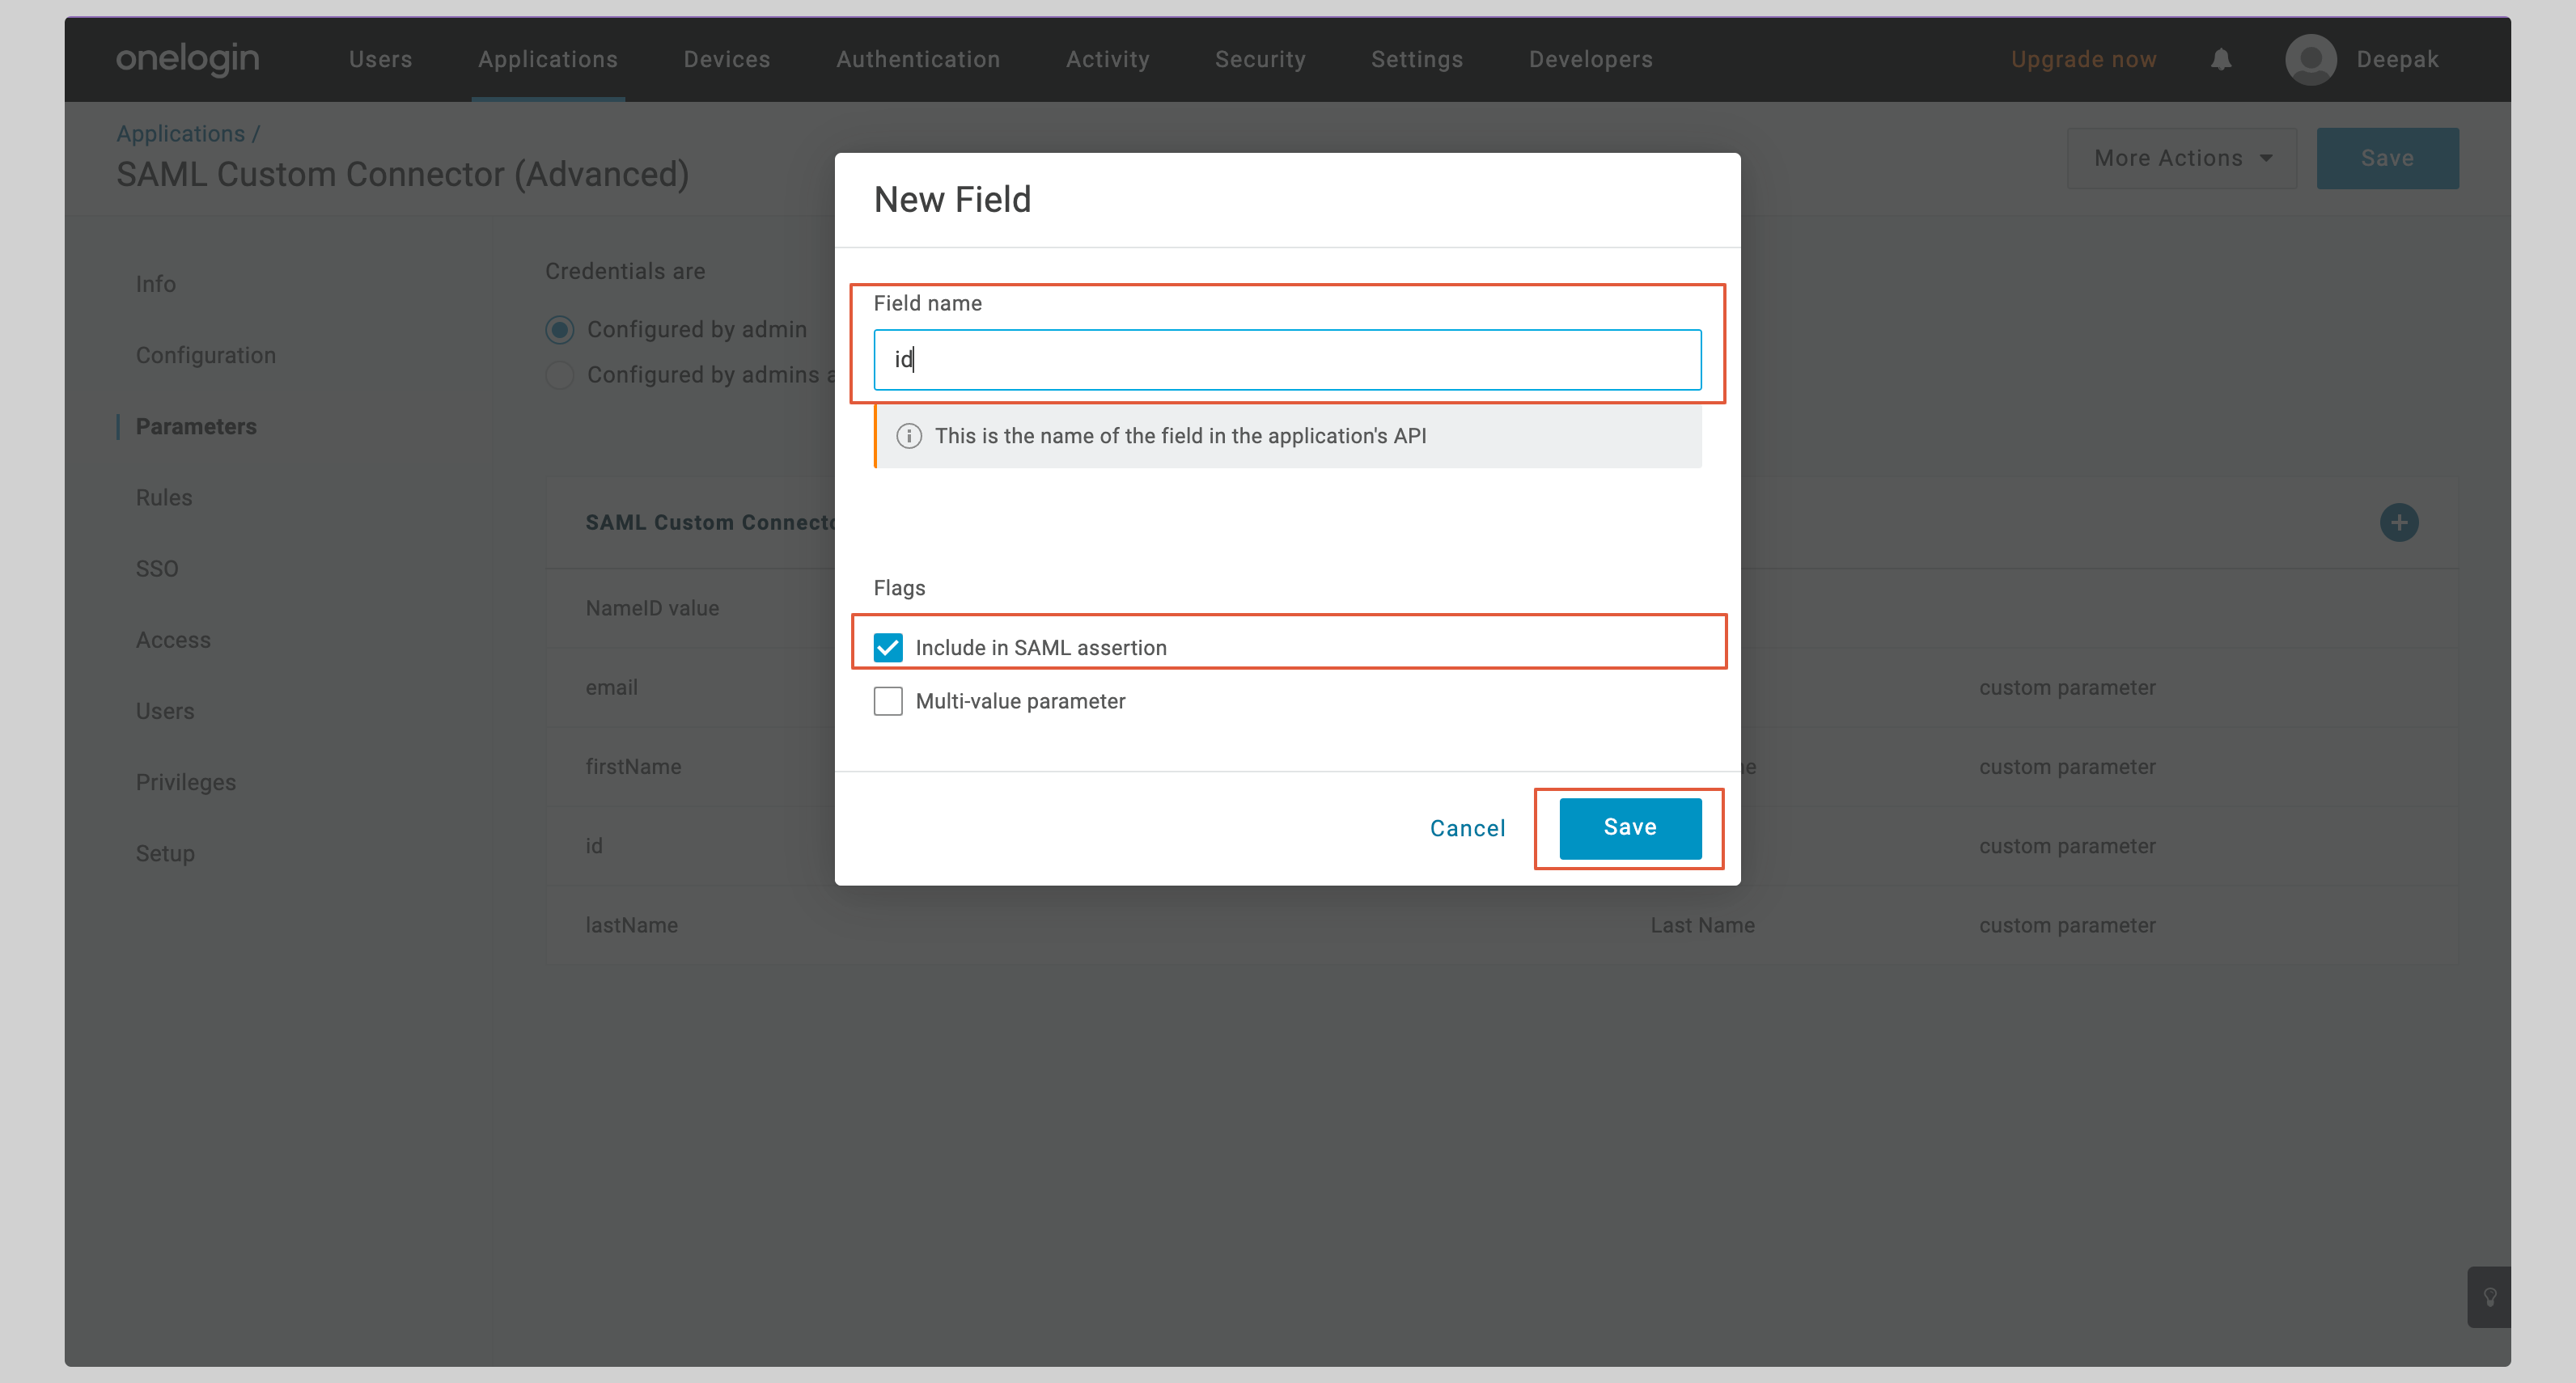
-
On the next screen, select UUID from the Value dropdown and click Save.
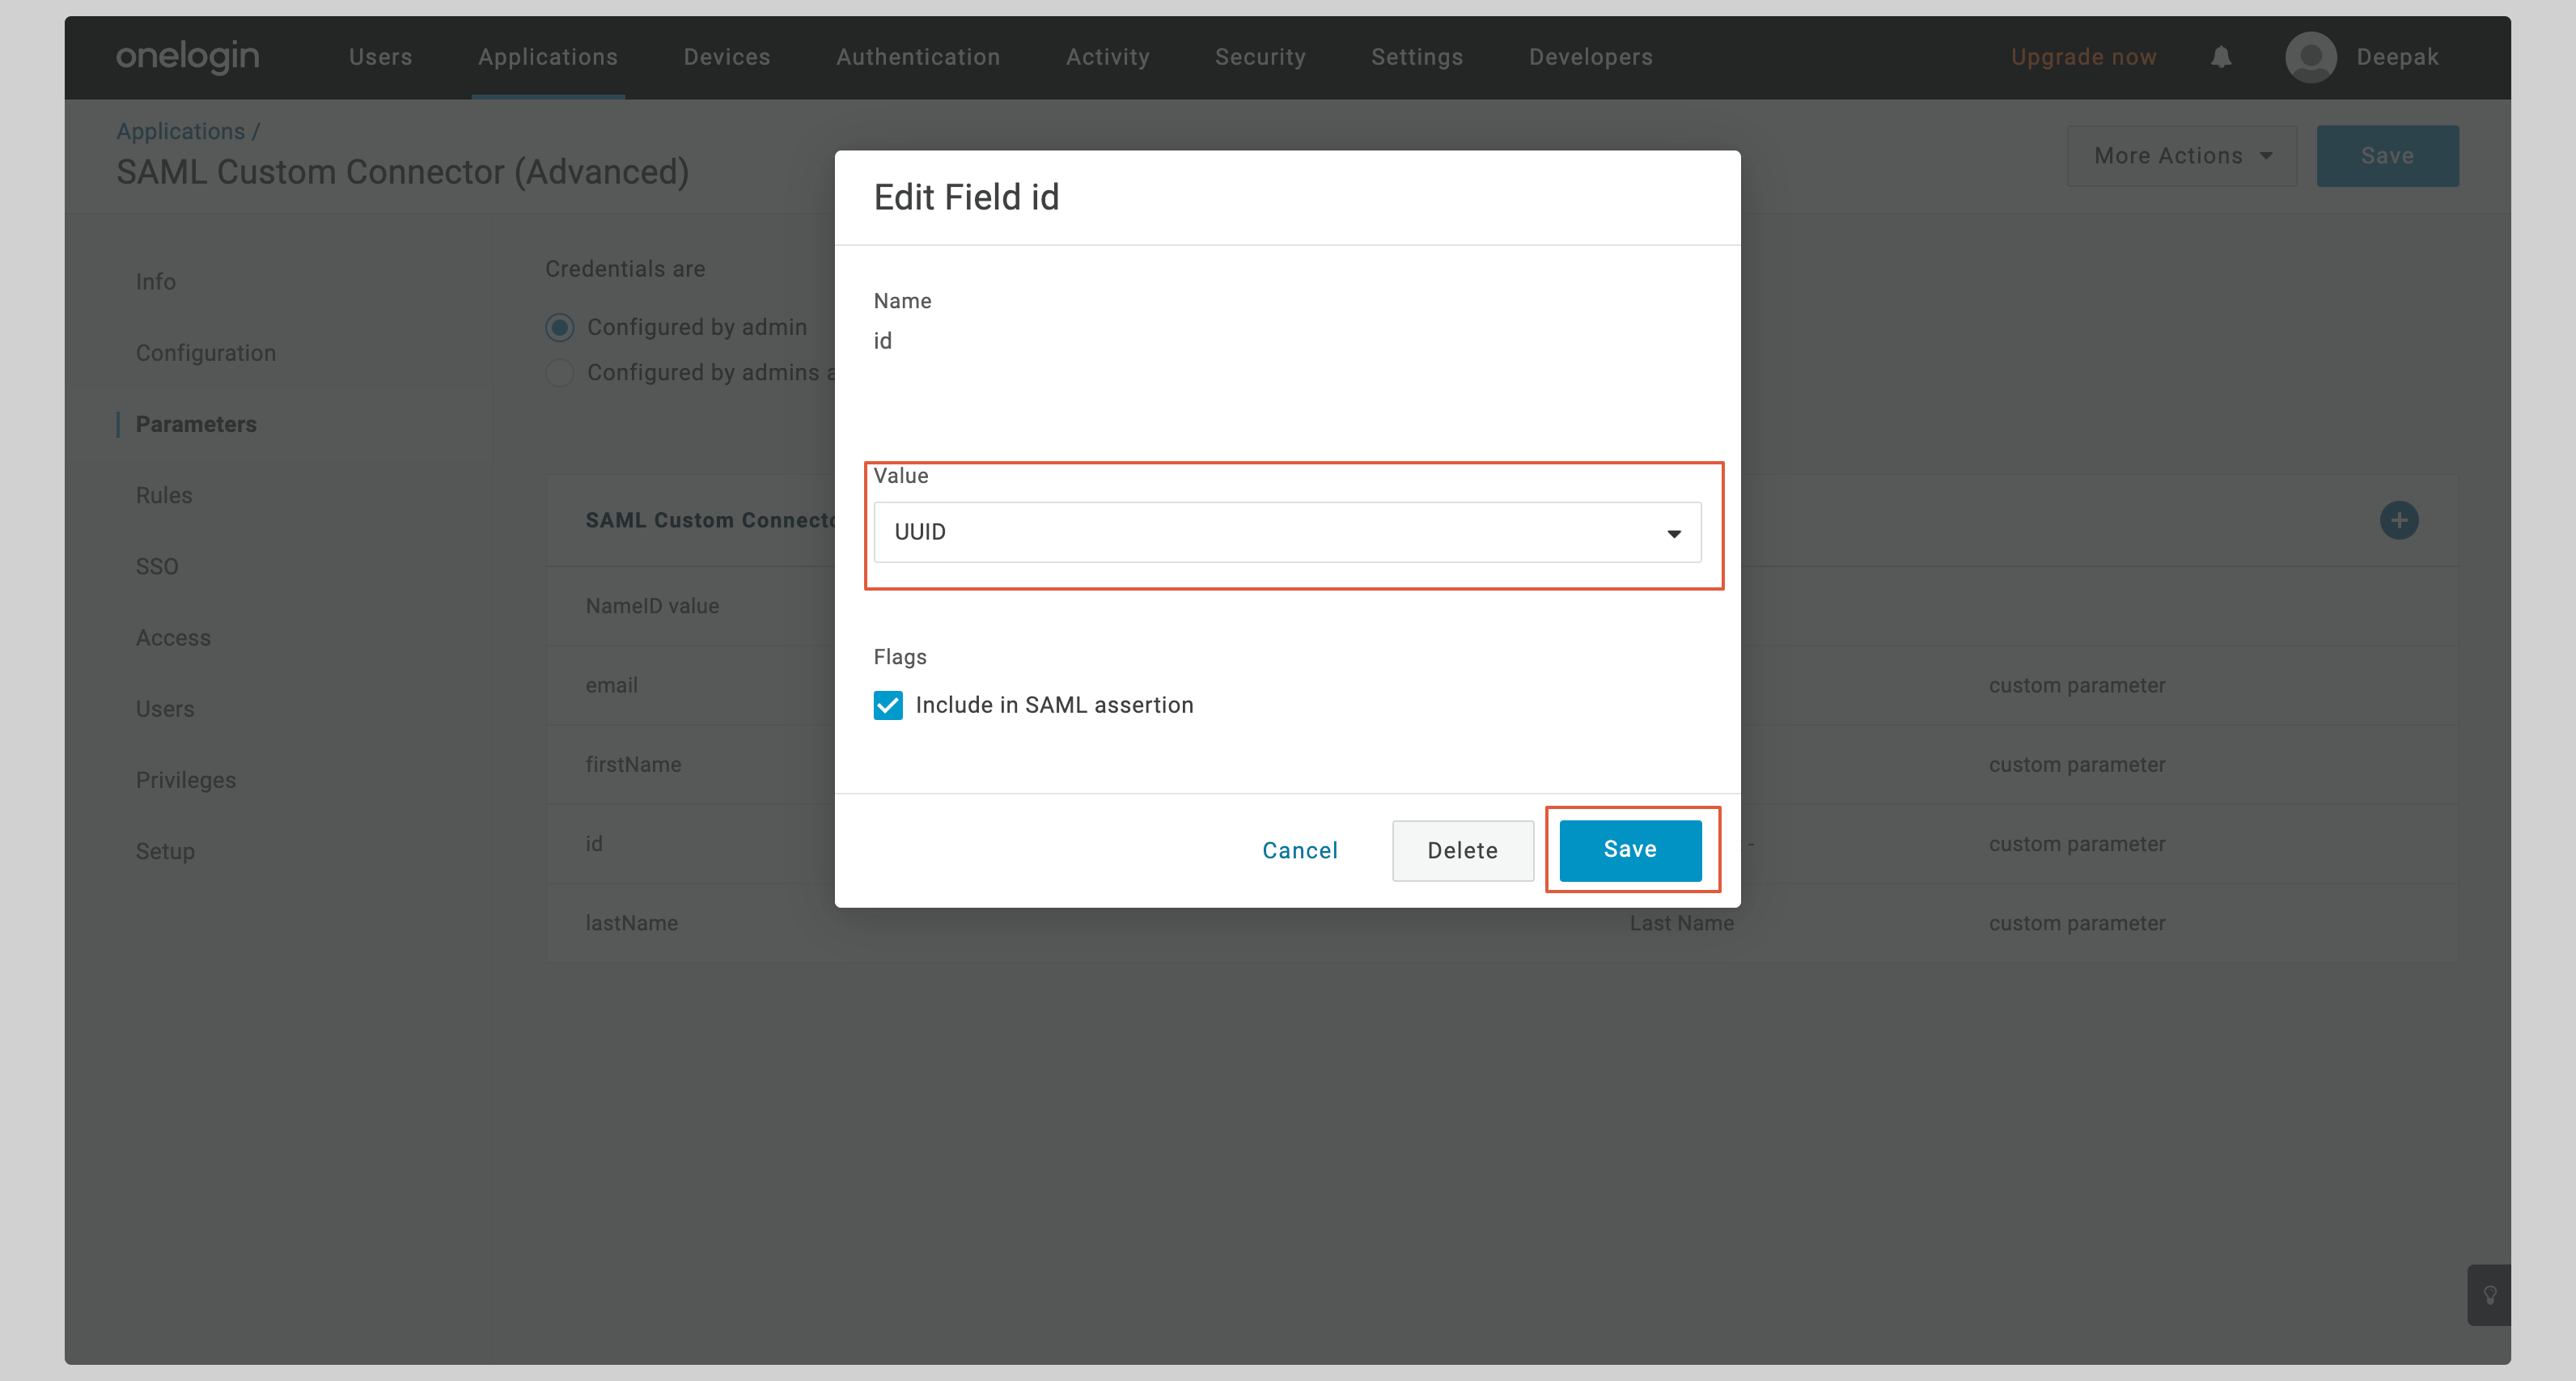
- Do the same for the other attributes (email, firstName, lastName).