Create application
- From your JumpCloud Admin console, click SSO from the left navigation menu.
- If your application is already created, choose it from the list and move to the section Configure Application
-
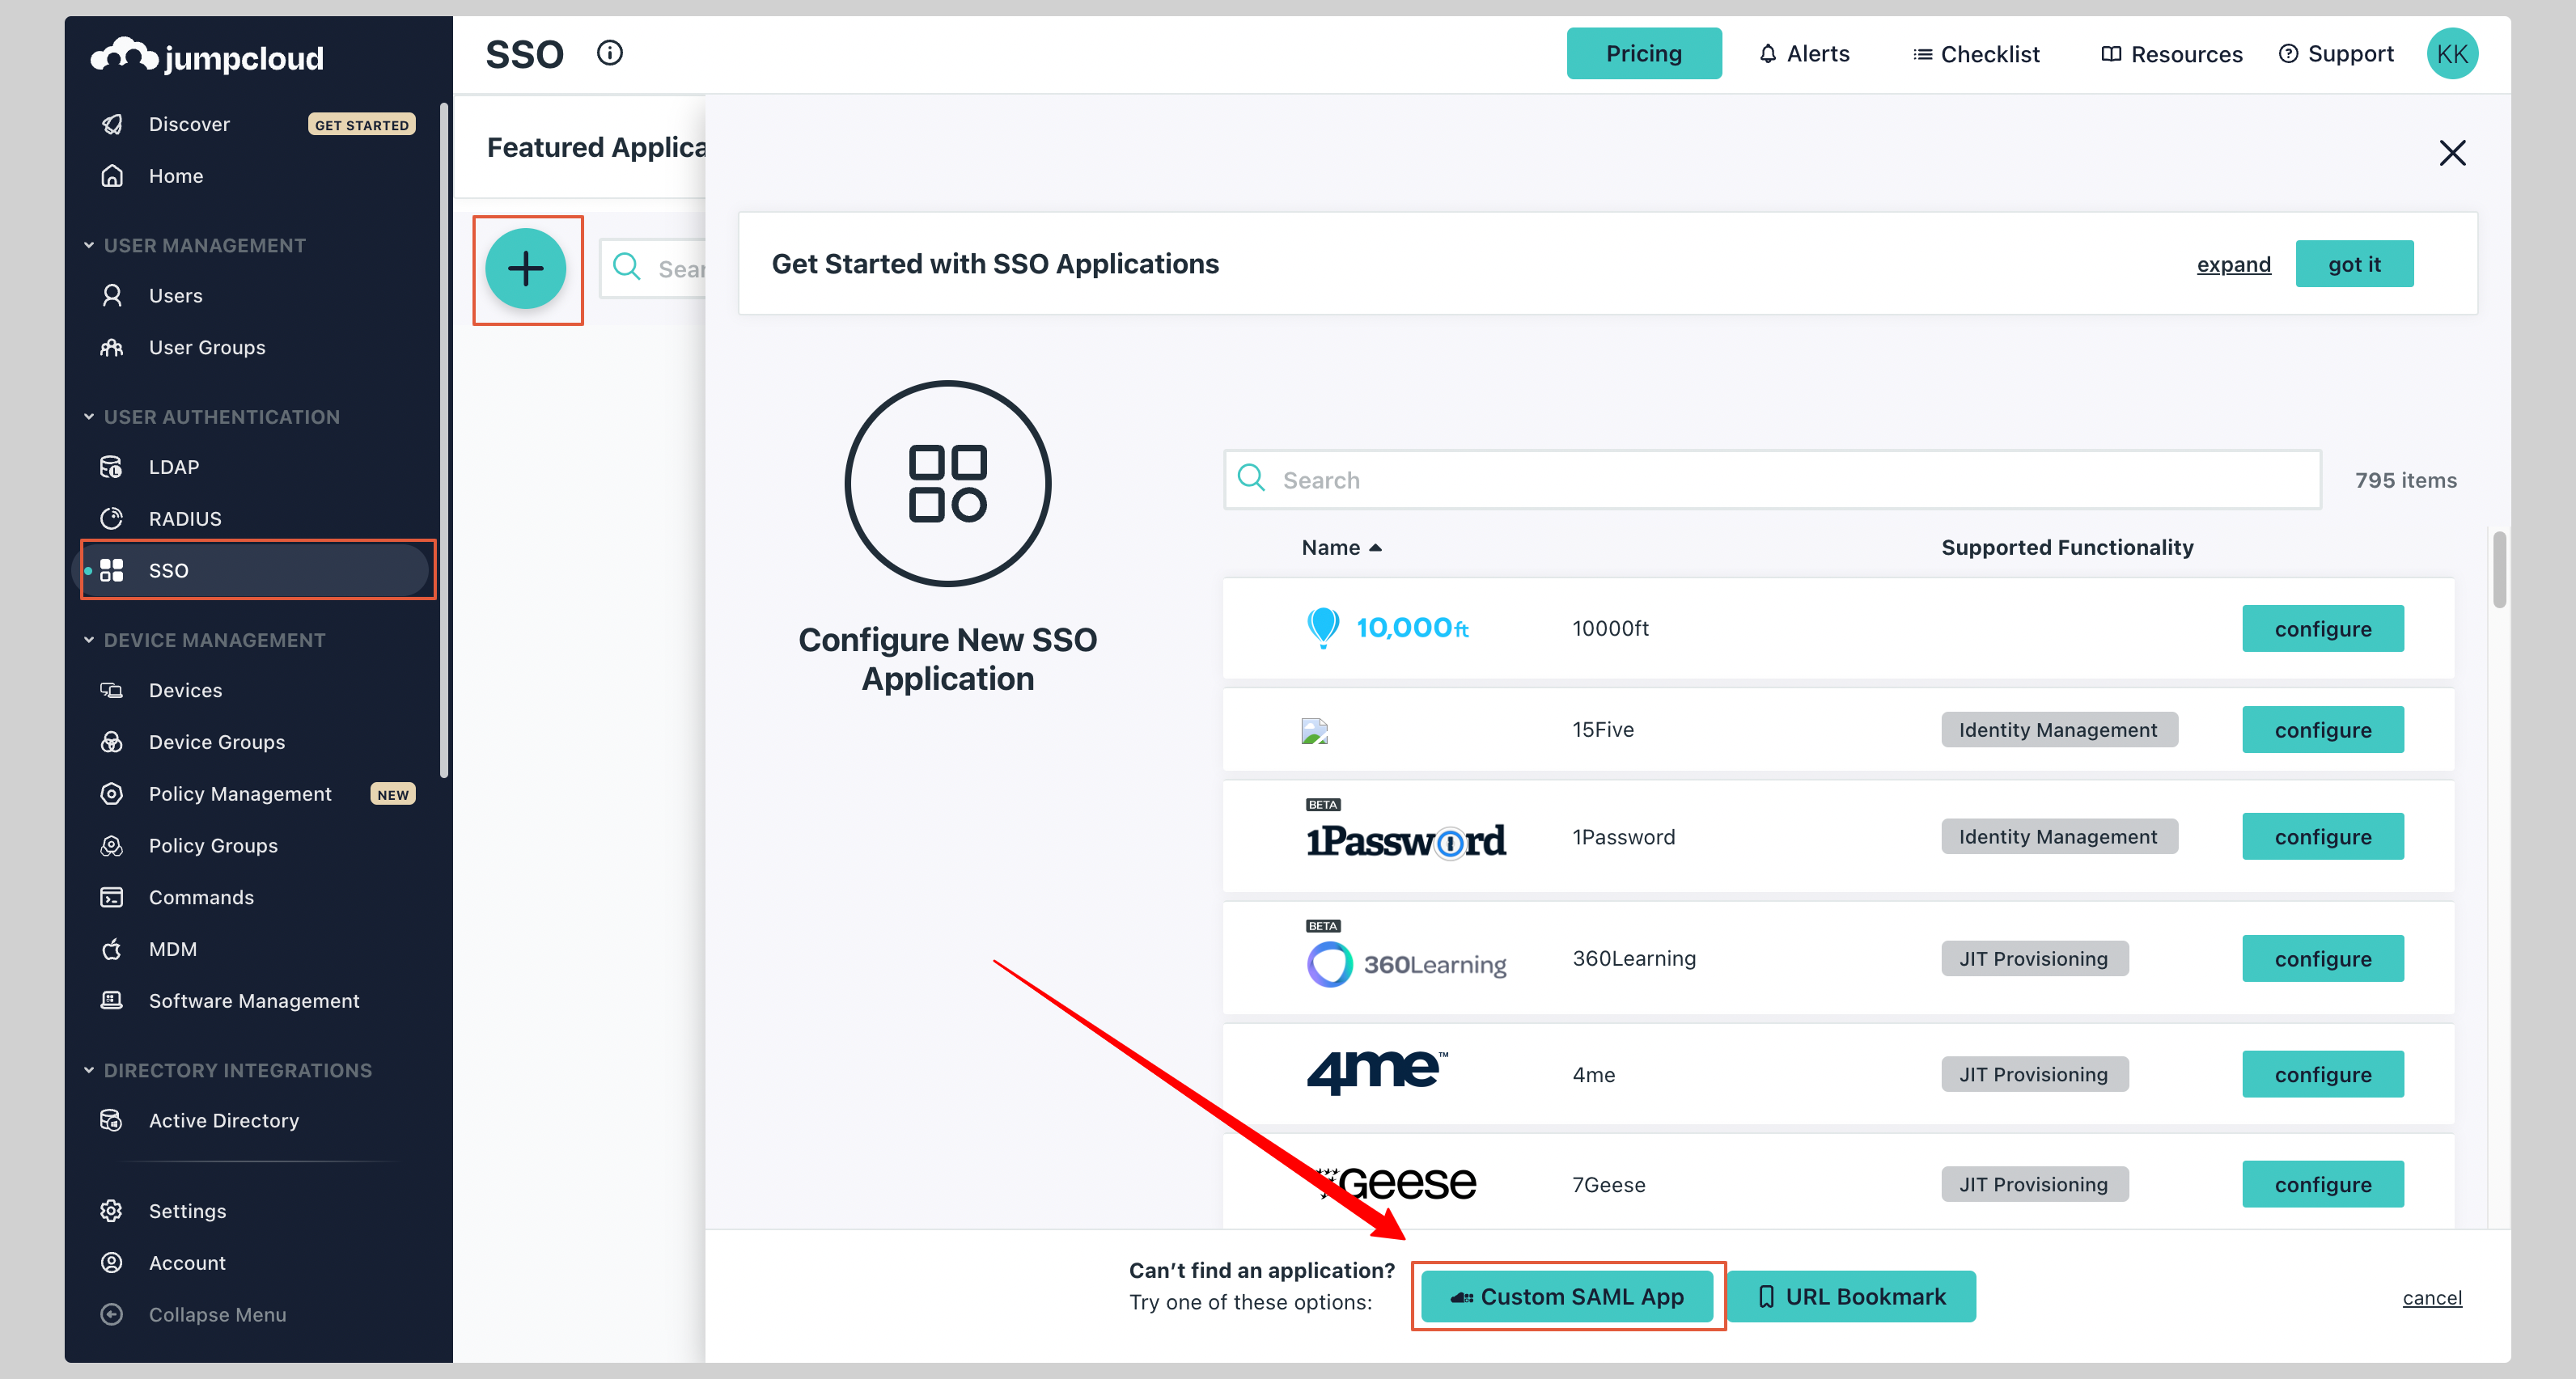
If you haven’t created a SAML application, click plus icon and then Custom SAML App to create a new application
-
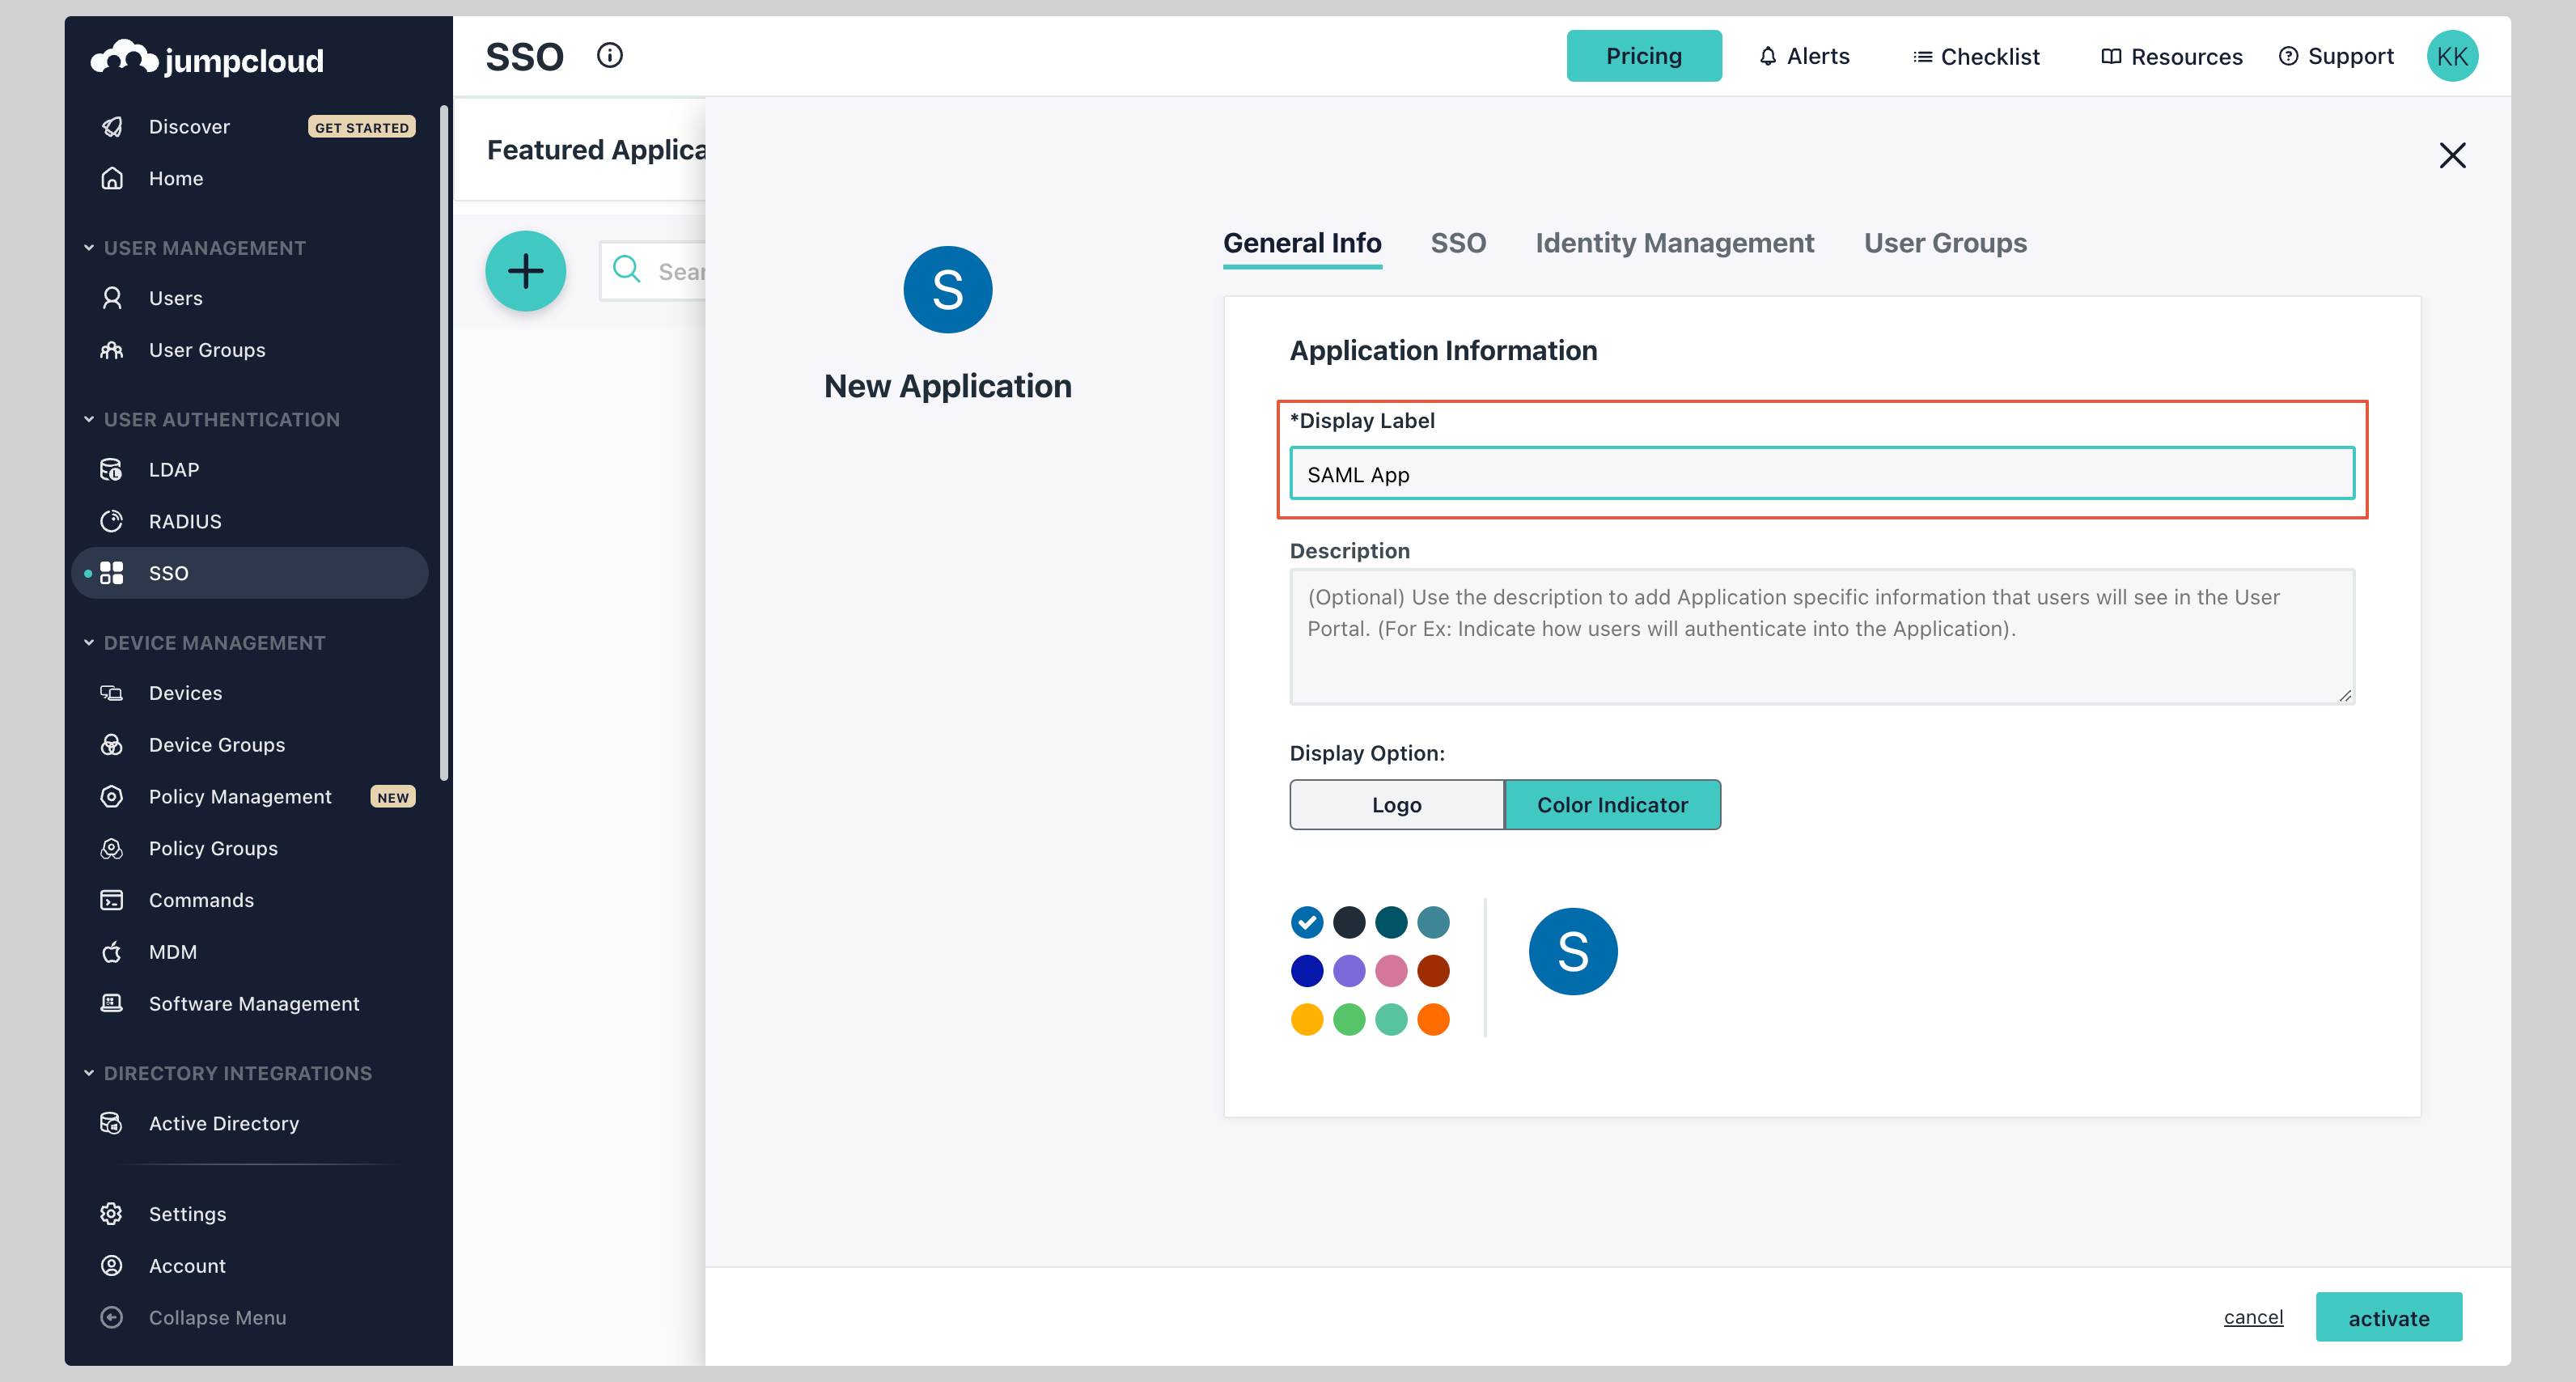
Give your application a Display Label.
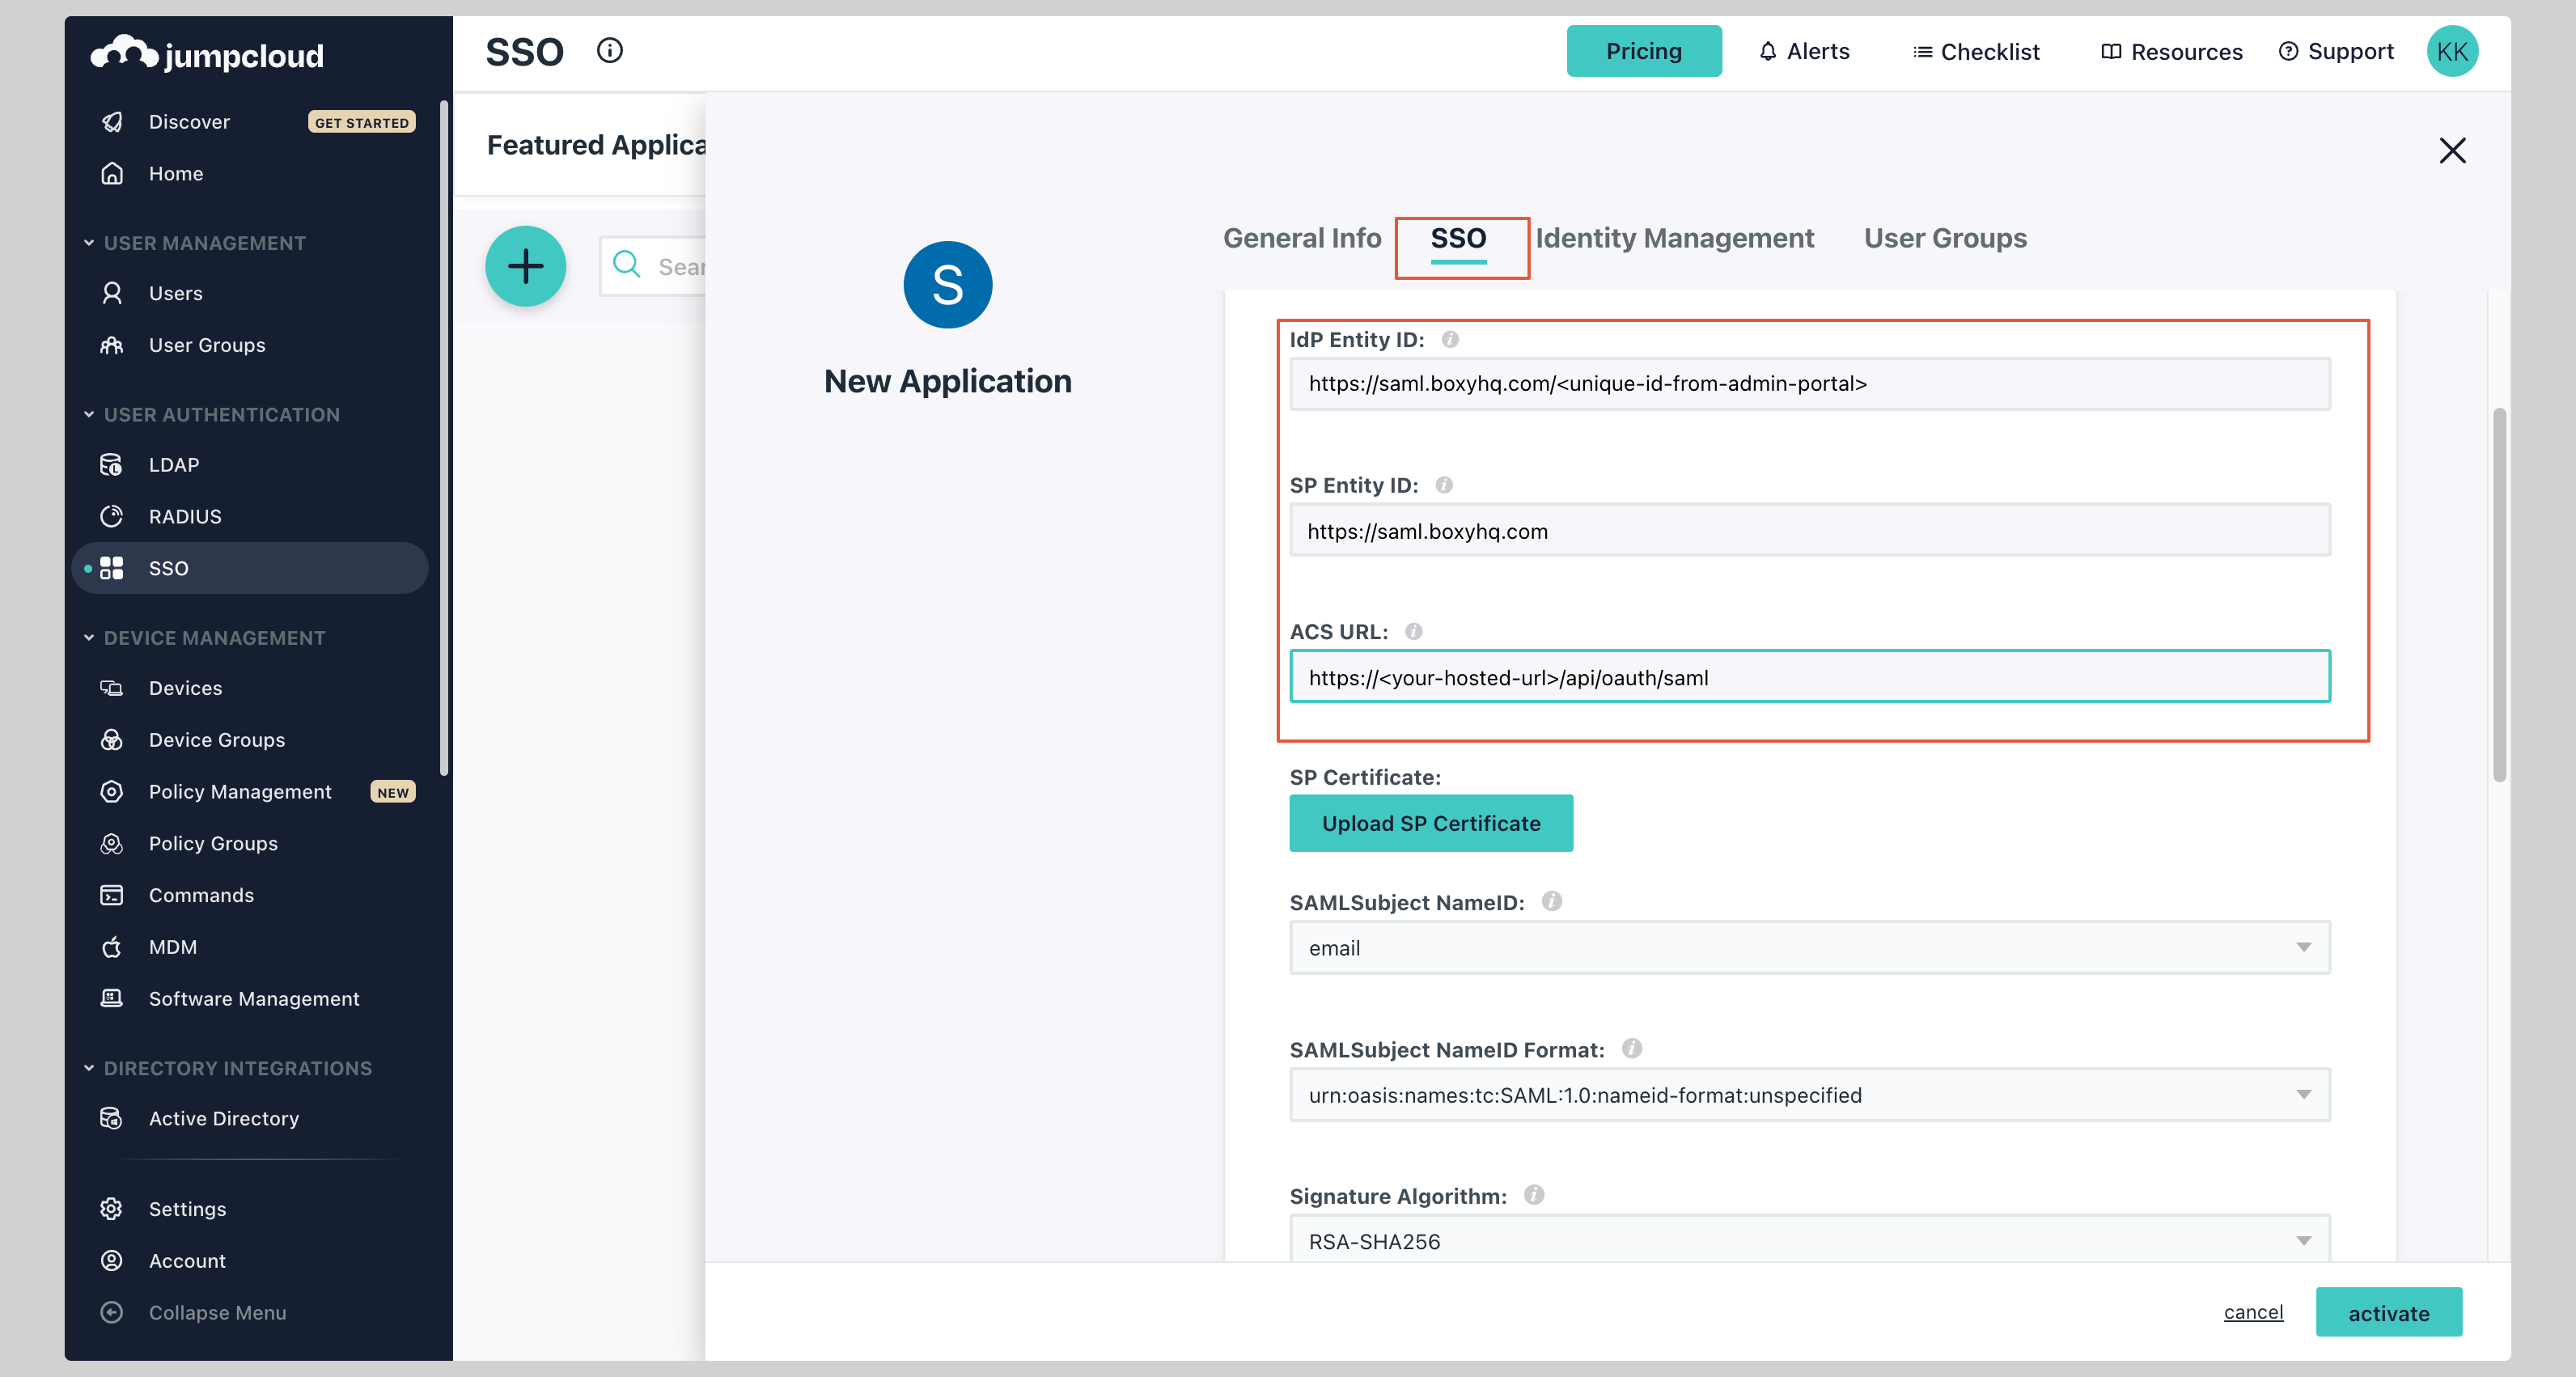
Configure application
-
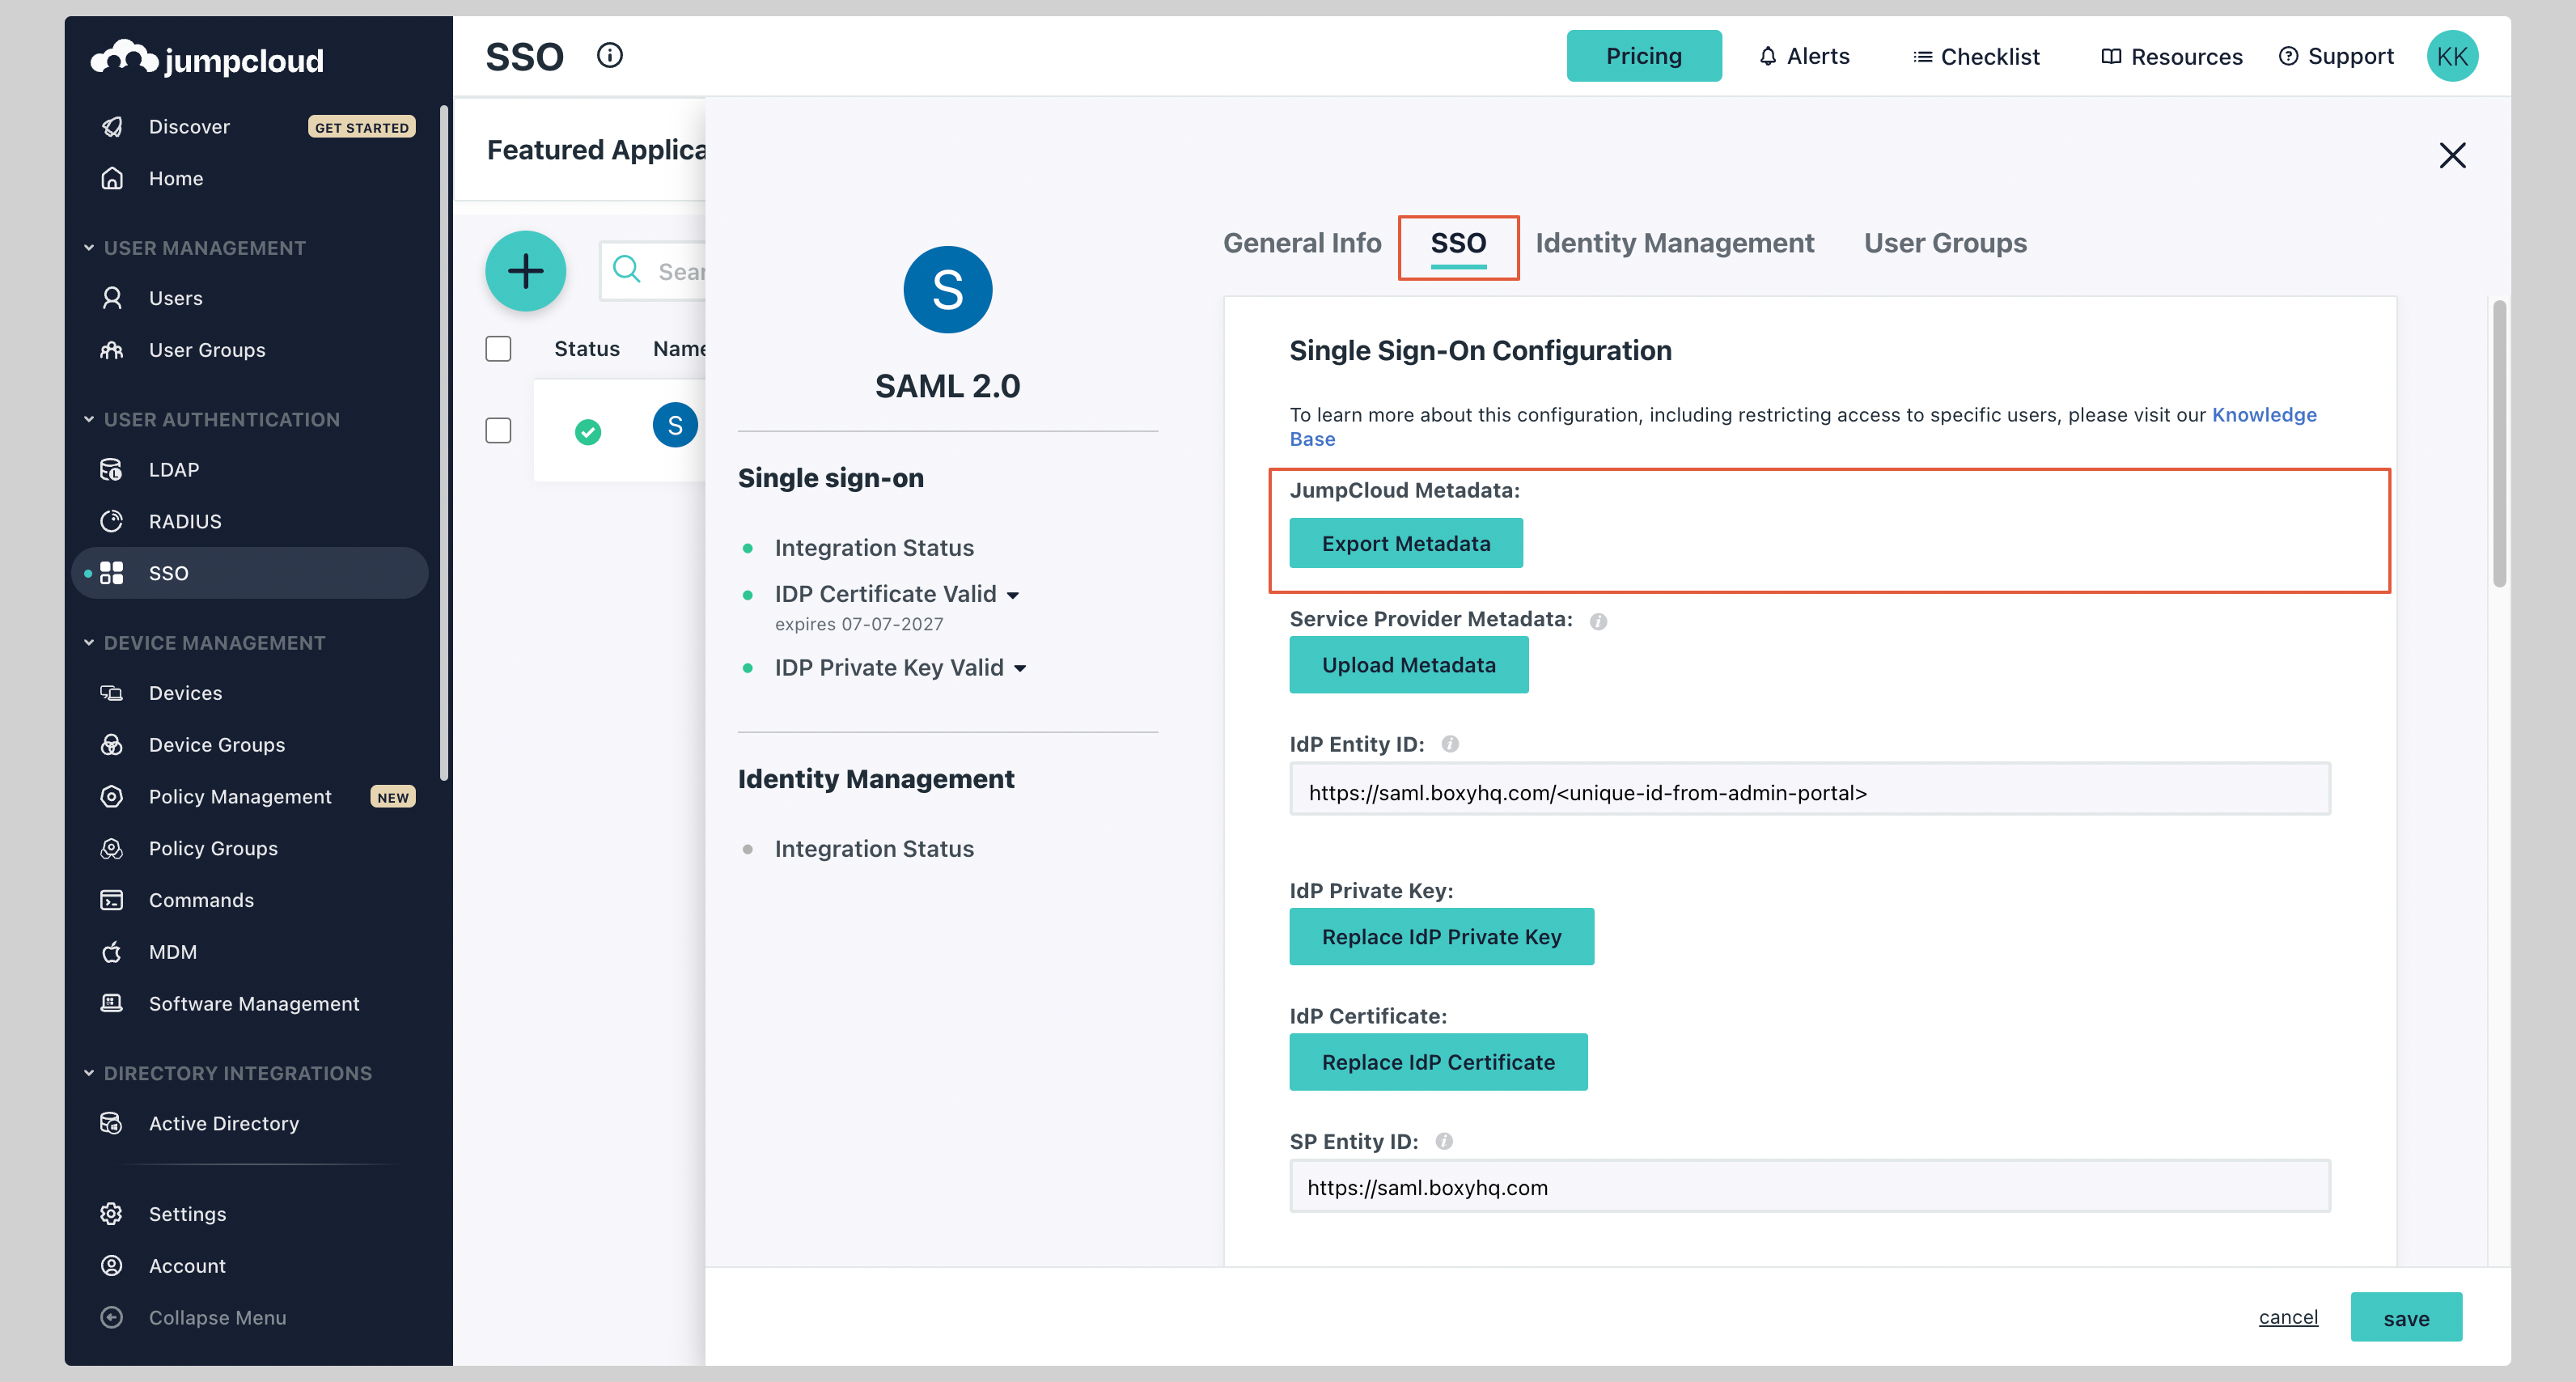
Next click on the SSO tab and enter the following values:
- IdP Entity ID
- SP Entity ID
- ACS URL
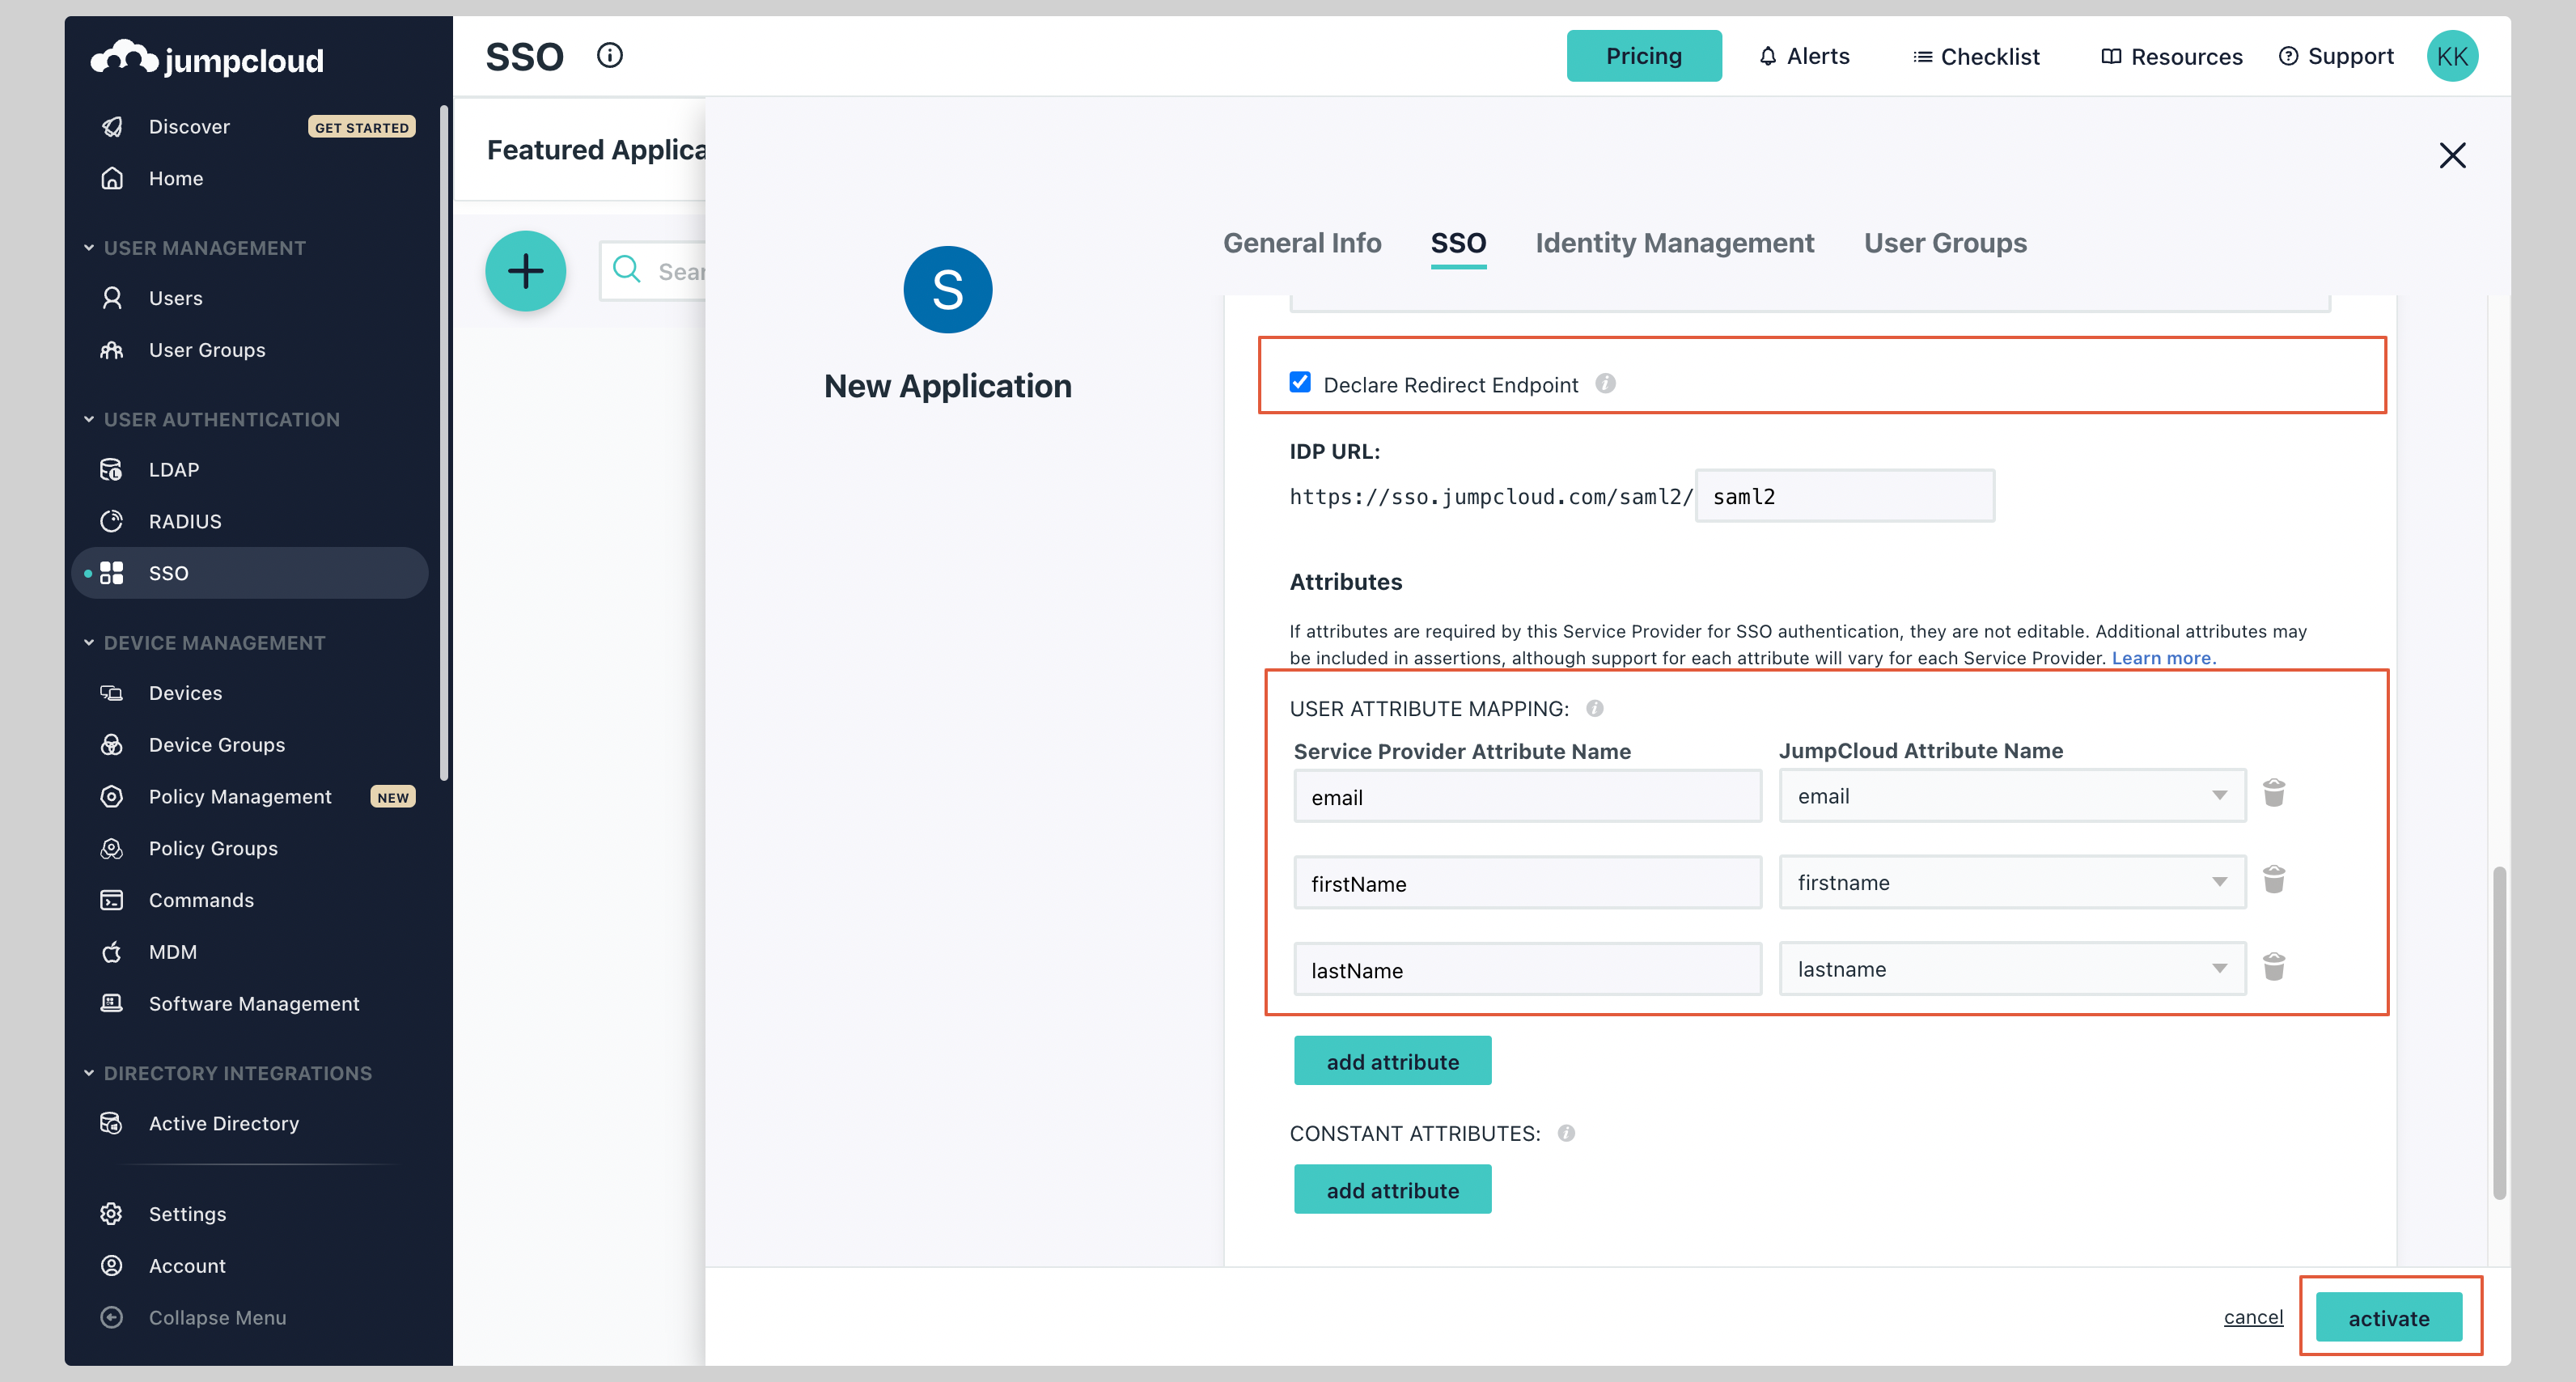
Attribute mapping
Under the Attributes section, you have to configure the following attributes: See the screenshot below.| Service Provider Attribute Name | JumpCloud Attribute Name |
|---|---|
firstName | firstname |
lastName | lastname |