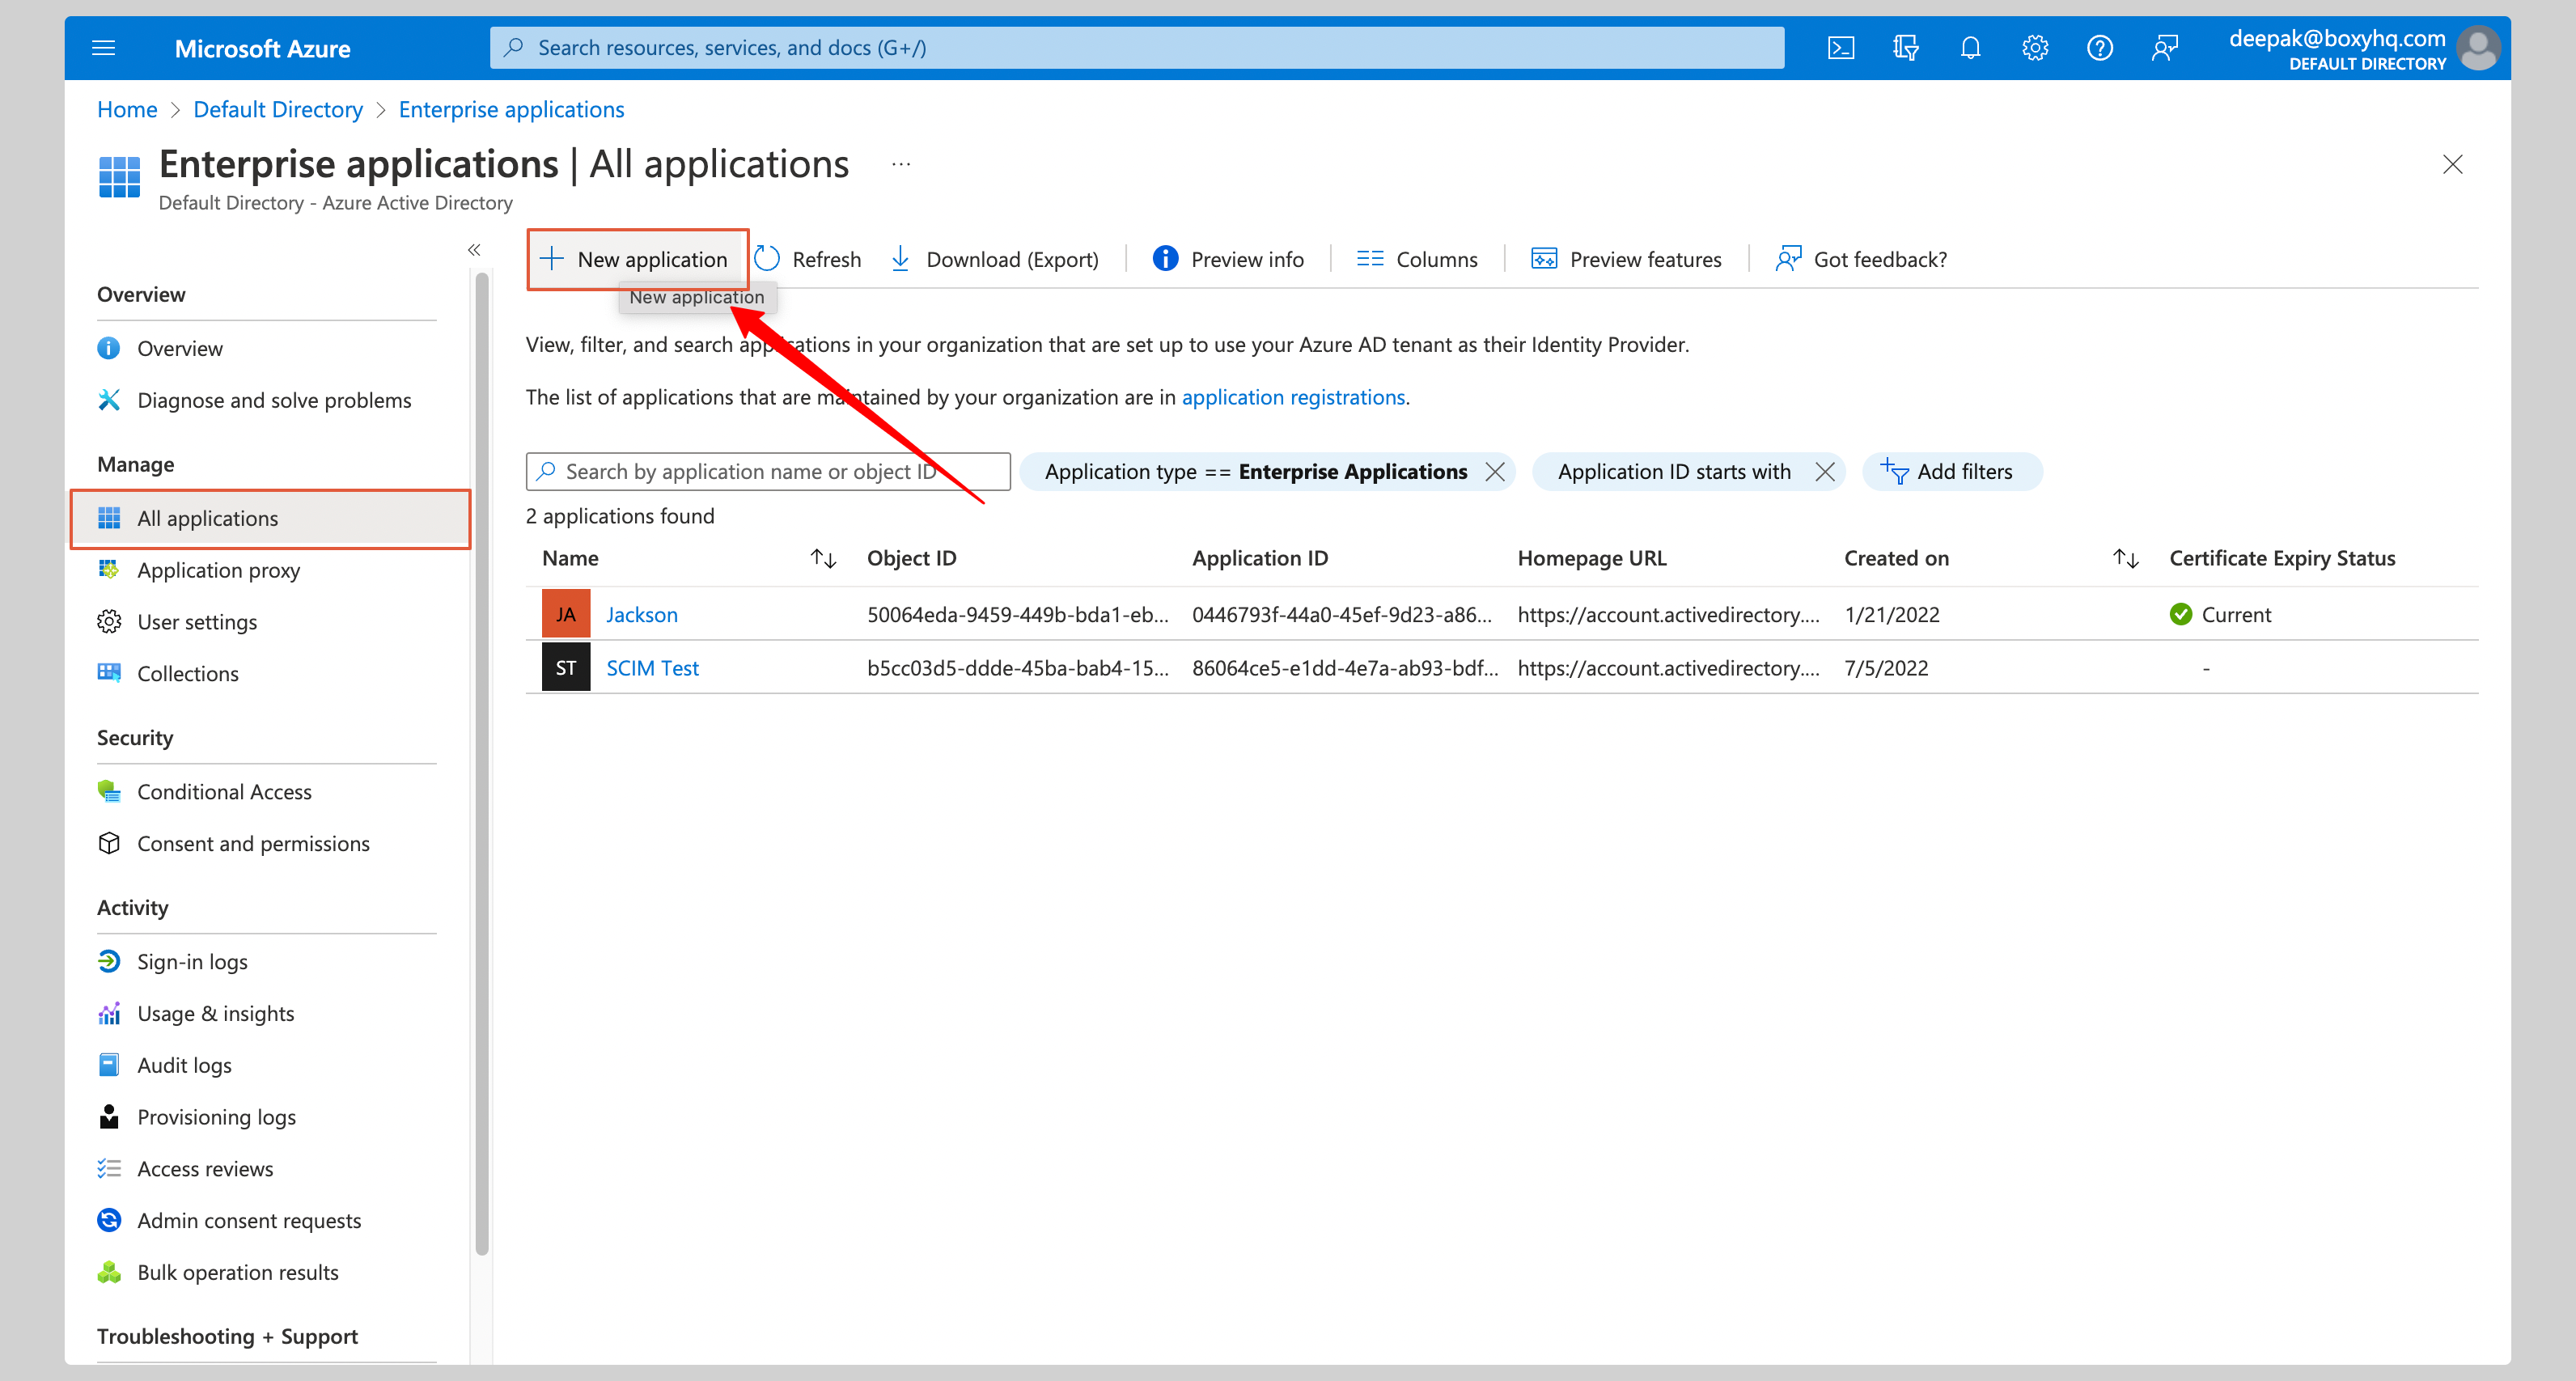
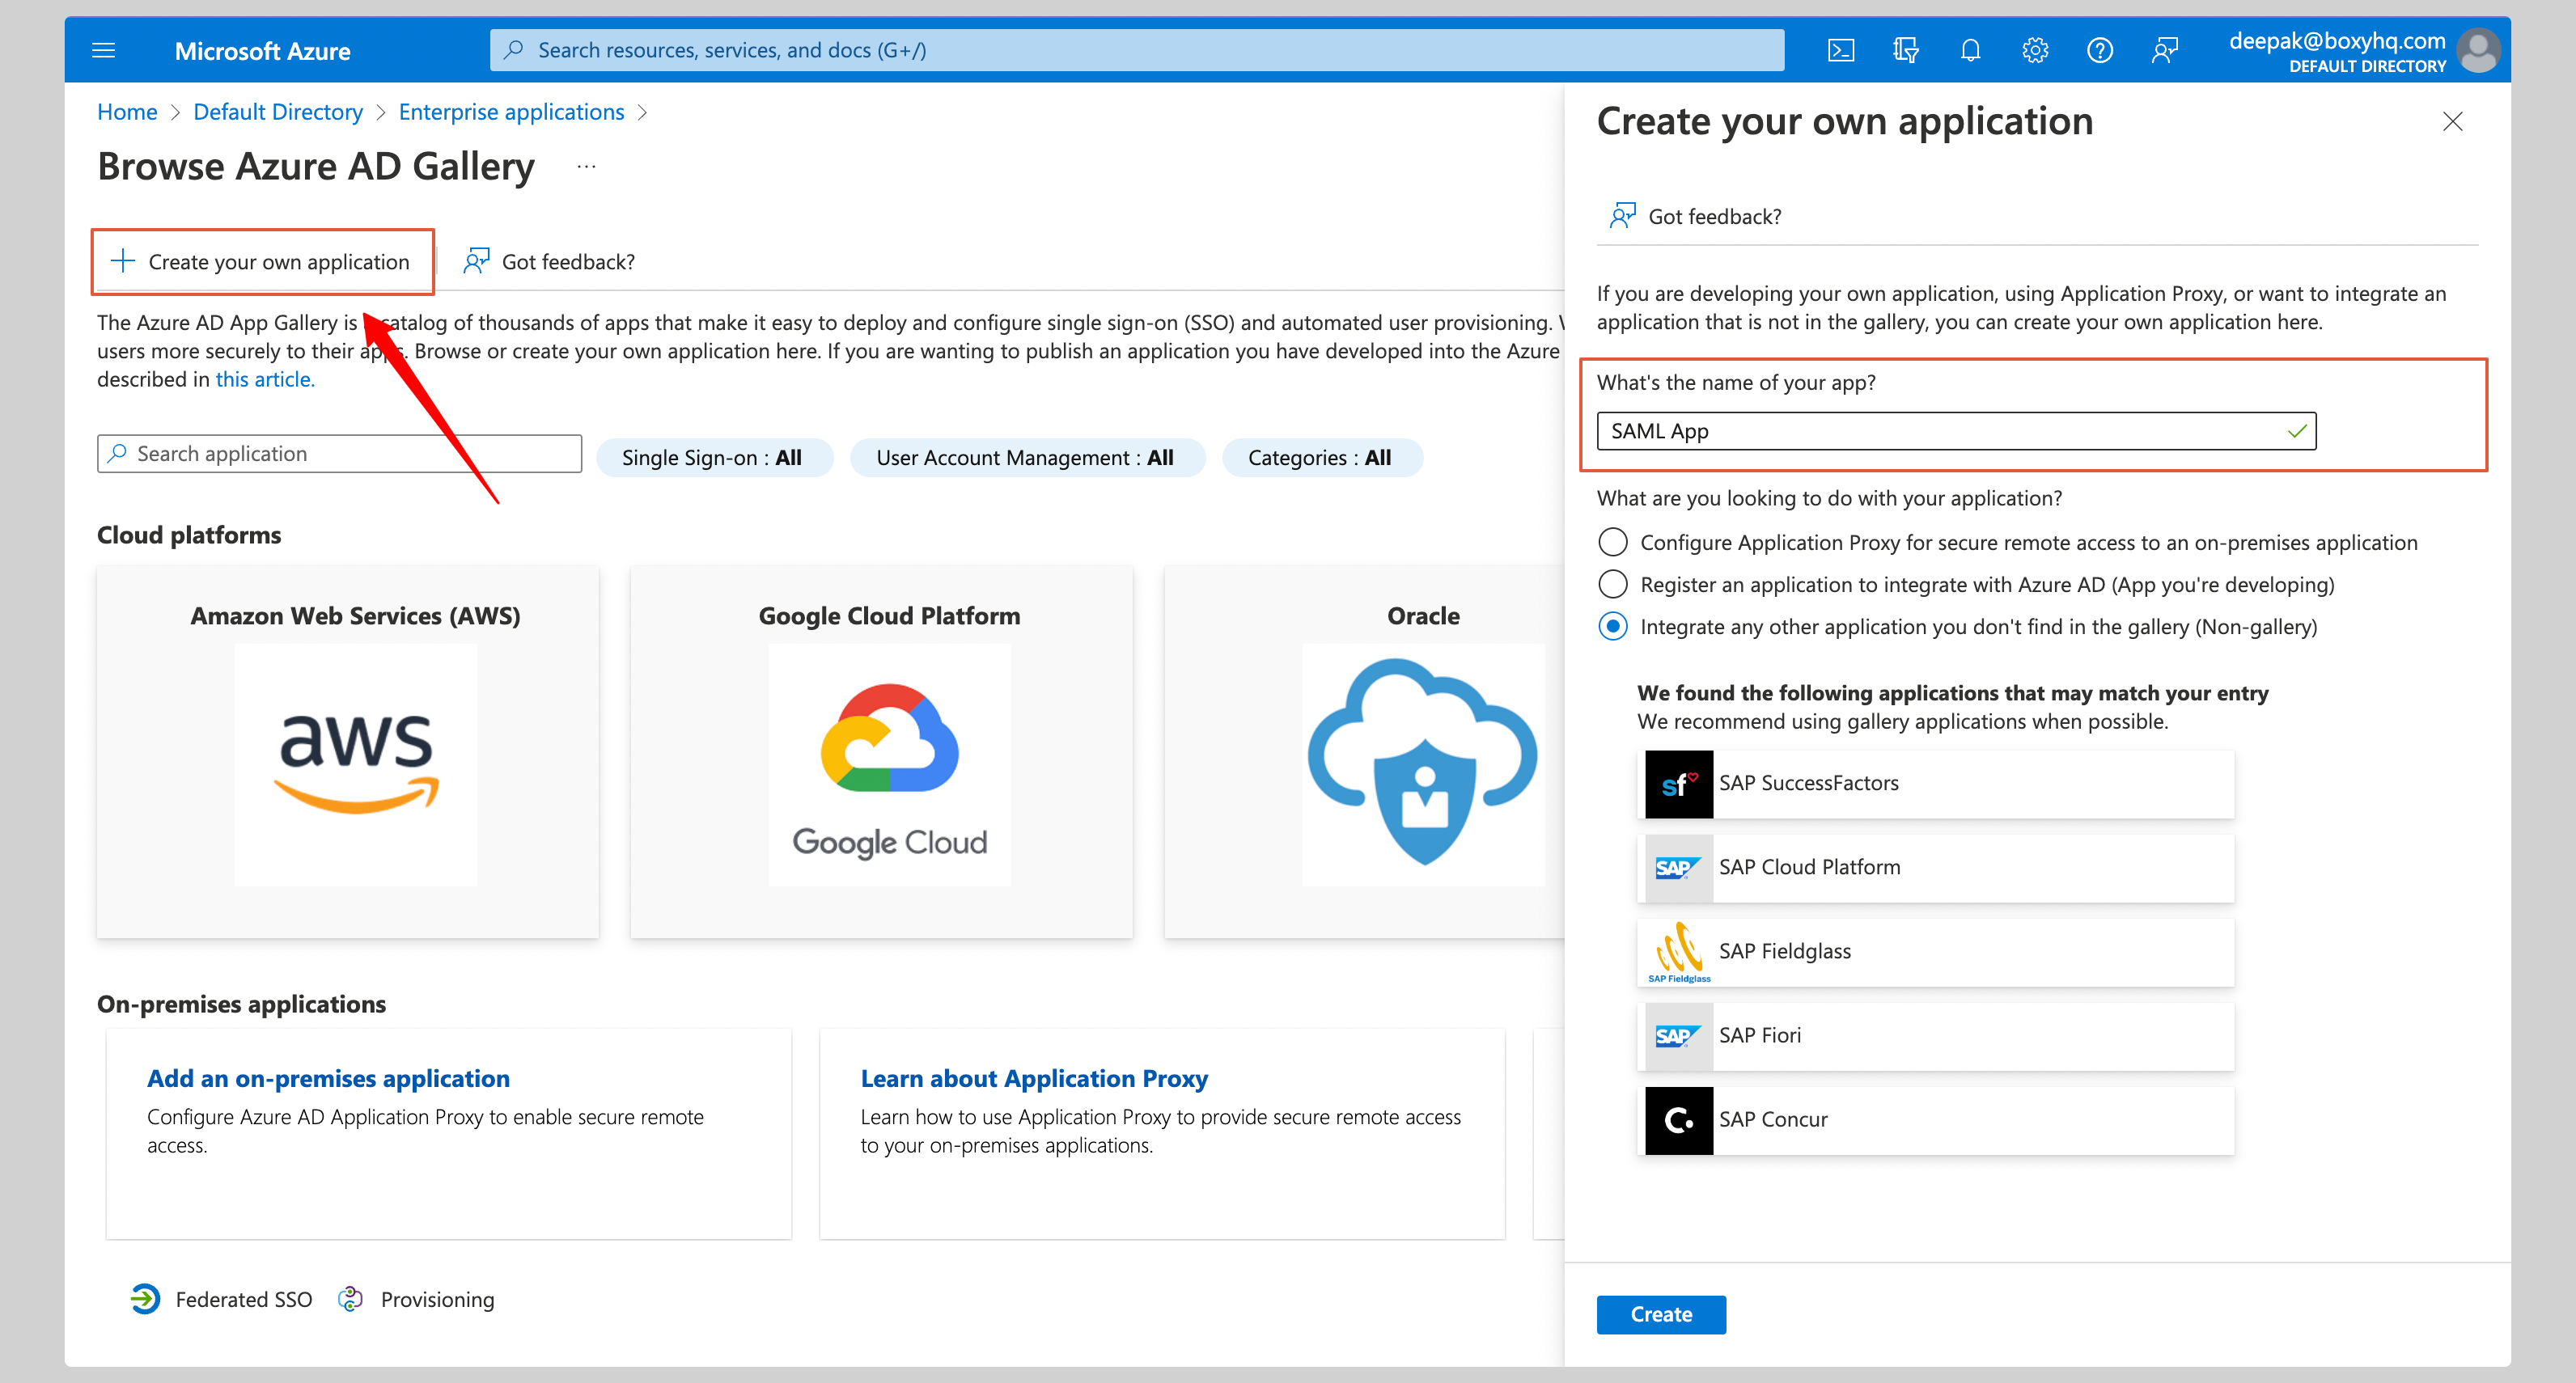
Create application

From your Azure Admin console, click Enterprise applications from the left navigation menu. Sso Microsoft Entraid1 Pn If your application is already created, choose it from the list and move to the section Configure Application. If you haven’t created a SAML application, click New application from the top to create a new application. Sso Microsoft Entraid2 Pn From the next screen, click Create your own application. Give your application a Name and click Create. Sso 3 Pn

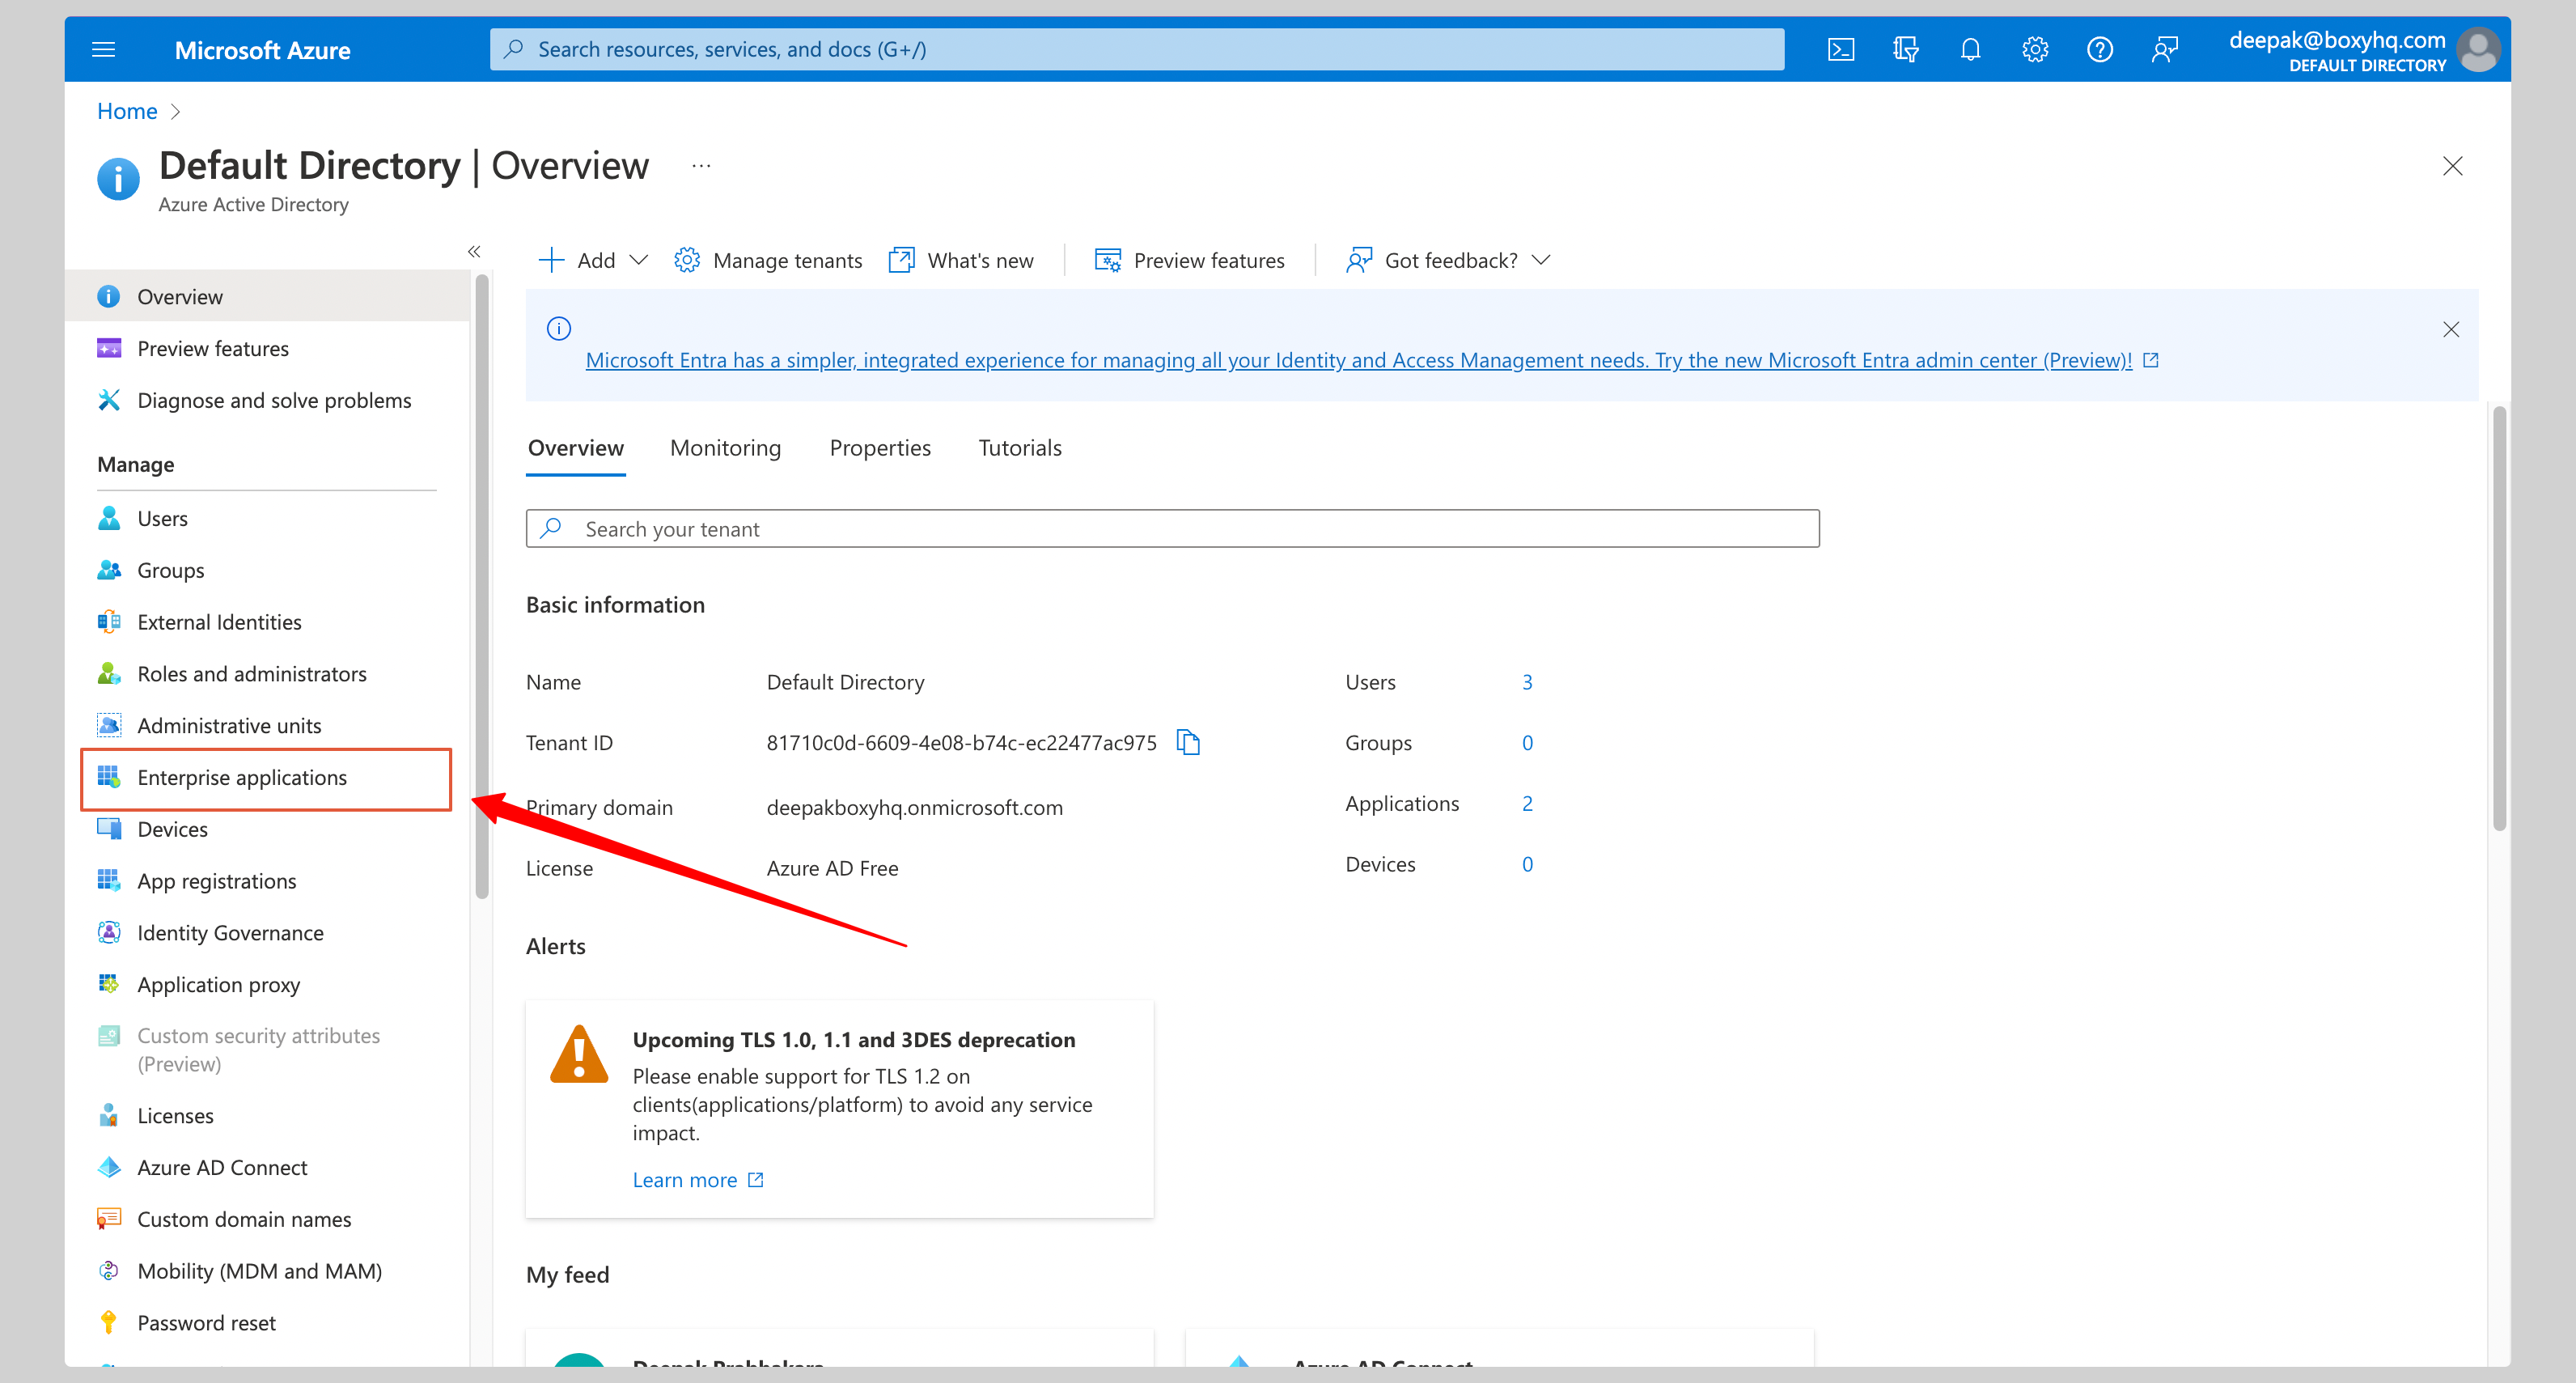
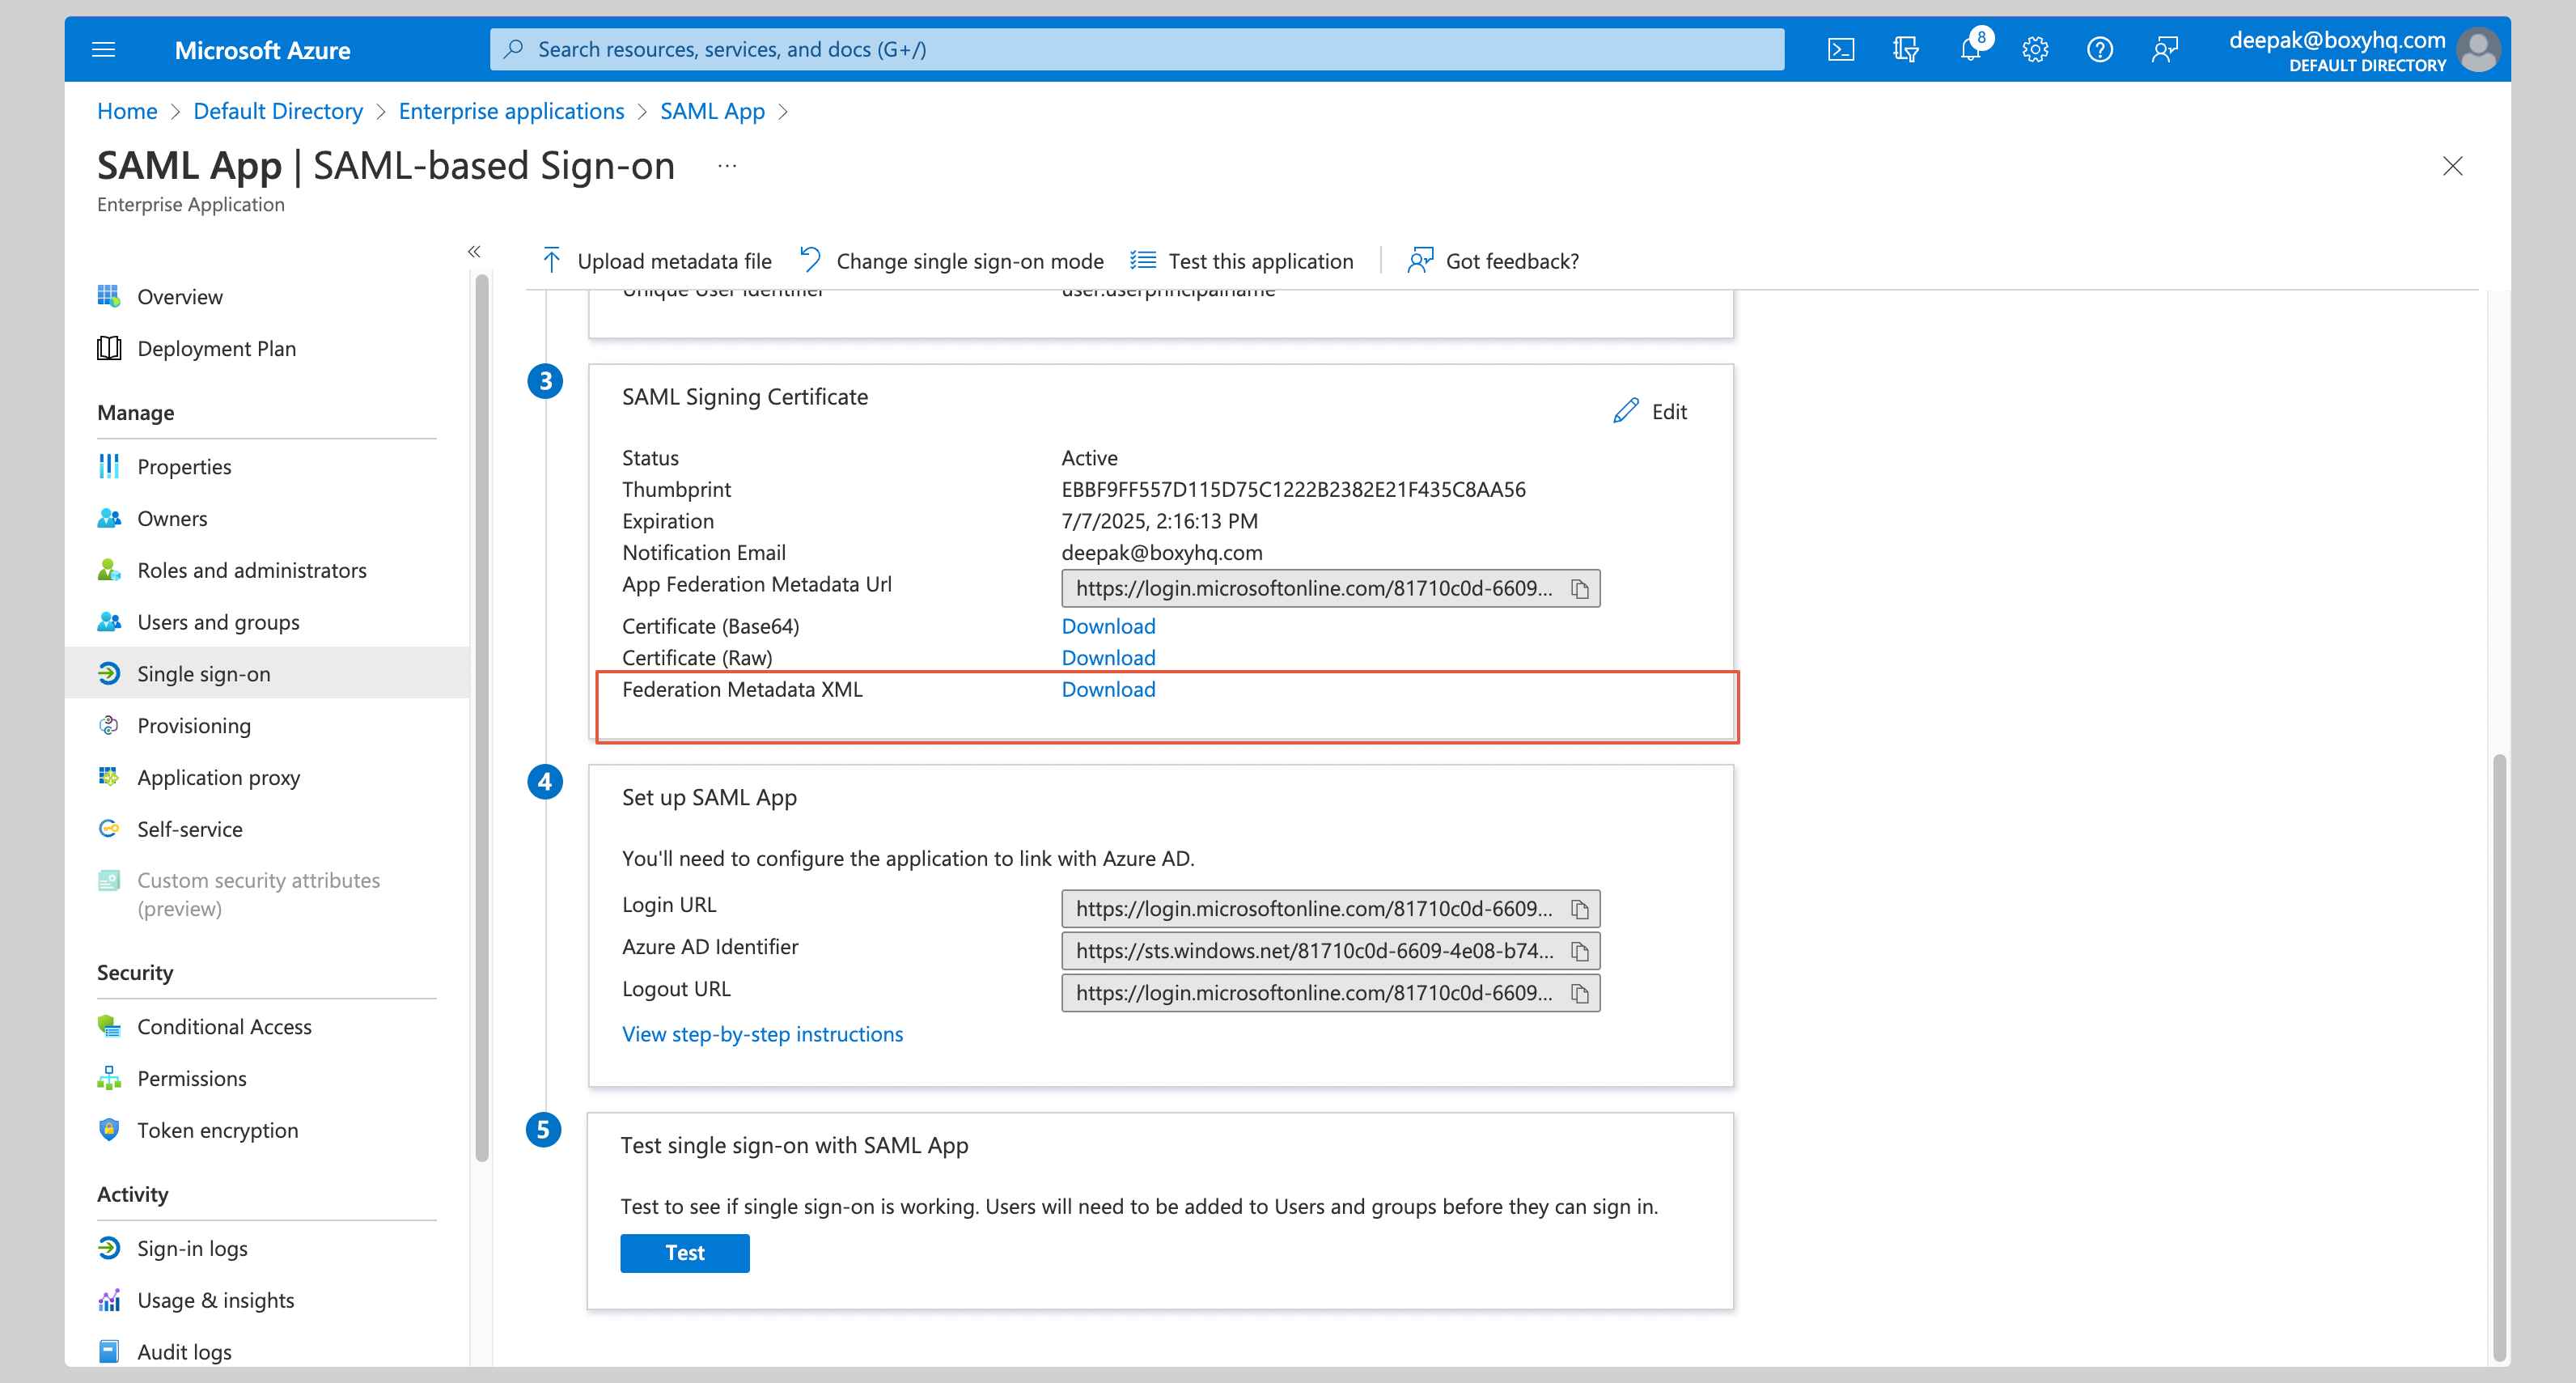
Configure application

Select Single Sign On from the Manage section of your app and then SAML. Sso 4 Pn Click Edit on the Basic SAML Configuration section. Sso Microsoft Etraid5 Pn Enter the following values in the Basic SAML Configuration section on the next screen:
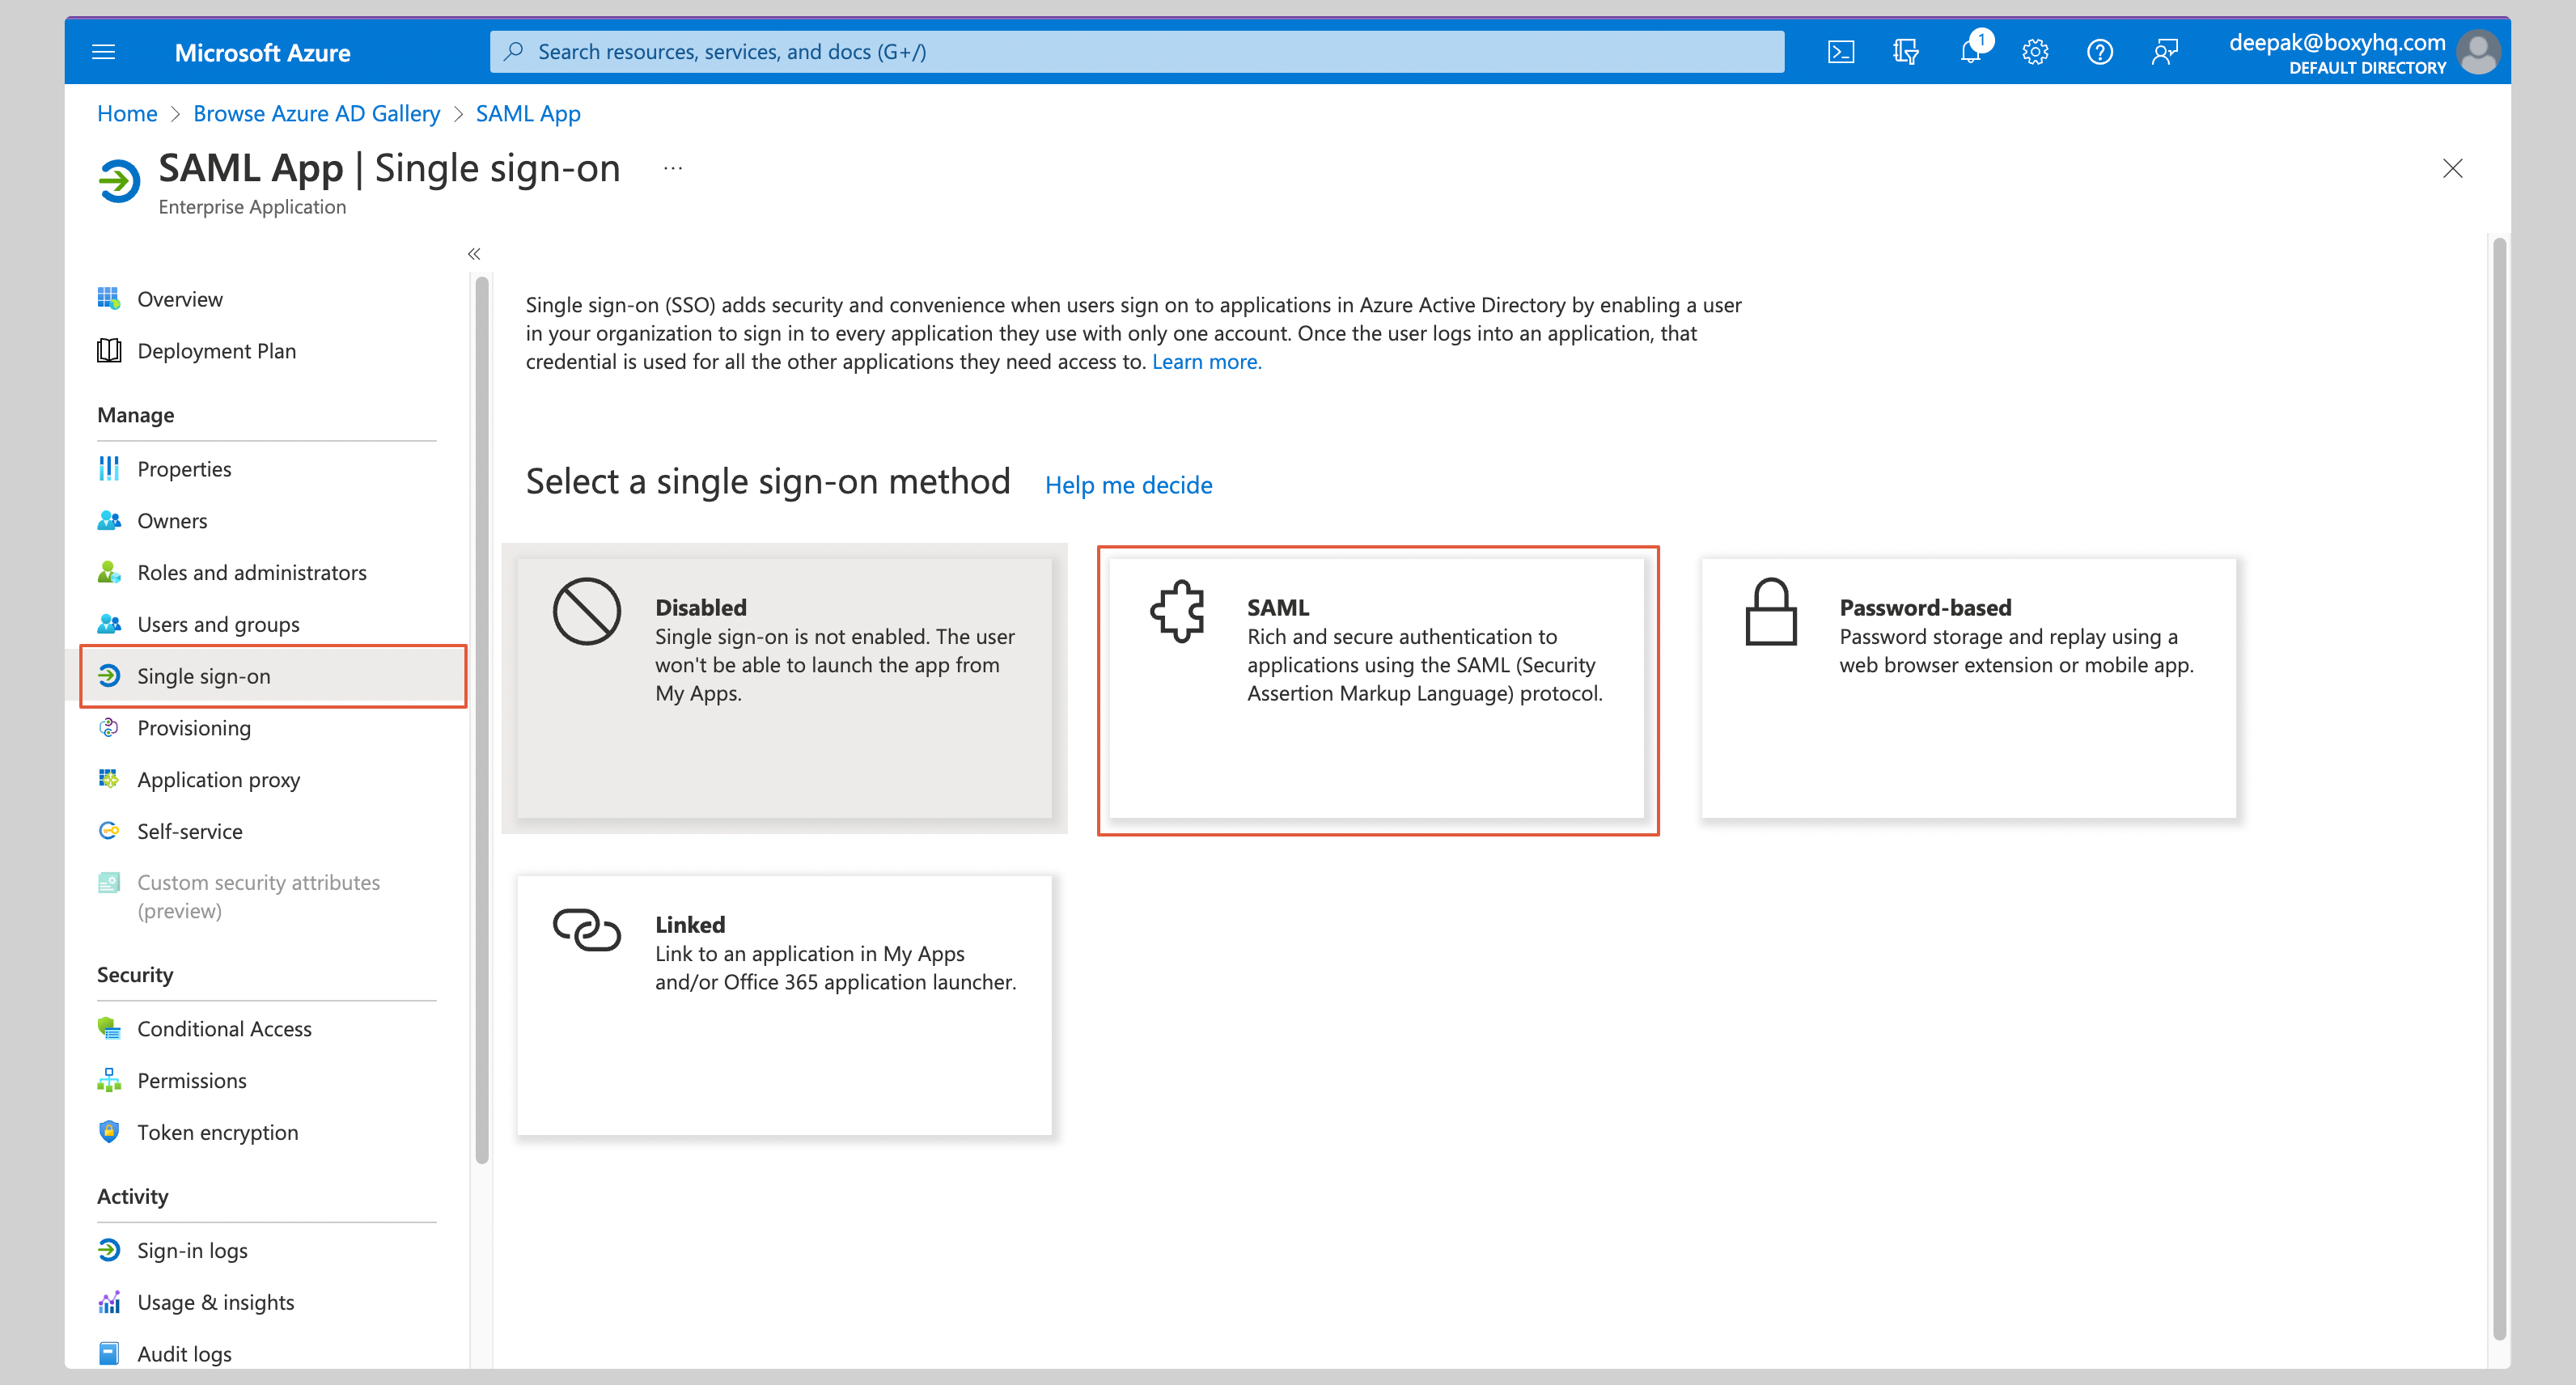
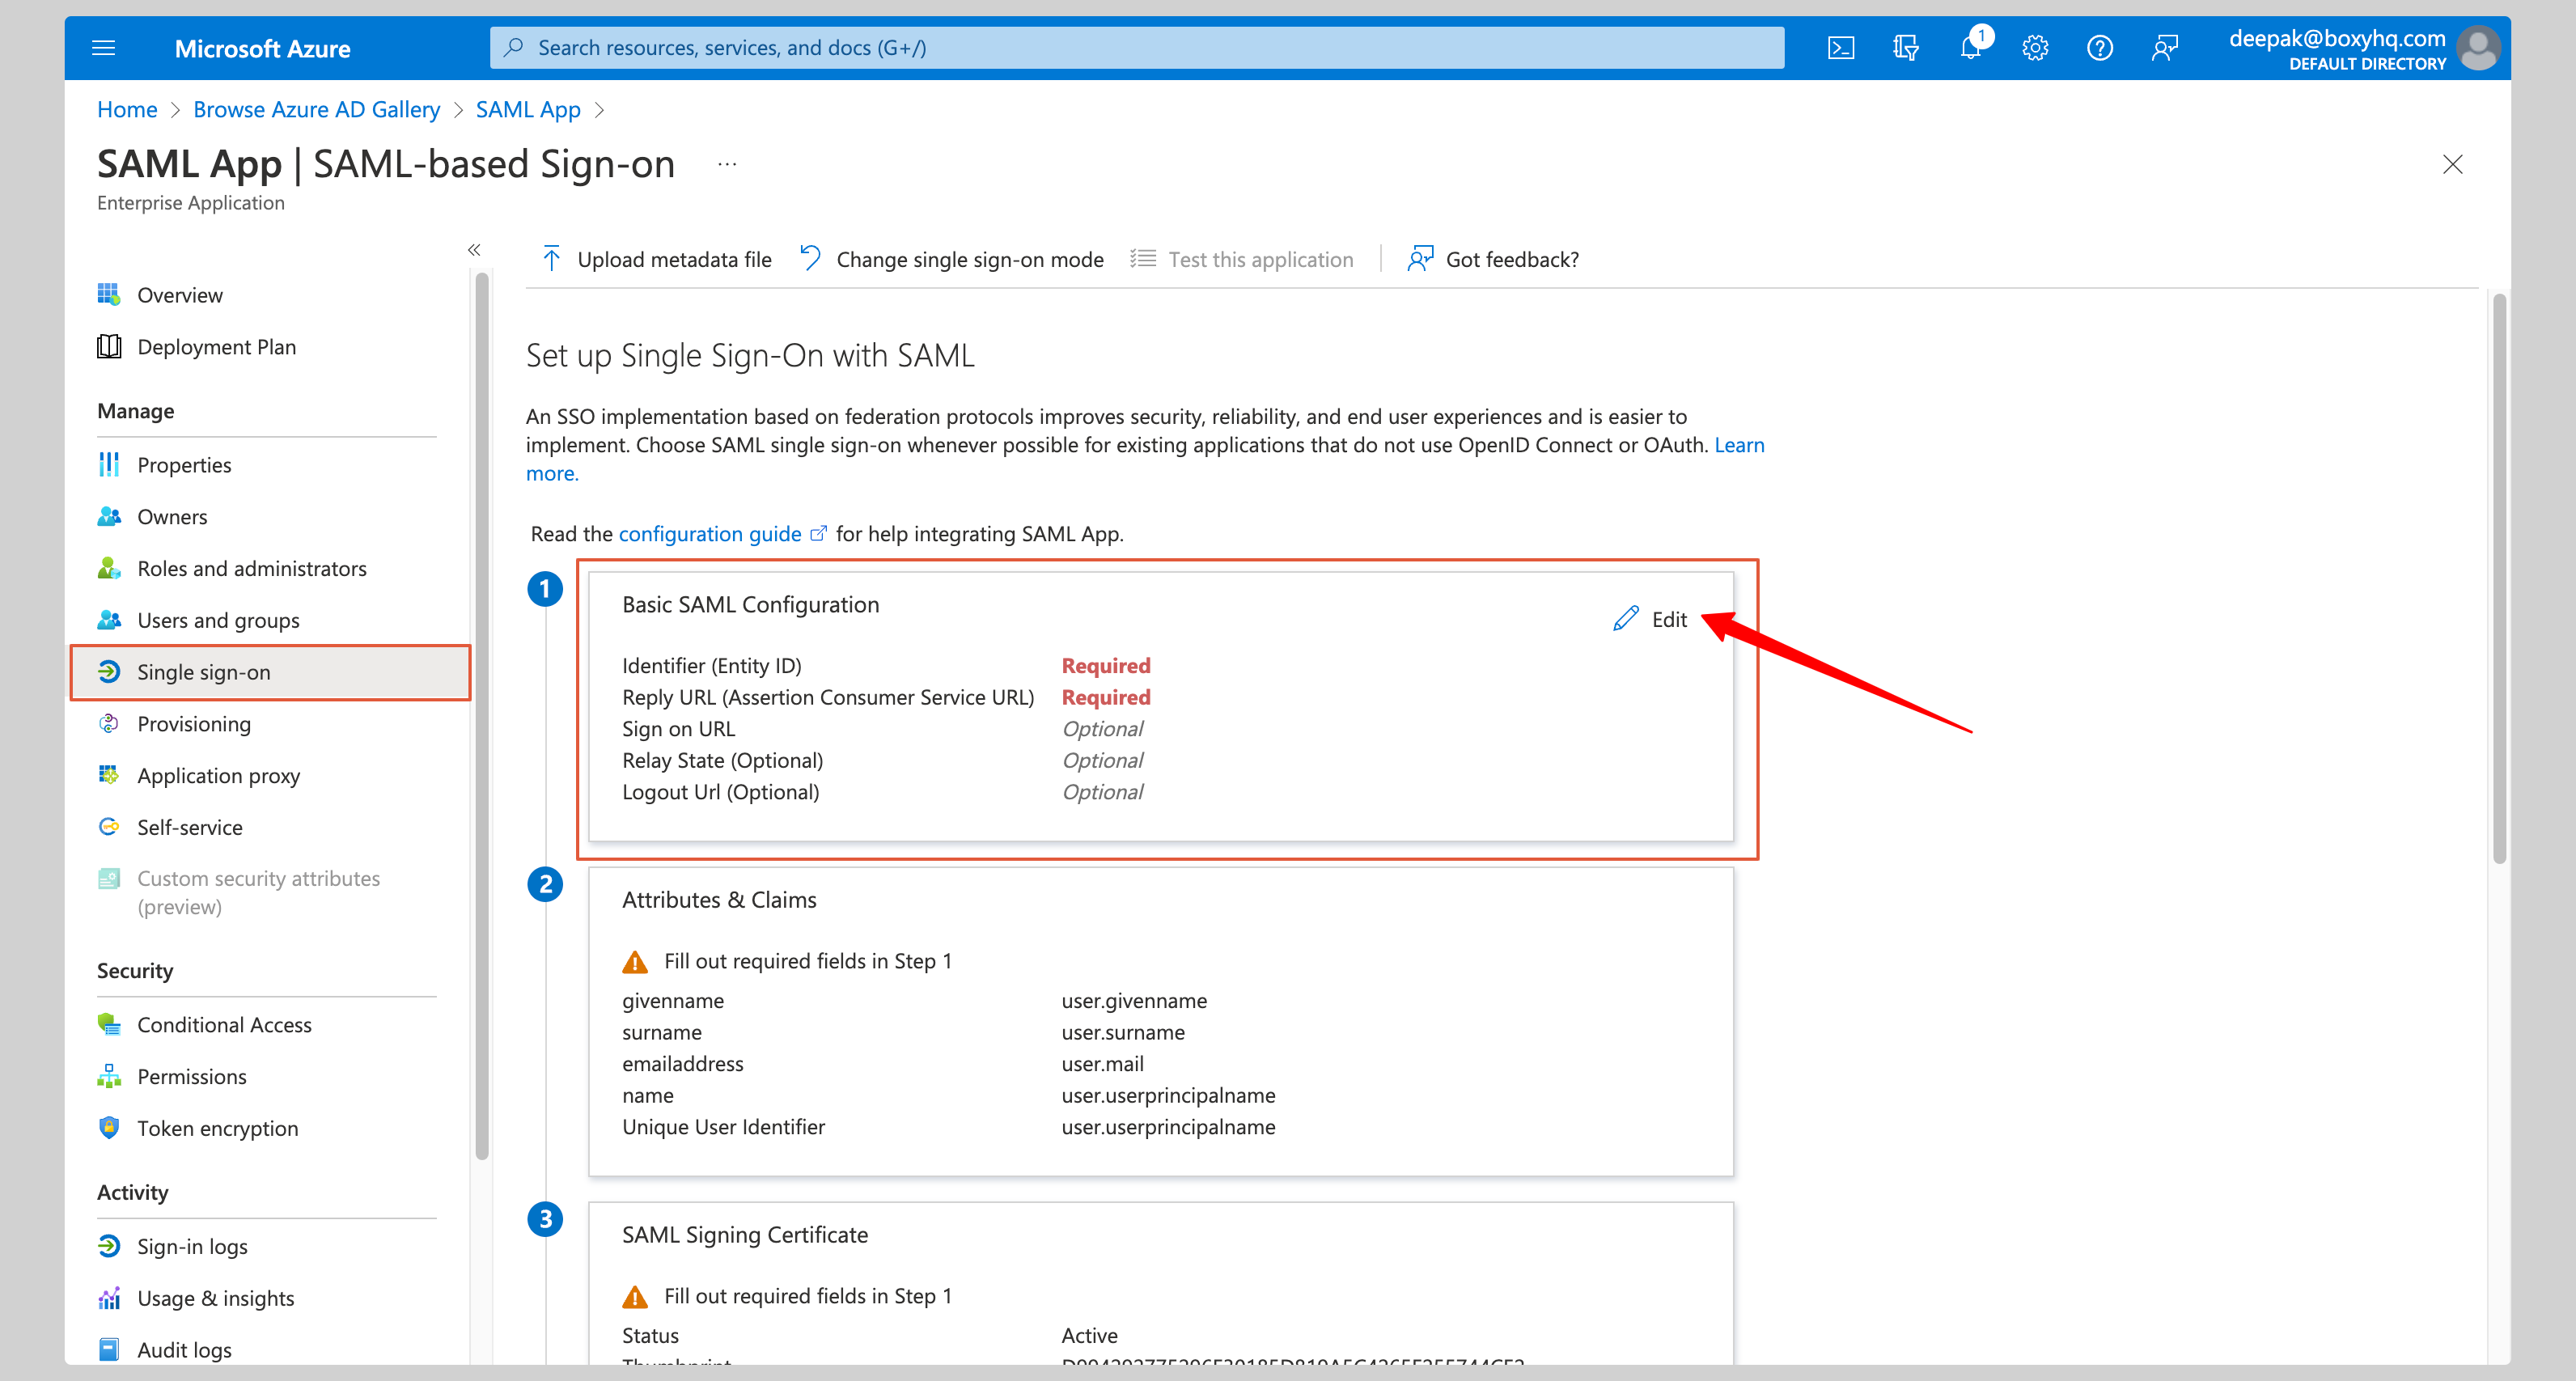
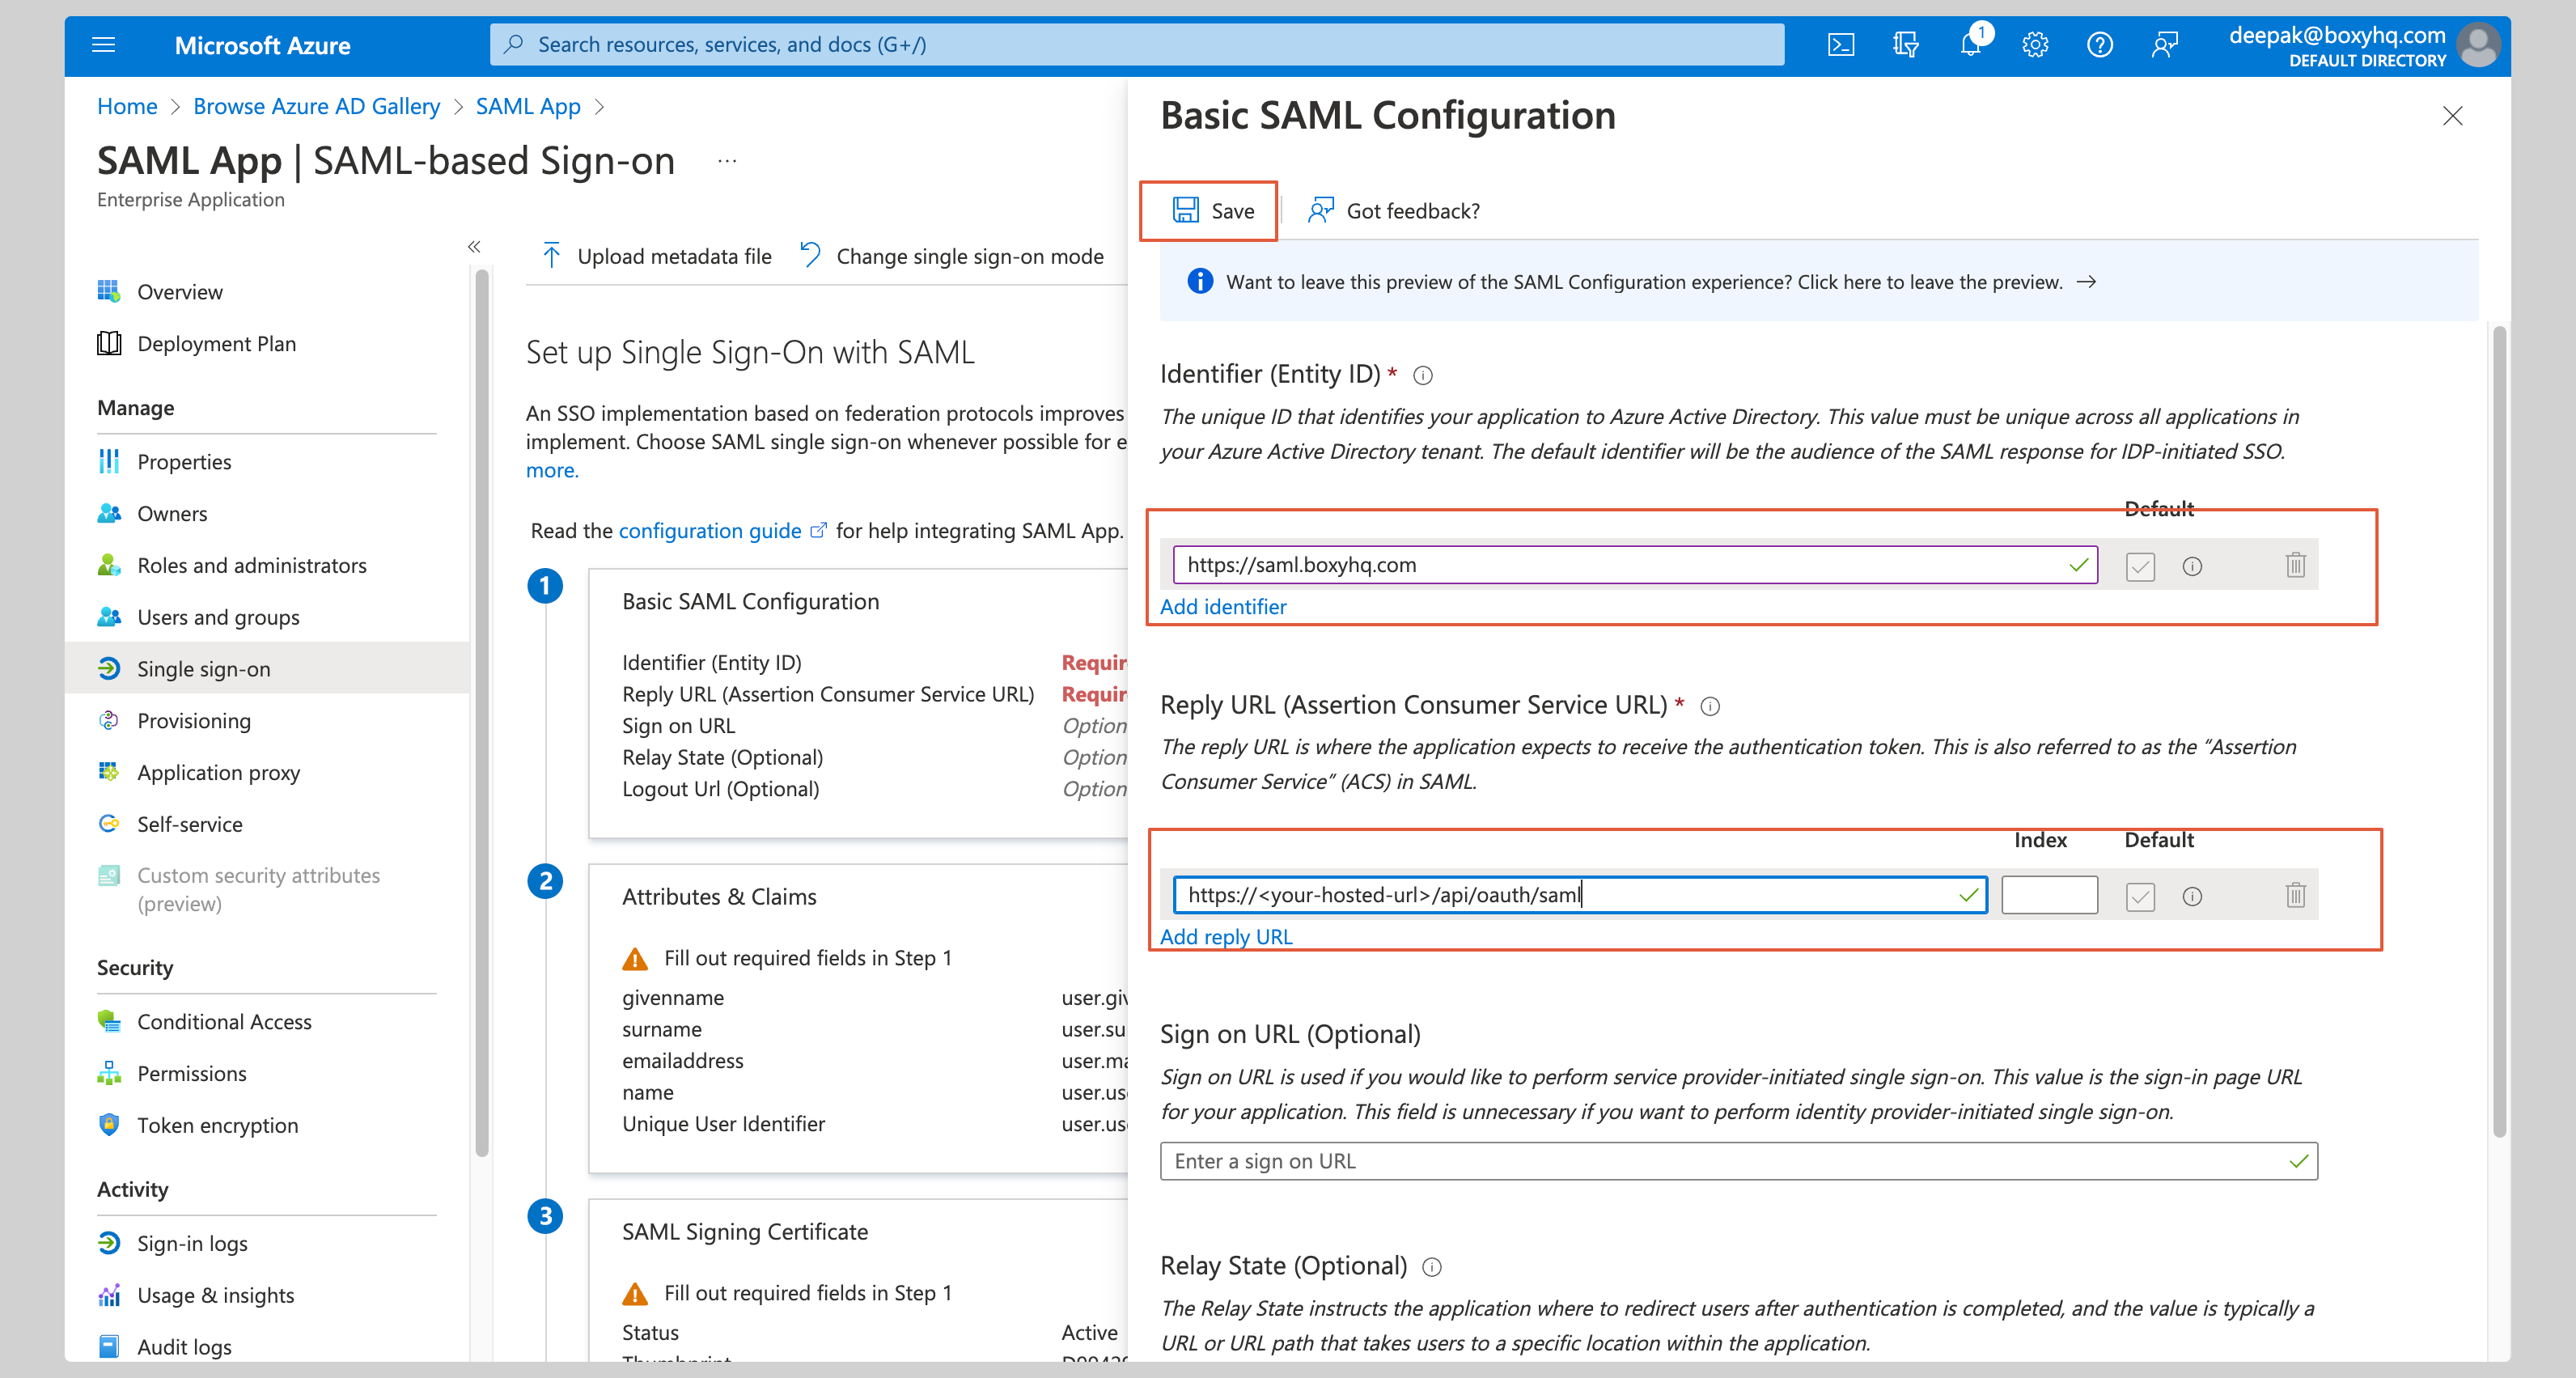
  • Identifier (Entity ID)
  • Reply URL (Assertion Consumer Service URL)
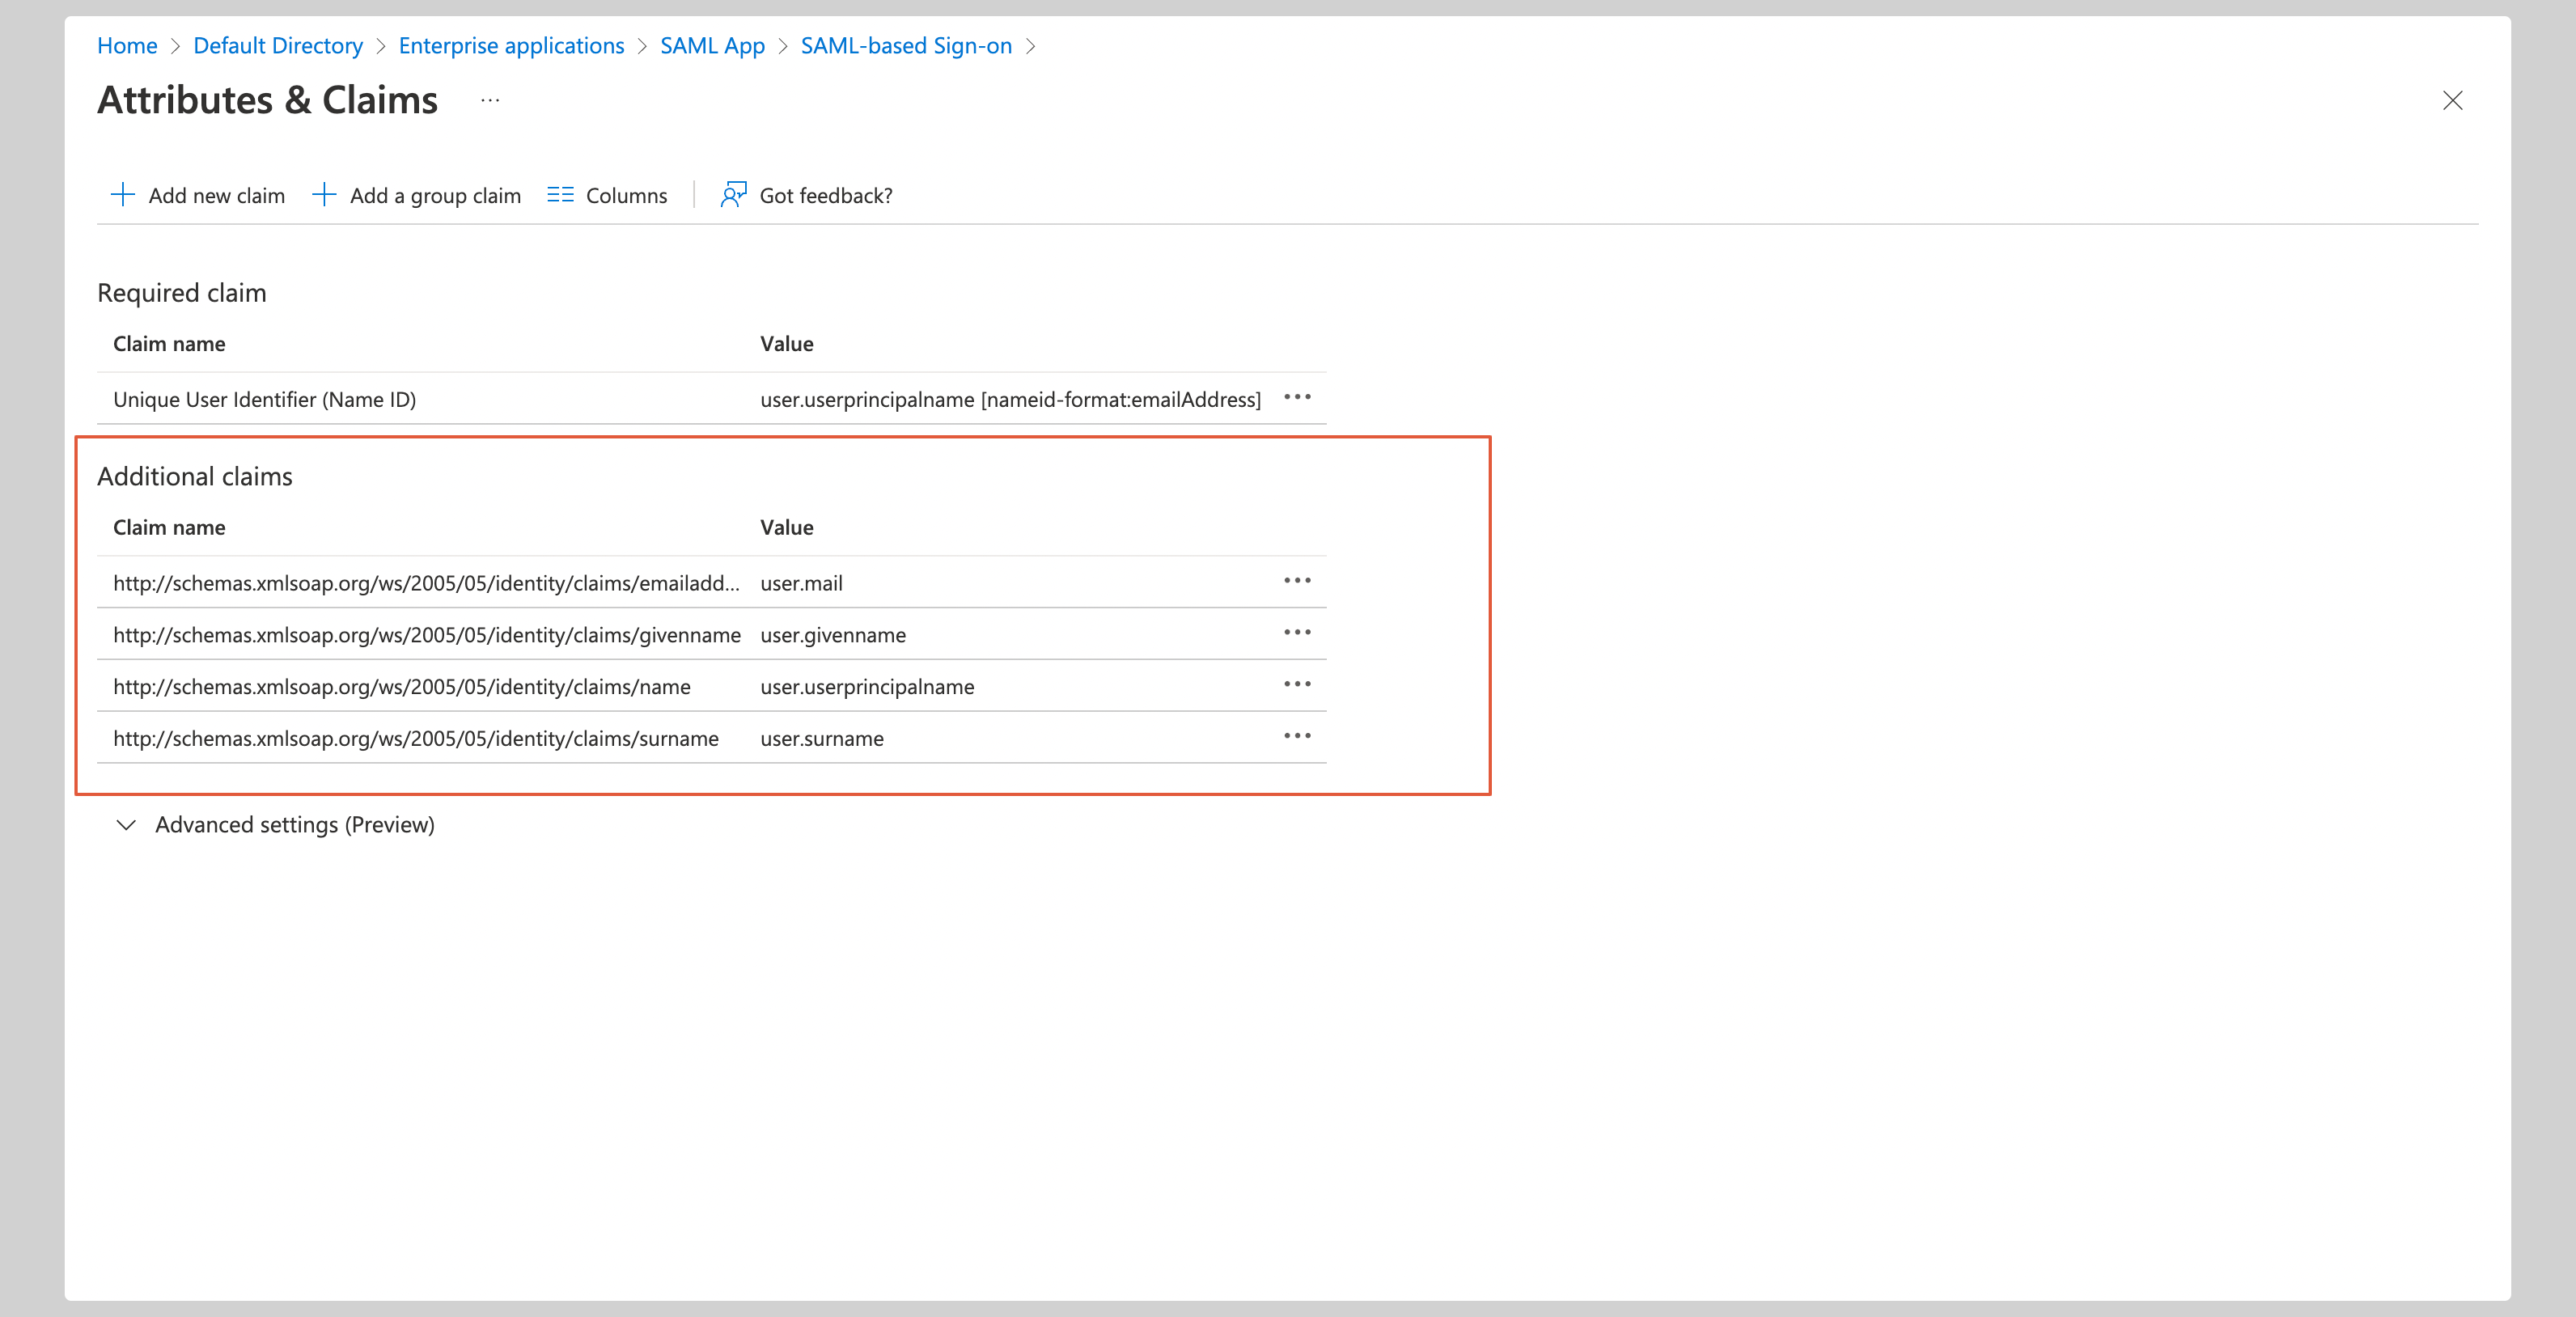
Replace the values with the ones you have received from Aampe. Click Save to save your changes. Sso 6 Pn

Attribute mapping

Click Edit on the Attributes & Claims section.
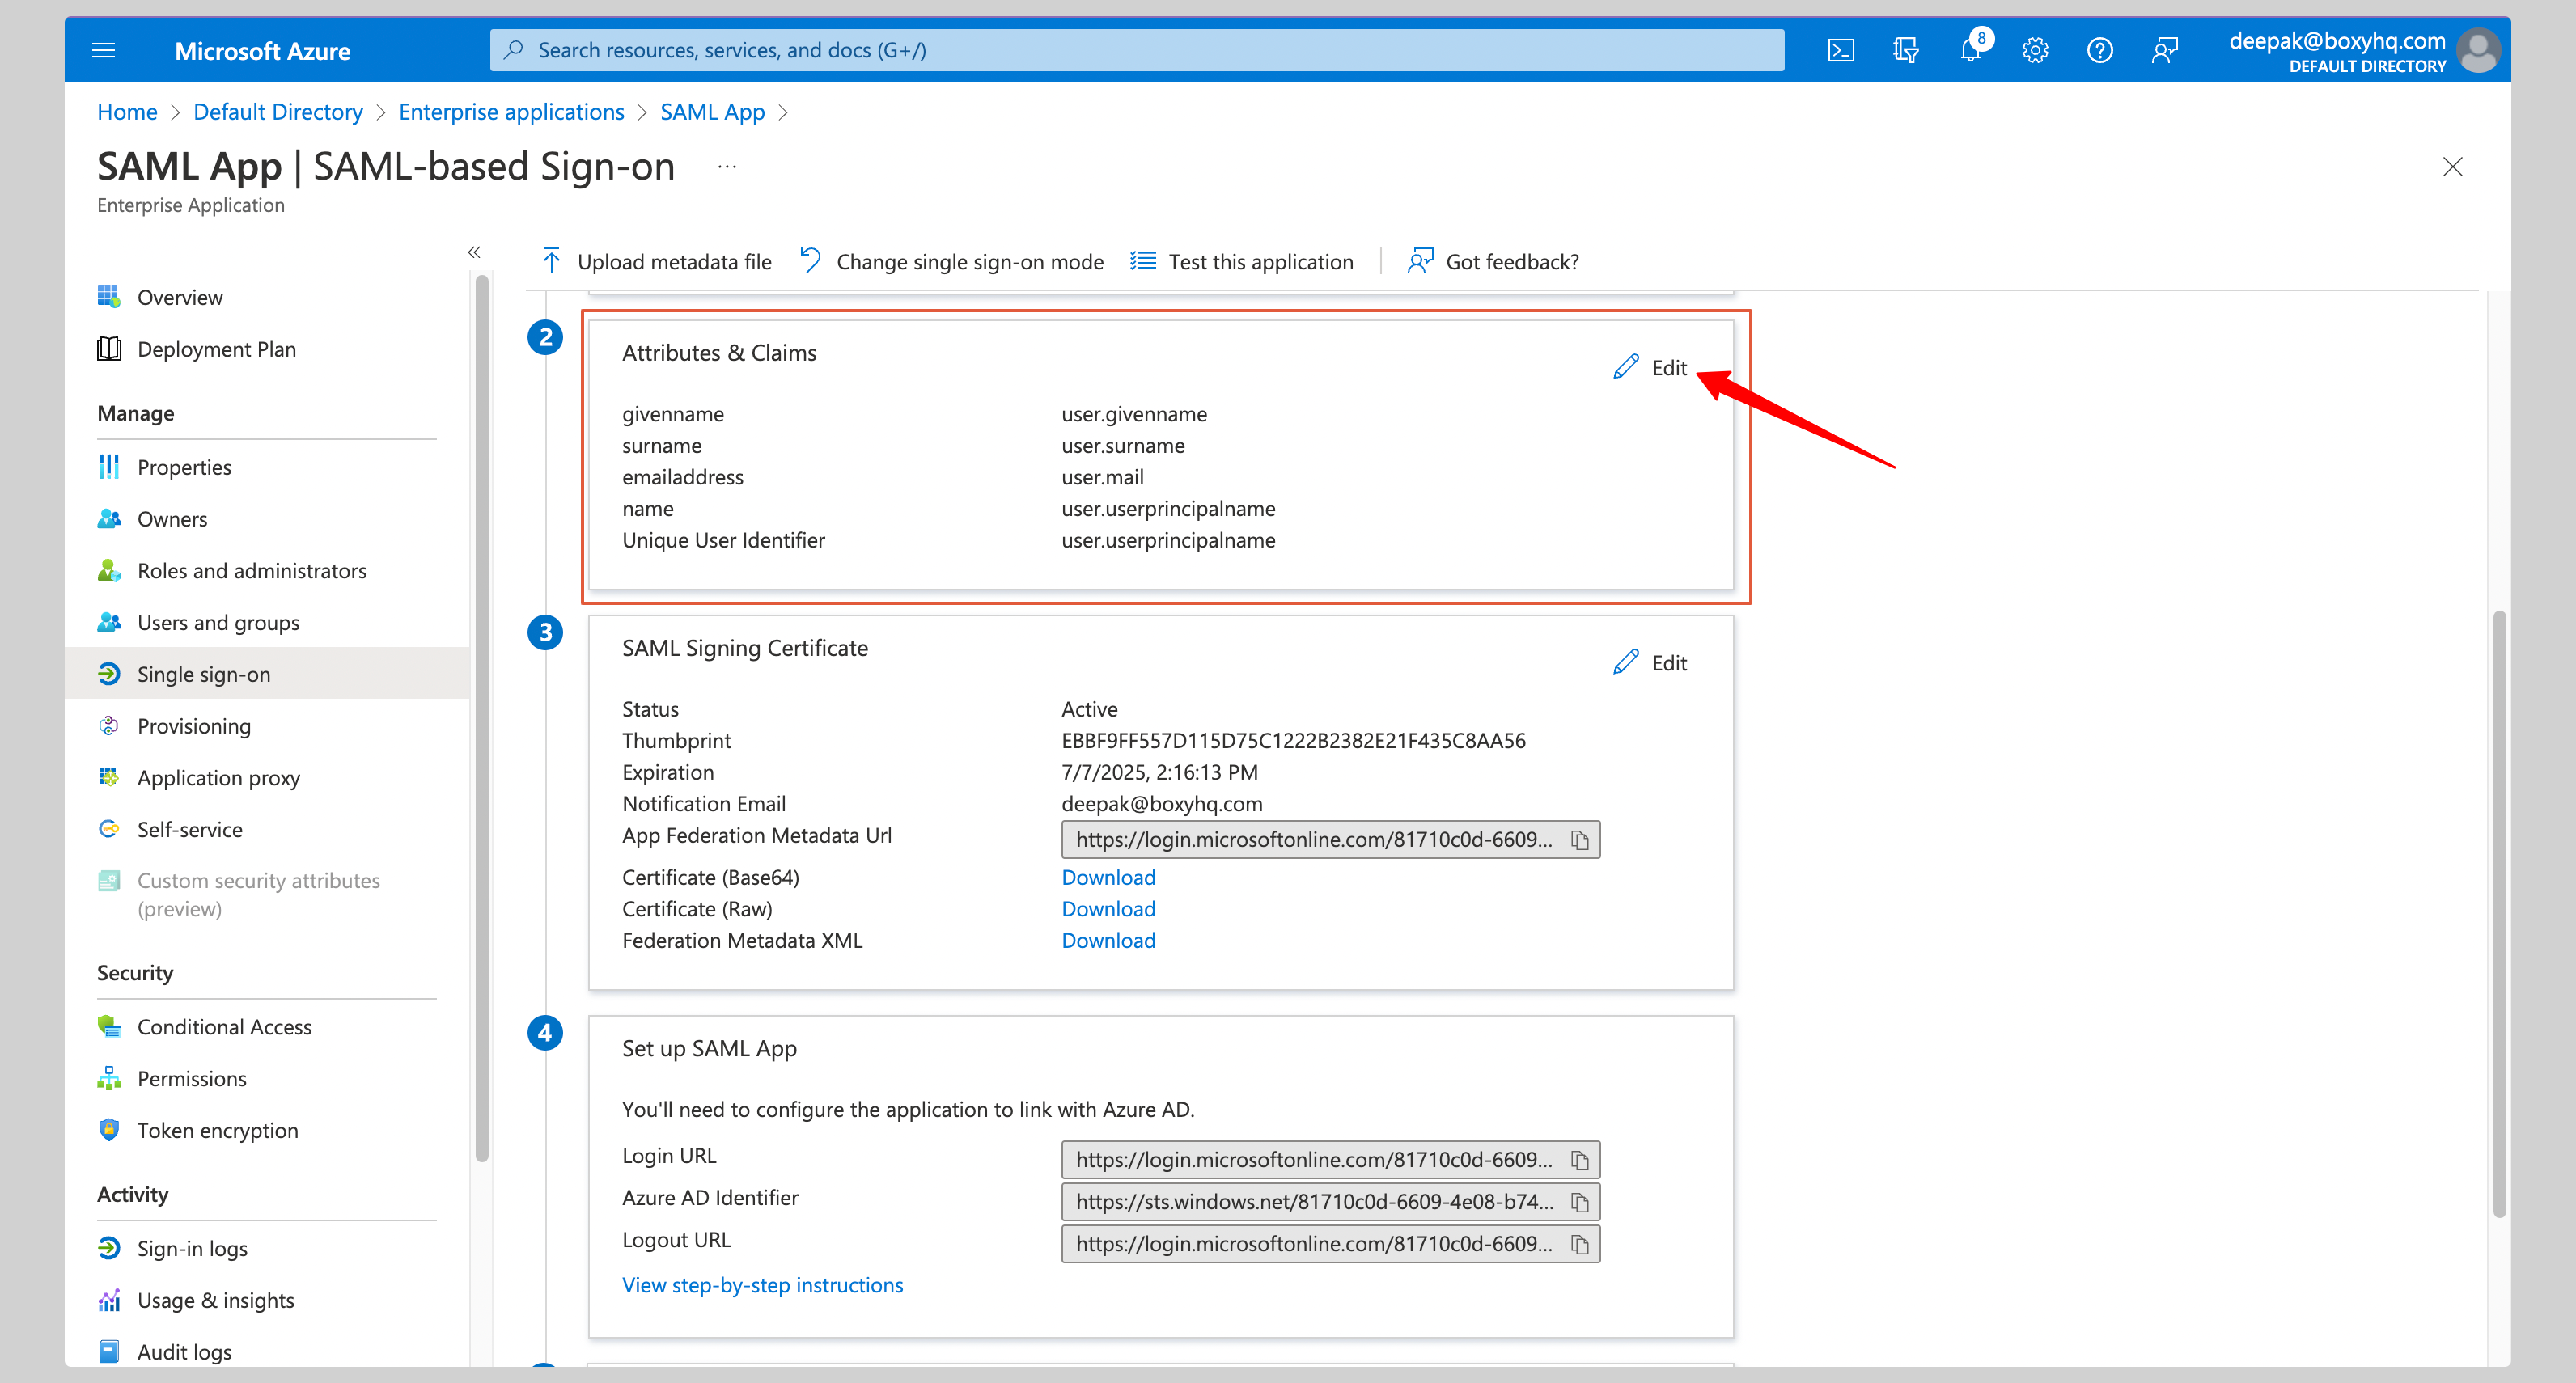
 Sso 7 Pn You have to configure the following attributes under the Attributes & Claims section:
NameValue
http://schemas.xmlsoap.org/ws/2005/05/identity/claims/emailaddressuser.mail
http://schemas.xmlsoap.org/ws/2005/05/identity/claims/givennameuser.givenname
http://schemas.xmlsoap.org/ws/2005/05/identity/claims/nameuser.userprincipalname
http://schemas.xmlsoap.org/ws/2005/05/identity/claims/surnameuser.surname
See the screenshot below. Sso 8 Pn Go to the section SAML Signing Certificate section and download the Federation Metadata XML. Sso 9 Pn

Next steps

You’ve successfully configured your custom SAML application for Microsoft Entra ID SAML. At this stage, you can assign users to your application and start using it.
_Source: _Ory Documentation - Microsoft Entra ID SAML SSO