Requirements
- API Key created for Aampe
- Your Region of setup for Customer.io
Steps
Aampe will call the Customer.io API on your behalf.Create API Key for Aampe
-
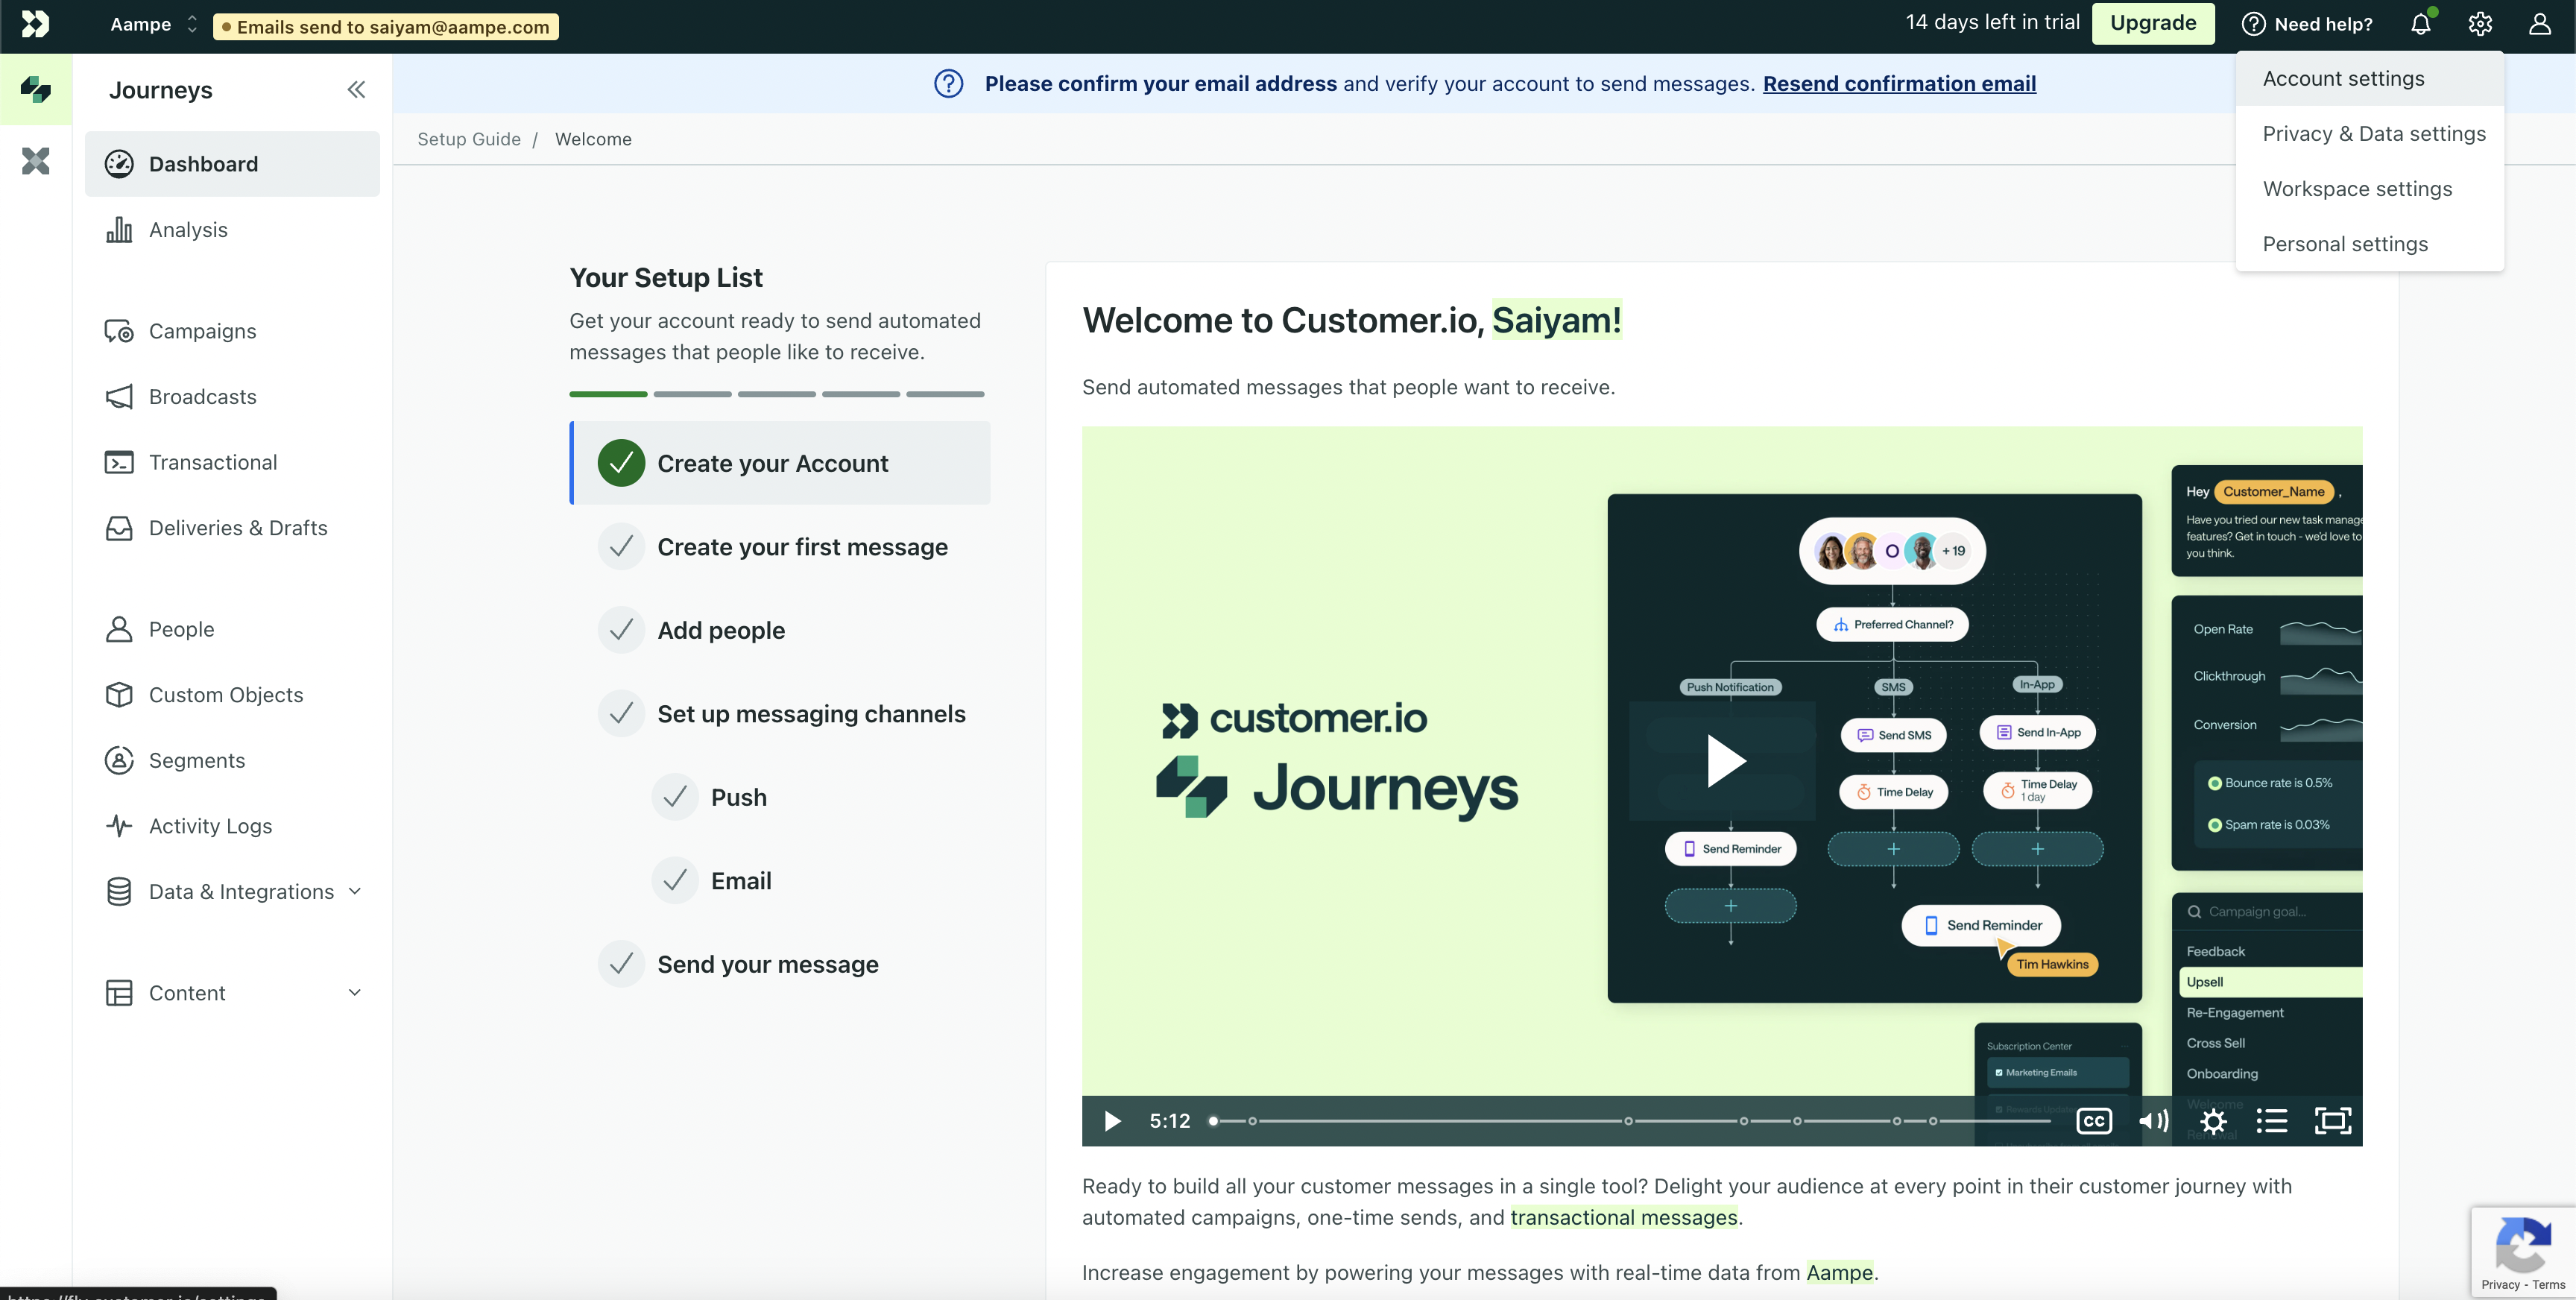
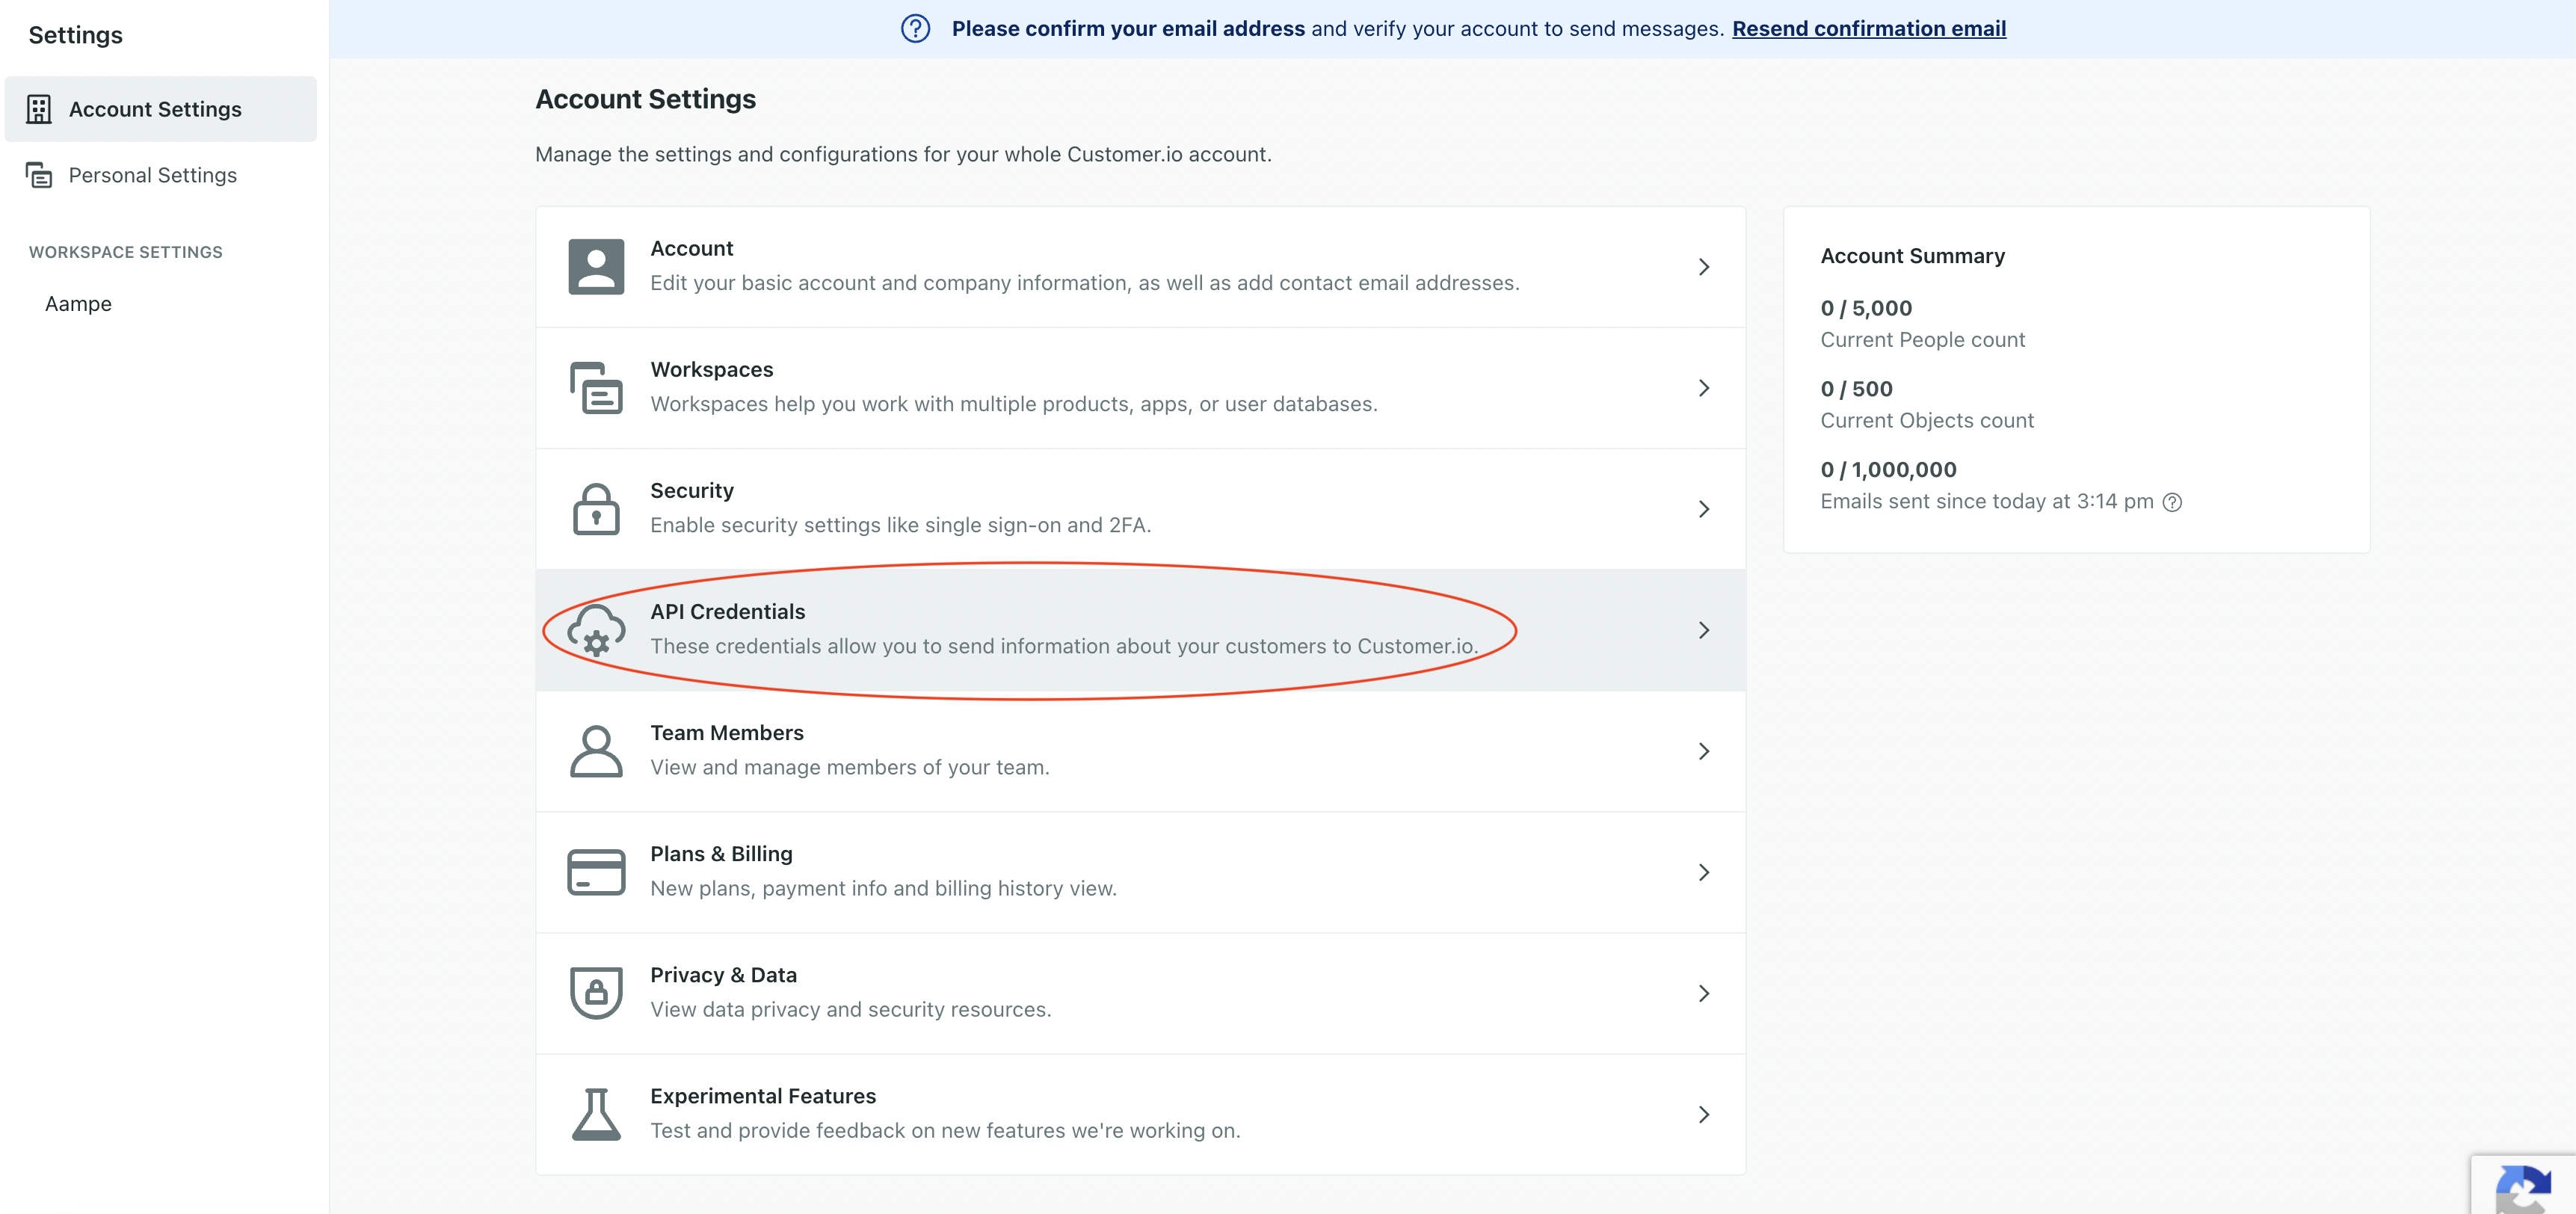
Once logged in to Customer.io account, navigate to Settings Icon > Account Settings
-
Select API Credentials from the menu bar.
-
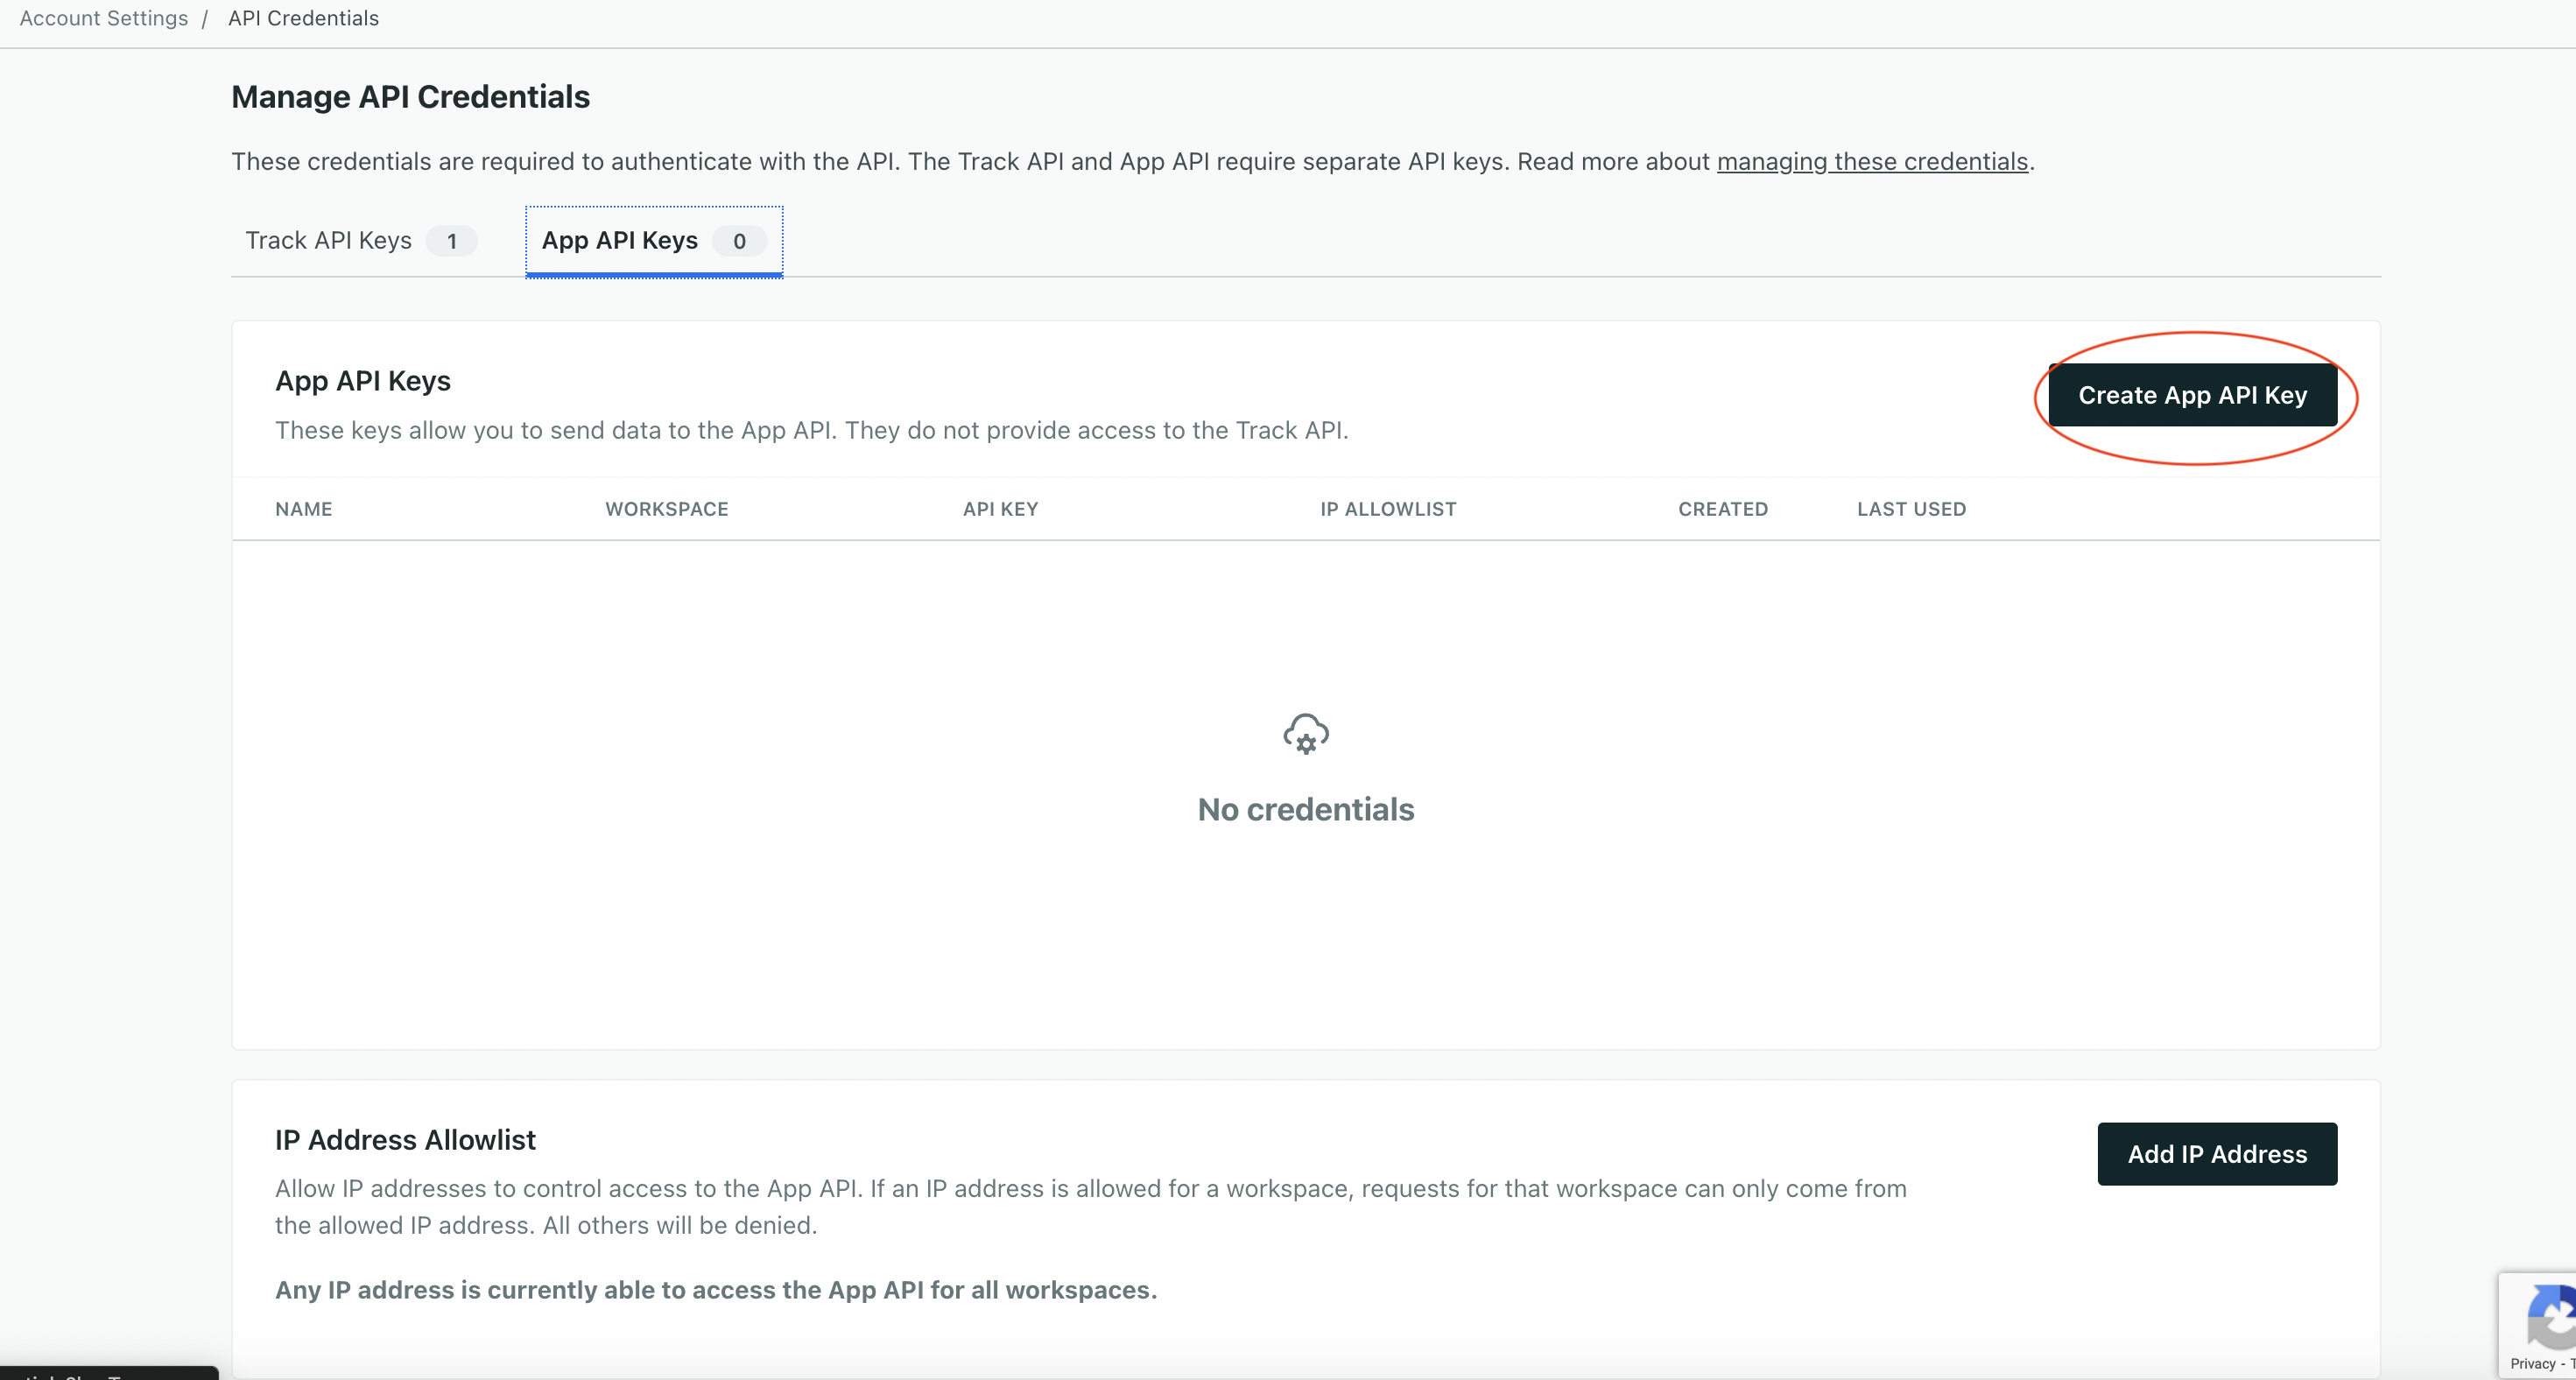
Click on the 2nd tab i.e Add API keys > Create App API Key
-
Give it the name you like (e.g
aampe_push_access) and select your prod workspace and then hit Create App API Key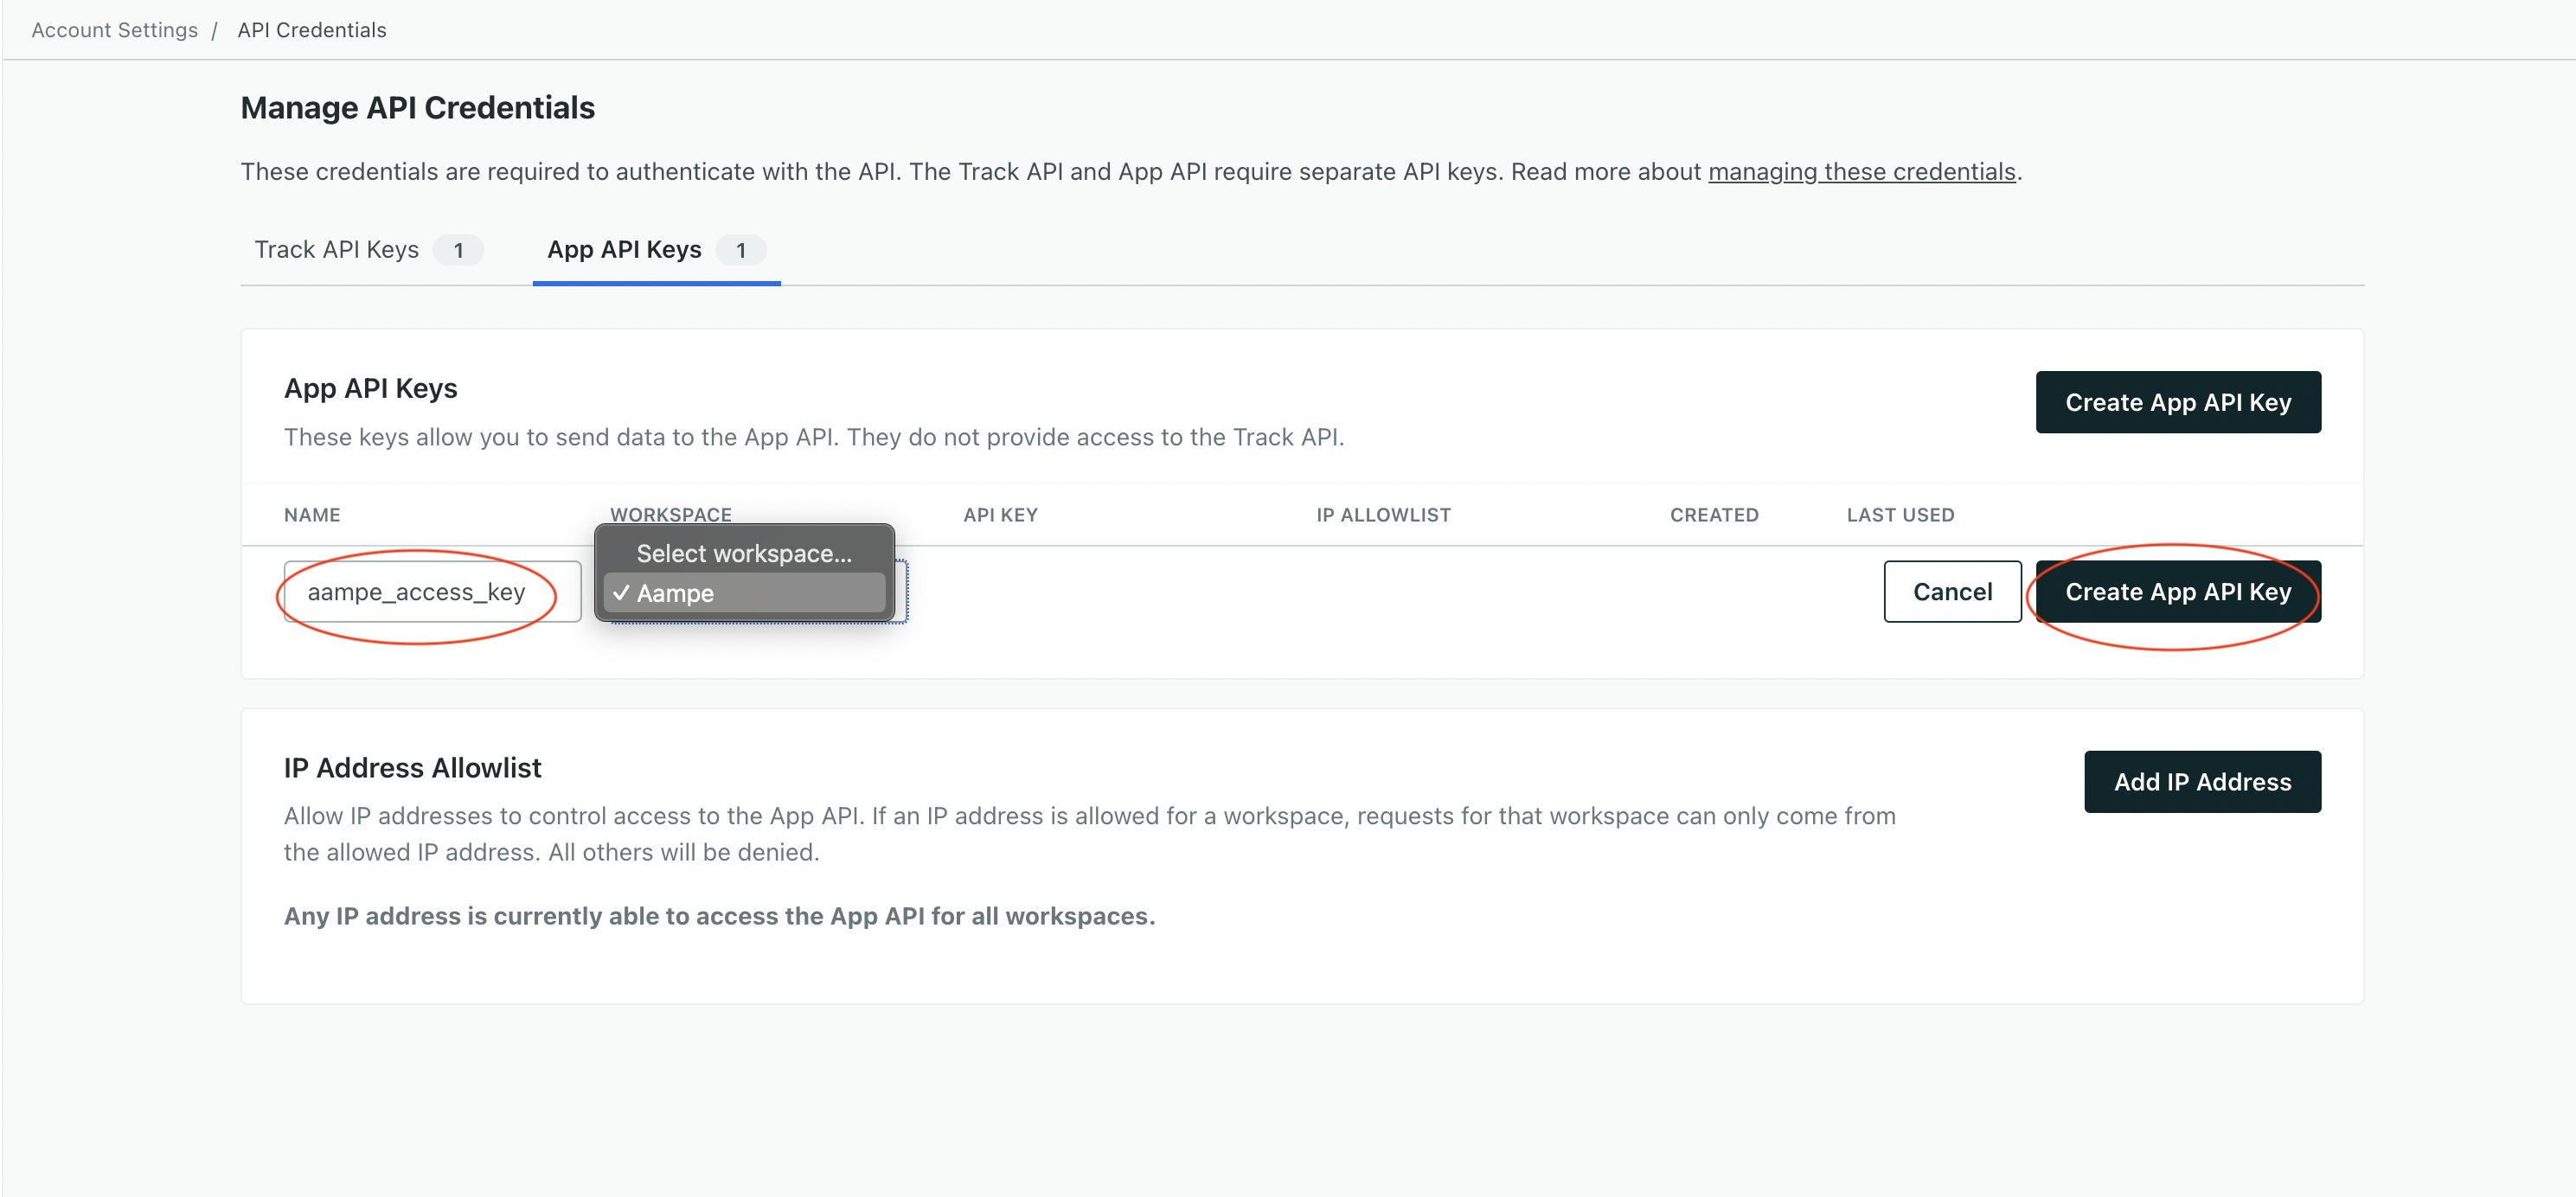
- Copy the API Key shown on the prompt - you won’t be able to access it again.
Configure Your Customer.io Push Integration on Aampe
- Go to https://compose.aampe.com and login using your Aampe credentials
- Navigate to System setup > Integrations
-
The Messaging Provider tab will open
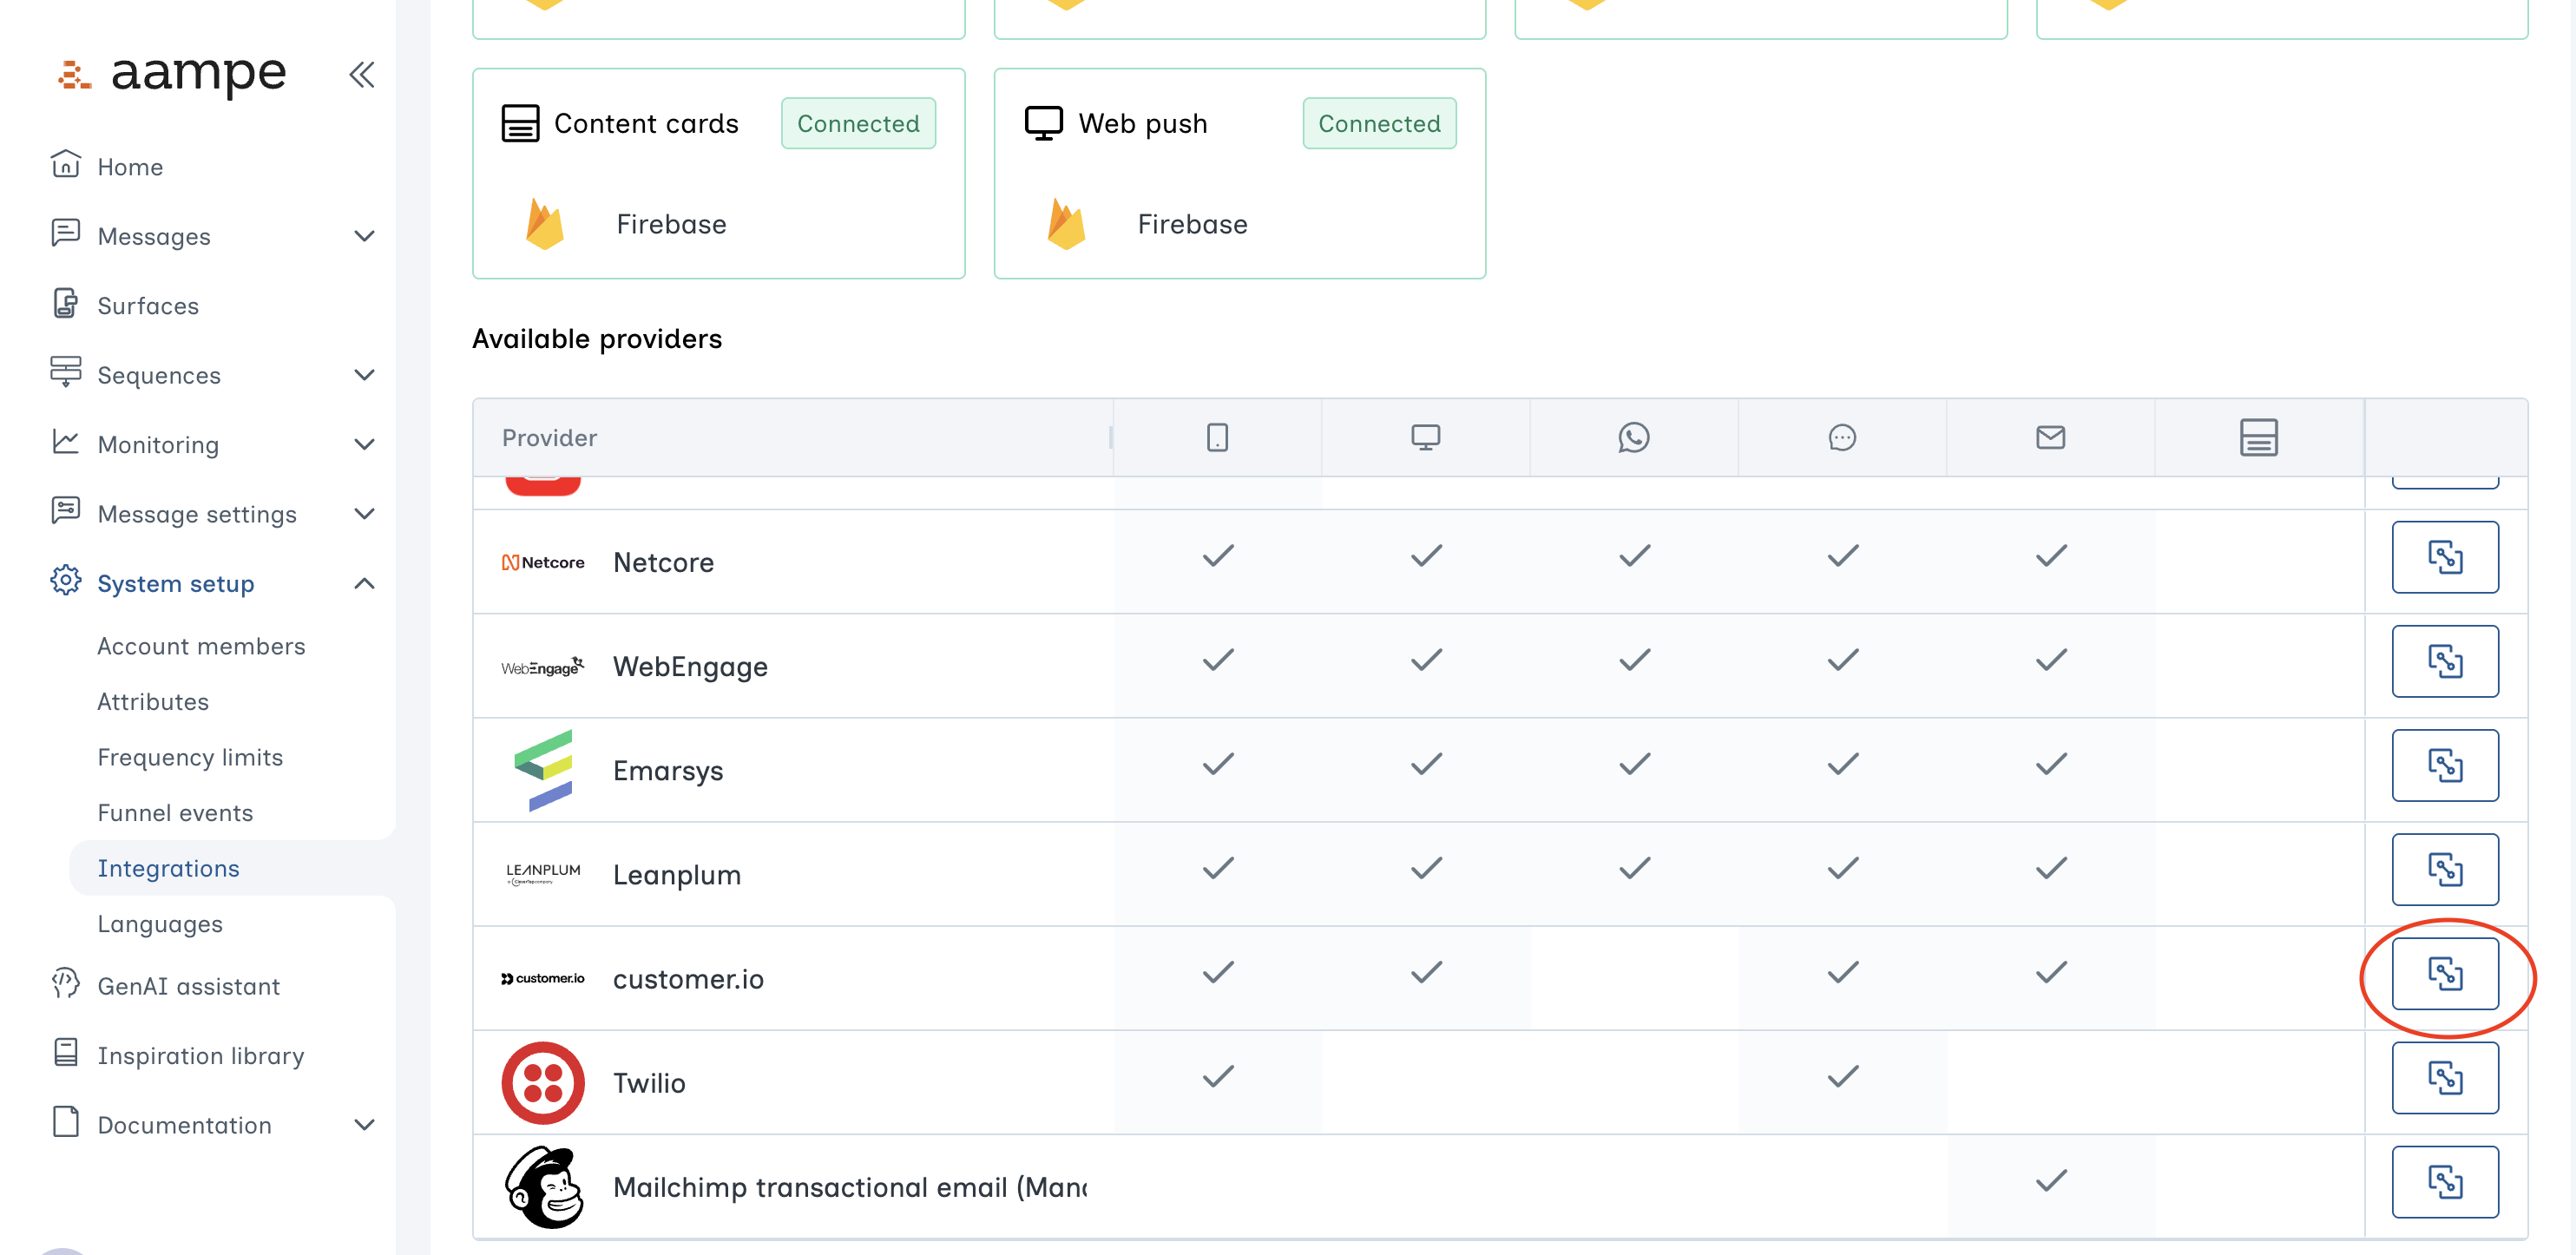
- Click on Customer.io
-
Input the API Key, Region in the respective textboxes
- If you want to check your region you can go to Settings -> Privacy and Data Settings and check the Data Center Region
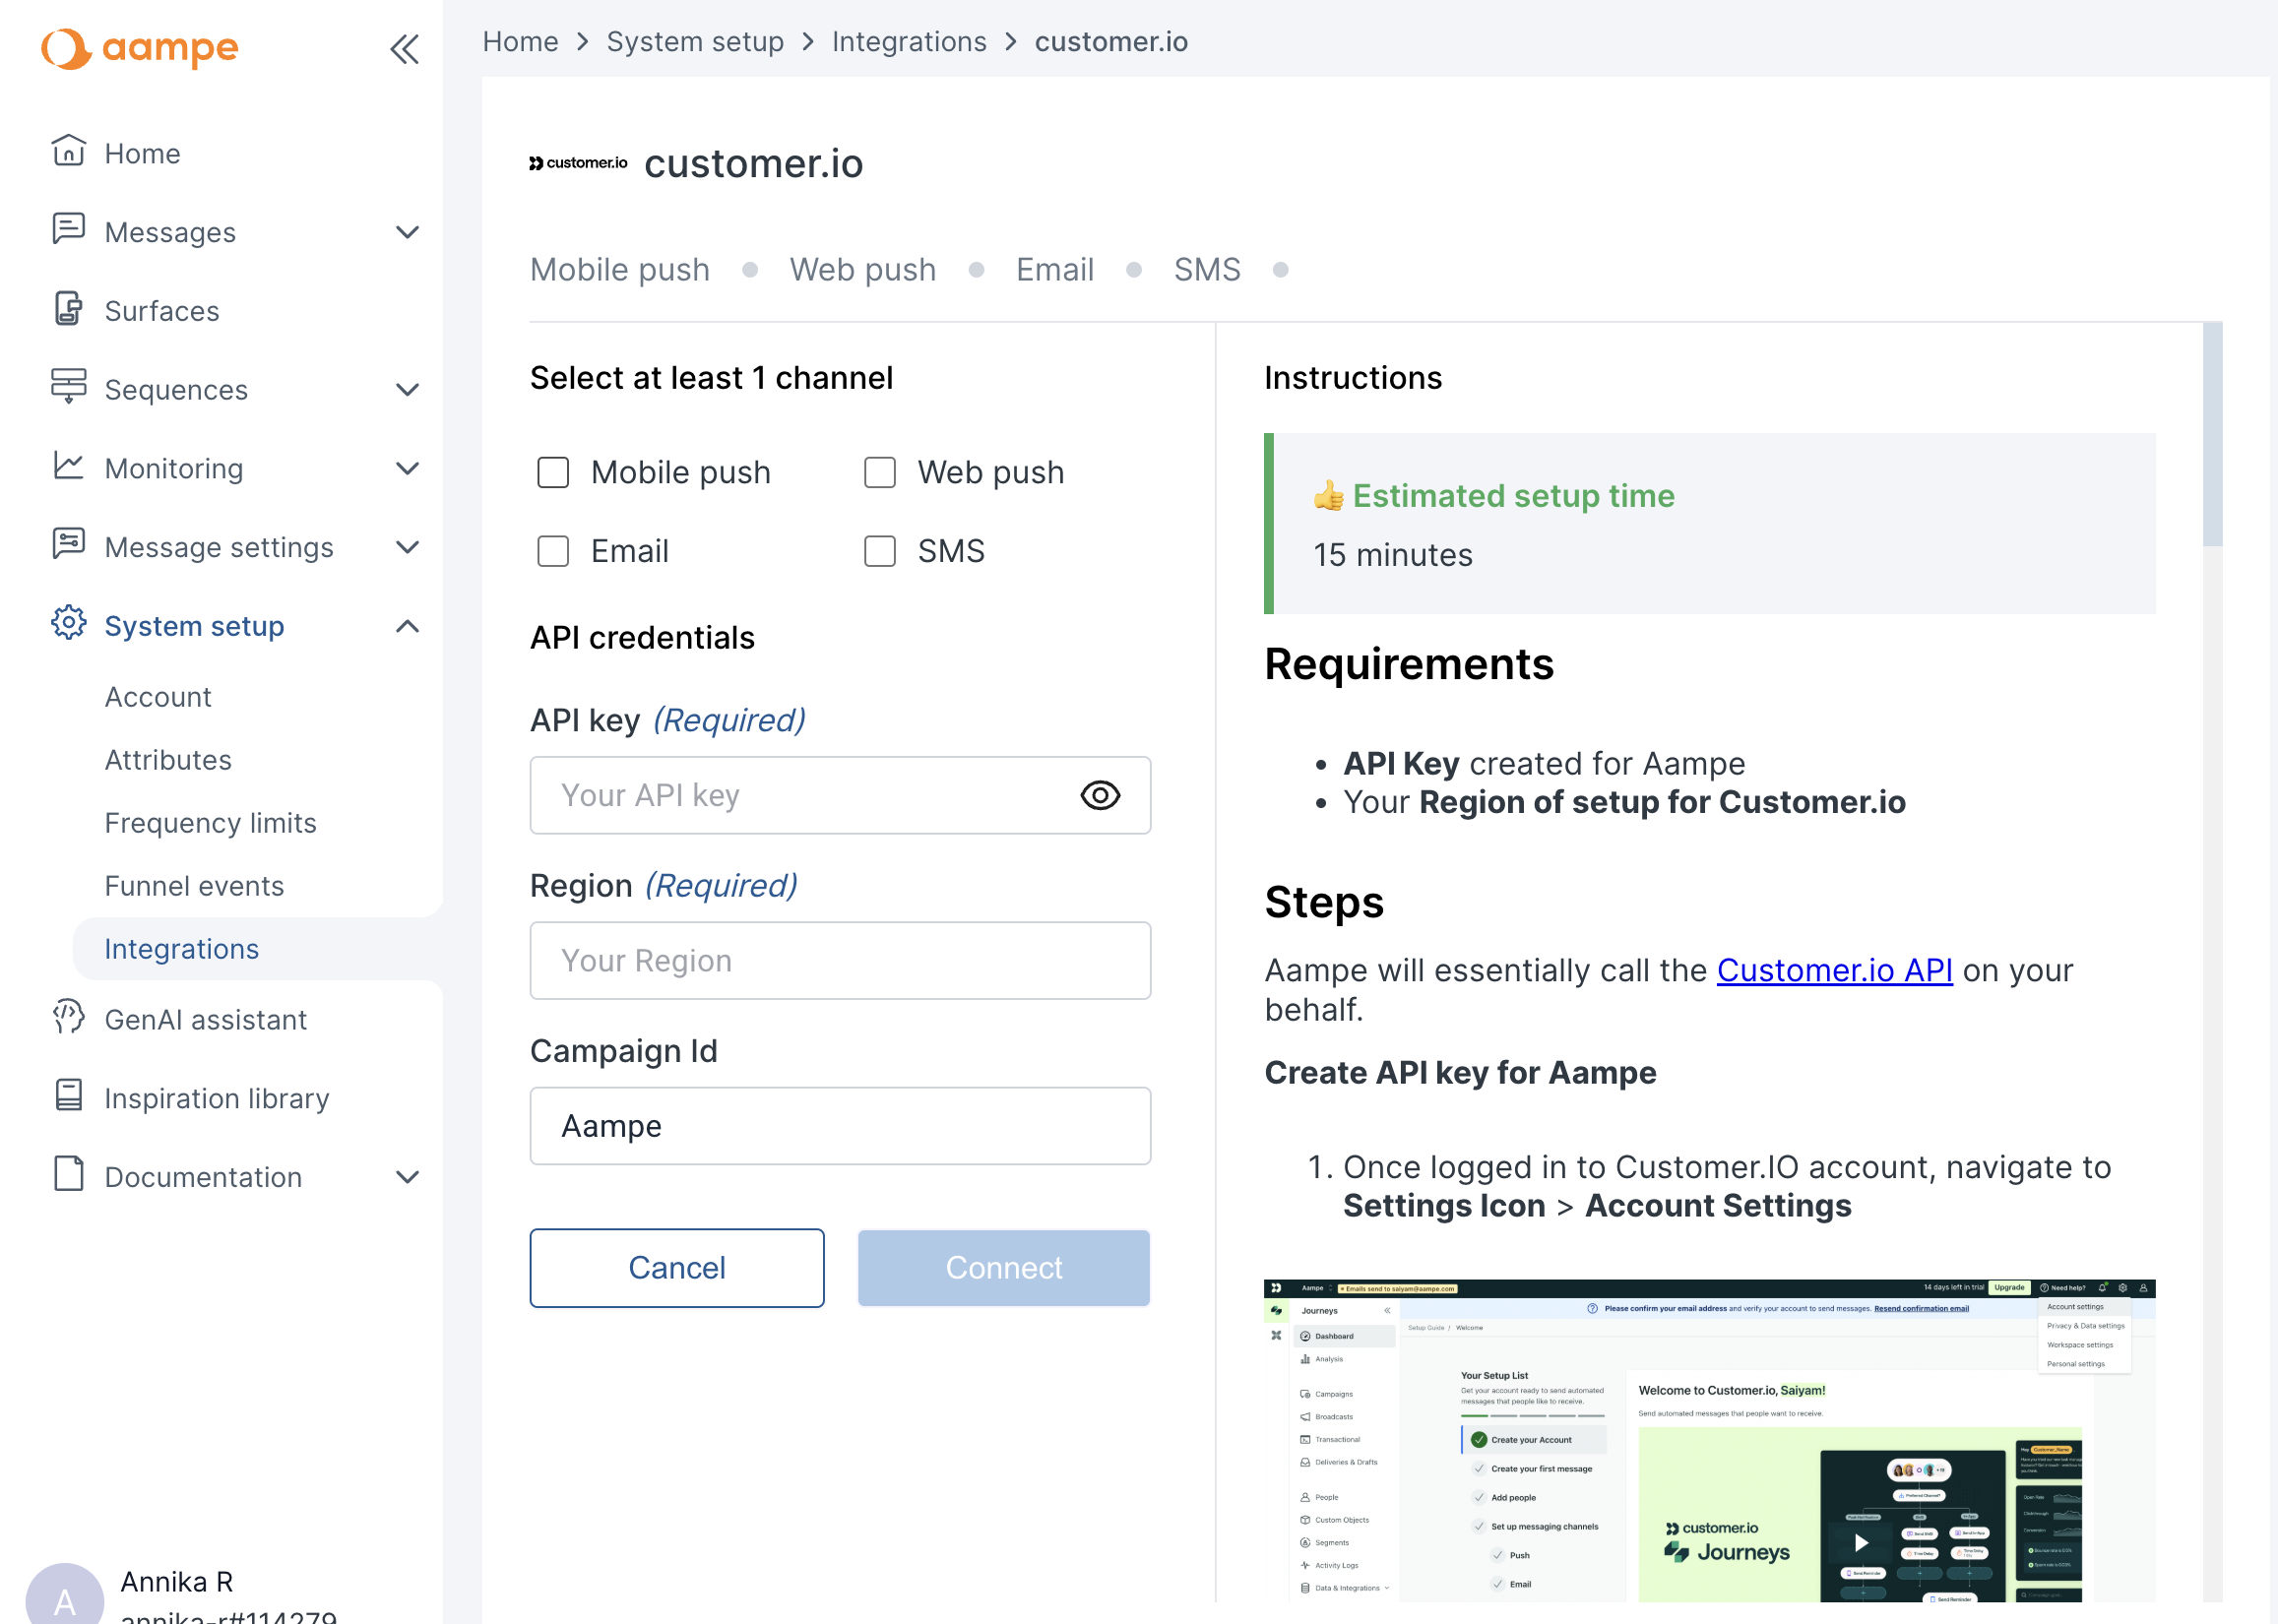
- Click on Connect
Step 2: Create Campaign for Aampe
-
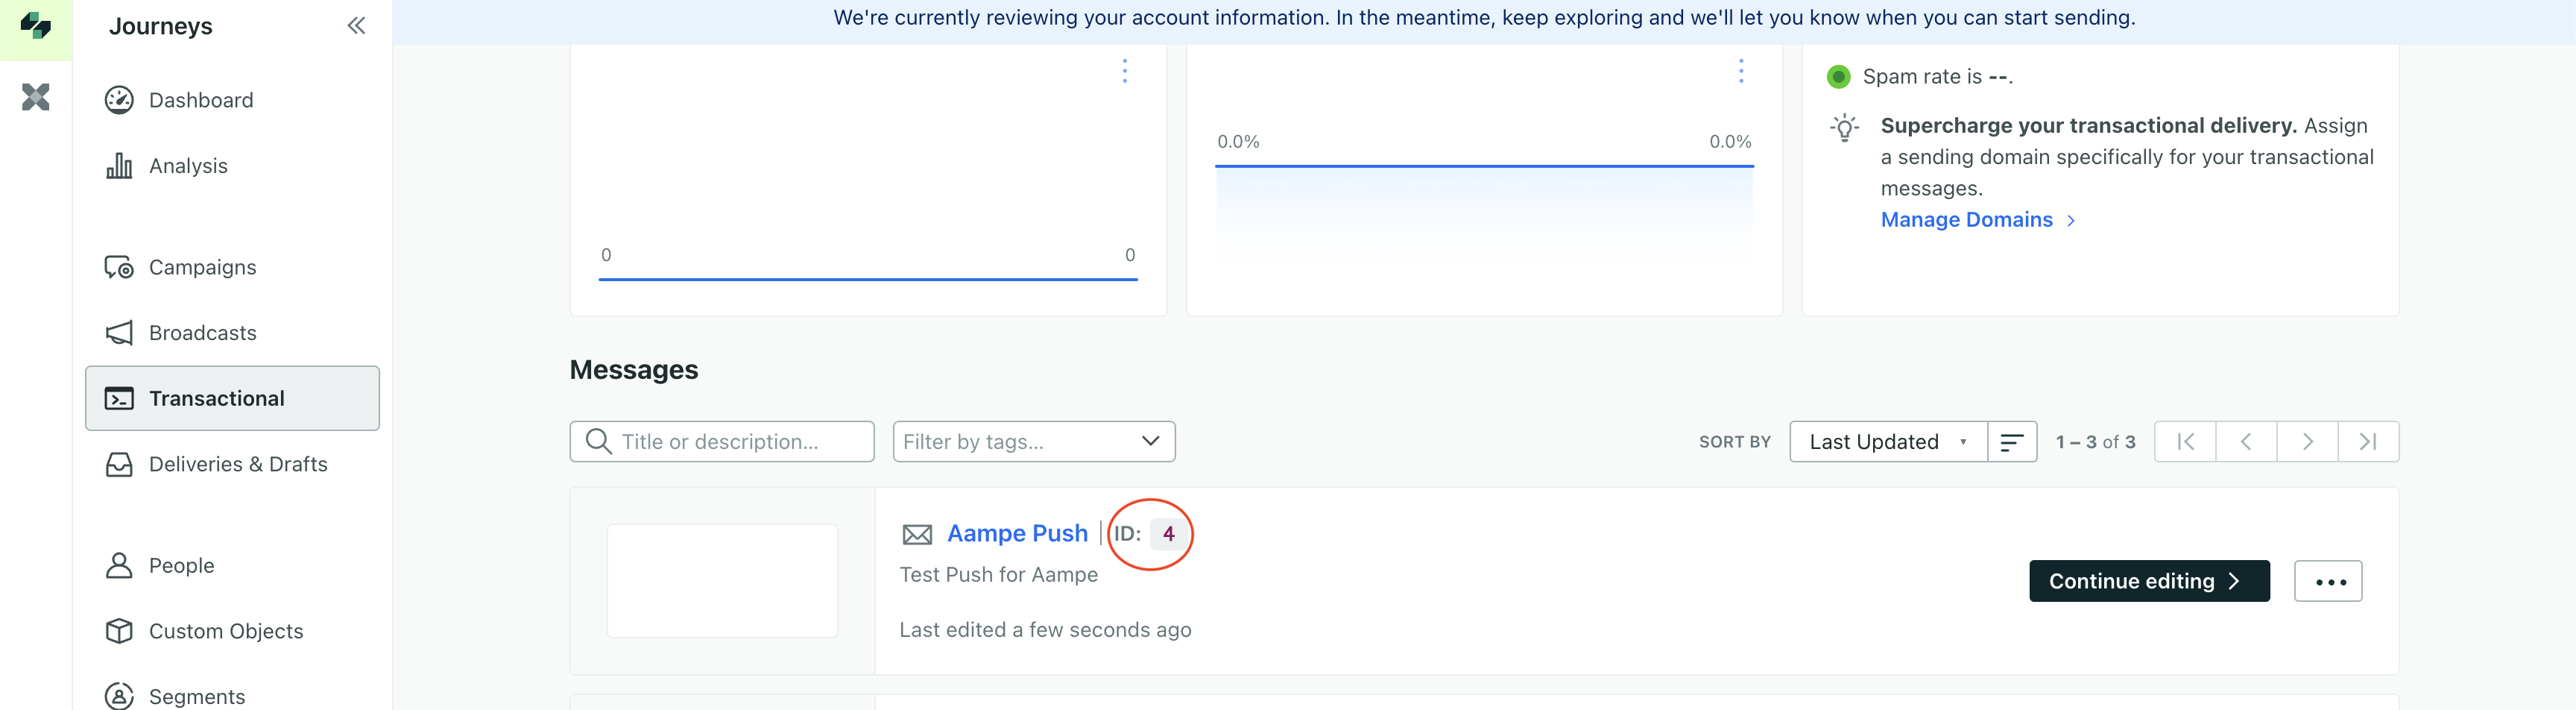
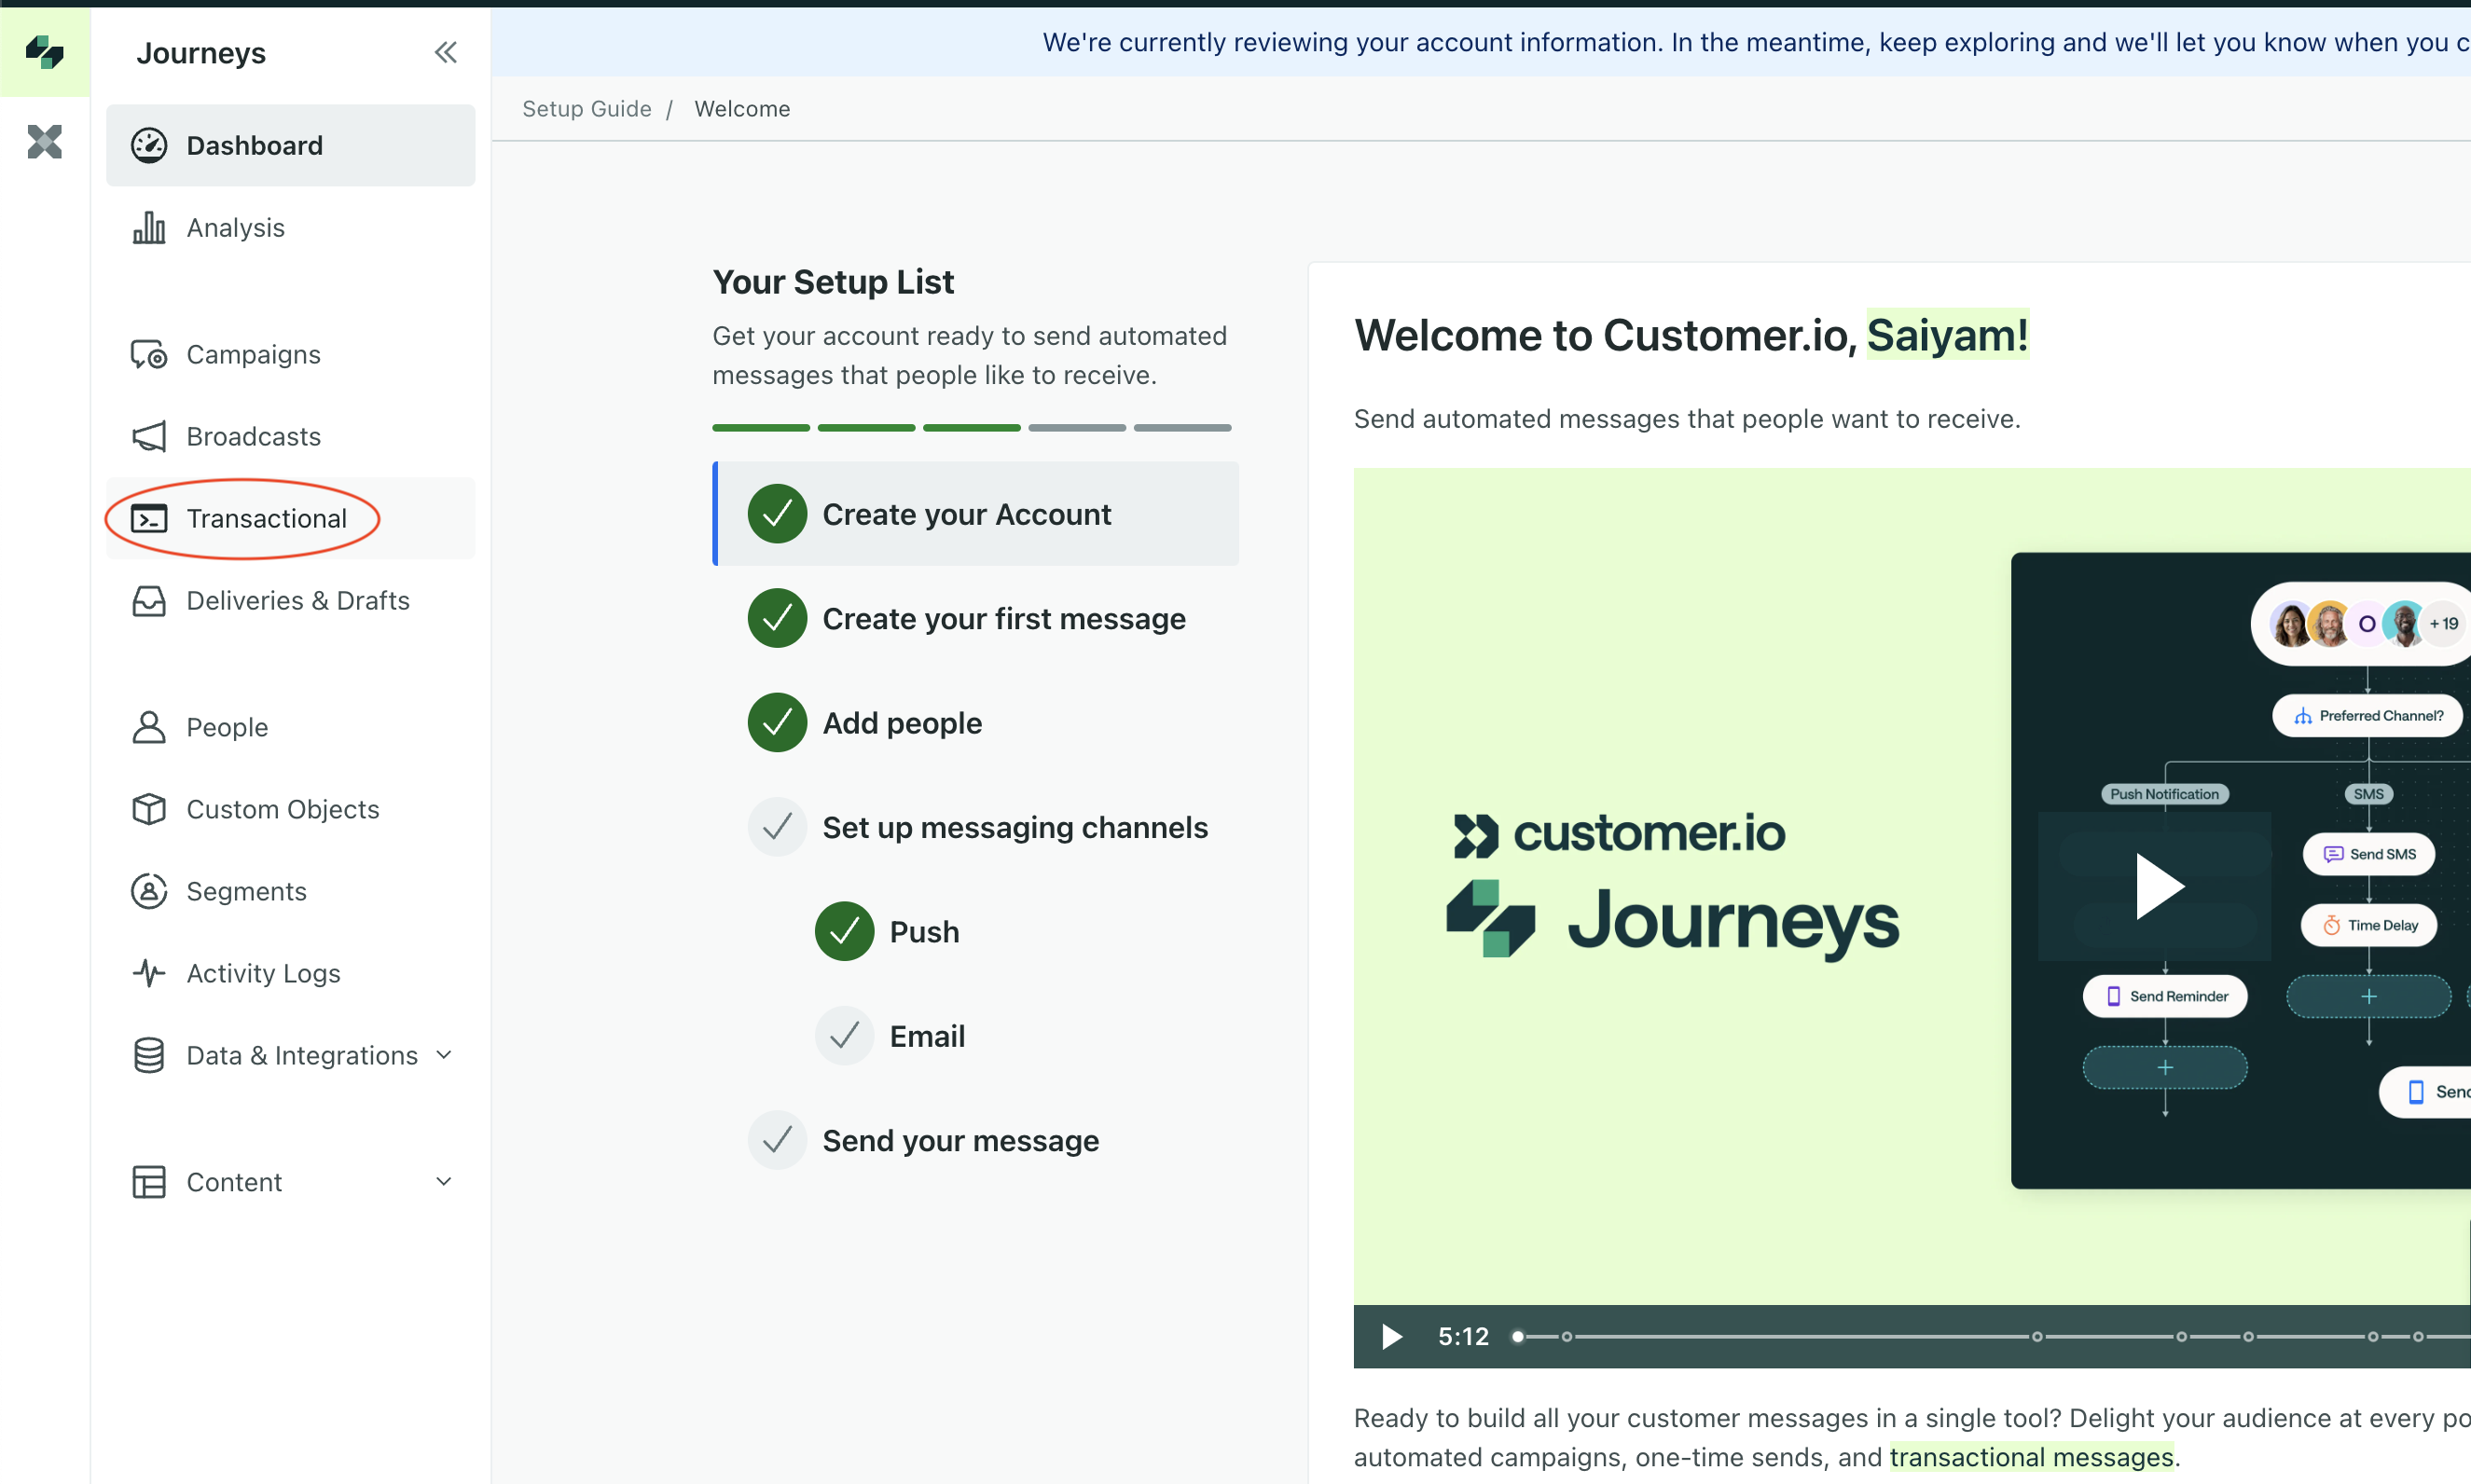
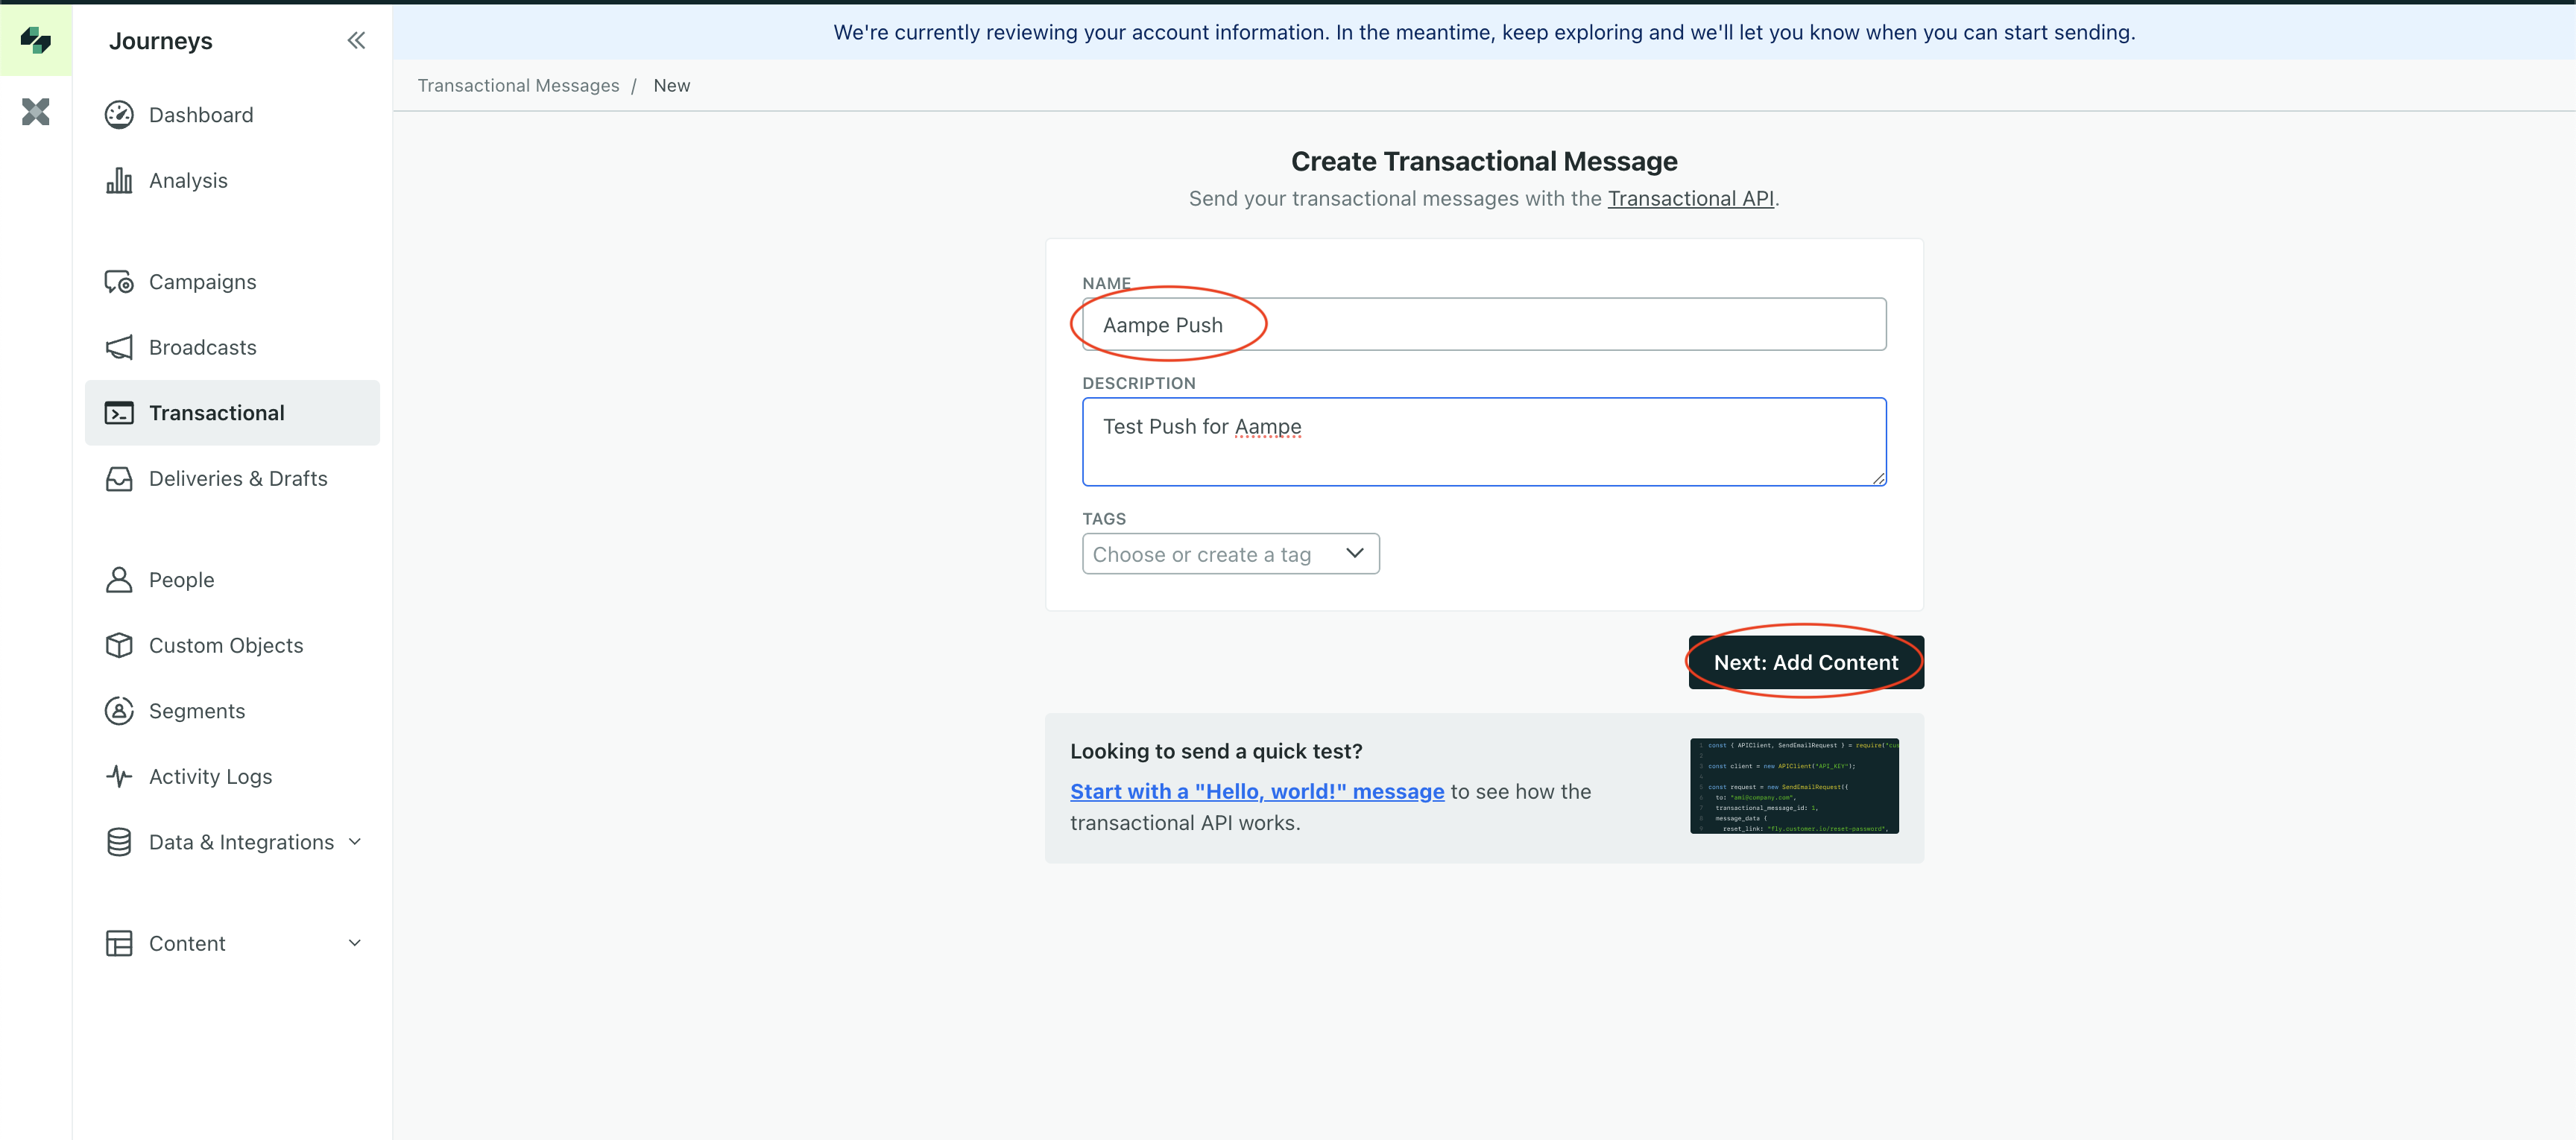
Go to Transactional in the navigation bar
- On Transactional, select Create a Message
-
Feed in the title and description for Aampe message and click on Add Content
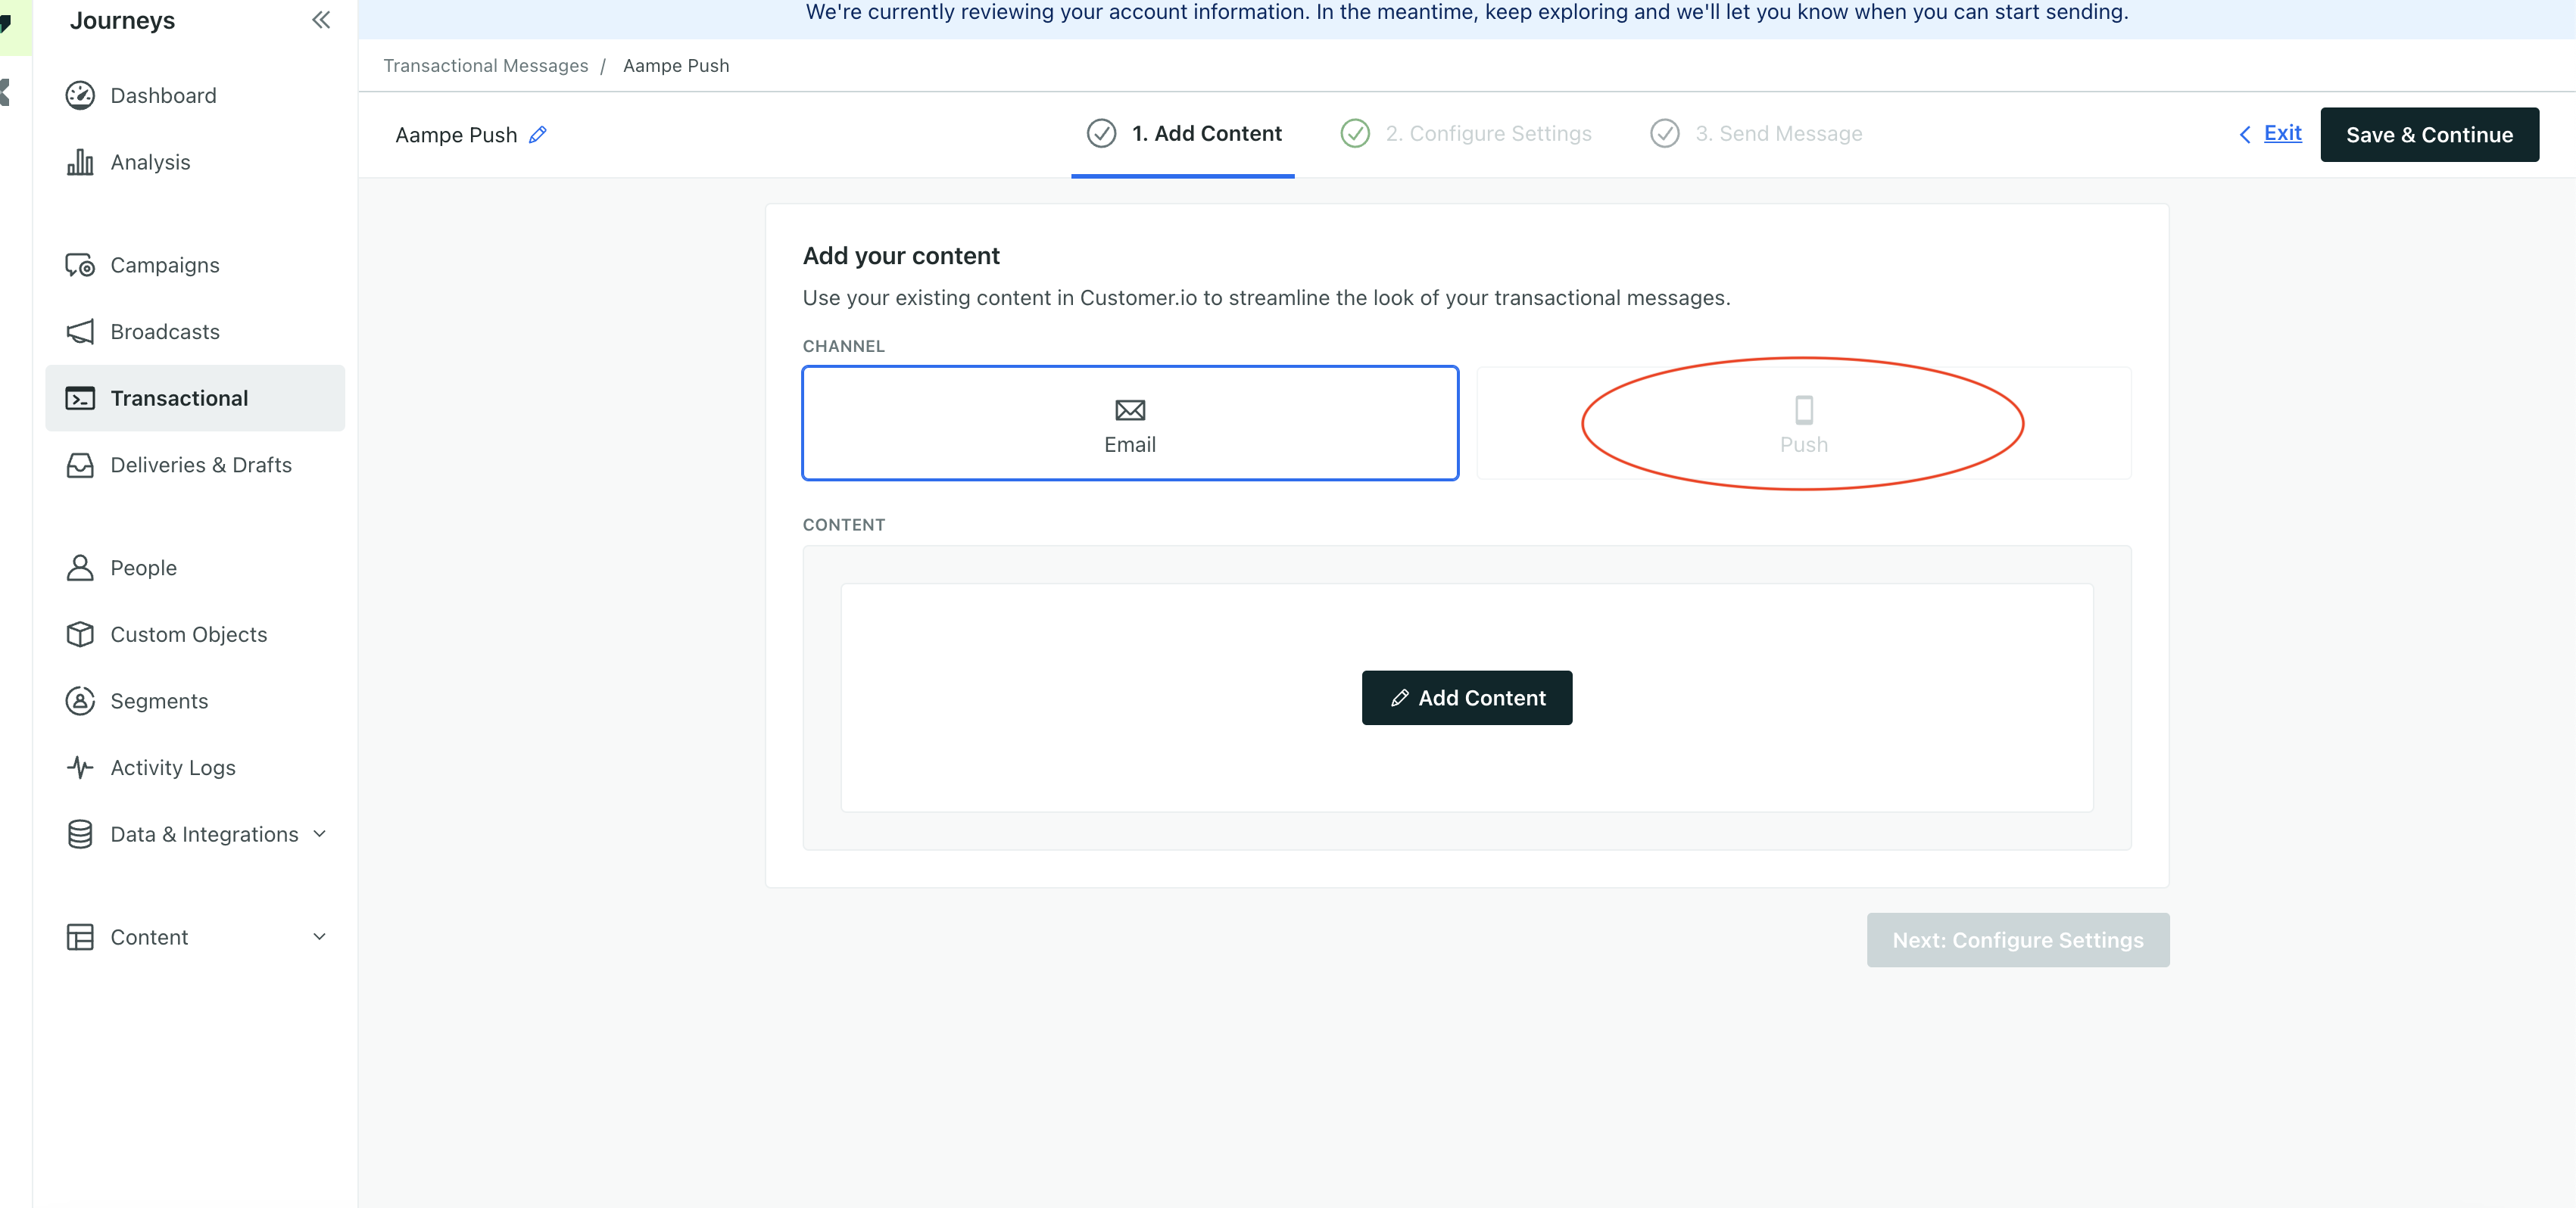
-
Select Push or Email as appropriate. No need to add content -> Click on Save & Continue
- Keep the default settings and launch the message
-
On the Transactional messages dashboard you will get an ID for the new message you created. Send the ID to Aampe.