Requirements
To perform the following steps, you need a CleverTap admin account for your project.
Step 1: Create a User for Aampe
- Login to your CleverTap dashboard as an admin user
-
Go to Settings at the bottom left corner of the screen

-
Select Users

-
Click on +Users

-
Enter
developer+<your_business_name>@aampe.comin the Email address textbox - Check the Creator role from the dropdown list and click Apply
-
Click on Invite

Step 2: Generate a User-Passcode for Aampe
- Login to your CleverTap dashboard as an admin user
-
Go to Settings at the bottom left corner of the screen
-
Select Users
-
Type
aampein the search box to find the user you previously created for Aampe -
Press the 3 dot icon at the right side of the table once the Aampe user is found

-
Select Grant Passcode

-
Select Forever and click on Grant

Step 3: Configure Your CleverTap Push Integration on Aampe
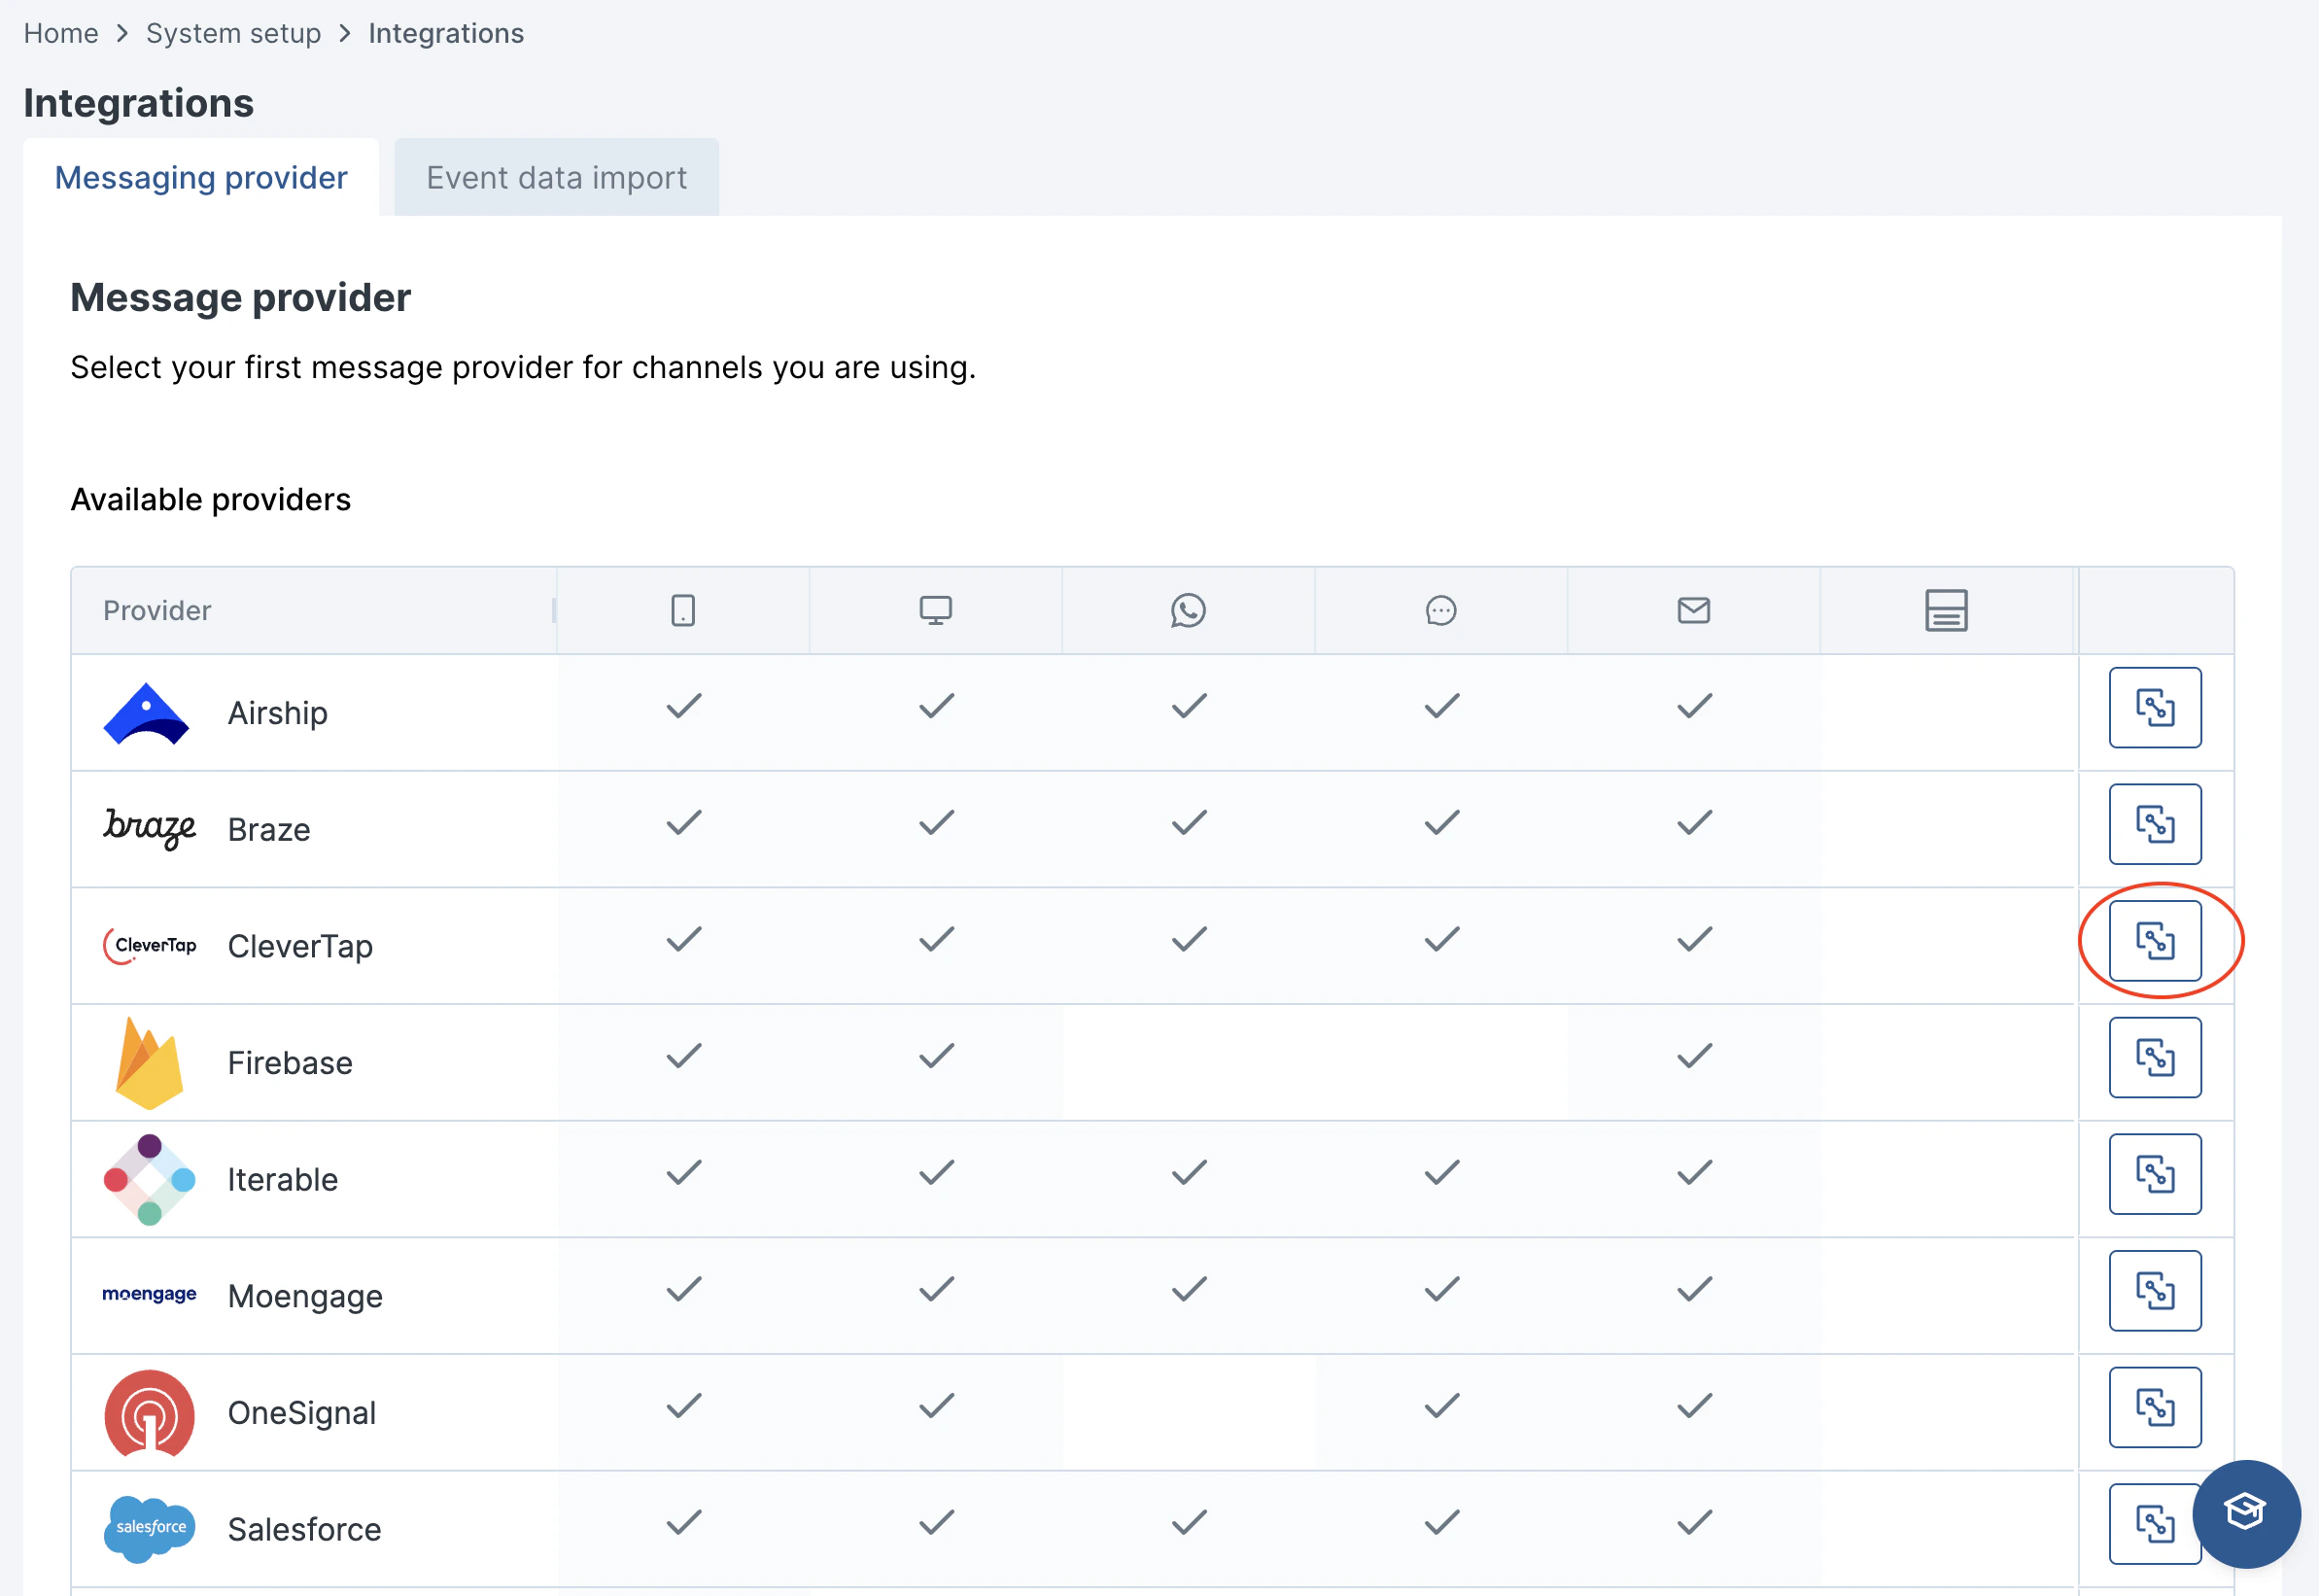
- Go to https://compose.aampe.com and login using your Aampe credentials
- Navigate to System setup > Integrations
-
The Messaging Provider tab will open
-
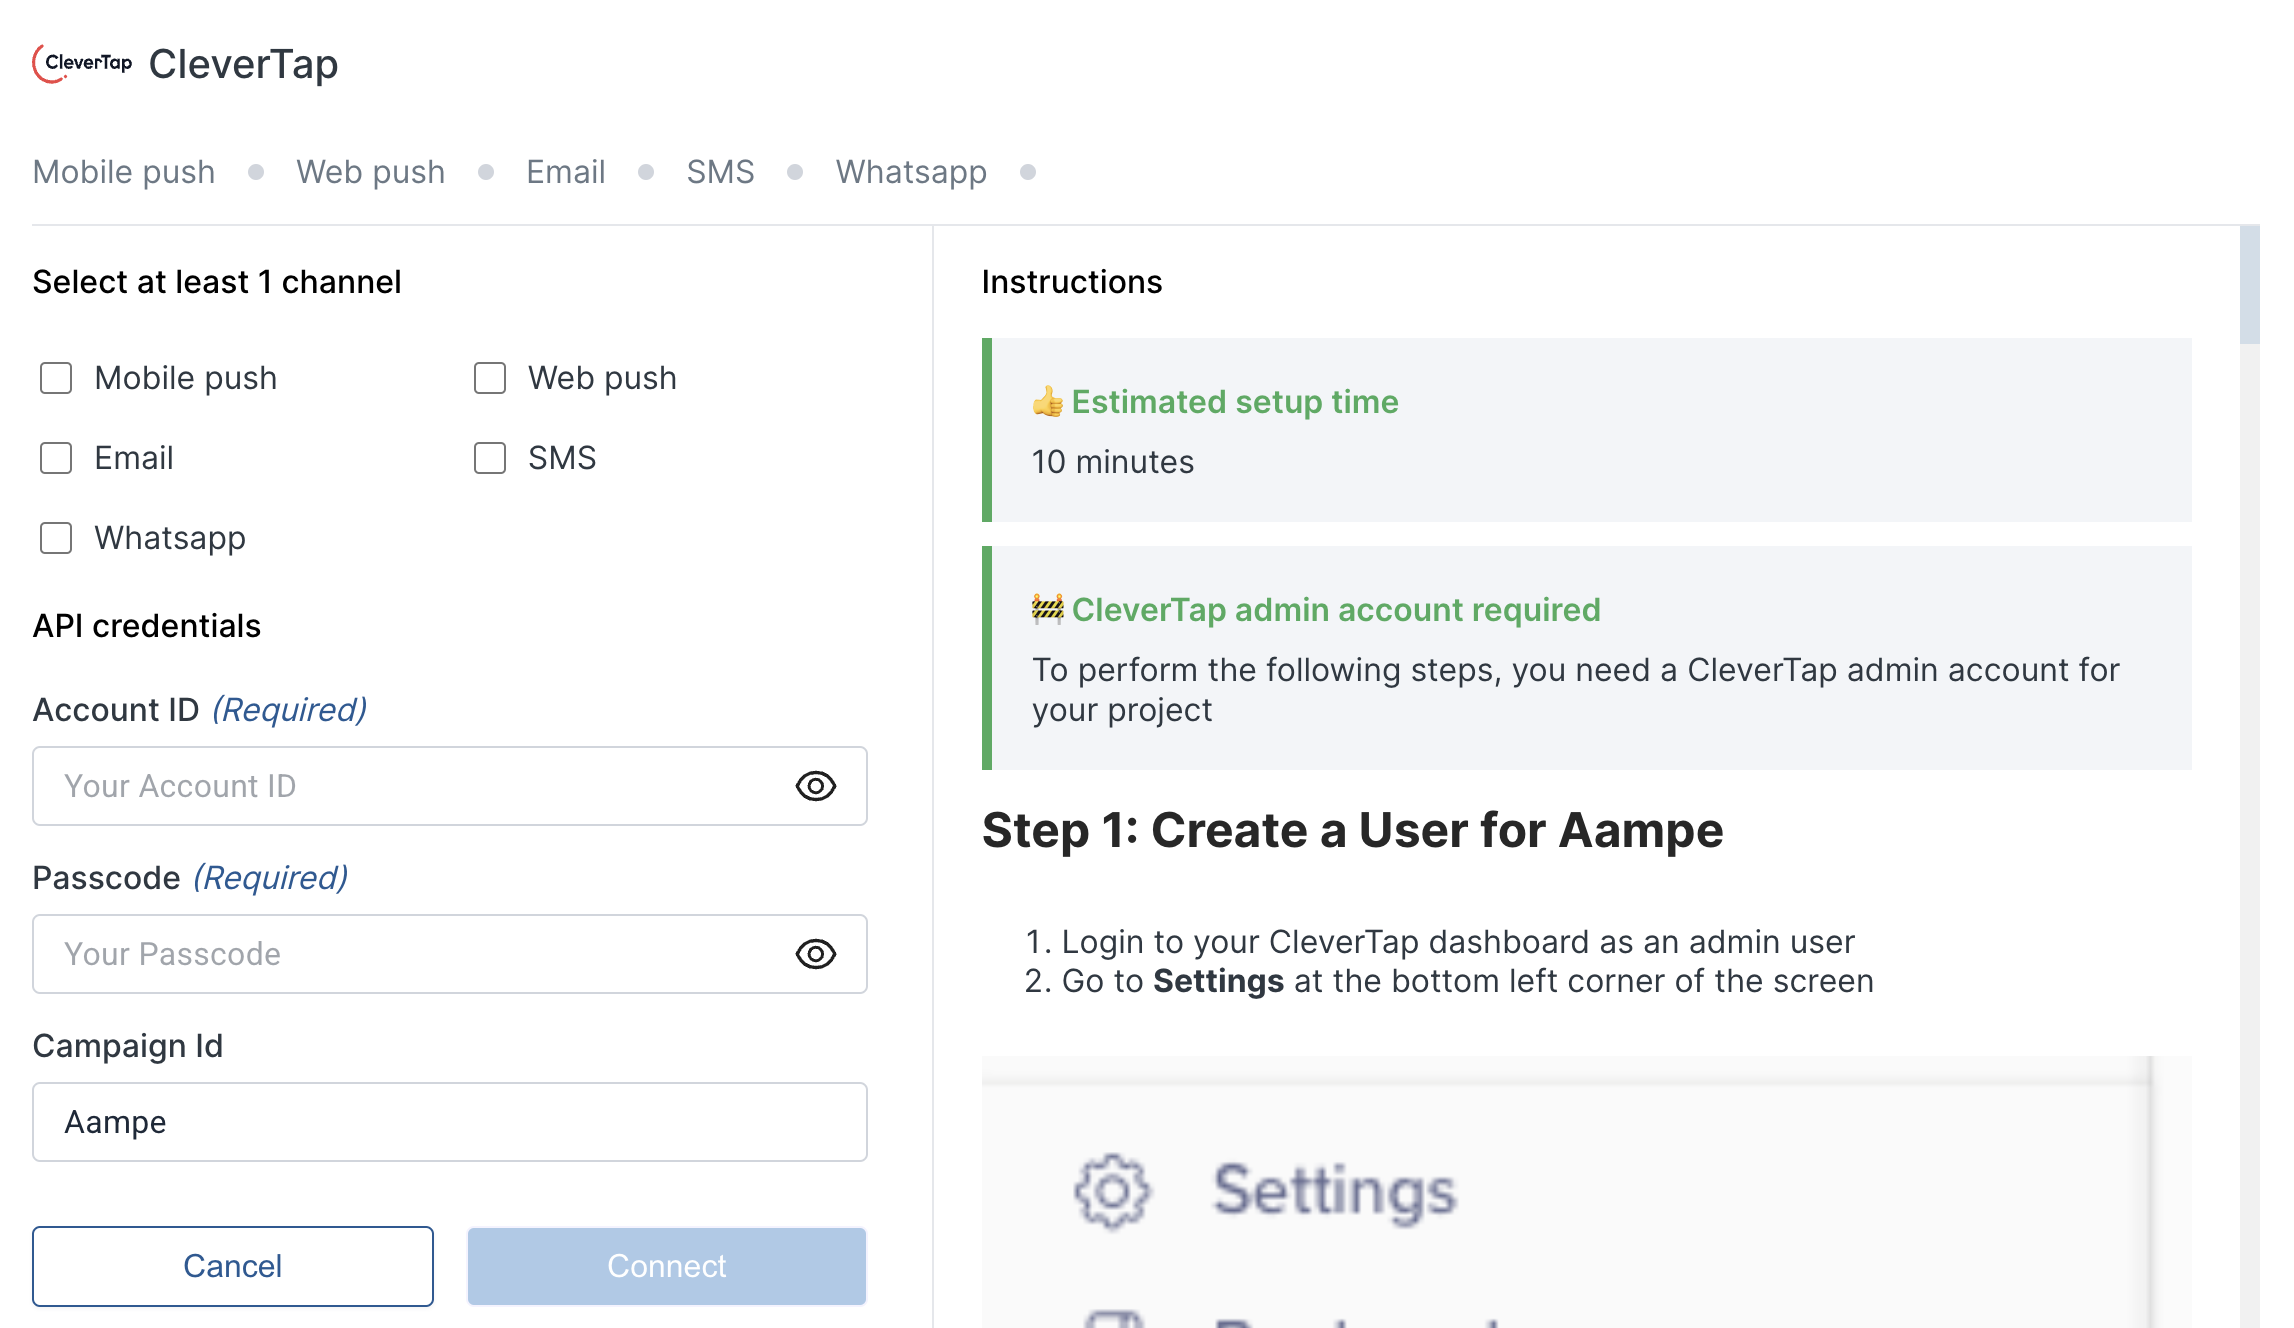
Click on CleverTap
-
To get the account ID: Go to Settings (in Clevertap) and then Project. Copy the Project ID

- For the passcode input the user passcode you just generated for Aampe in the above steps.
- Press Activate