Requirements
- An API Key for your app group.
- Braze App Id
- The Braze dashboard URL that you use (dashboard-01 to 08 or dashboard-01.braze.eu)
Create an API Key
- From the Braze dashboard go to Settings > API Keys
- On this page you will find the Rest API Keys table
-
Click on + Create New API Key

-
Choose a name for your new key, such as
aampe-personalization. You’ll see a list of checkboxes.
📘 Note 2: If required, contact your Aampe customer success manager or onboarding representative for the IP access range to enable IP whitelisting on your API allow list.
- Tick the checkboxes to add following permissions:


| Braze Permission | Braze REST API endpoint | |
|---|---|---|
| users.export.ids | GET /users/export/ids | For exporting current users |
| users.export.segment | GET /users/export/segment | For exporting current user attributes |
| users.export.global_control_group | POST/users/export/global_control_group | For exporting global control group membership |
| sends.id.create | POST /sends/id/create | For creating IDs for message performance tracking |
| messages.send | POST /messages/send | Trigger an API Campaign in Braze. |
| campaigns.trigger.send | POST /campaigns/trigger/send | Trigger a send for a campaign that is configured for API-triggered delivery. |
| campaigns.trigger.schedule.create | POST /campaigns/trigger/schedule/create | Trigger a send for a campaign that is configured for scheduled API-triggered delivery. |
| campaigns.list | GET /campaigns/list | Retrieve the list of all the campaigns configured in Braze and their associated metadata. |
| campaigns.data_series | GET /campaigns/data_series | Retrieve the analytics data of a specific Braze campaign. |
| campaigns.details | GET /campaigns/details | Retrieve the details of a specific Braze campaign. |
| segments.list | GET /segments/list | Retrieve the list of all the segments configured in Braze and their associated metadata. |
| segments.data_series | GET /segments/data_series | Retrieve the size of the Braze segment. |
| segments.details | GET /segments/details | Retrieve the details of a specific Braze segment. |
| email.unsubscribe | For retrieving email unsubscribe information | |
| email.hard_bounces | GET /email/hard_bounce | To retrieve email bounce information |
| templates.info | GET /templates/email/info | Retrieve the details of a specific Braze HTML email template. |
| templates.list | GET /templates/email/list | Retrieve the list of all the Braze HTML email templates configured in Braze and their subject line and HTML content. |
| subscription.status.get | GET /subscription/user/status | To get subscription status |
| subscription.groups.get | GET/ subscription.groups.get | To get subscription groups |
- Finalize the key creation.
- You can then view the newly created key by clicking on the gear icon at the right
- Copy the API key value.
- Login into the Aampe composer using your Aampe credentials.
-
Enter System setup -> Integrations -> Braze. Activate Braze

- Enter the API key and dashboard URL copied from the earlier steps. Your connection is now ready to deliver messages
App Id Setup
- To find your app_id go to your Braze account and navigate to Settings > API and Identifiers > App Identifiers
-
Copy your app_id and navigate back to Aampe Braze integration page select the email channel and add your app_id


API Campaign Setup
Setting up an API Campaign in Braze allows you to send transactional messages by generating a campaign_id for use in your API calls. This process involves creating the campaign in the Braze dashboard and then using the campaign_id in your API requests to send messages. Here’s a step-by-step guide to setting up an API Campaign:Access the Braze Dashboard:
- Log in to your Braze account. Navigate to the Messaging section and select Campaigns.
-
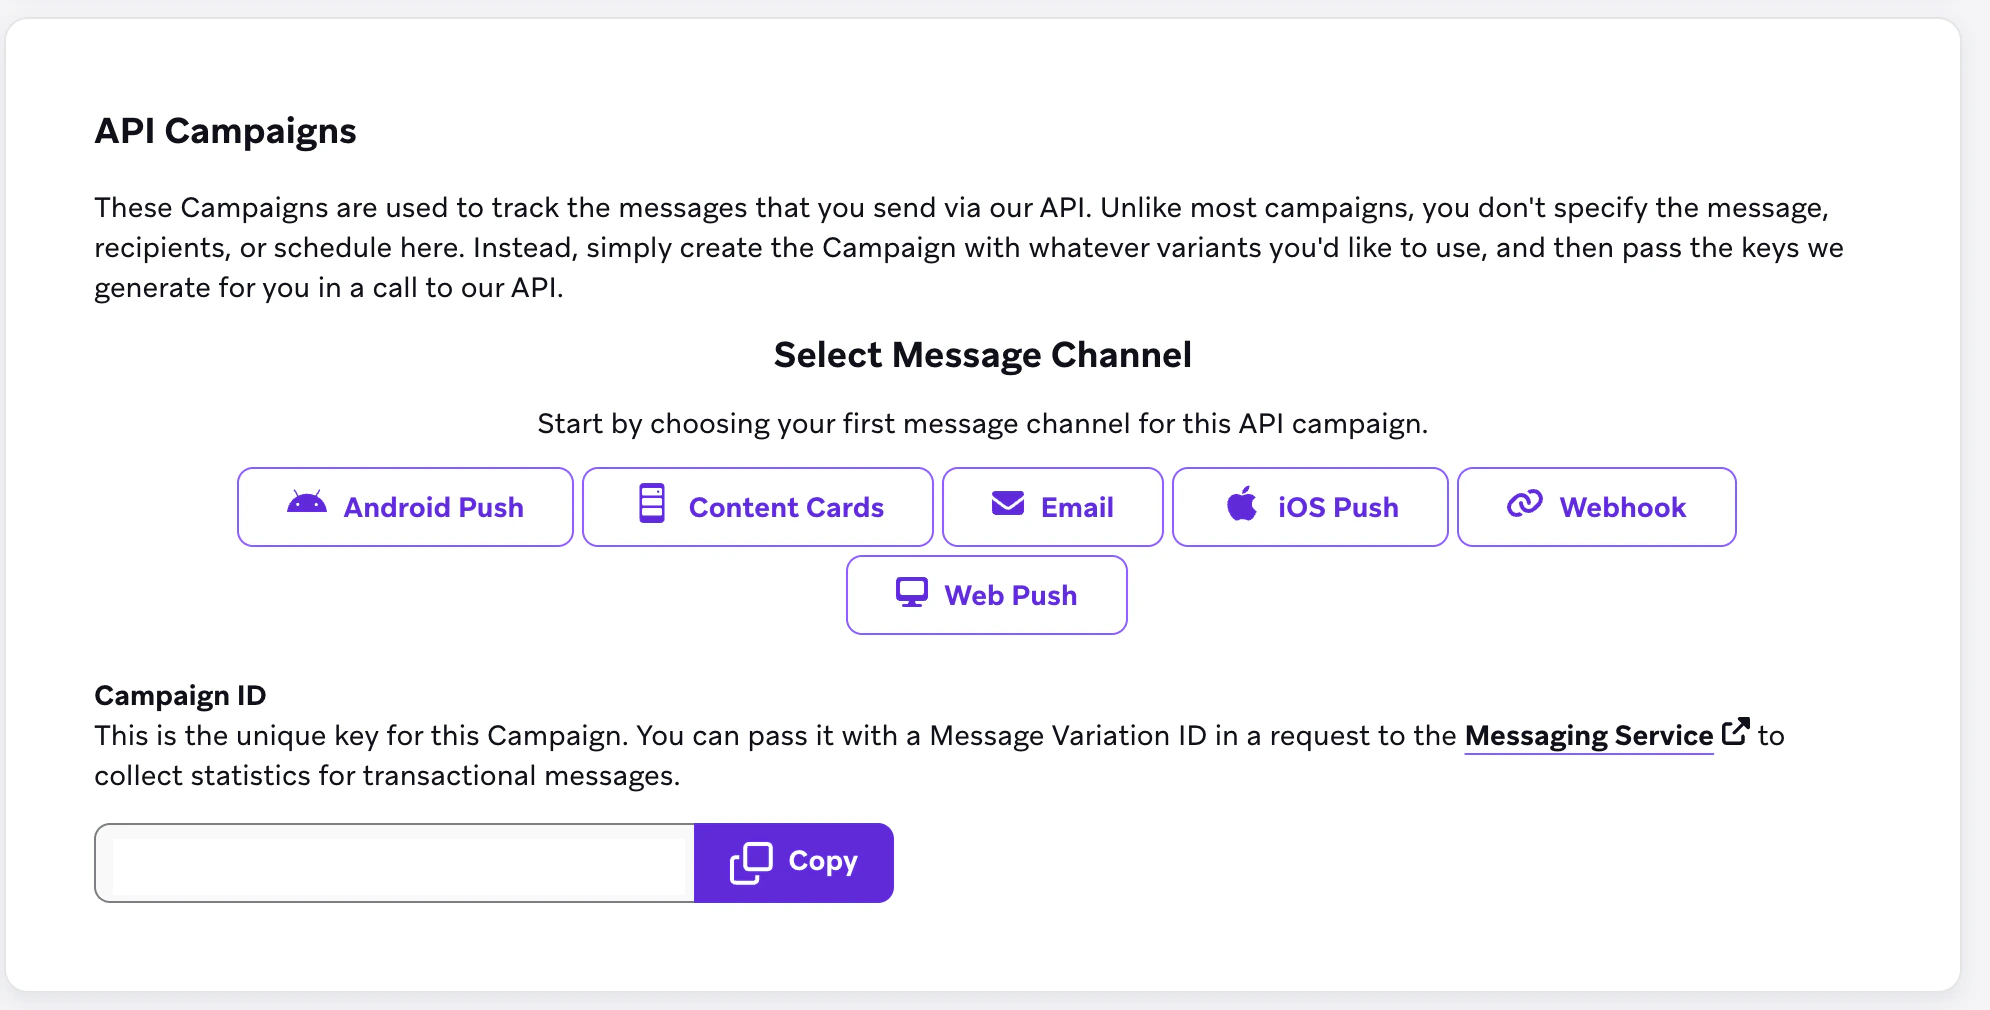
Create a New Campaign: Click on Create Campaign. Choose API Campaigns as the campaign type.


Configure the Campaign:
- Name the Campaign: Provide a descriptive title to easily identify the campaign later.
-
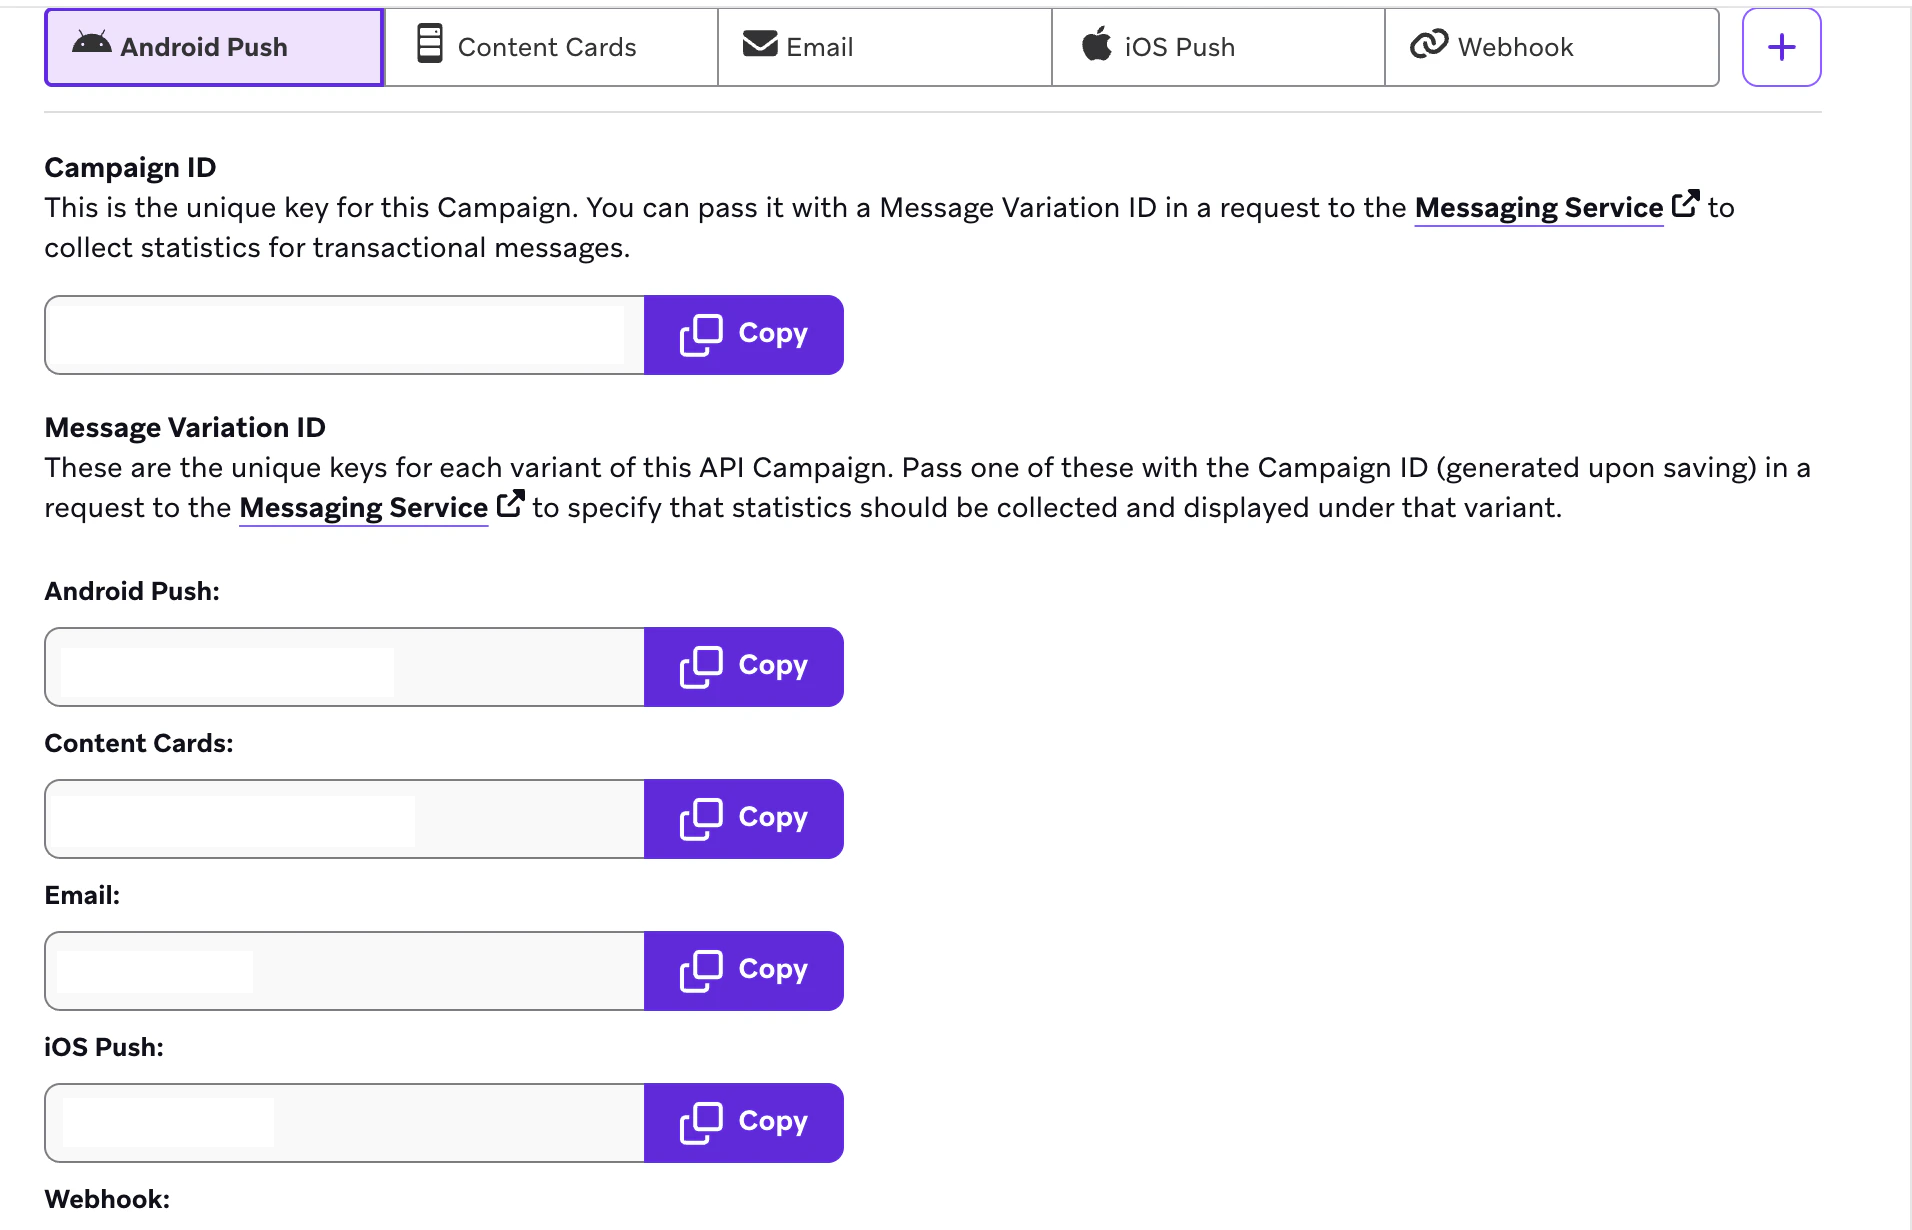
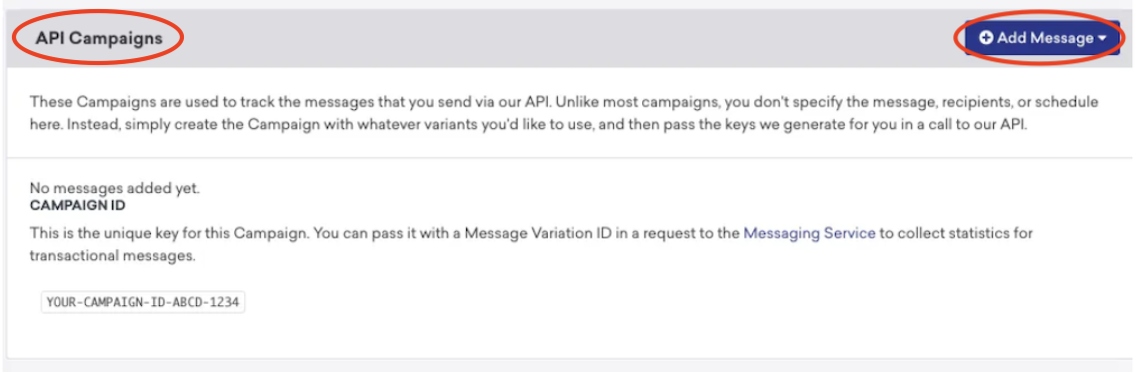
Add Message: Click on Select Message. Select the message types (channels) you intend to use (e.g., Email, SMS, Push Notifications). This action will generate a campaign_id and a message variation ID for each channel.
- Optional - Add Conversion Events: If you wish to track specific user actions as conversions, you can add a conversion event to the campaign.
In the Campaign Limits:
- User re-eligible for messages: Check this box and select 0 minutes as we would like Aampe agents to be re-eligible based on user’s best time.
- Select Don’t Count this towards intelligent Frequency limits as we don’t want Aampe to be affected by Braze limits
Save the Campaign:
- After configuring the necessary settings, click on Save Campaign.
Configure in Aampe:
- Campaign ID: After saving your campaign, retrieve the campaign_id and add to the Braze Integration Settings in Composer.
-
Variation IDs: If you added messages to your campaign for each channel, note down the variation_id for each and send it to your onboarding representative at Aampe.