- Direct Read Access from Your BQ Dataset
- Push to Google Cloud Storage Bucket
Option 1: Direct Read Access from Your BQ Dataset
Aampe will access your BQ with a dedicated service account. To grant Aampe read-only access to your BQ dataset, you need to create an Aampe service account and grant the following permissions:bigquery.datasets.getbigquery.readsessions.createbigquery.readsessions.getDatabigquery.tables.getbigquery.tables.getDatabigquery.tables.list
Step-by-step Procedure
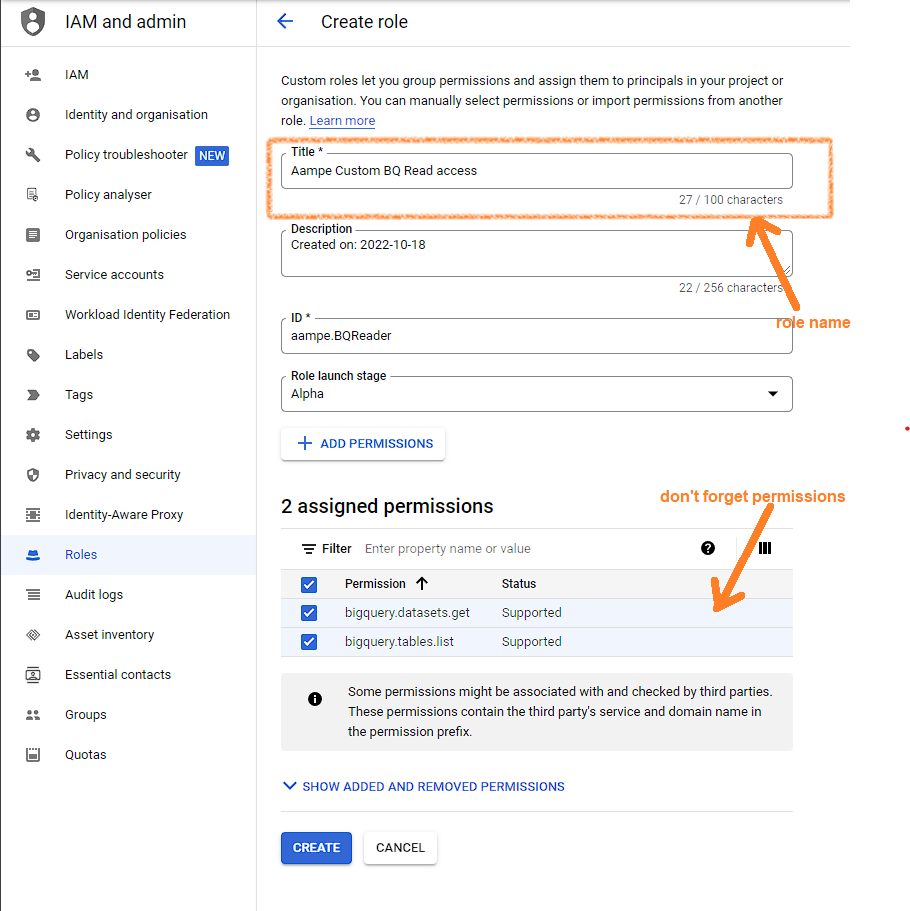
- Create the custom role:
-
Go to https://console.cloud.google.com/iam-admin/roles

-
Fill the form (title: Aampe Custom BQ Read Access)
-
Add the following permissions:
bigquery.datasets.getbigquery.readsessions.createbigquery.readsessions.getDatabigquery.tables.getbigquery.tables.getDatabigquery.tables.list
-
Go to https://console.cloud.google.com/iam-admin/roles
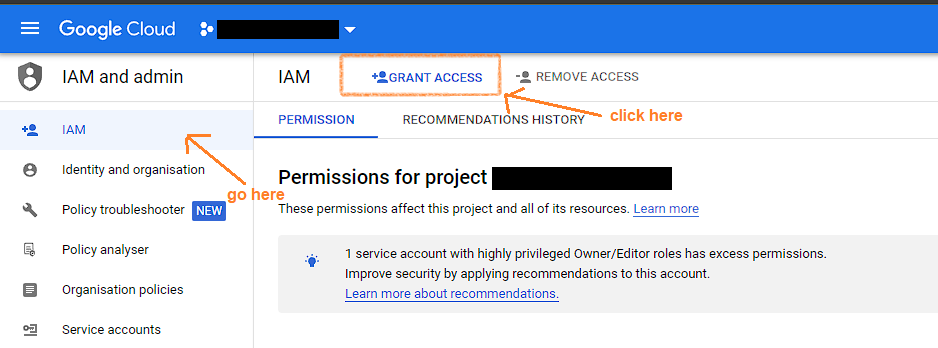
- Grant permissions:
- Go to https://console.cloud.google.com/iam-admin/iam?project=
-
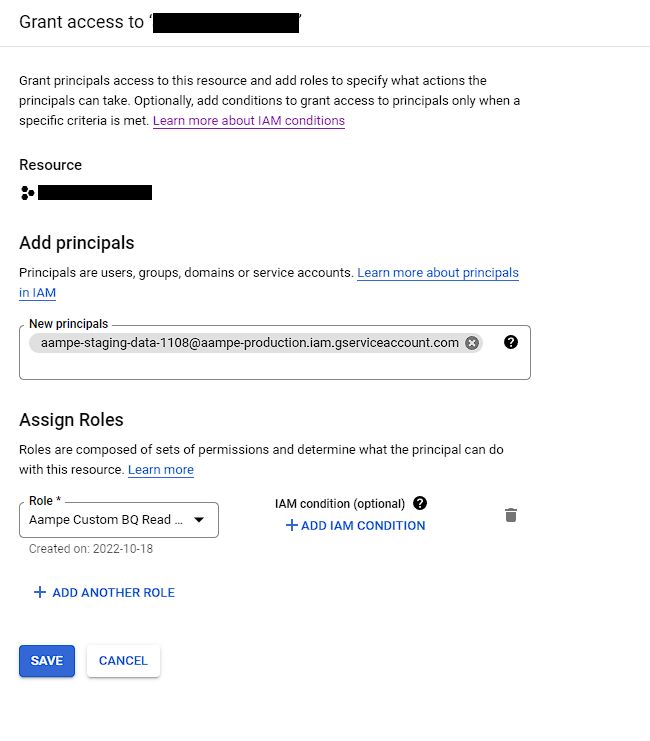
Press Grant access button
- Fill the form “add principal” with the Aampe service account that we will provide you (We will provide you the service account to use for integration via email)
-
Fill the form “assign role” with Aampe Custom BQ Read Access
- Project ID
- Dataset ID
- Data location
- Table names (of all the tables that you would like to provide us data of)
Option 2: Push to Google Cloud Storage Bucket
When the data size is very large we recommend that you push data to a cloud storage bucket. We will then copy this data from your GCS bucket to one set up by Aampe for ingestion to our system. If you prefer, you can directly push to a bucket created by Aampe.Steps
- Create a bucket on GCP.
- Provide Aampe with access to that bucket (We will provide you the details of the account that you need to provide access to)
- Set up export from BQ to the cloud storage bucket: Export Data
- Automate the export for each day of event data