> ## Documentation Index
> Fetch the complete documentation index at: https://kb.aampe.com/llms.txt
> Use this file to discover all available pages before exploring further.
# Preparing Content for Surfaces
> If code renders the element on your screen, Surfaces can personalize it
## The End Goal
To implement Surfaces, your goal as an Aampe user is to
* create a list of all the surface elements that will personalize when a page loads
* prepare any images or other creative assets, if needed
When you load this information into the Surfaces composer, it will provide you with an API. You can share this API with your engineering team to embed Aampe into your application.
## Step 1: Examine Your Current Screens
Consider any screen in your app or website. What elements could be personalized? \
\
Let's examine this fictional landing page.
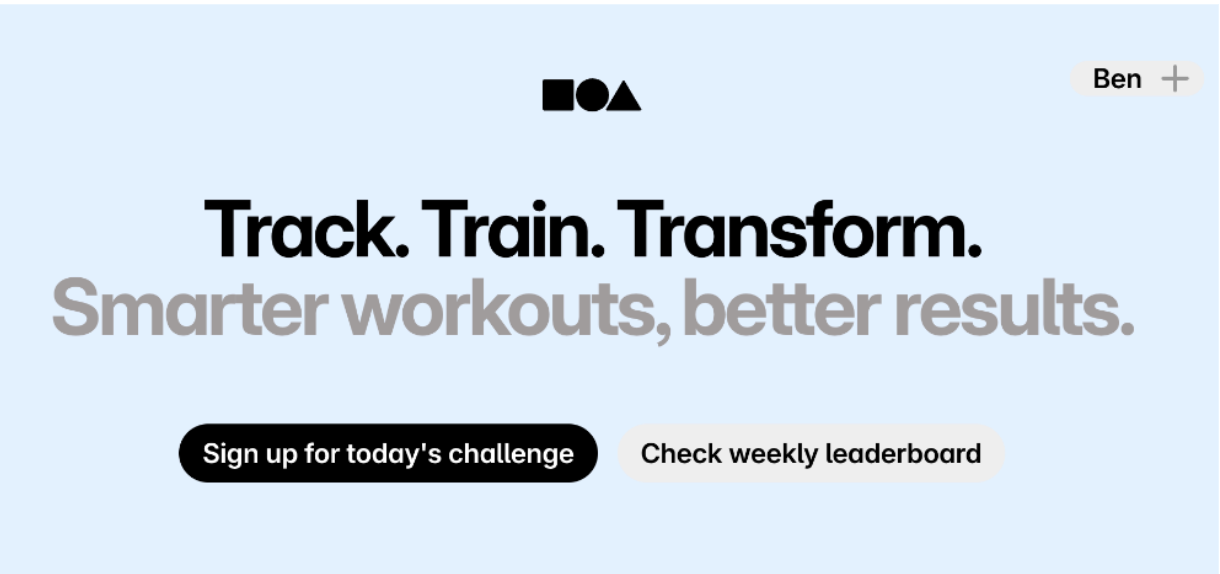 Even on a simple screen like this, there are several elements we could personalize.\
\
Let’s start with the gray subtitle. Instead of **smarter workouts**, some users may respond more to **community and connection**.
Even on a simple screen like this, there are several elements we could personalize.\
\
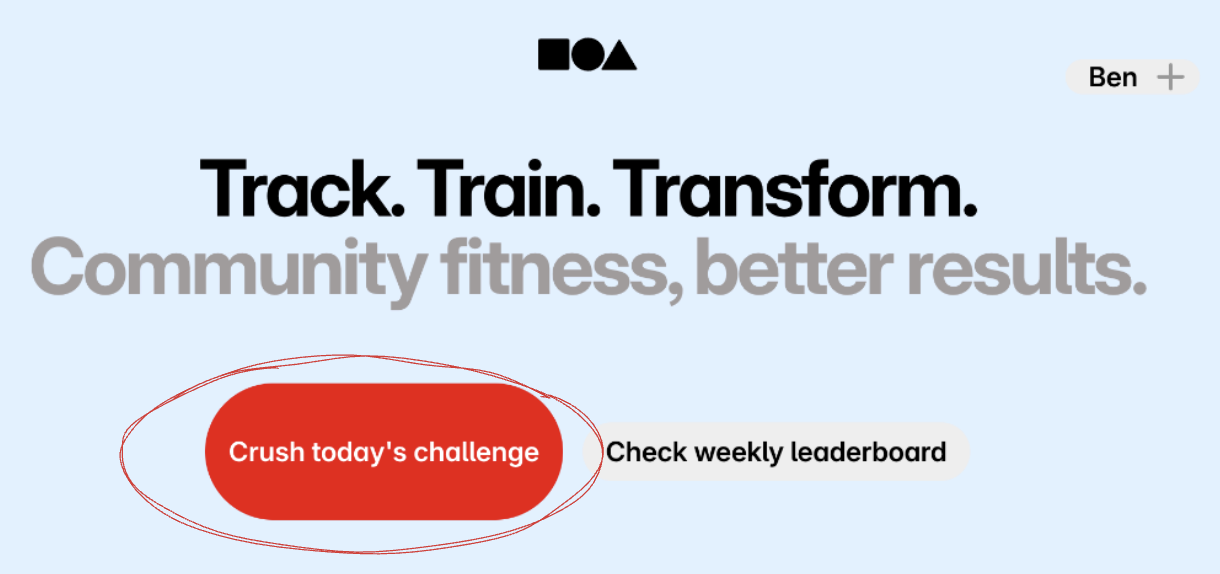
Let’s start with the gray subtitle. Instead of **smarter workouts**, some users may respond more to **community and connection**.
 Suppose you also want to personalize the call-to-action button with variations in text, color, size, or all of the above.
 ## Step 2: Prepare Visual Assets
Once you've decided what elements are worth personalizing...
* Prepare any images and other pre-made visual assets you'd potentially use. If you're personalizing which of 10 cat pictures will show up for each user, you'll need all of those images ready.
* List the text fields, colors, button sizes, or other UI elements you want to personalize
* Make sure these fields can be programmatically defined at runtime—Aampe will overwrite them with values from the Surfaces API when the page loads. For images, this usually means having an image url assigned.
## Step 3: Create the Surface in Aampe
Almost there! [See these instructions](/user-guide/using-aampe/product-surfaces/surfaces-composer) for creating your Surface in Aampe.
## Bonus: Special Tools for Figma Users
If you're working in Figma, the [Aampe Surface Creator](/tools/figma-plugin) plugin can help you quickly extract page components and prepare them for integration.
## Step 2: Prepare Visual Assets
Once you've decided what elements are worth personalizing...
* Prepare any images and other pre-made visual assets you'd potentially use. If you're personalizing which of 10 cat pictures will show up for each user, you'll need all of those images ready.
* List the text fields, colors, button sizes, or other UI elements you want to personalize
* Make sure these fields can be programmatically defined at runtime—Aampe will overwrite them with values from the Surfaces API when the page loads. For images, this usually means having an image url assigned.
## Step 3: Create the Surface in Aampe
Almost there! [See these instructions](/user-guide/using-aampe/product-surfaces/surfaces-composer) for creating your Surface in Aampe.
## Bonus: Special Tools for Figma Users
If you're working in Figma, the [Aampe Surface Creator](/tools/figma-plugin) plugin can help you quickly extract page components and prepare them for integration.