> ## Documentation Index
> Fetch the complete documentation index at: https://kb.aampe.com/llms.txt
> Use this file to discover all available pages before exploring further.
# OneLogin SAML SSO
> Here we will show you how to set up your own custom SAML application for OneLogin SAML
## Create application
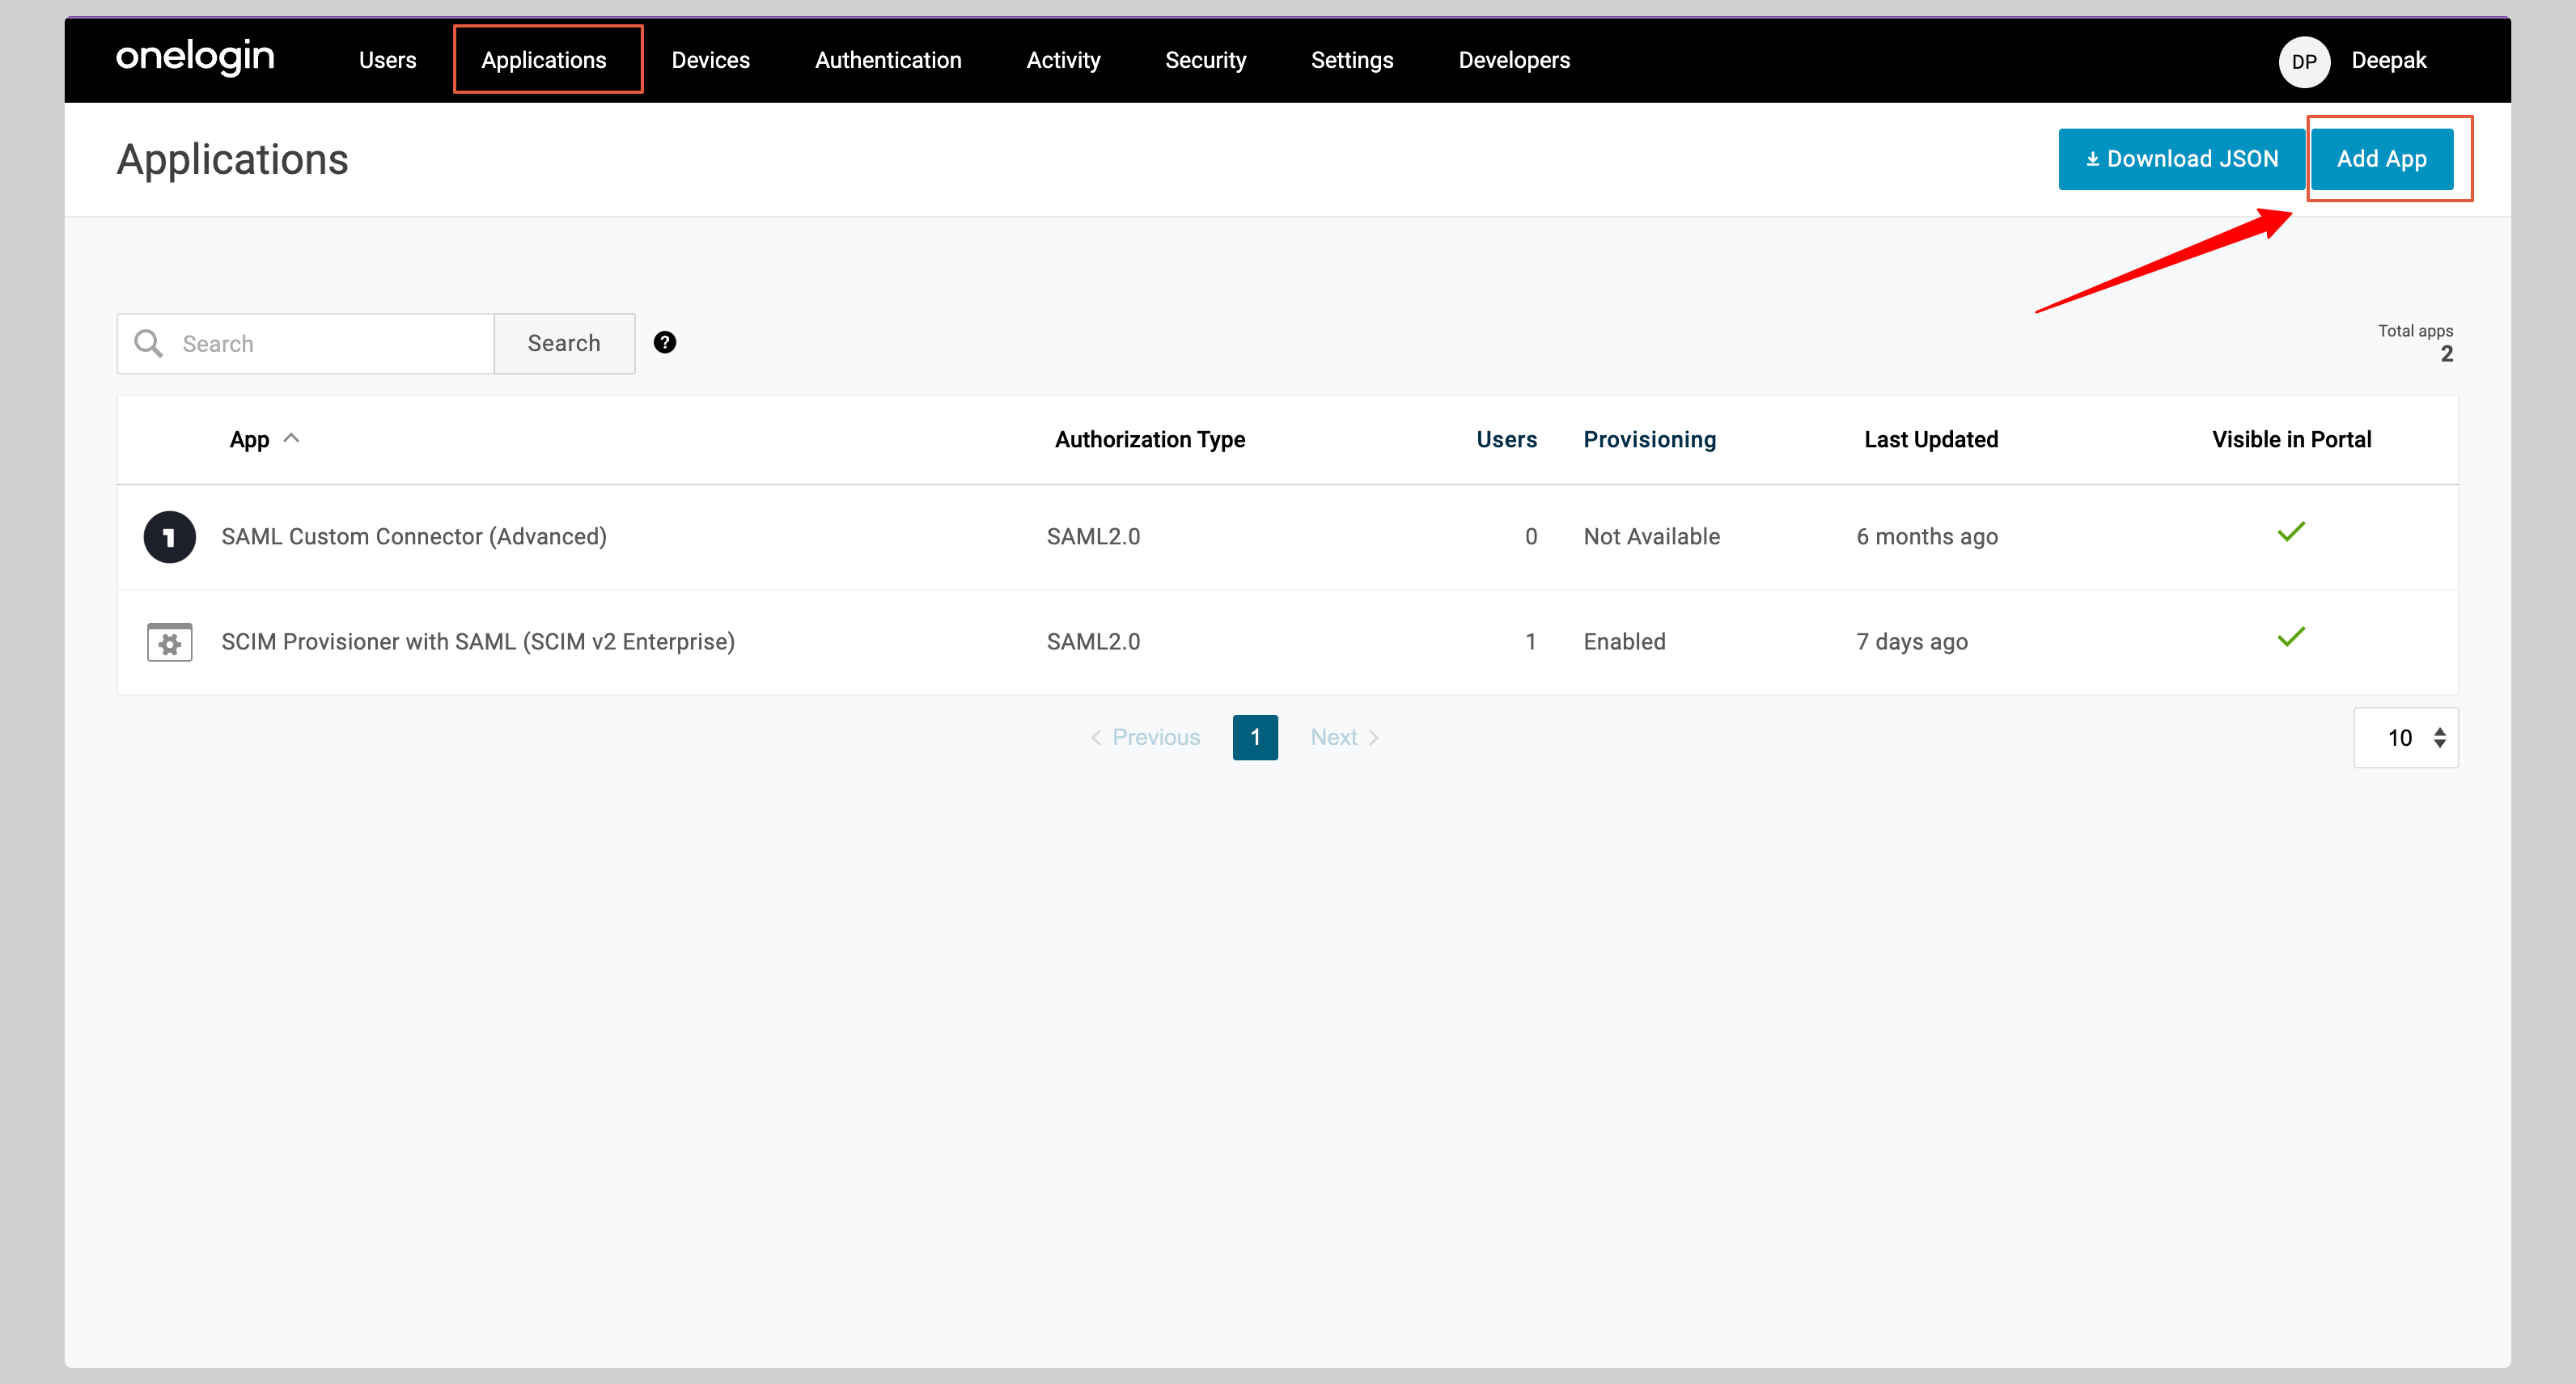
1. From your OneLogin account, click **Applications** from the top navigation menu.
2. If your application is already created, choose it from the list and move to the section [Configure Application](#configure-application)
3. If you haven't created a SAML application, click the **Add App** button to create a new application.
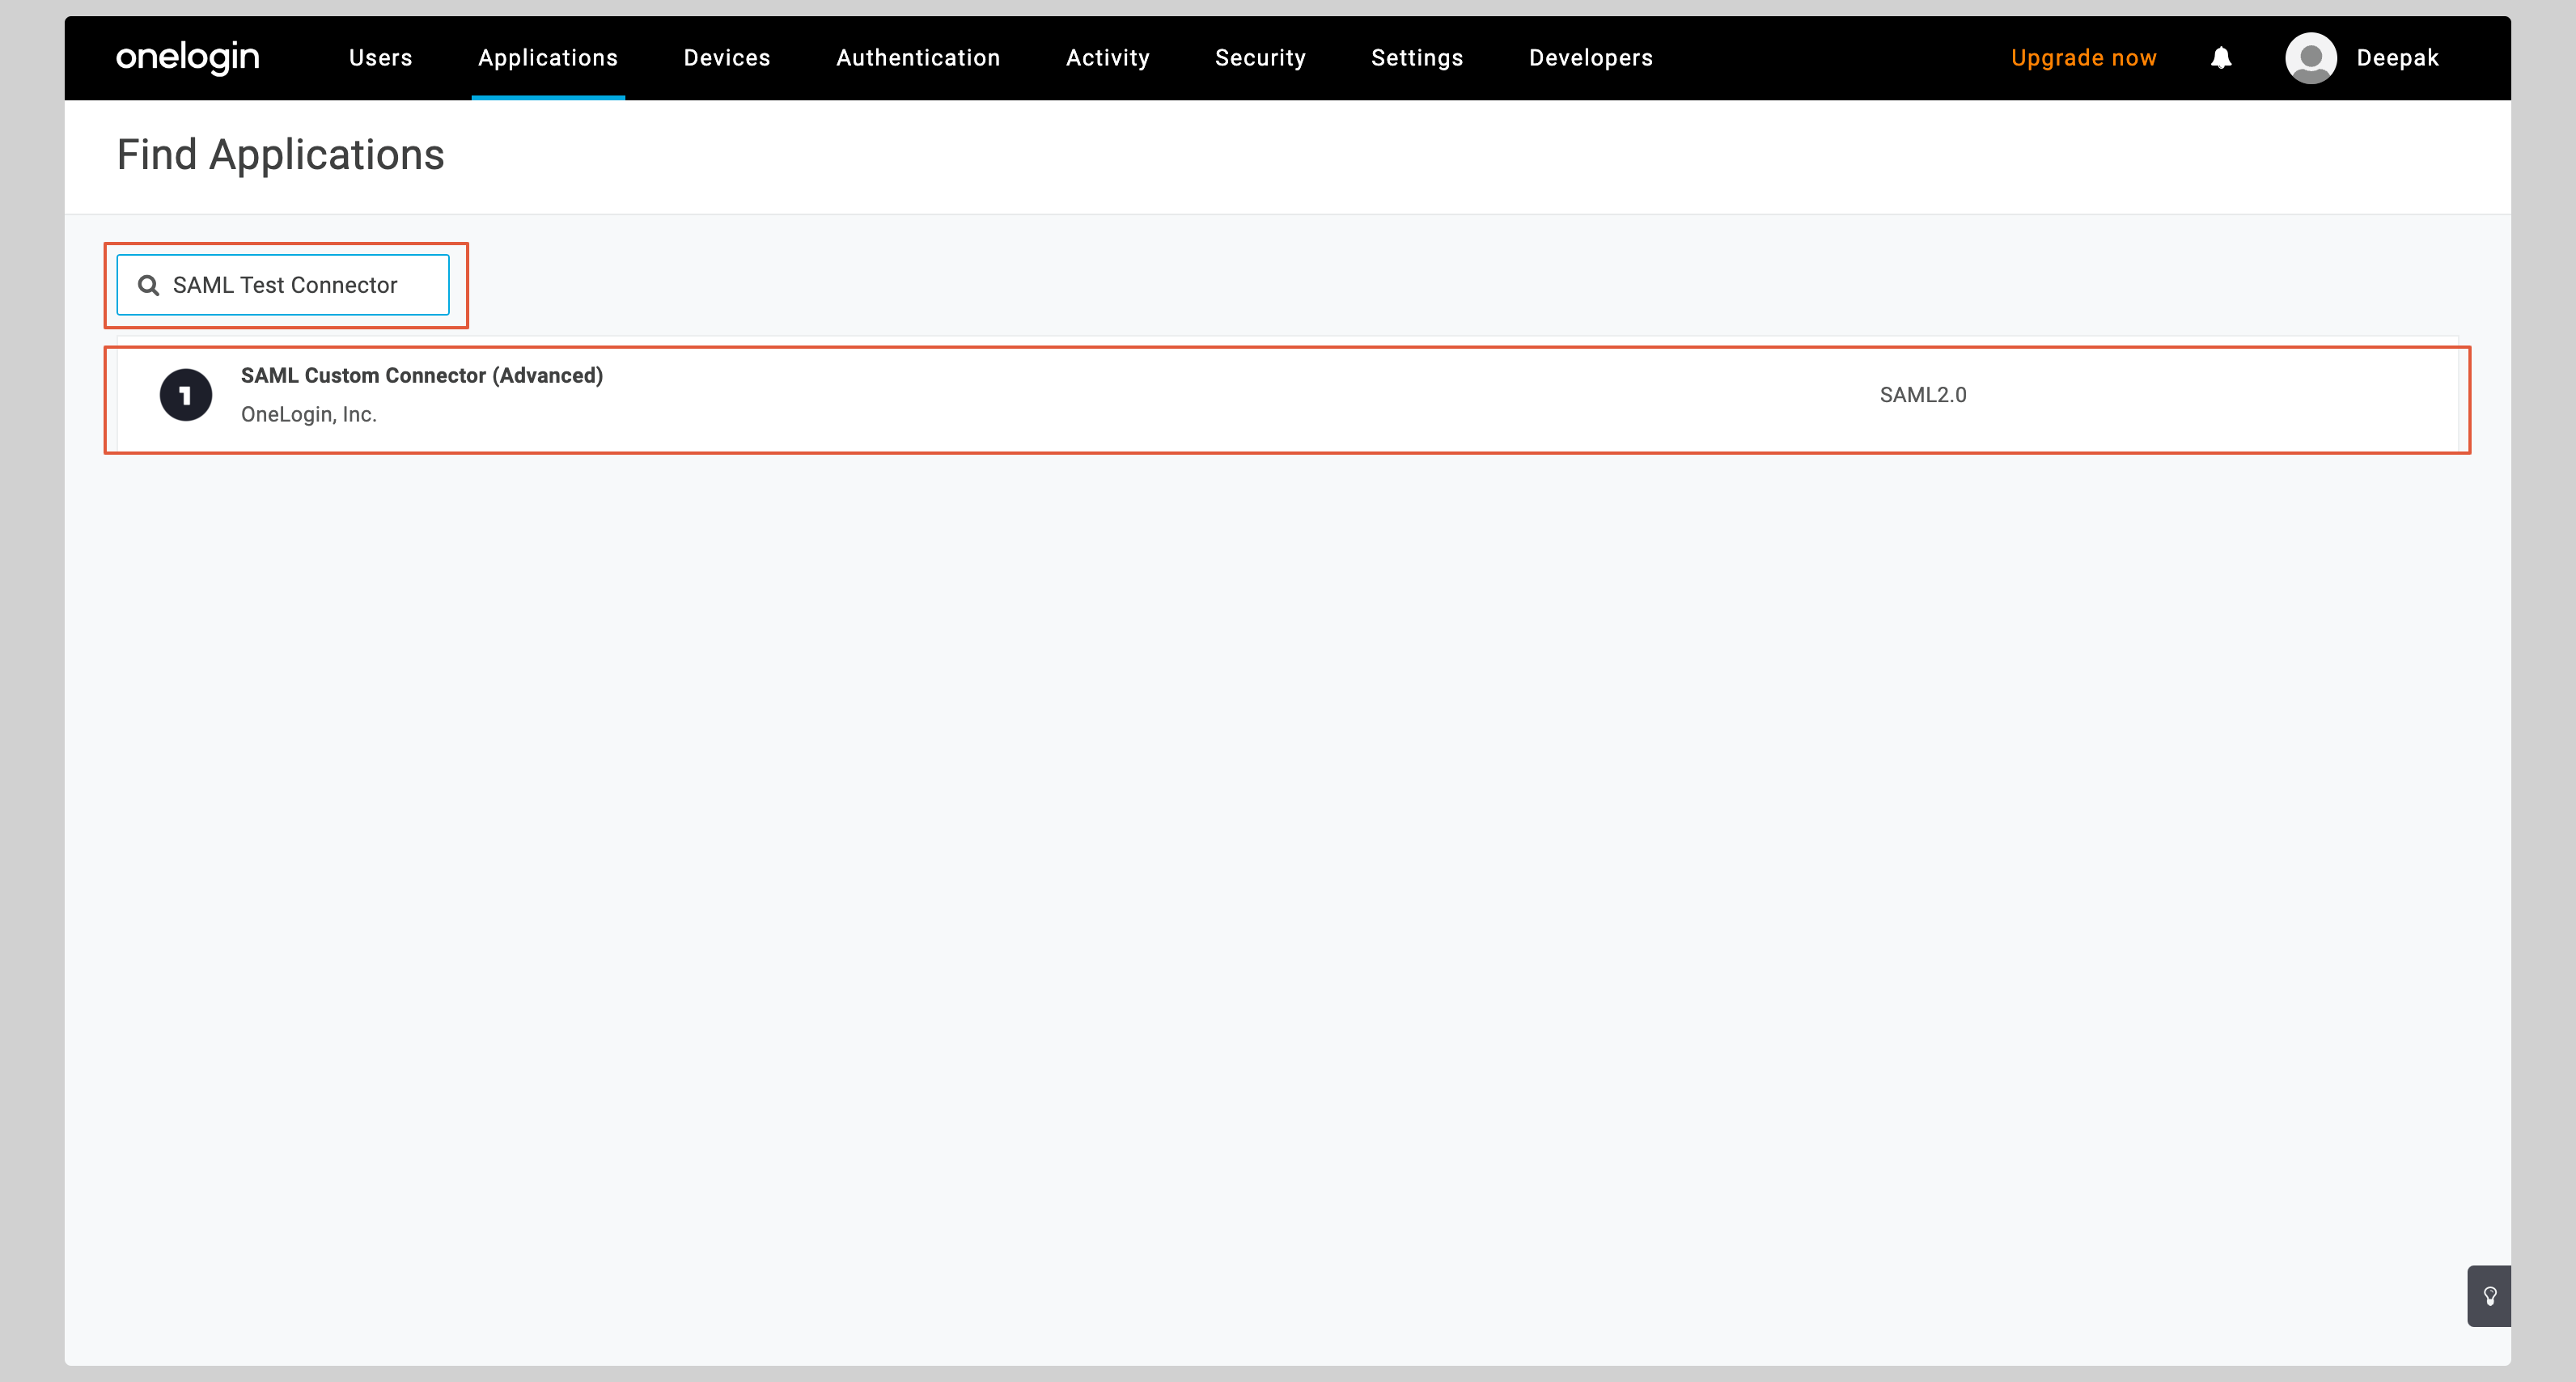
 4. Search for **SAML Test Connector** in the Find Applications section. Select **SAML Custom Connector (Advanced)** from the search results.
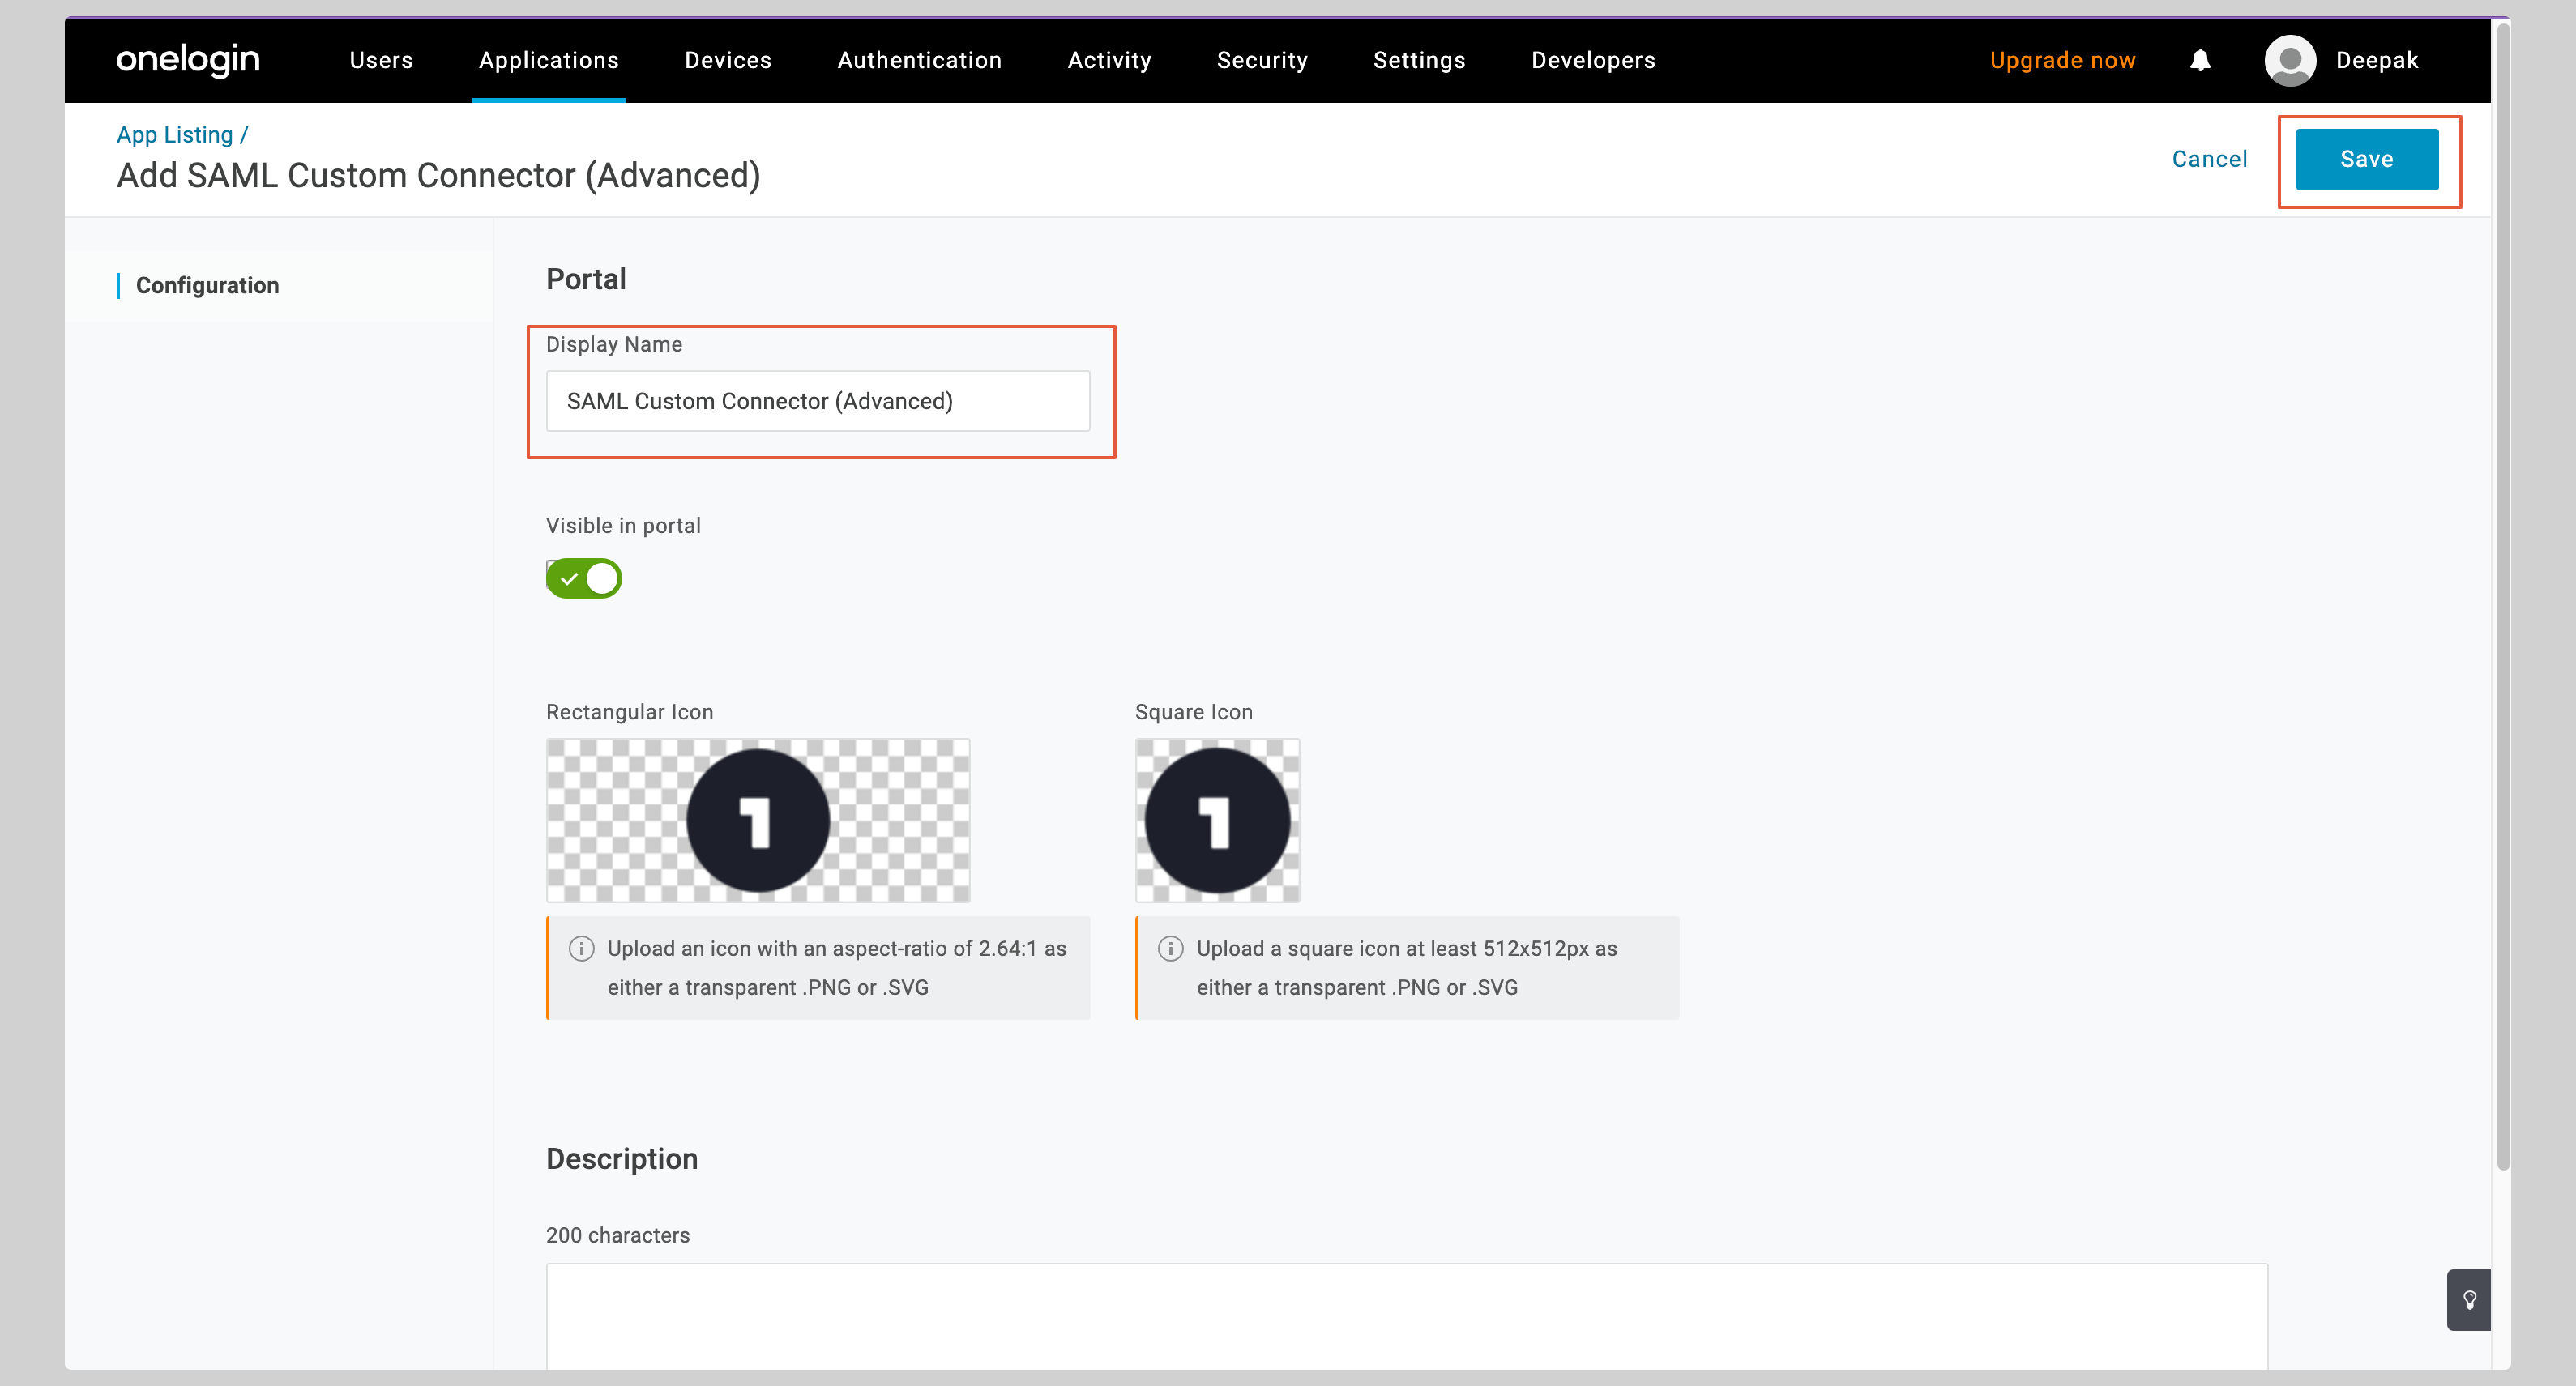
 5. Give your application a **Display Name** and click **Save**.
 ## Configure application
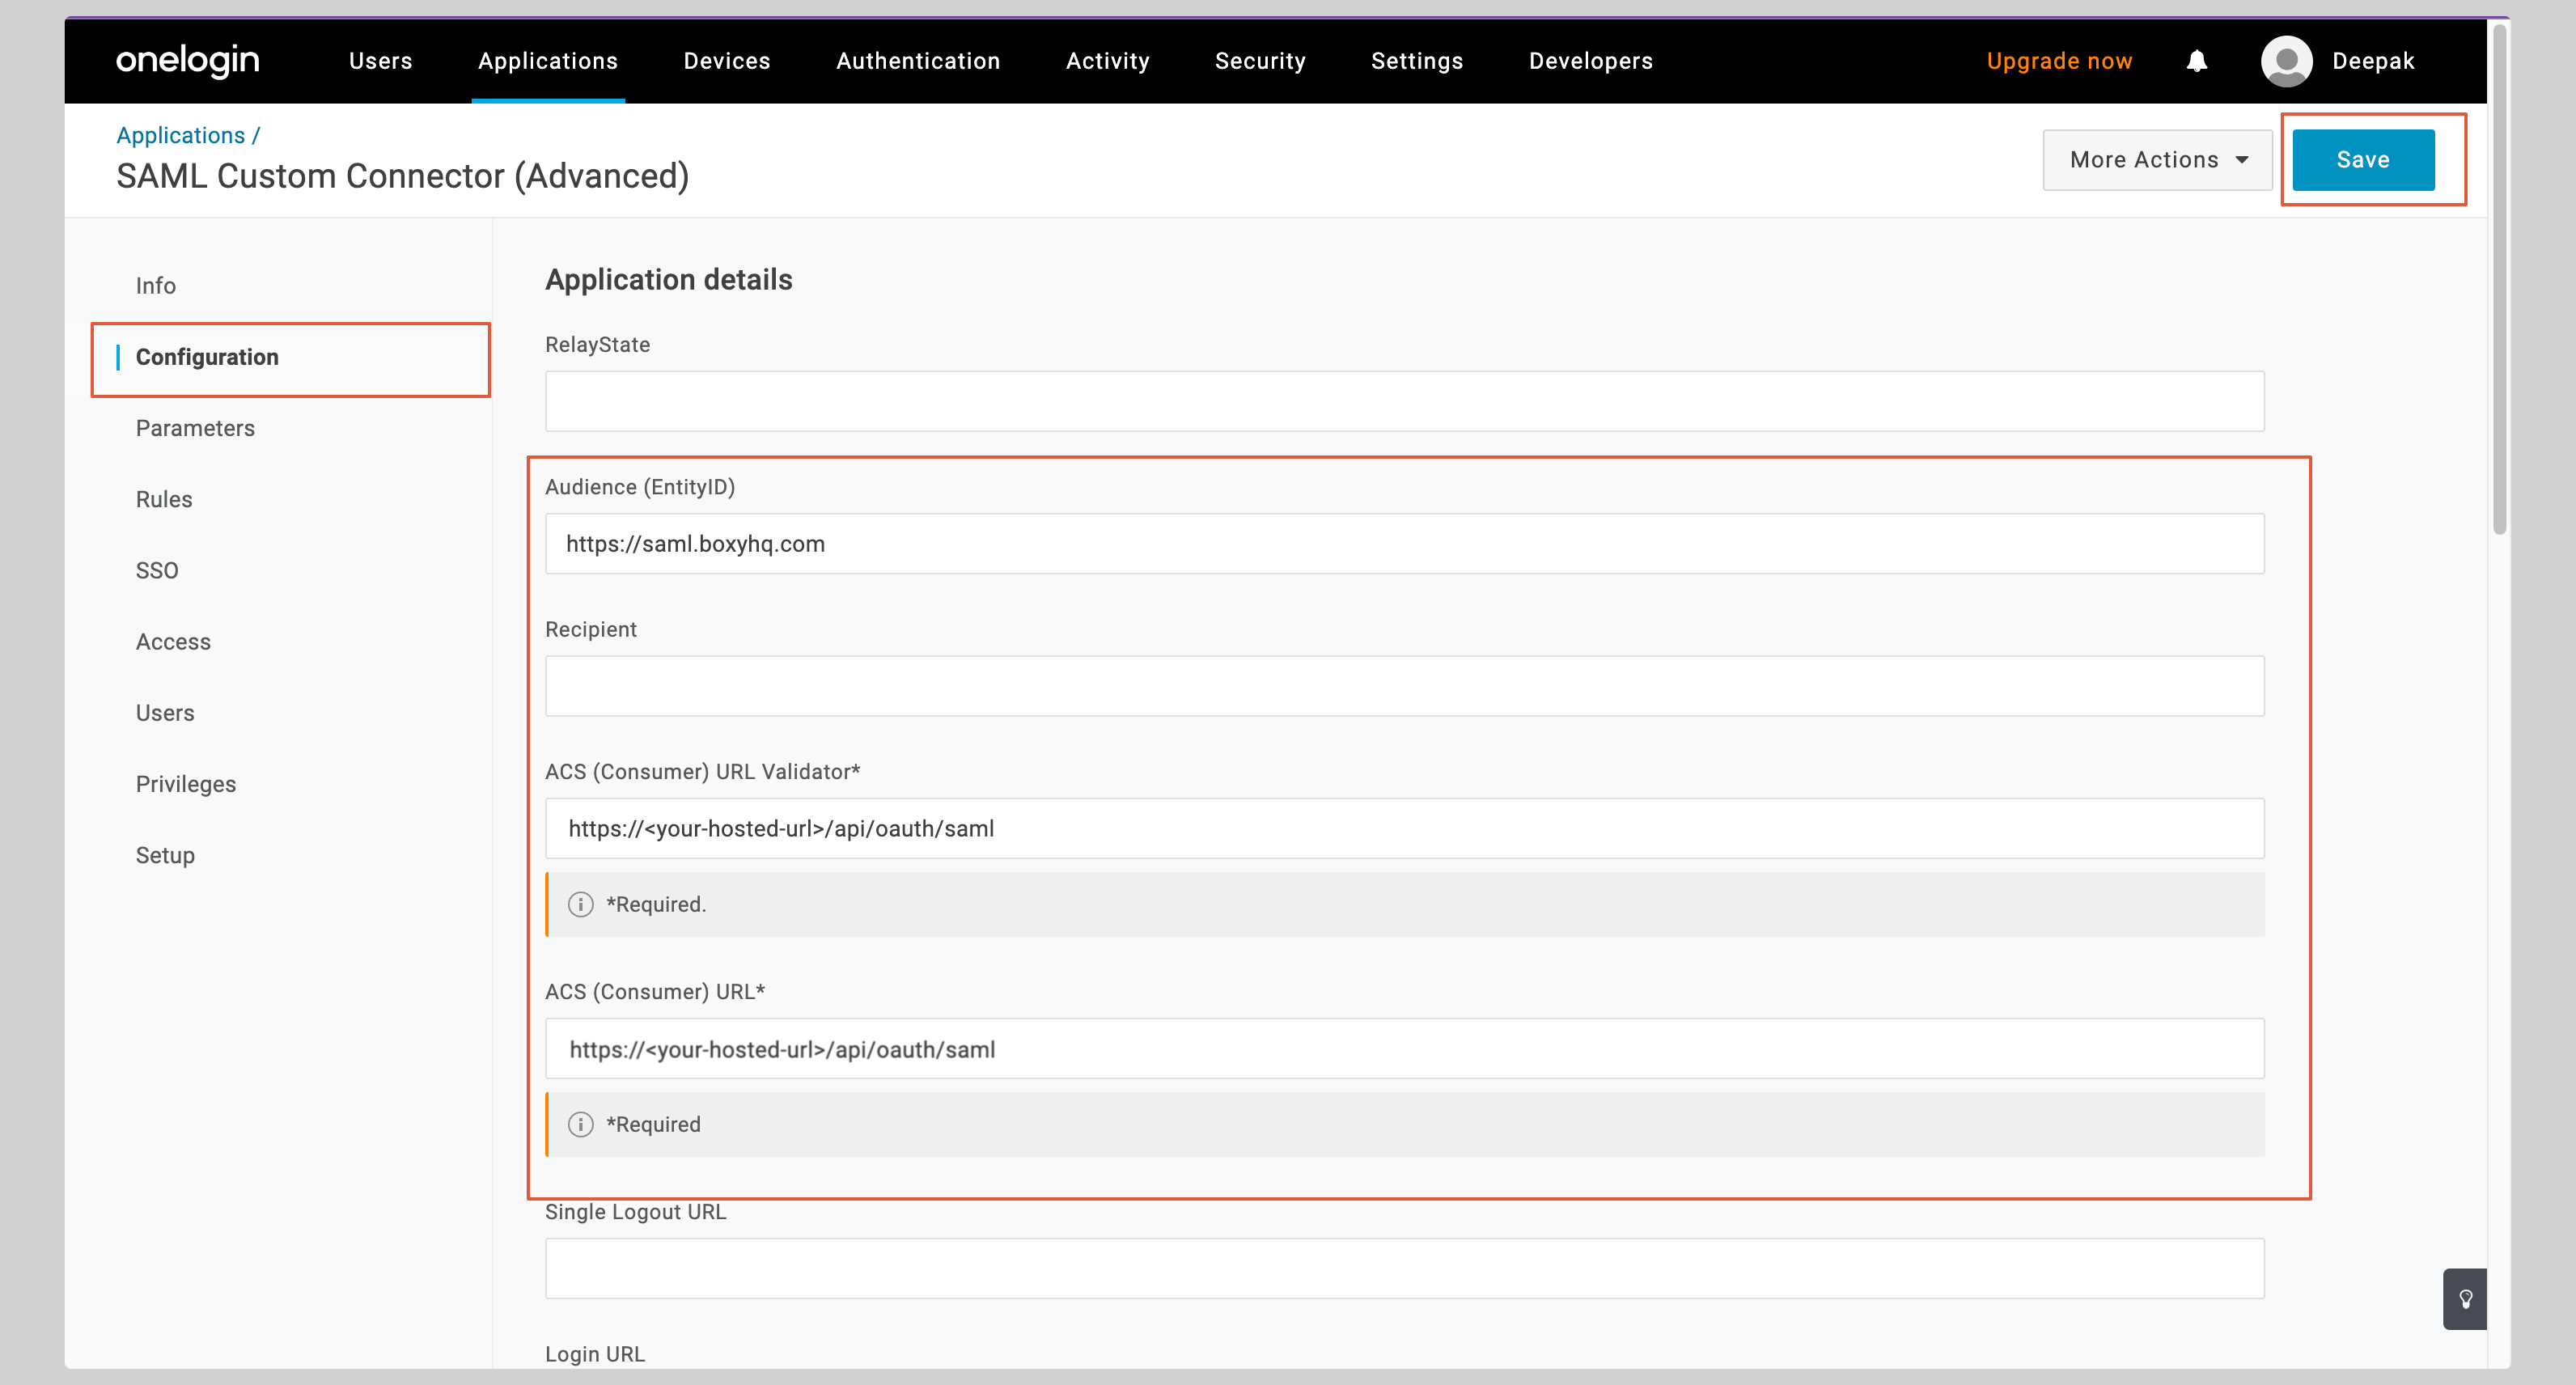
1. From your application, click the **Configuration** tab on the left to configure the application.
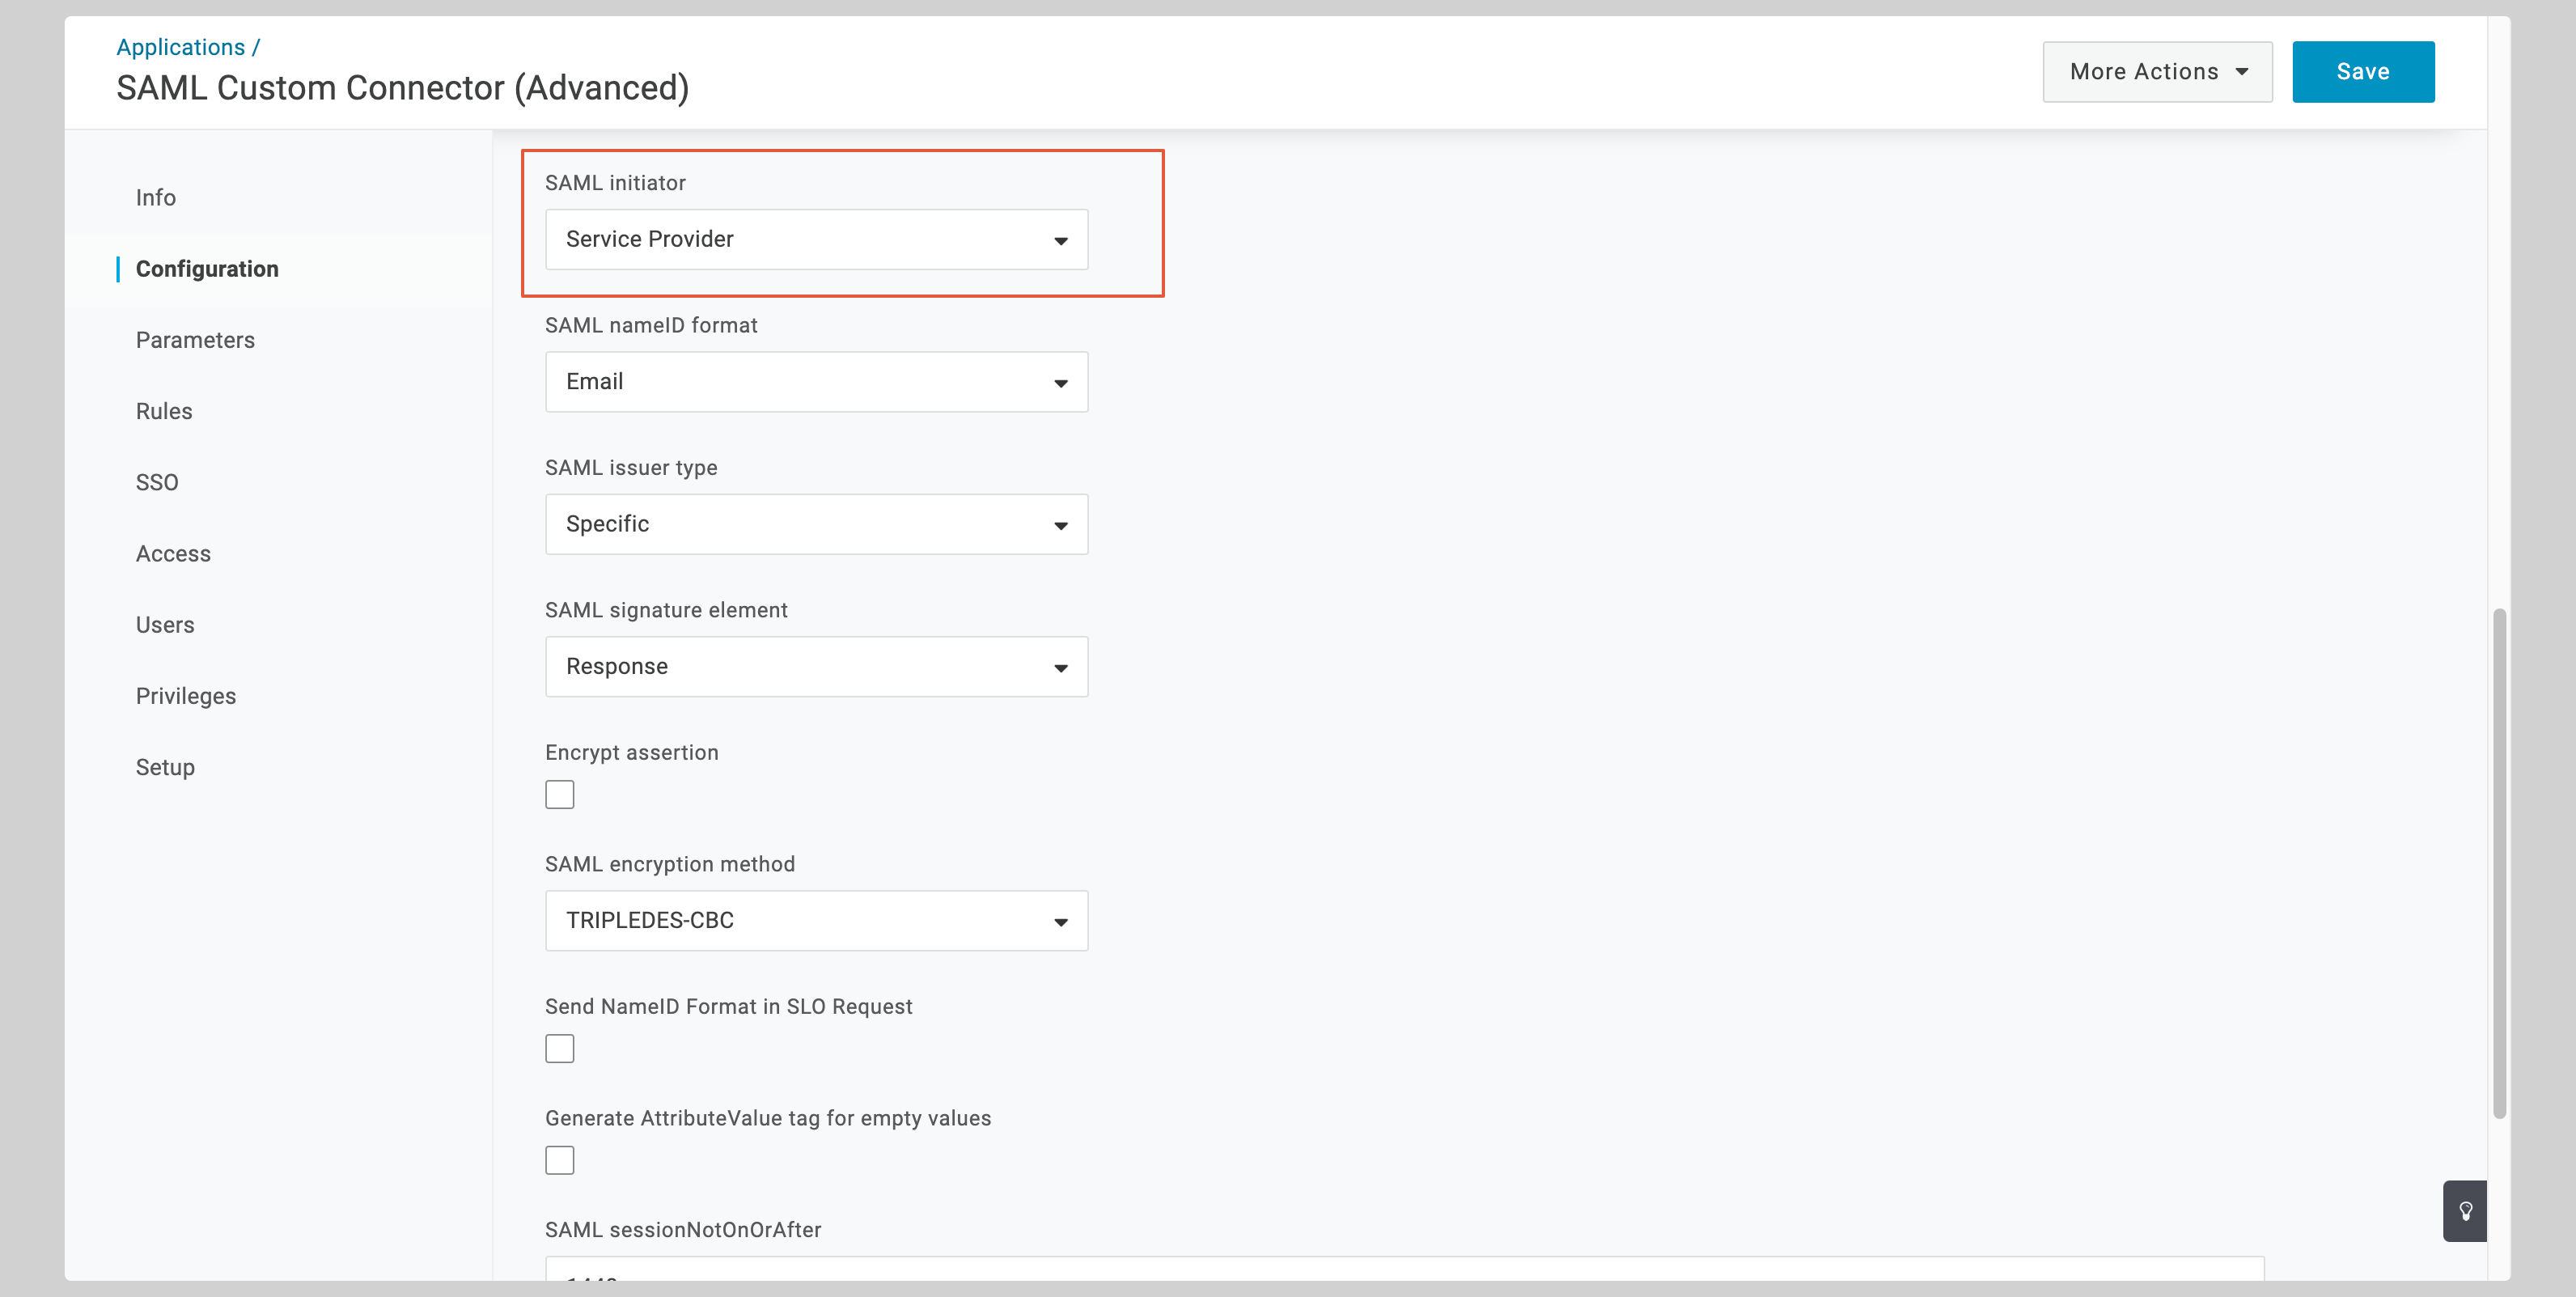
2. You have to enter the following values in the **Application details** section:
* **Audience (Entity ID)**
* **ACS (Consumer) URL Validator**
* **ACS (Consumer) URL**
* Select the **Service Provider** from the SAML initiator dropdown.
## Configure application
1. From your application, click the **Configuration** tab on the left to configure the application.
2. You have to enter the following values in the **Application details** section:
* **Audience (Entity ID)**
* **ACS (Consumer) URL Validator**
* **ACS (Consumer) URL**
* Select the **Service Provider** from the SAML initiator dropdown.
 Replace the values with the ones you have received from Aampe.
3. Click **Save** to save the configuration.
Replace the values with the ones you have received from Aampe.
3. Click **Save** to save the configuration.
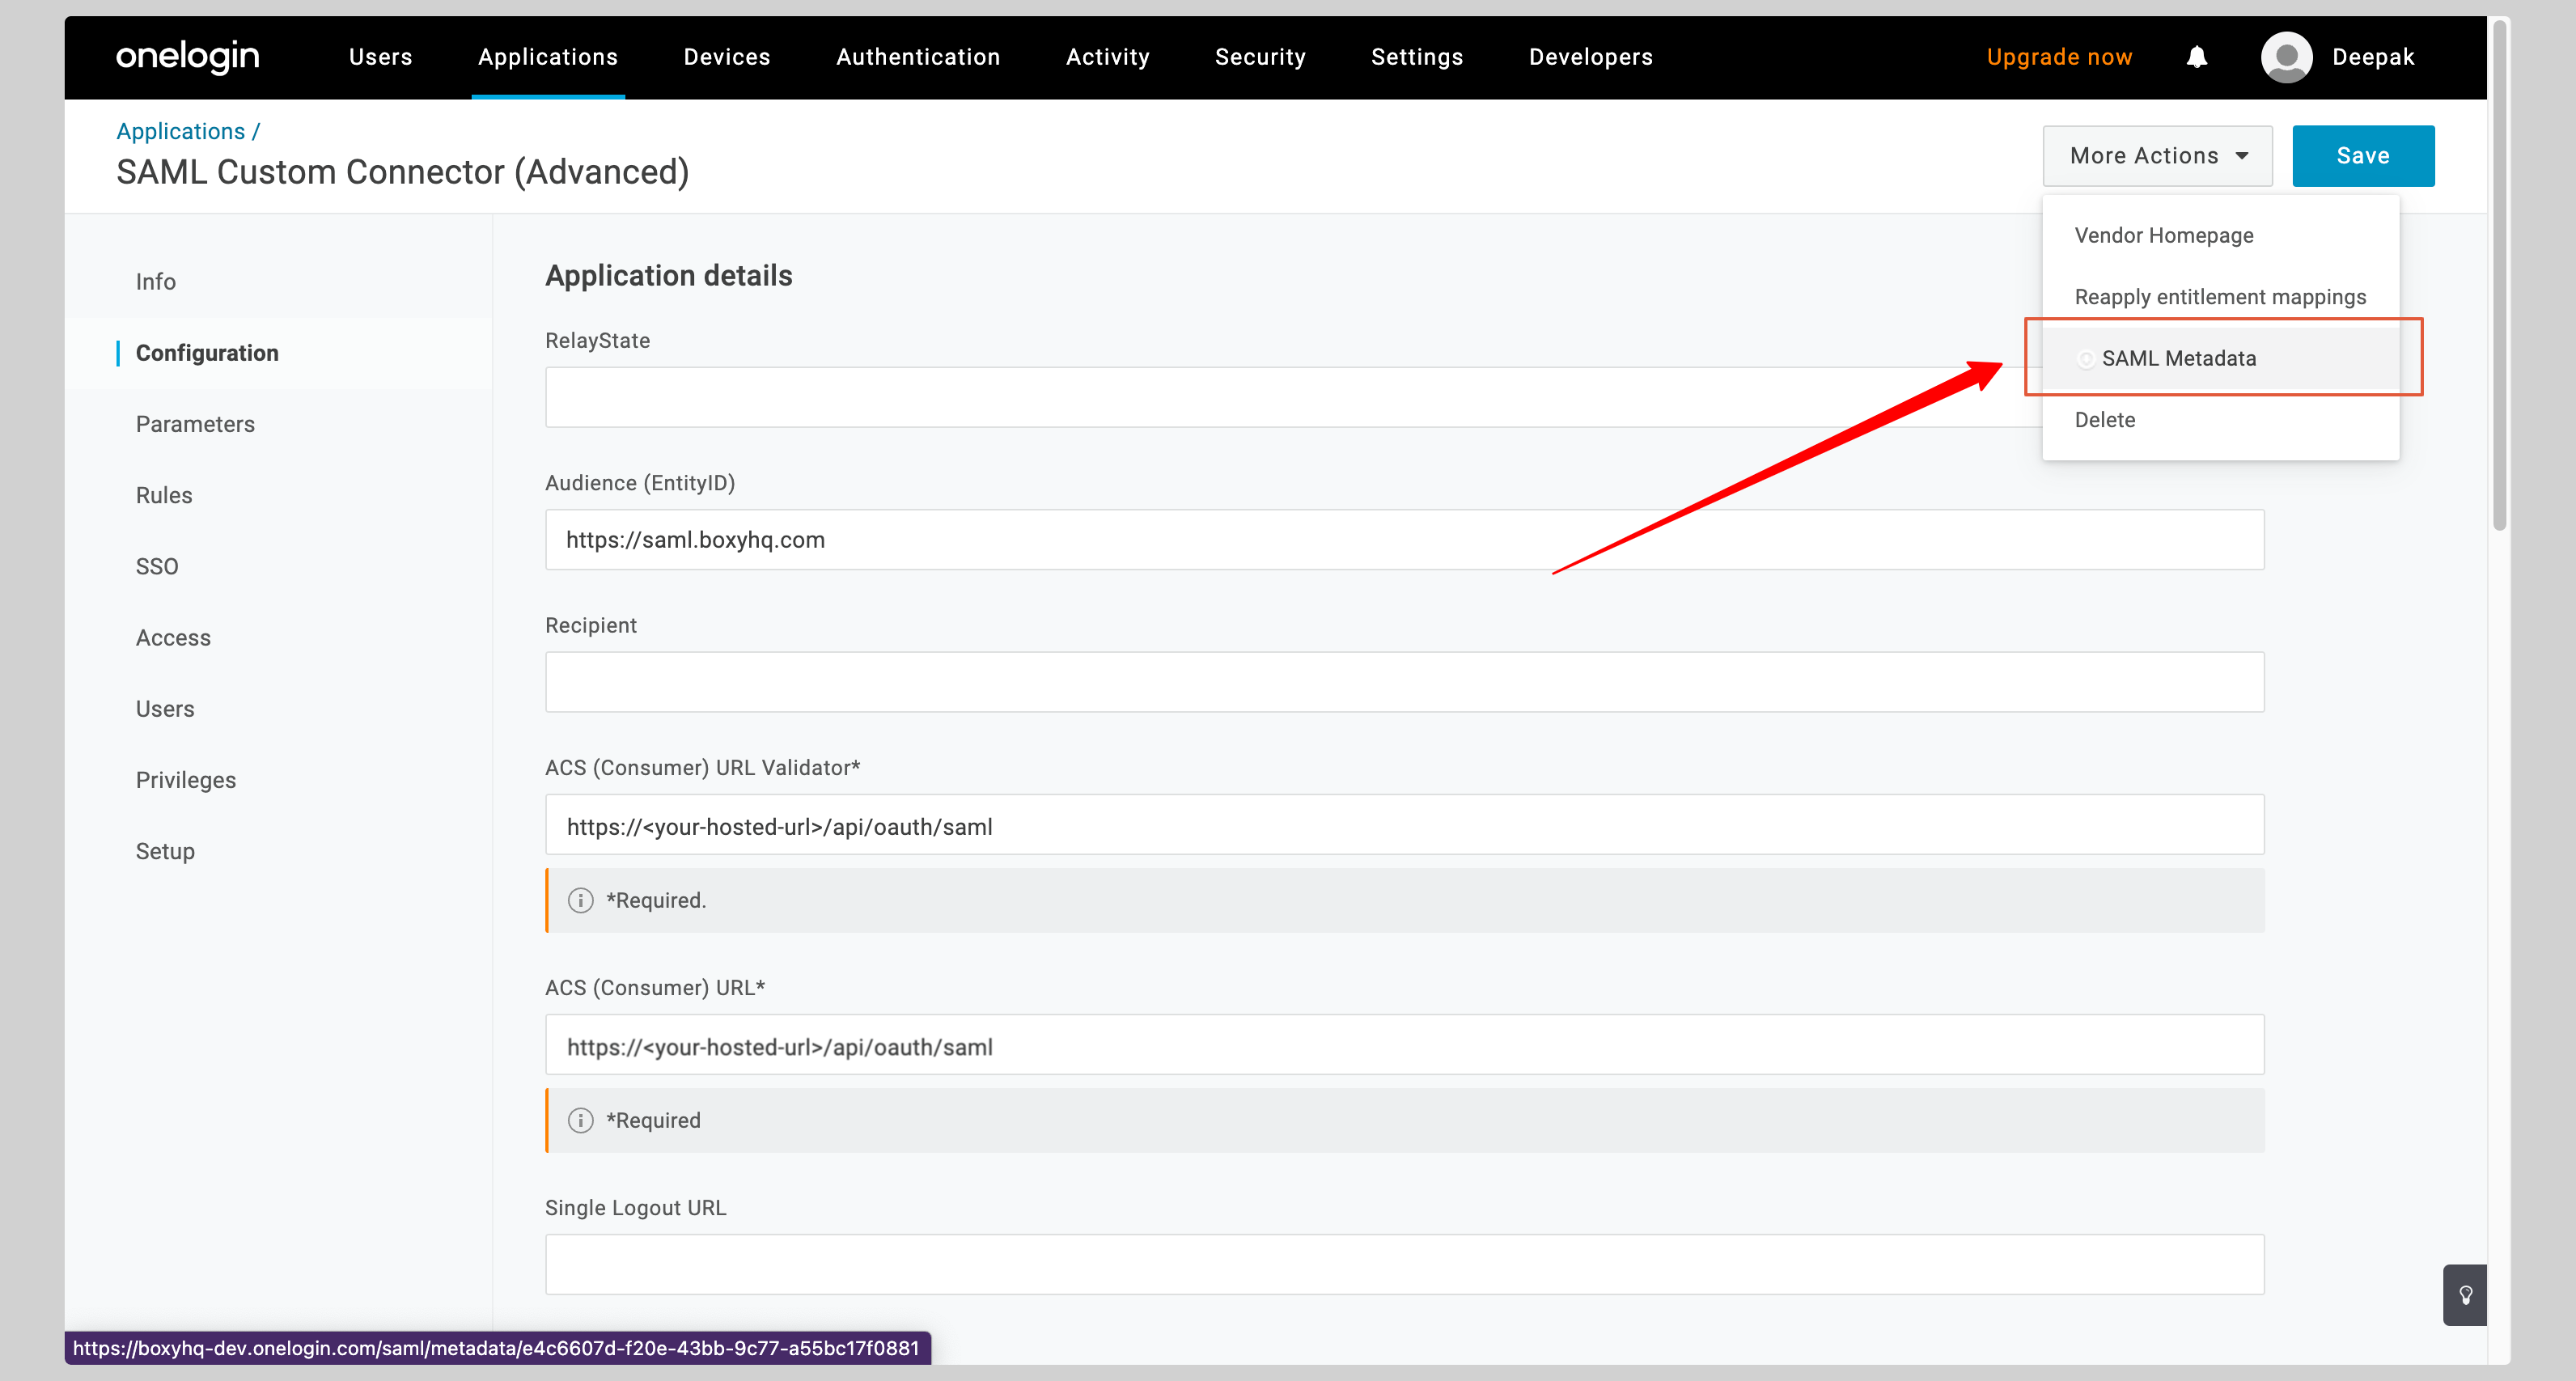
 4. Click the dropdown menu **More Actions** from the top right corner and click **SAML Metadata** to download the metadata XML file.
 ## Attribute mapping
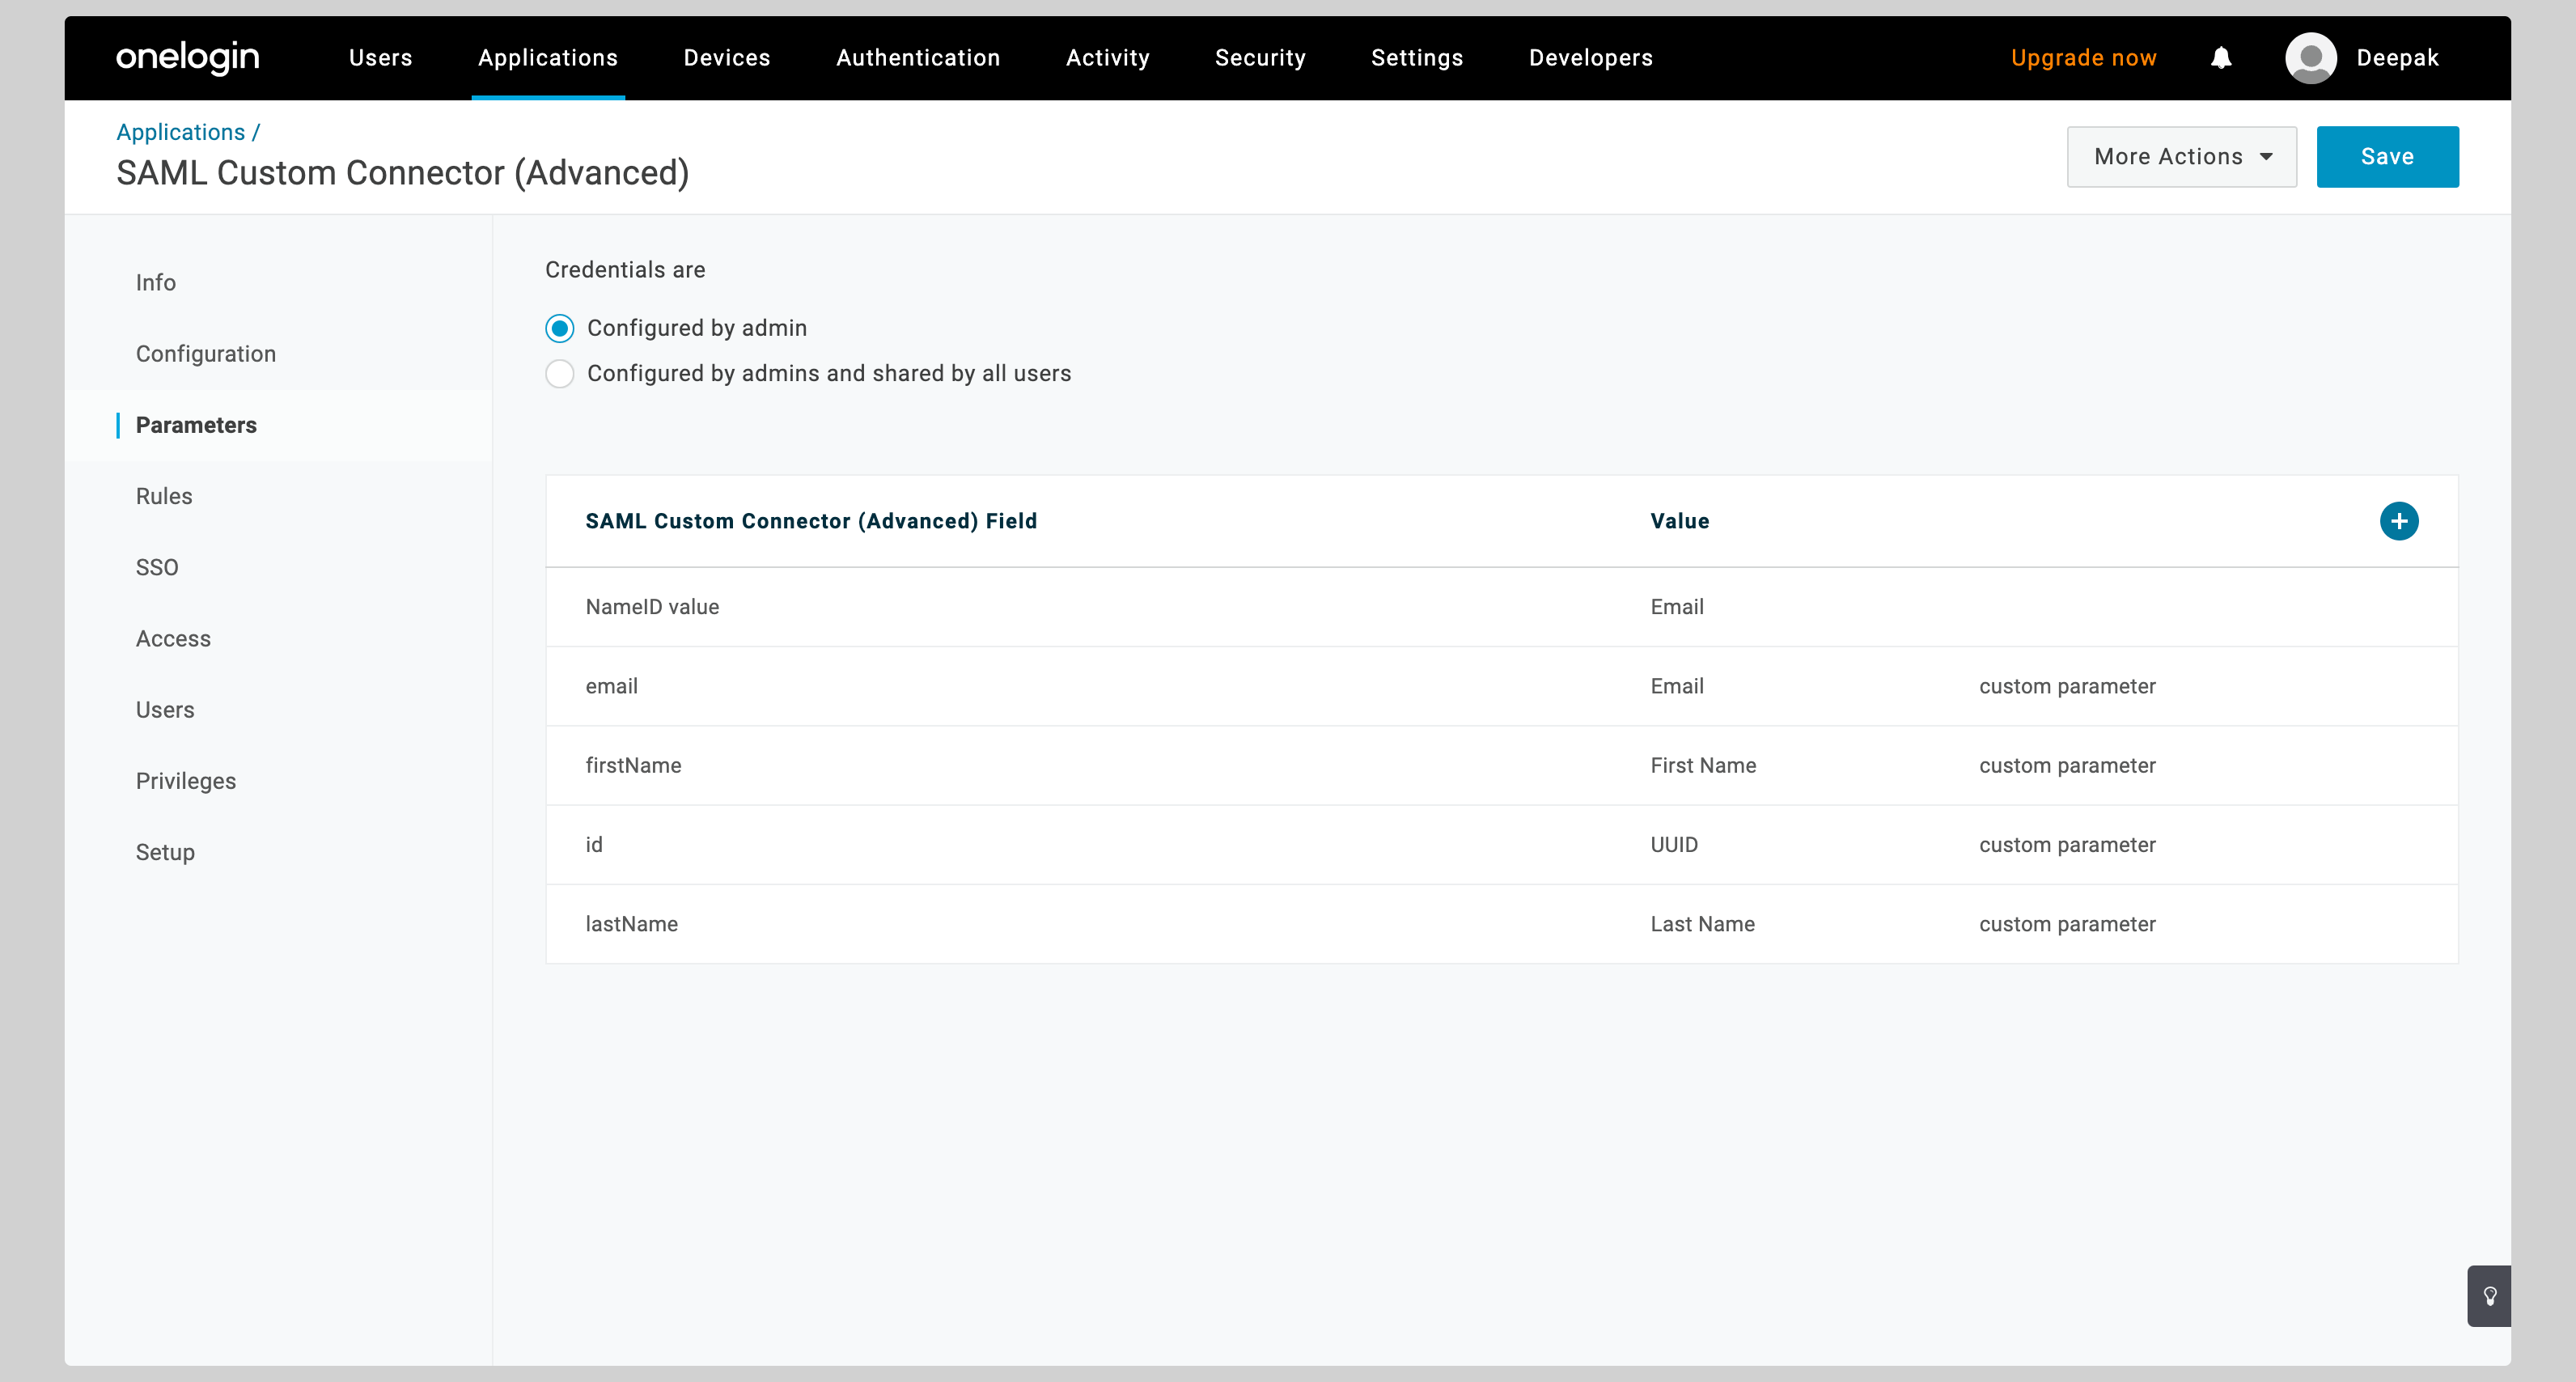
1. From your application, click the **Parameters** tab on the left.
2. You have to configure the following attributes:
| SAML Custom Connector Field | Value |
| :-------------------------- | :----------- |
| `id` | `UUID` |
| `firstName` | `First Name` |
| `lastName` | `Last Name` |
See the screenshot below.
## Attribute mapping
1. From your application, click the **Parameters** tab on the left.
2. You have to configure the following attributes:
| SAML Custom Connector Field | Value |
| :-------------------------- | :----------- |
| `id` | `UUID` |
| `firstName` | `First Name` |
| `lastName` | `Last Name` |
See the screenshot below.
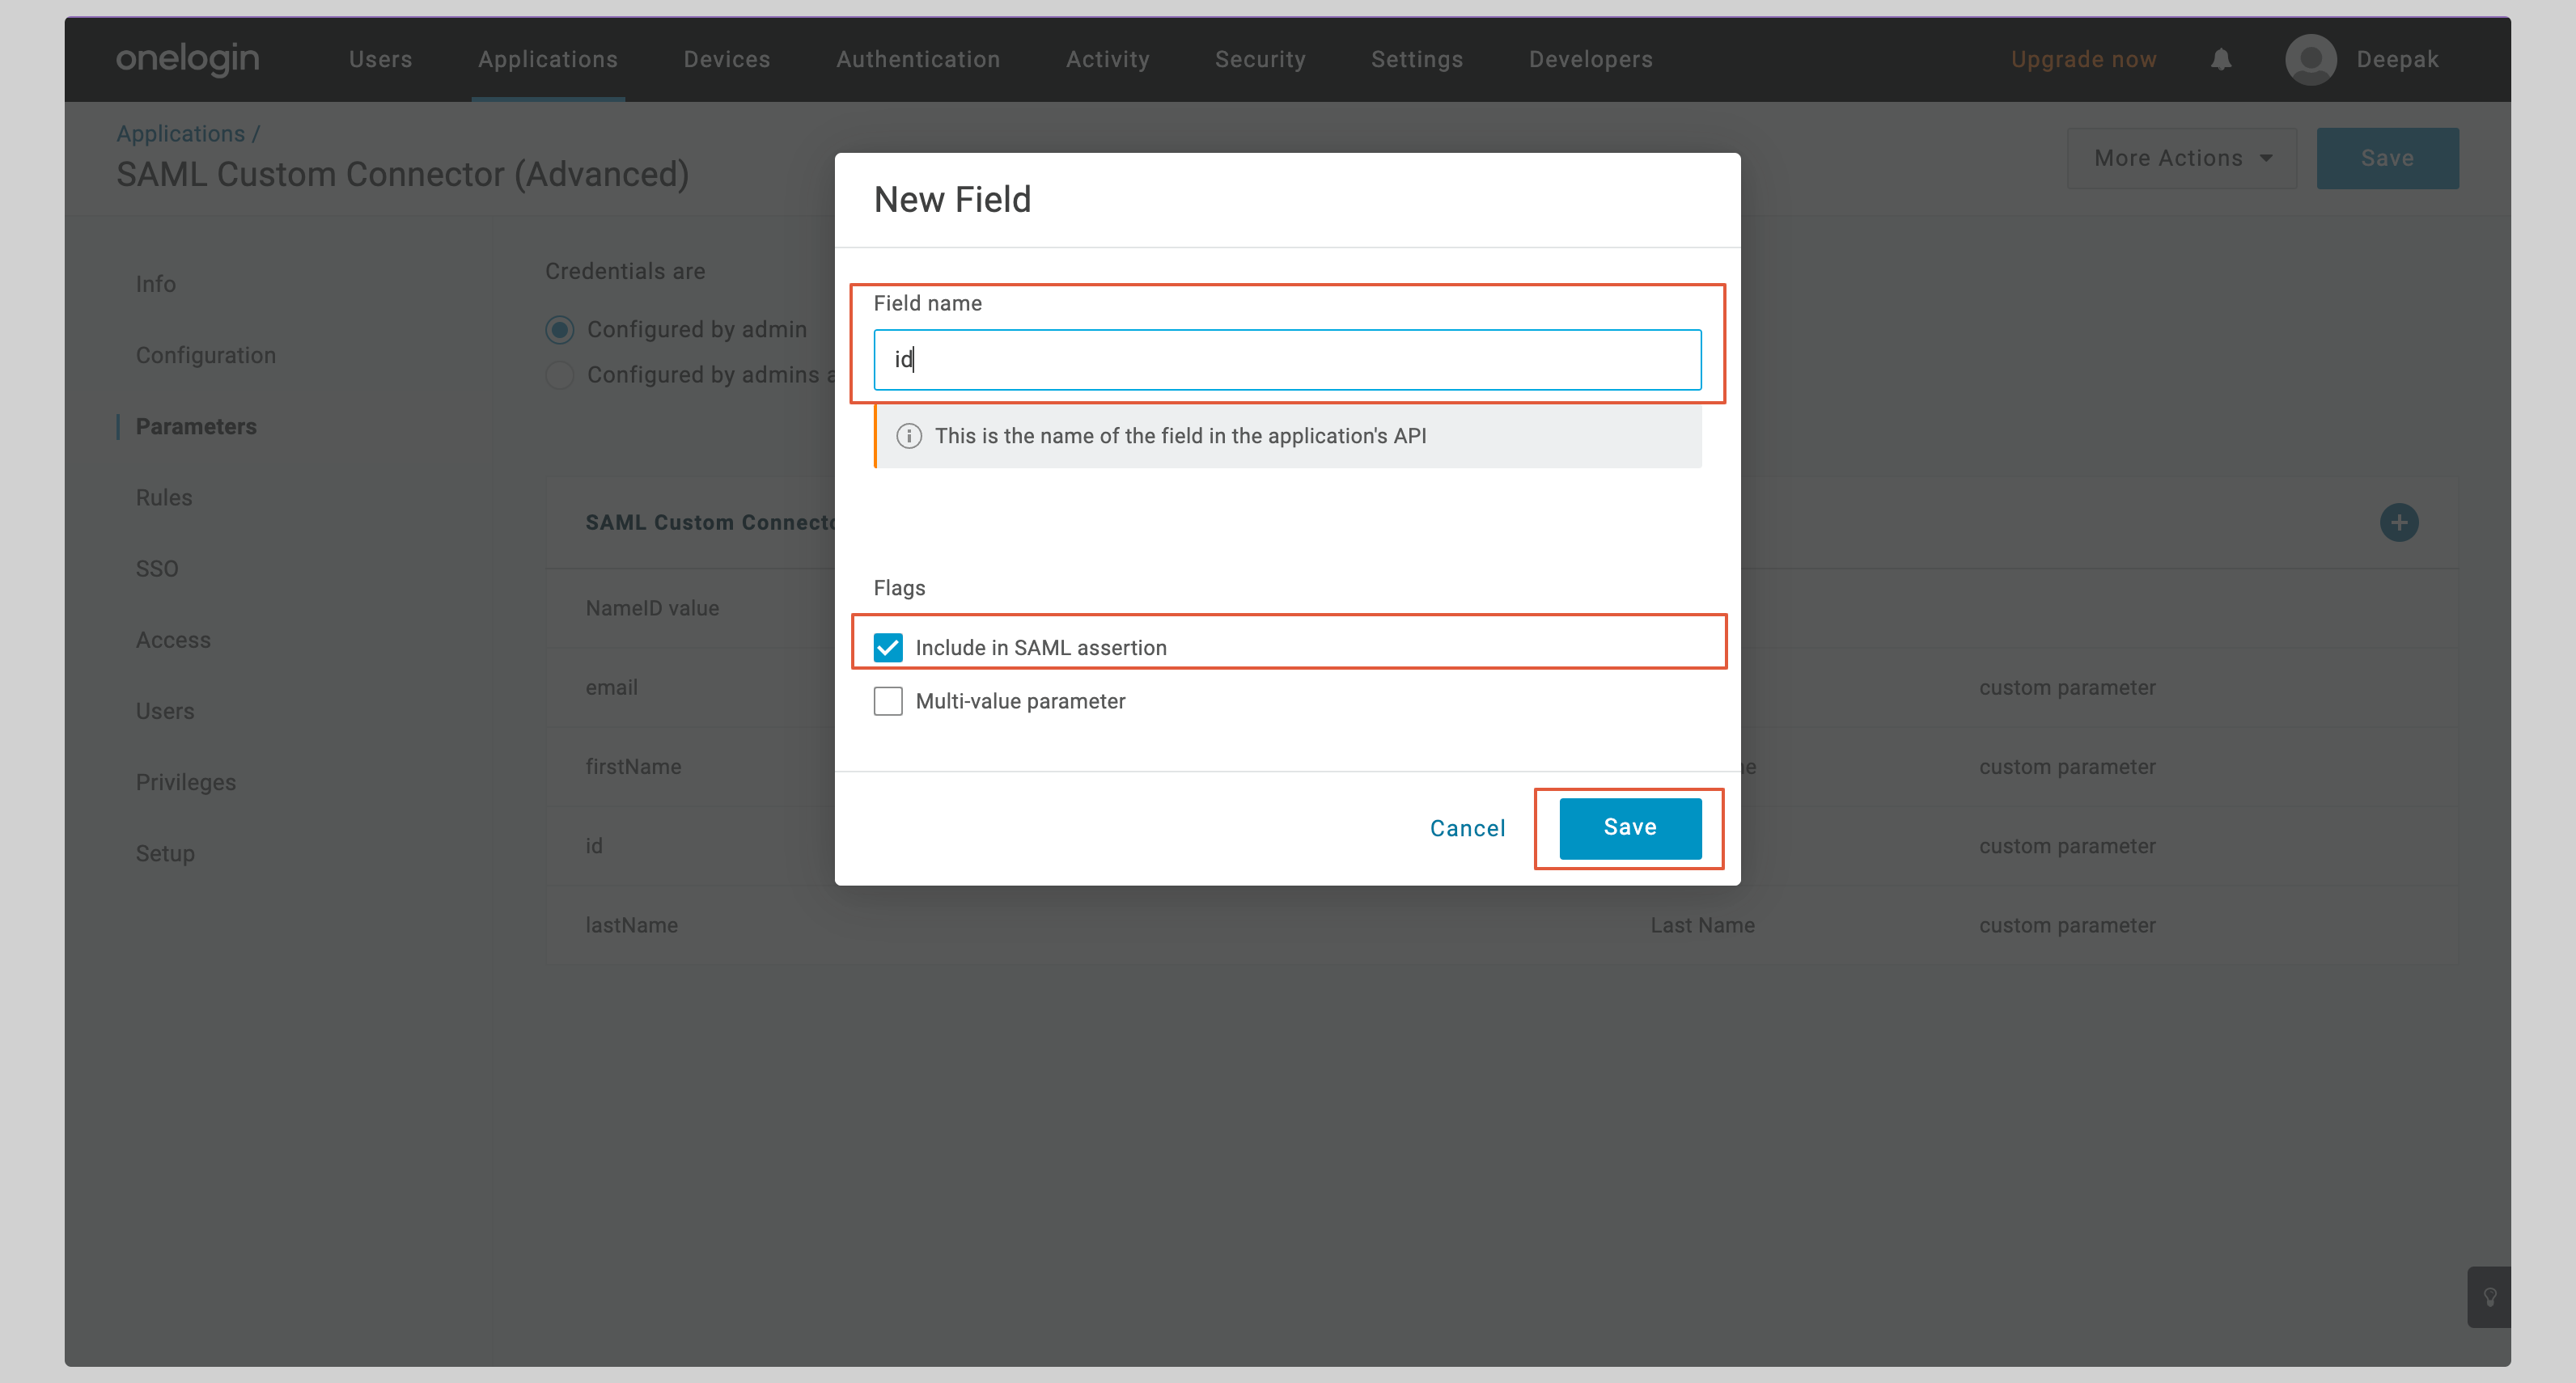
 See the below screenshot to see how to map the id attribute to UUID.
3. Enter `id` in the **Field name** input and check the **Include in SAML assertion** checkbox. Click **Save** to continue.
See the below screenshot to see how to map the id attribute to UUID.
3. Enter `id` in the **Field name** input and check the **Include in SAML assertion** checkbox. Click **Save** to continue.
 4. On the next screen, select **UUID** from the **Value** dropdown and click **Save**.
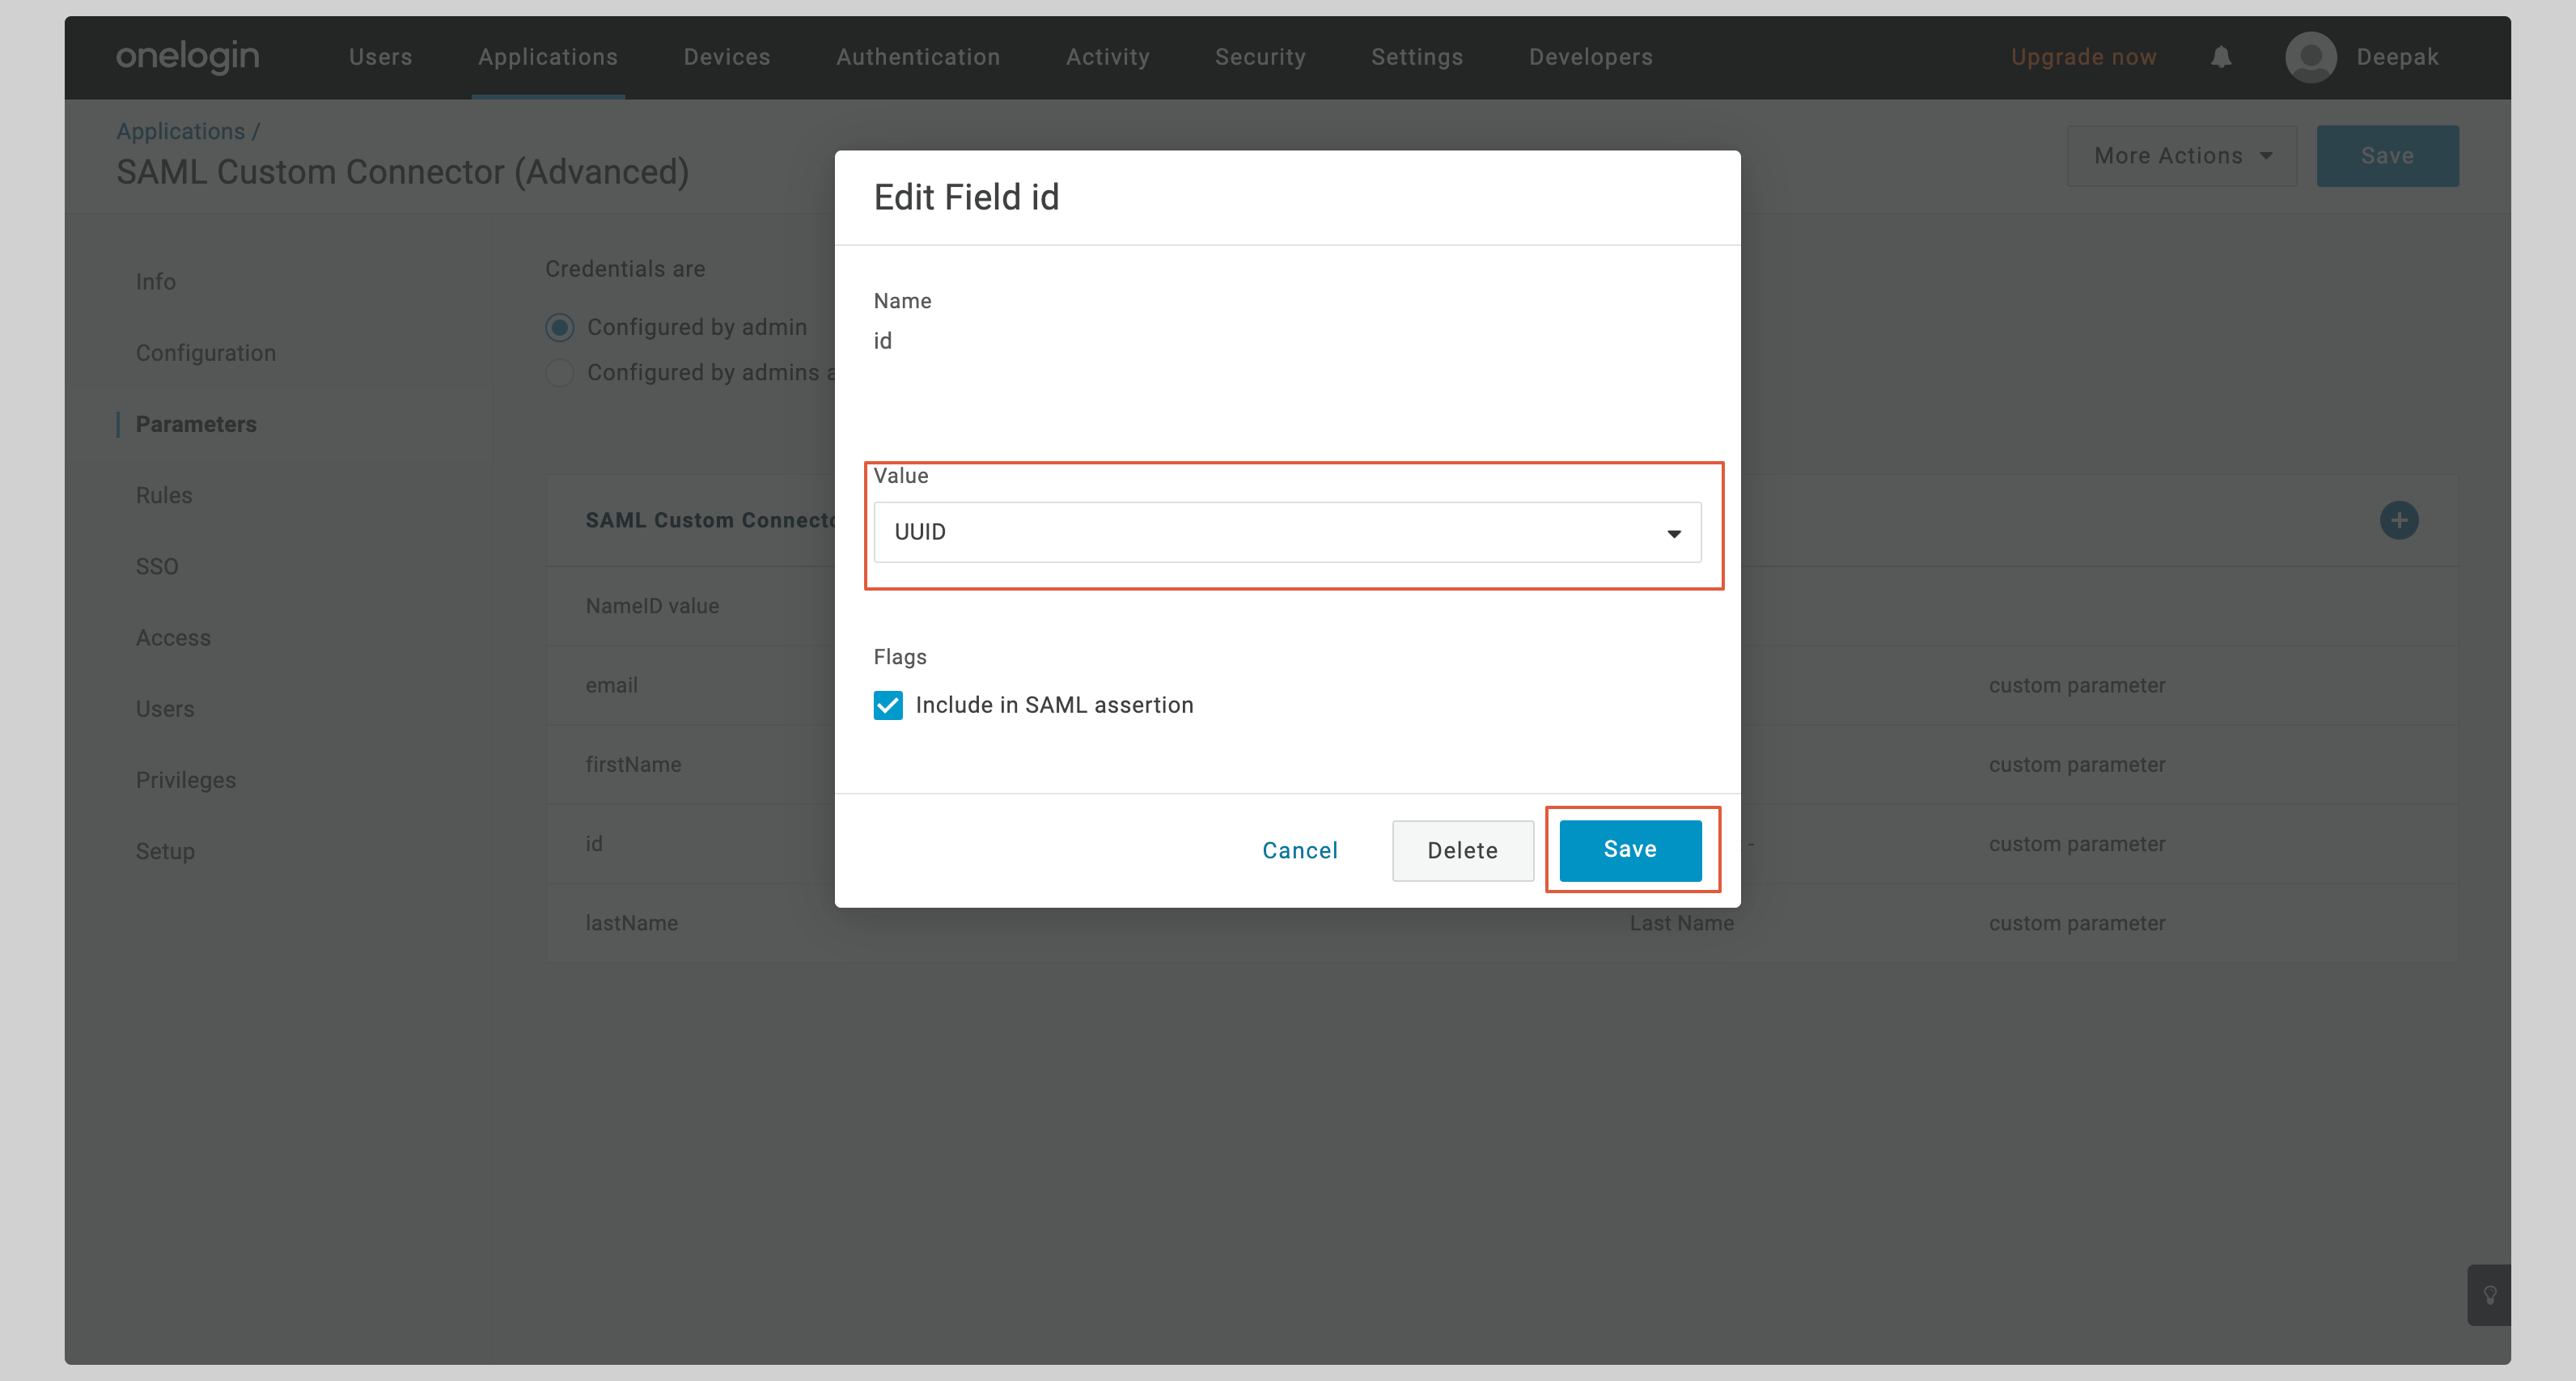 5. Do the same for the other attributes (email, firstName, lastName).
## Next steps
You've successfully configured your custom SAML application for OneLogin SAML. At this stage, you can assign users to your application and start using it.
5. Do the same for the other attributes (email, firstName, lastName).
## Next steps
You've successfully configured your custom SAML application for OneLogin SAML. At this stage, you can assign users to your application and start using it.