> ## Documentation Index
> Fetch the complete documentation index at: https://kb.aampe.com/llms.txt
> Use this file to discover all available pages before exploring further.
# Microsoft Entra ID (formerly Azure AD) SAML SSO
> Here we show you how to set up your own custom SAML application for Microsoft Entra ID SAML
## Create application
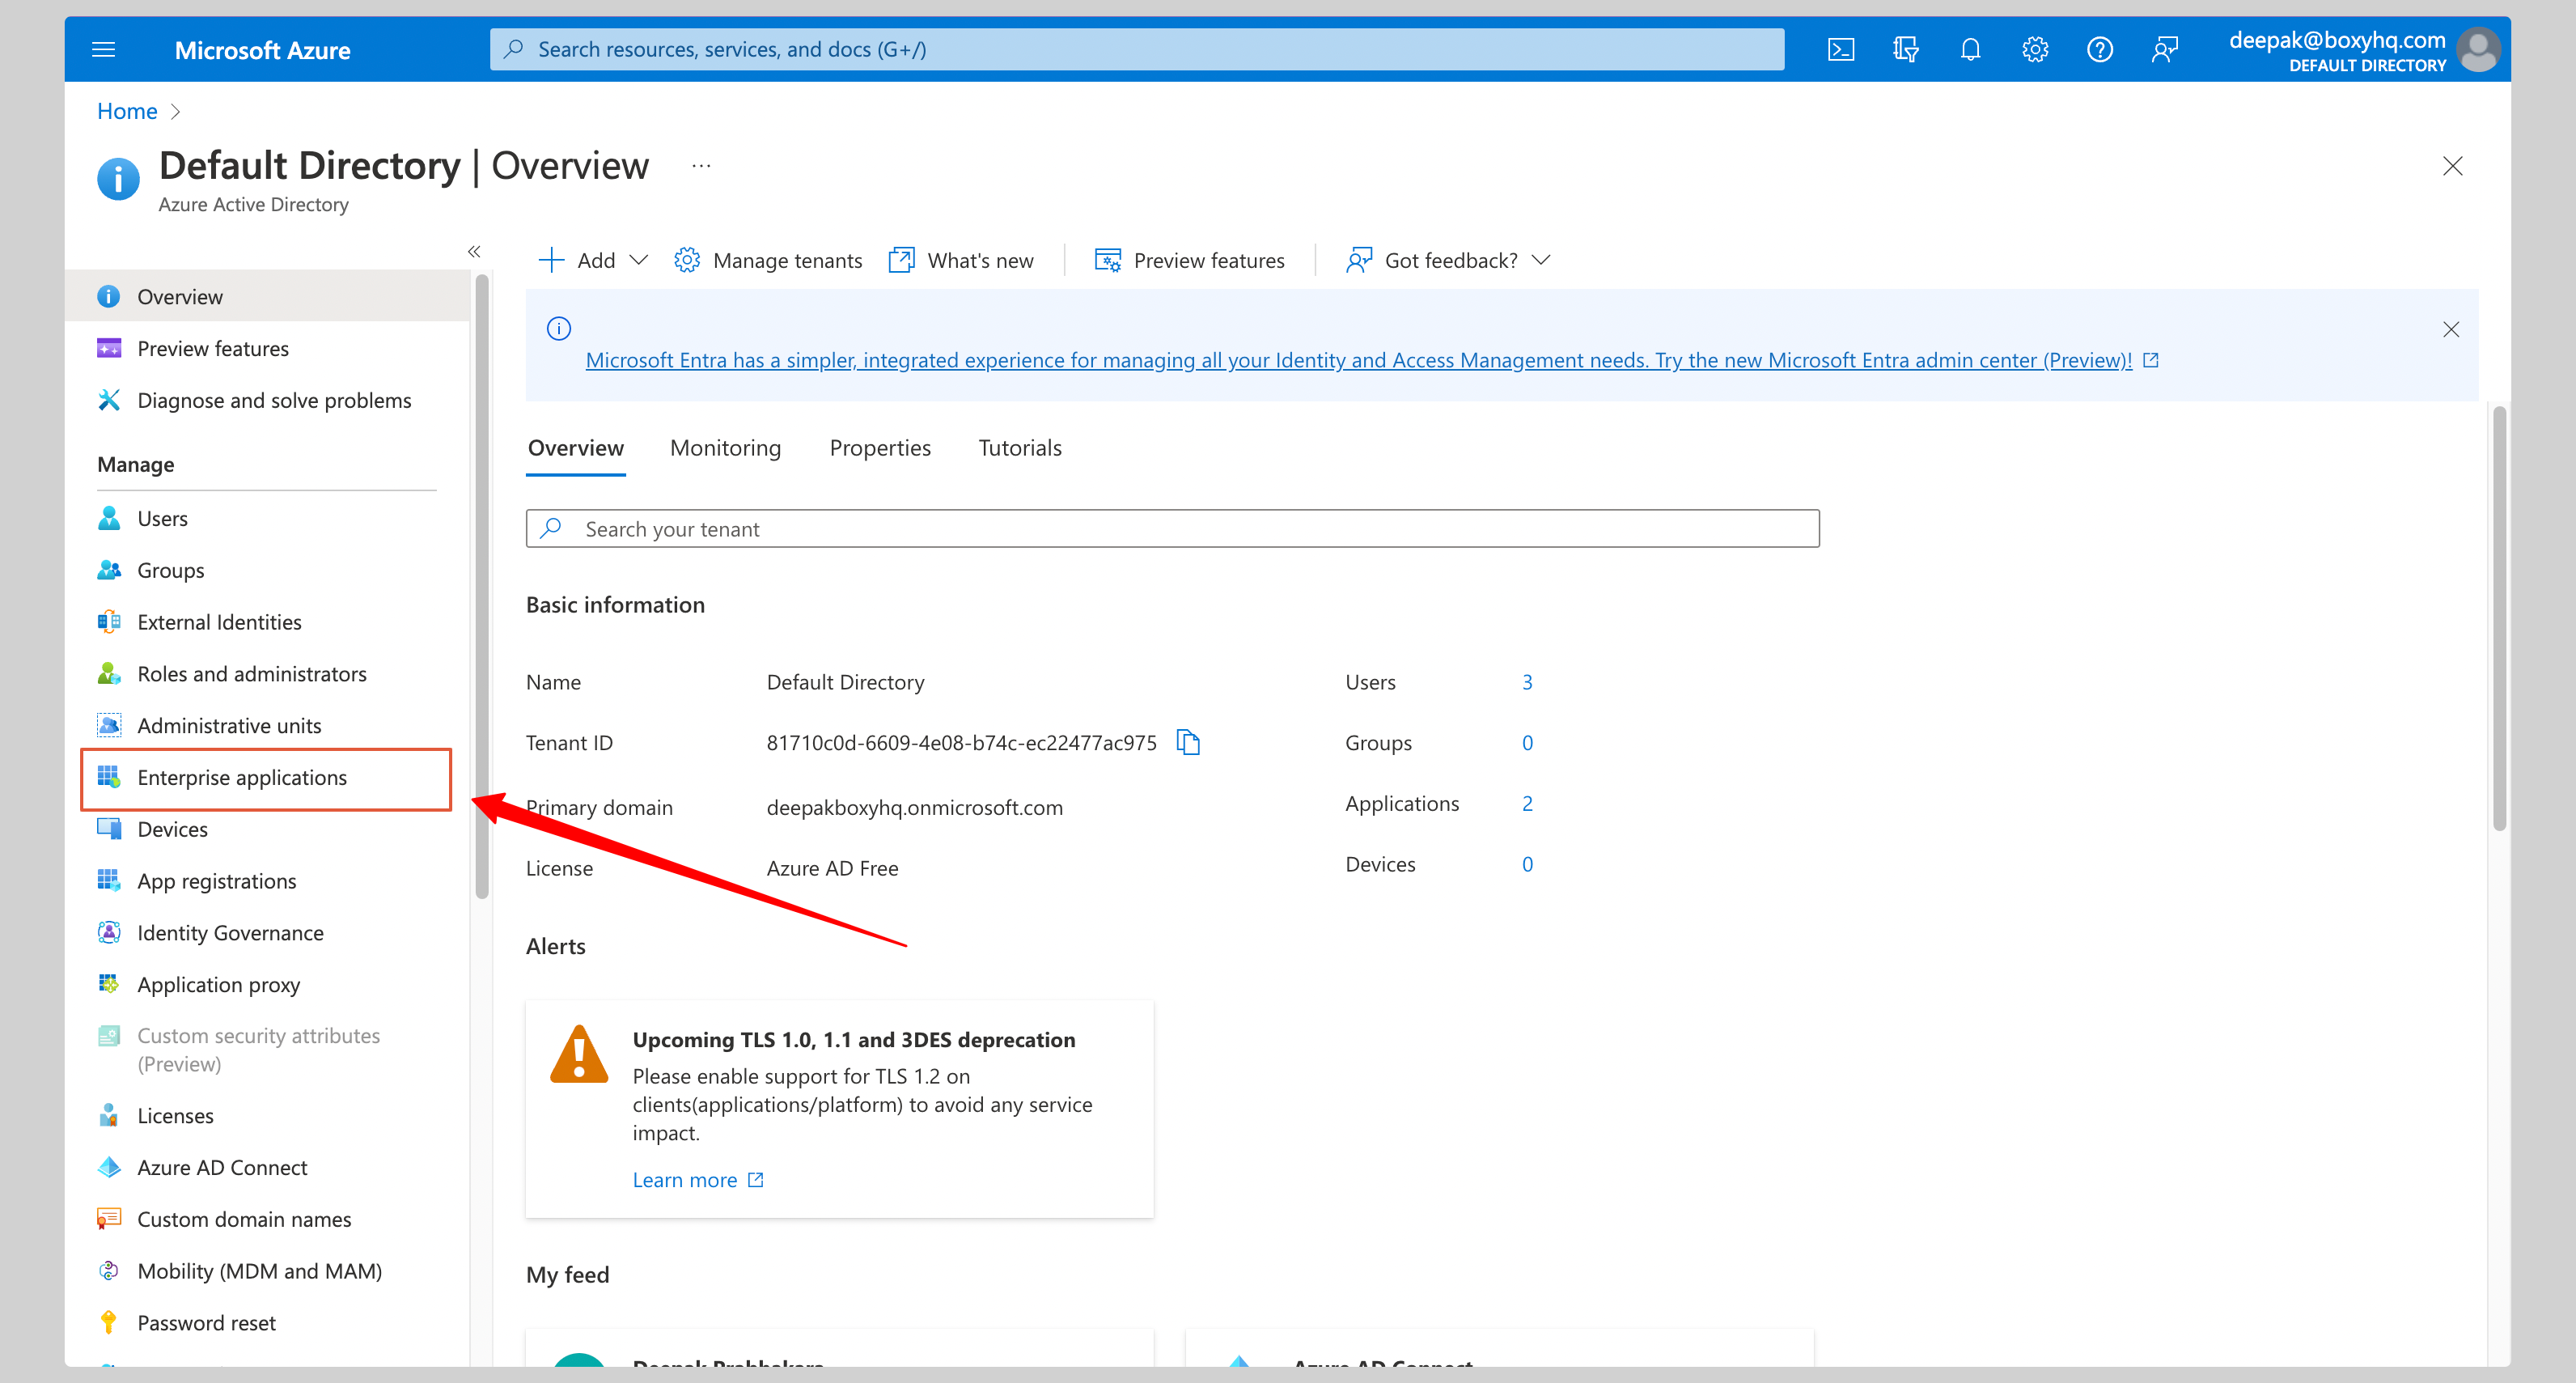
From your Azure Admin console, click **Enterprise applications** from the left navigation menu.
 If your application is already created, choose it from the list and move to the section [Configure Application](#configure-application).
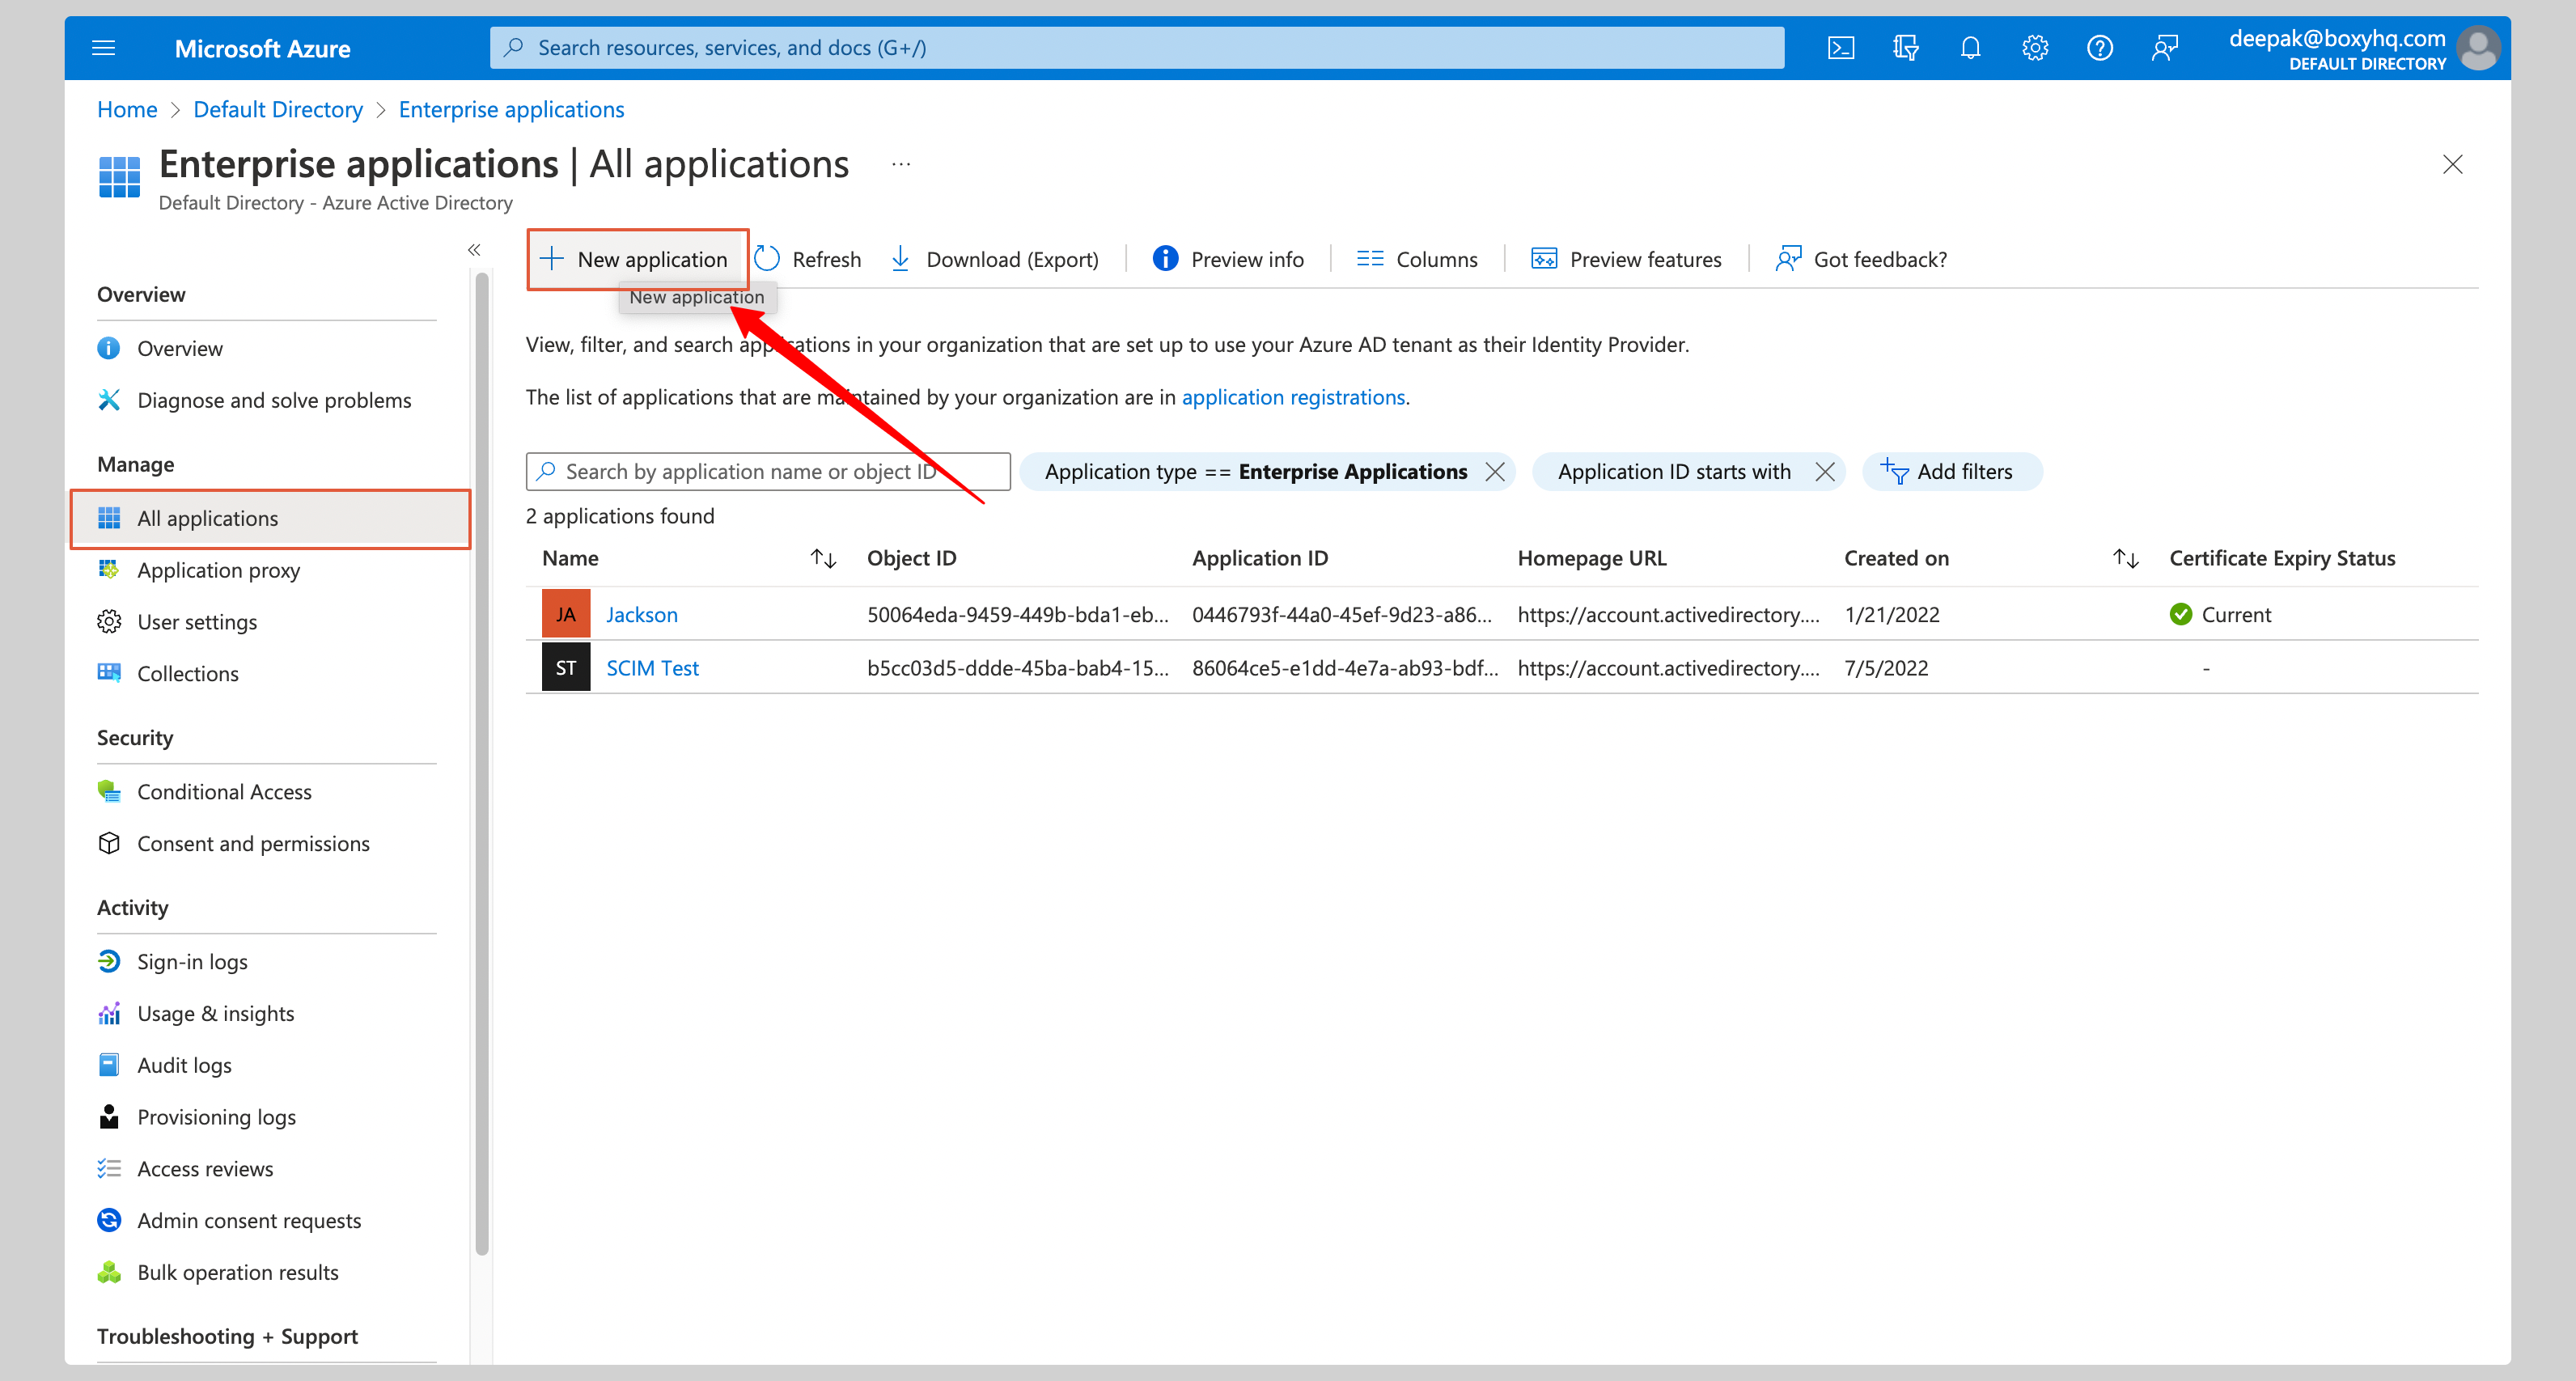
If you haven't created a SAML application, click **New application** from the top to create a new application.
If your application is already created, choose it from the list and move to the section [Configure Application](#configure-application).
If you haven't created a SAML application, click **New application** from the top to create a new application.
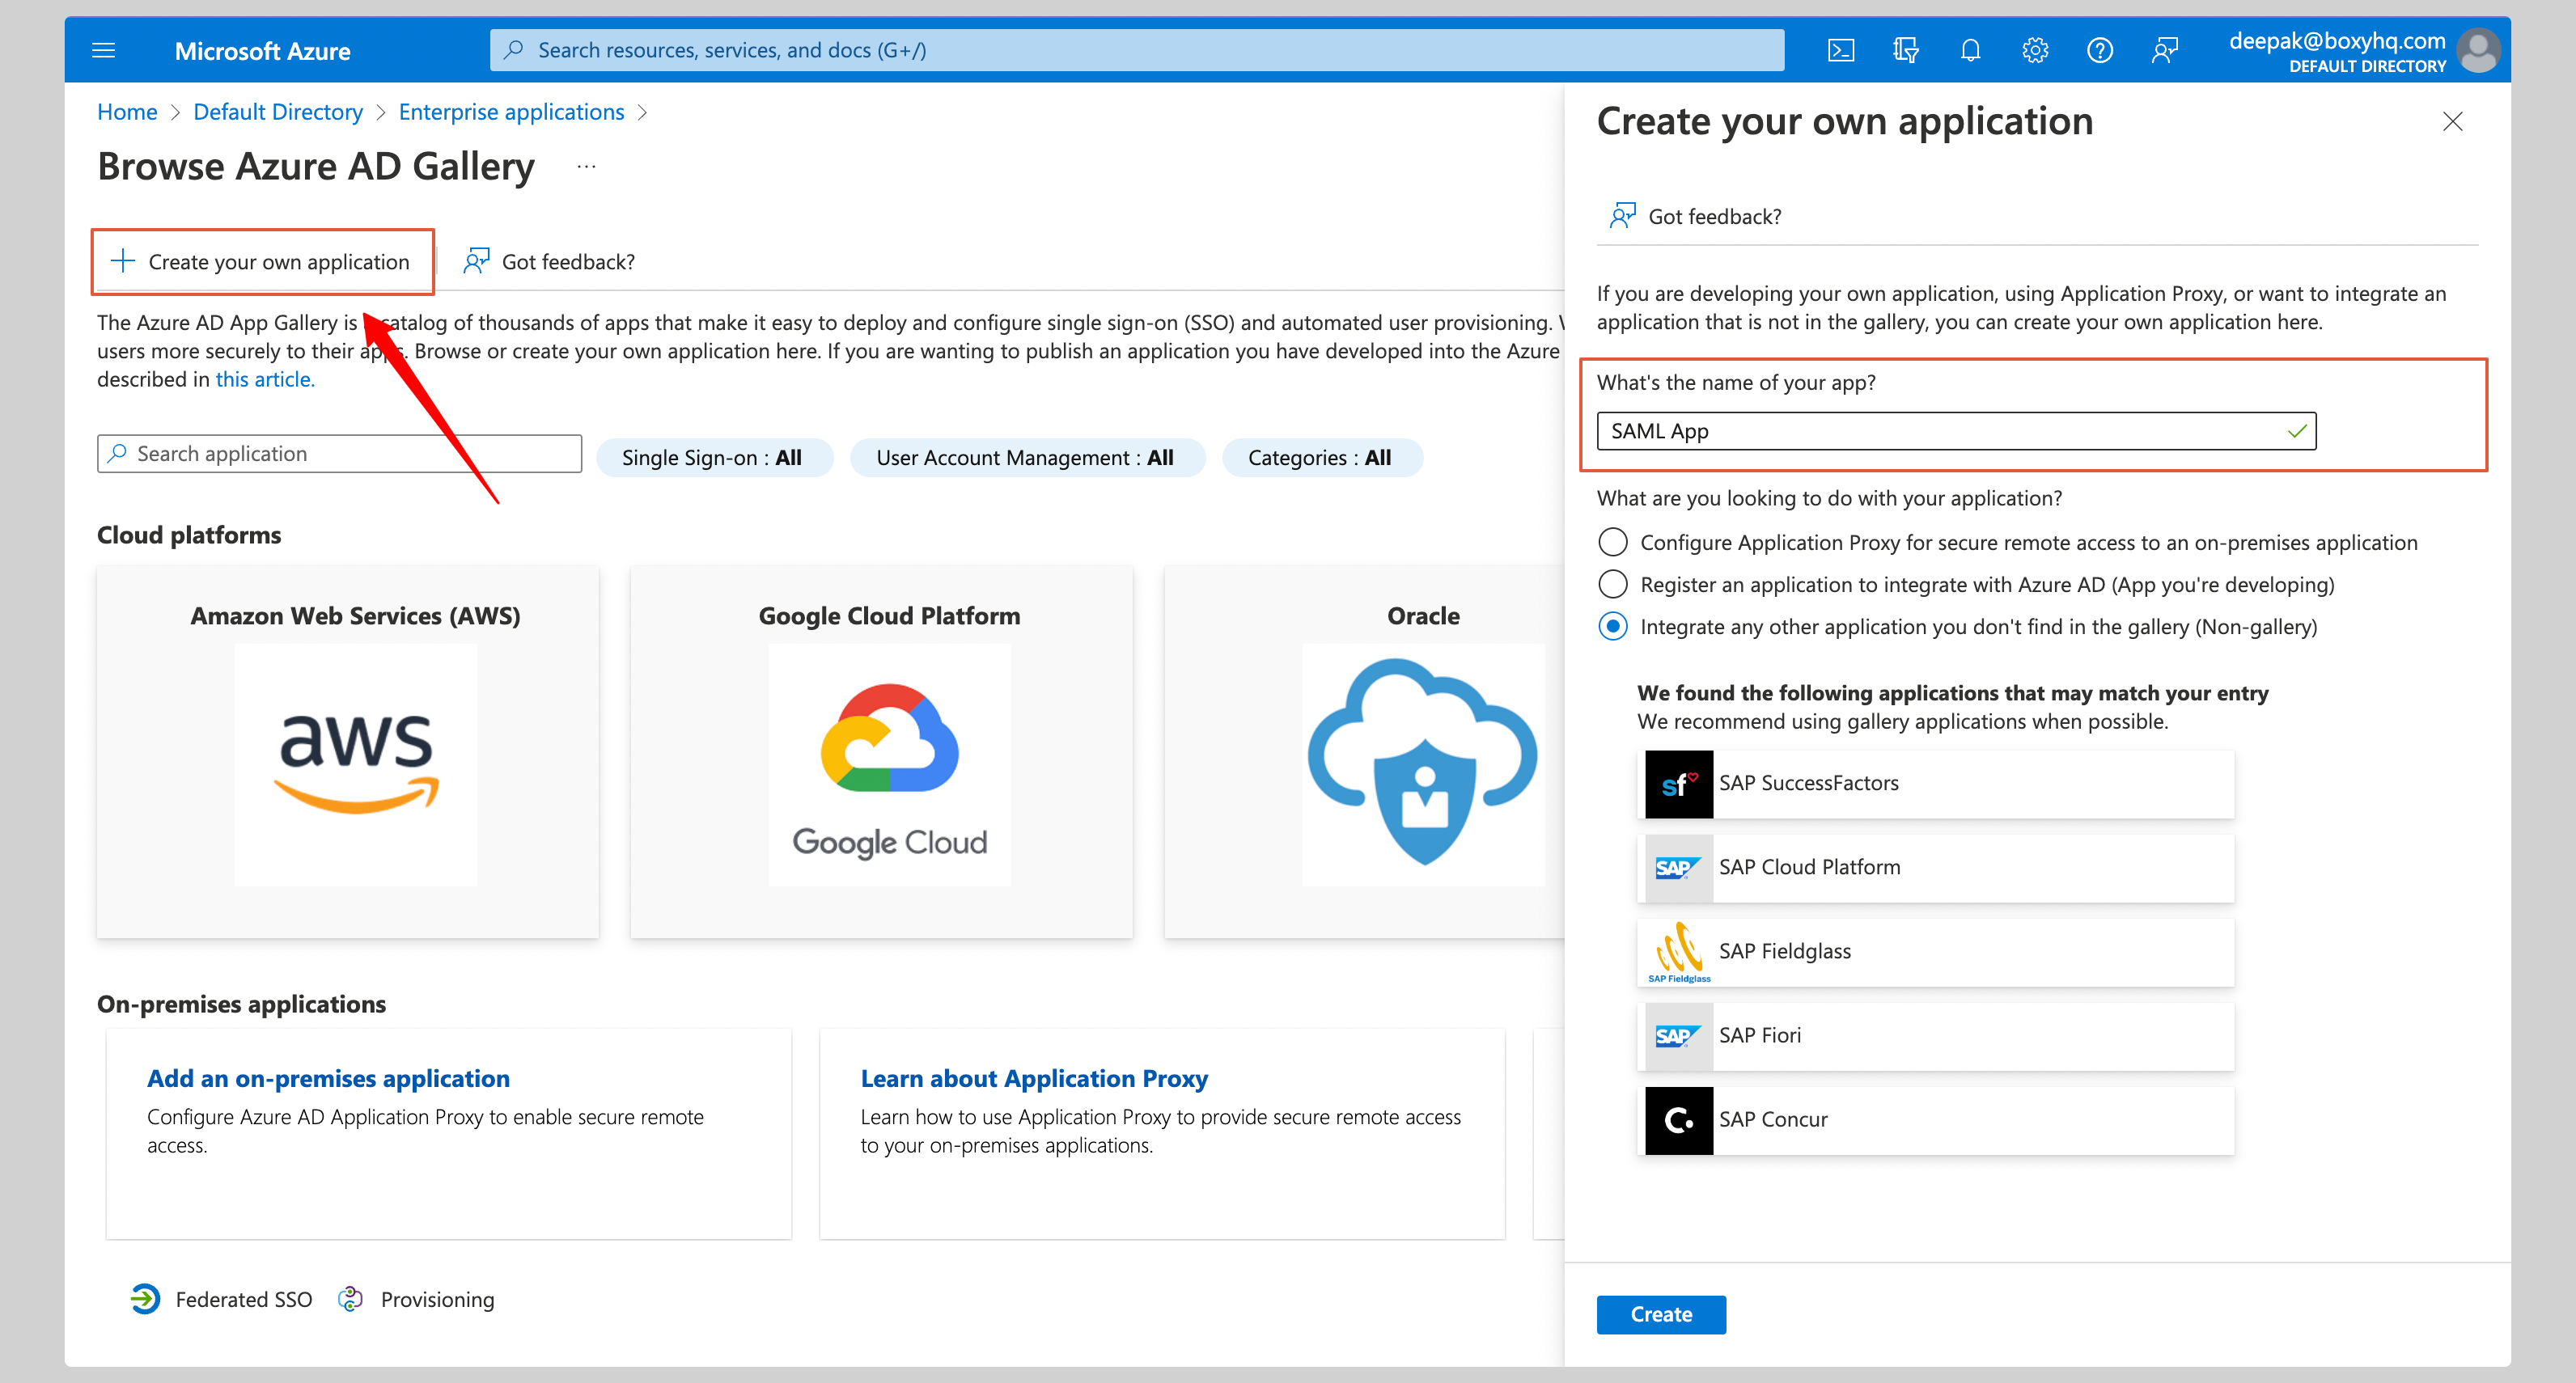
 From the next screen, click **Create your own application**. Give your application a **Name** and click **Create**.
 ## Configure application
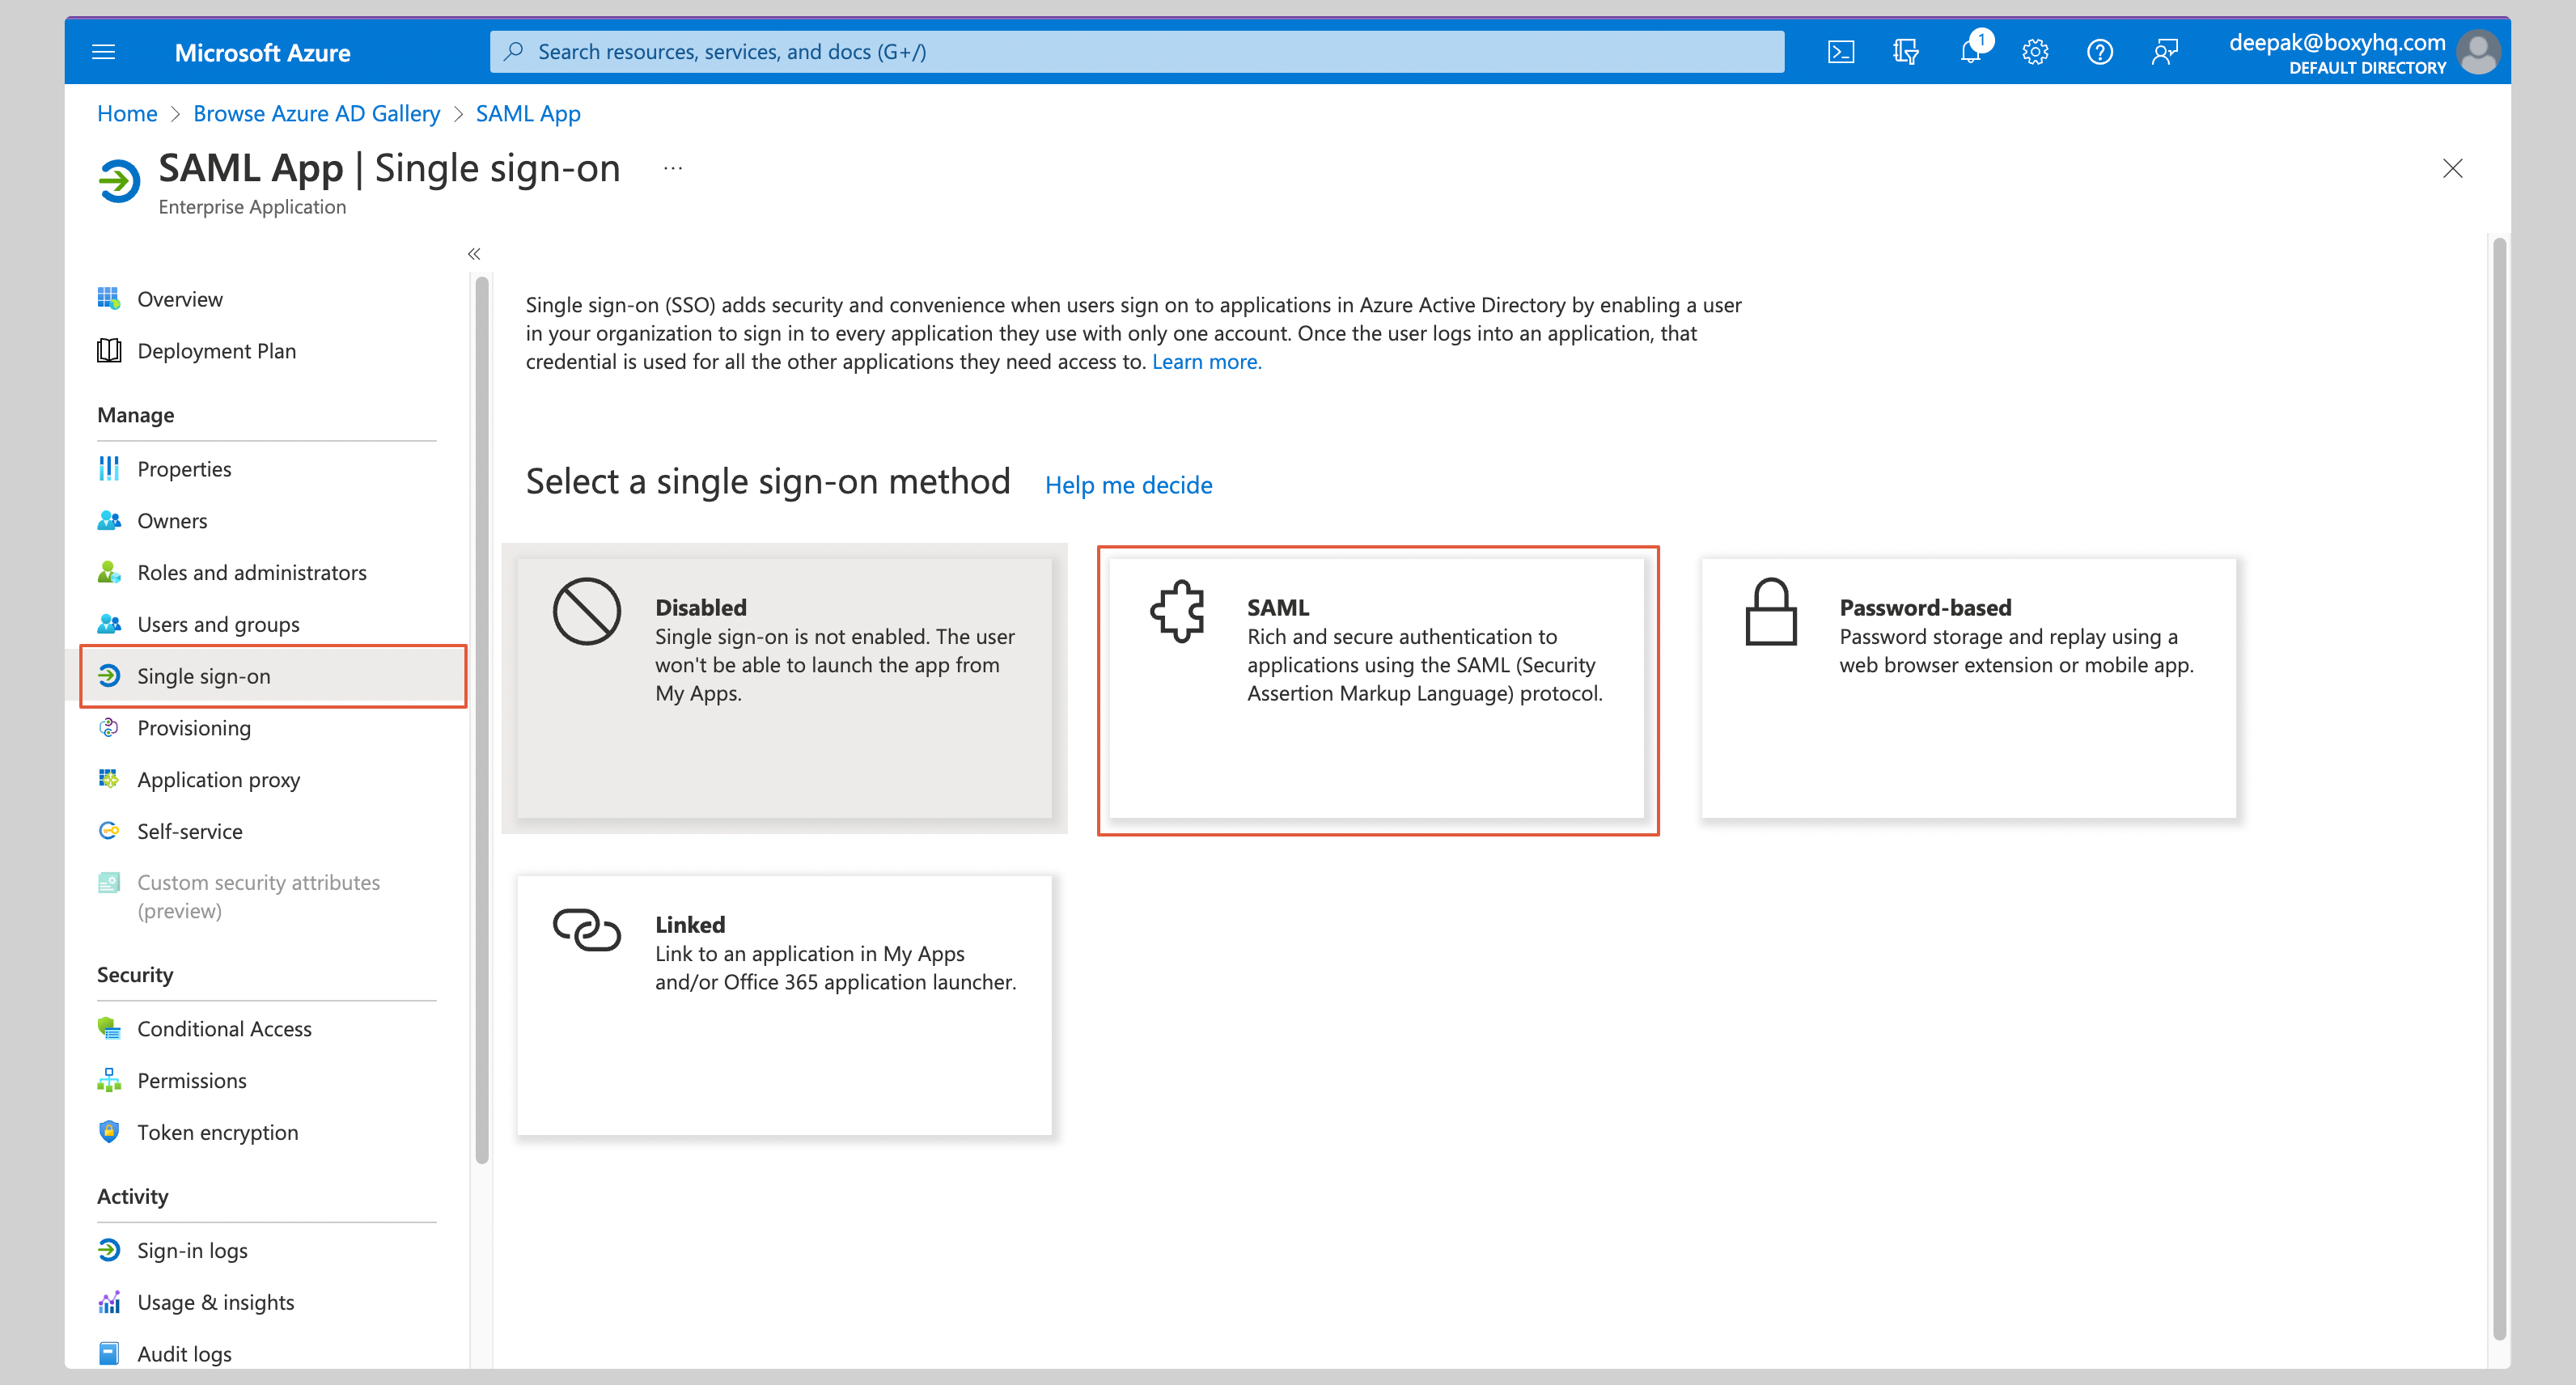
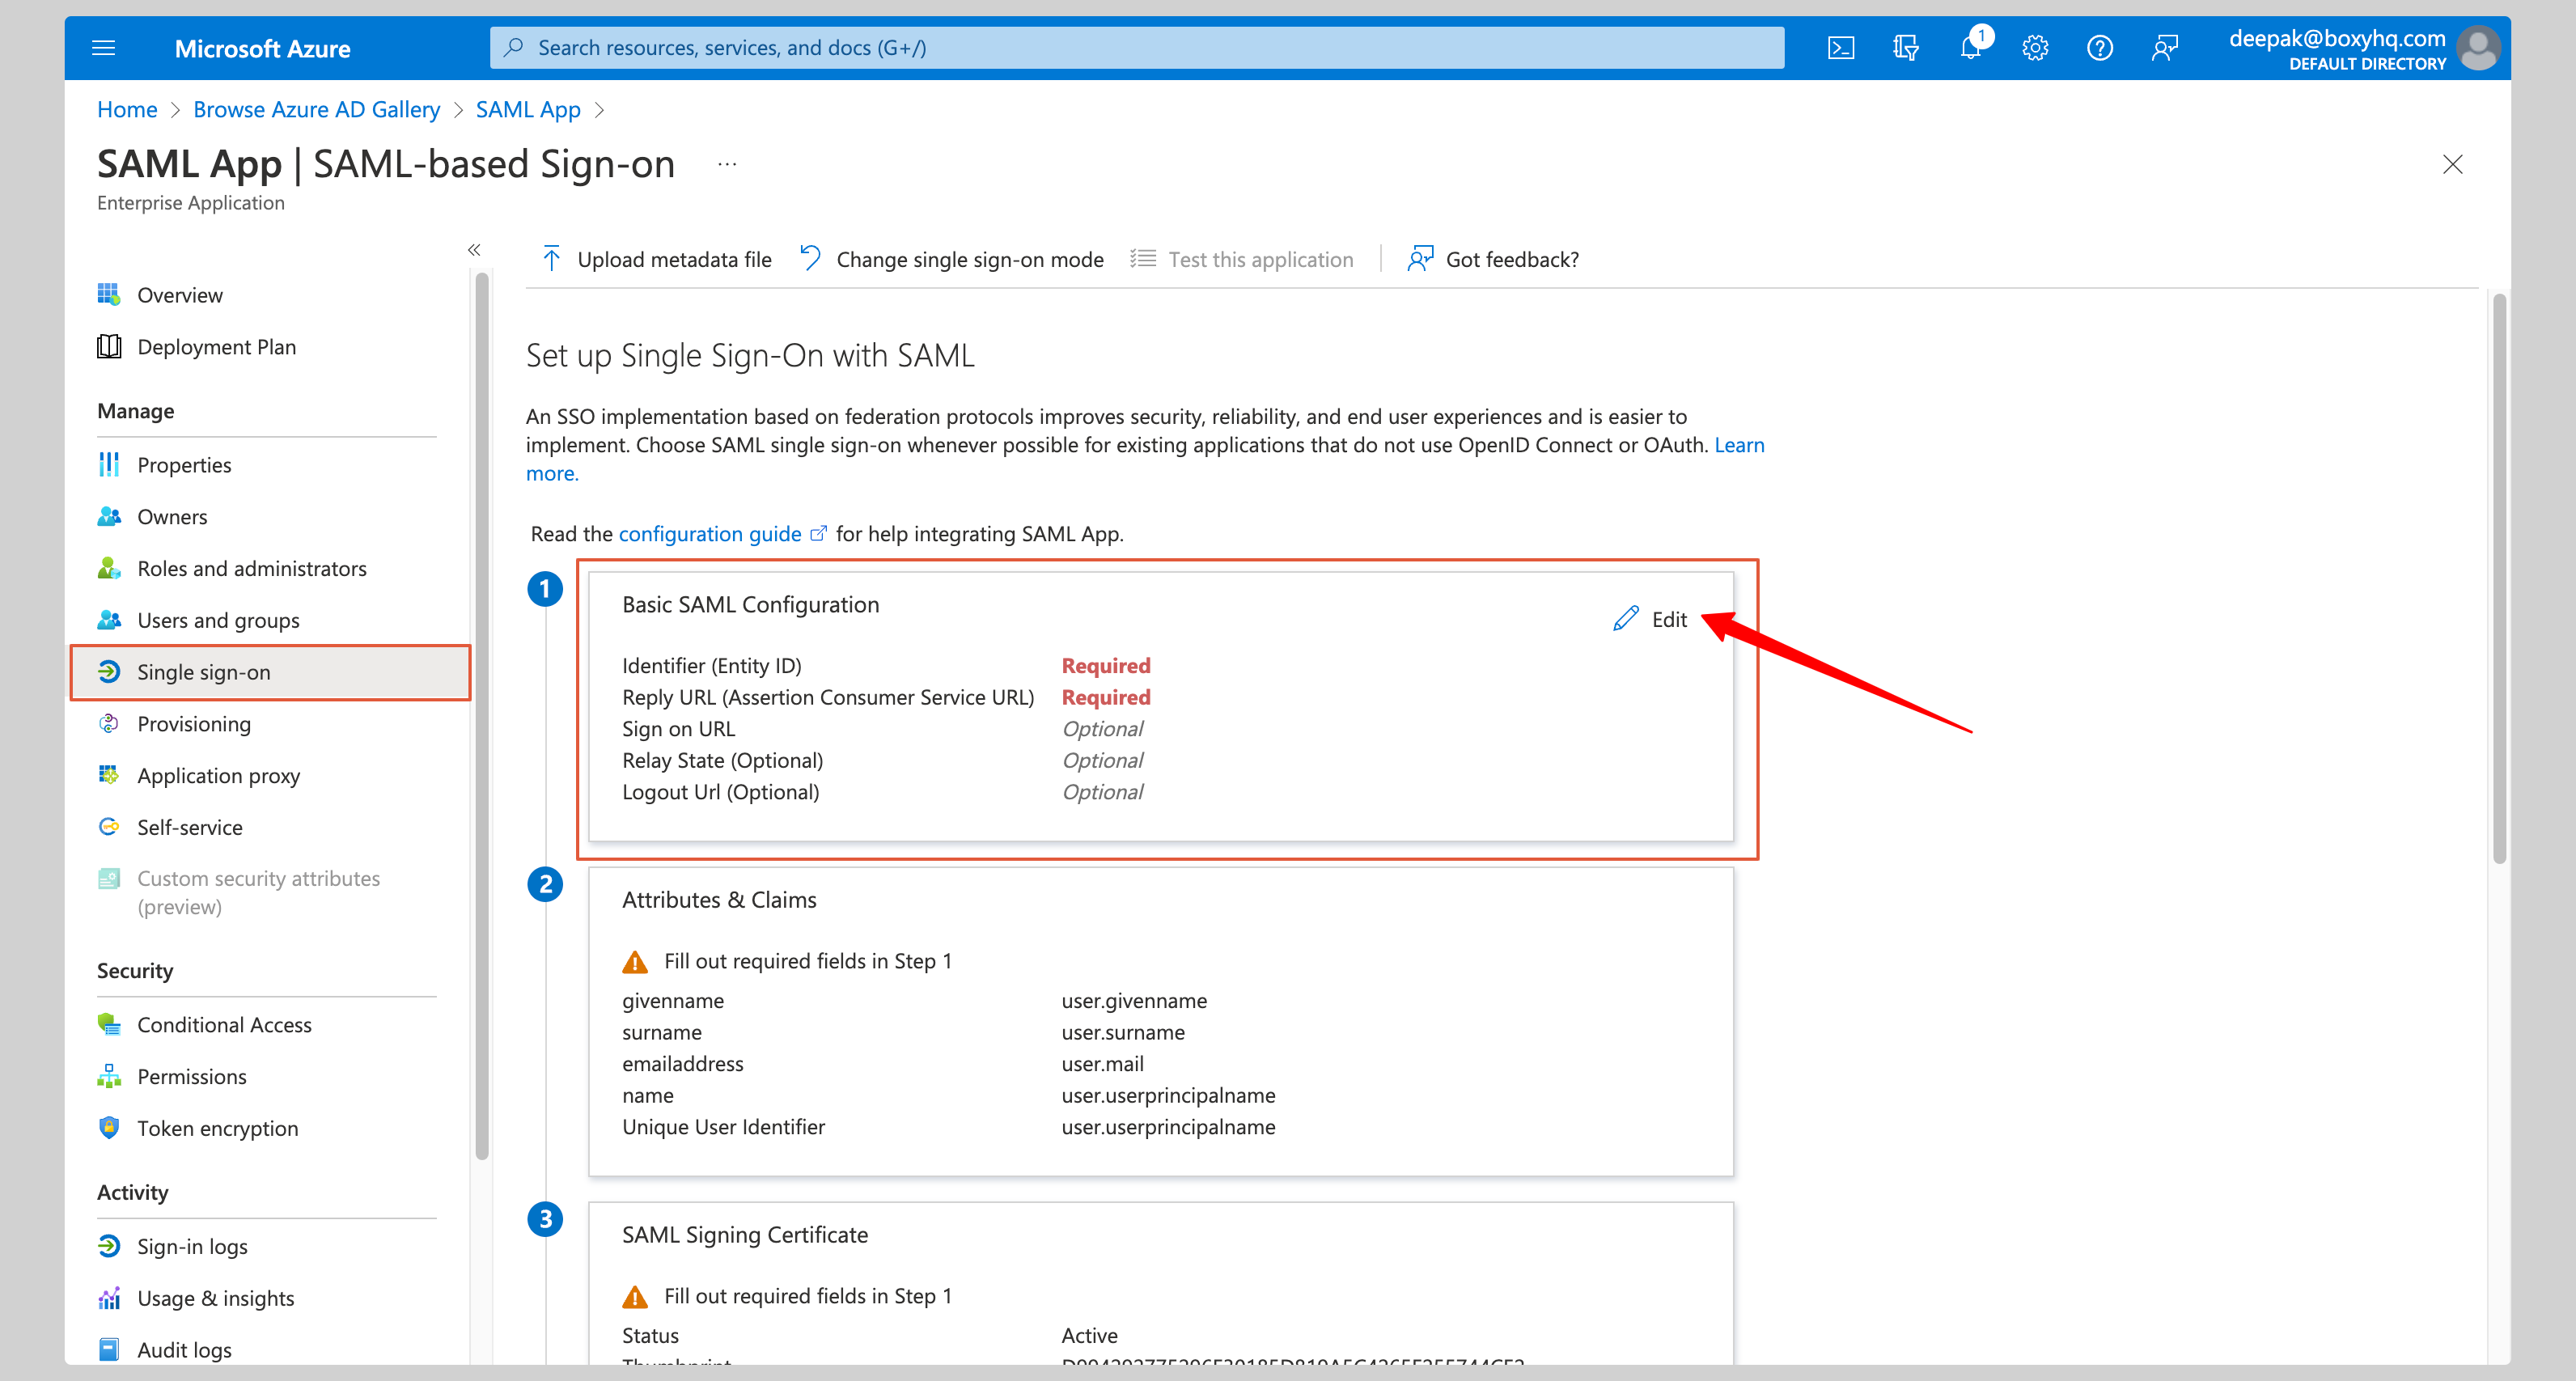
Select **Single Sign On** from the **Manage** section of your app and then **SAML**.
## Configure application
Select **Single Sign On** from the **Manage** section of your app and then **SAML**.
 Click **Edit** on the **Basic SAML Configuration** section.
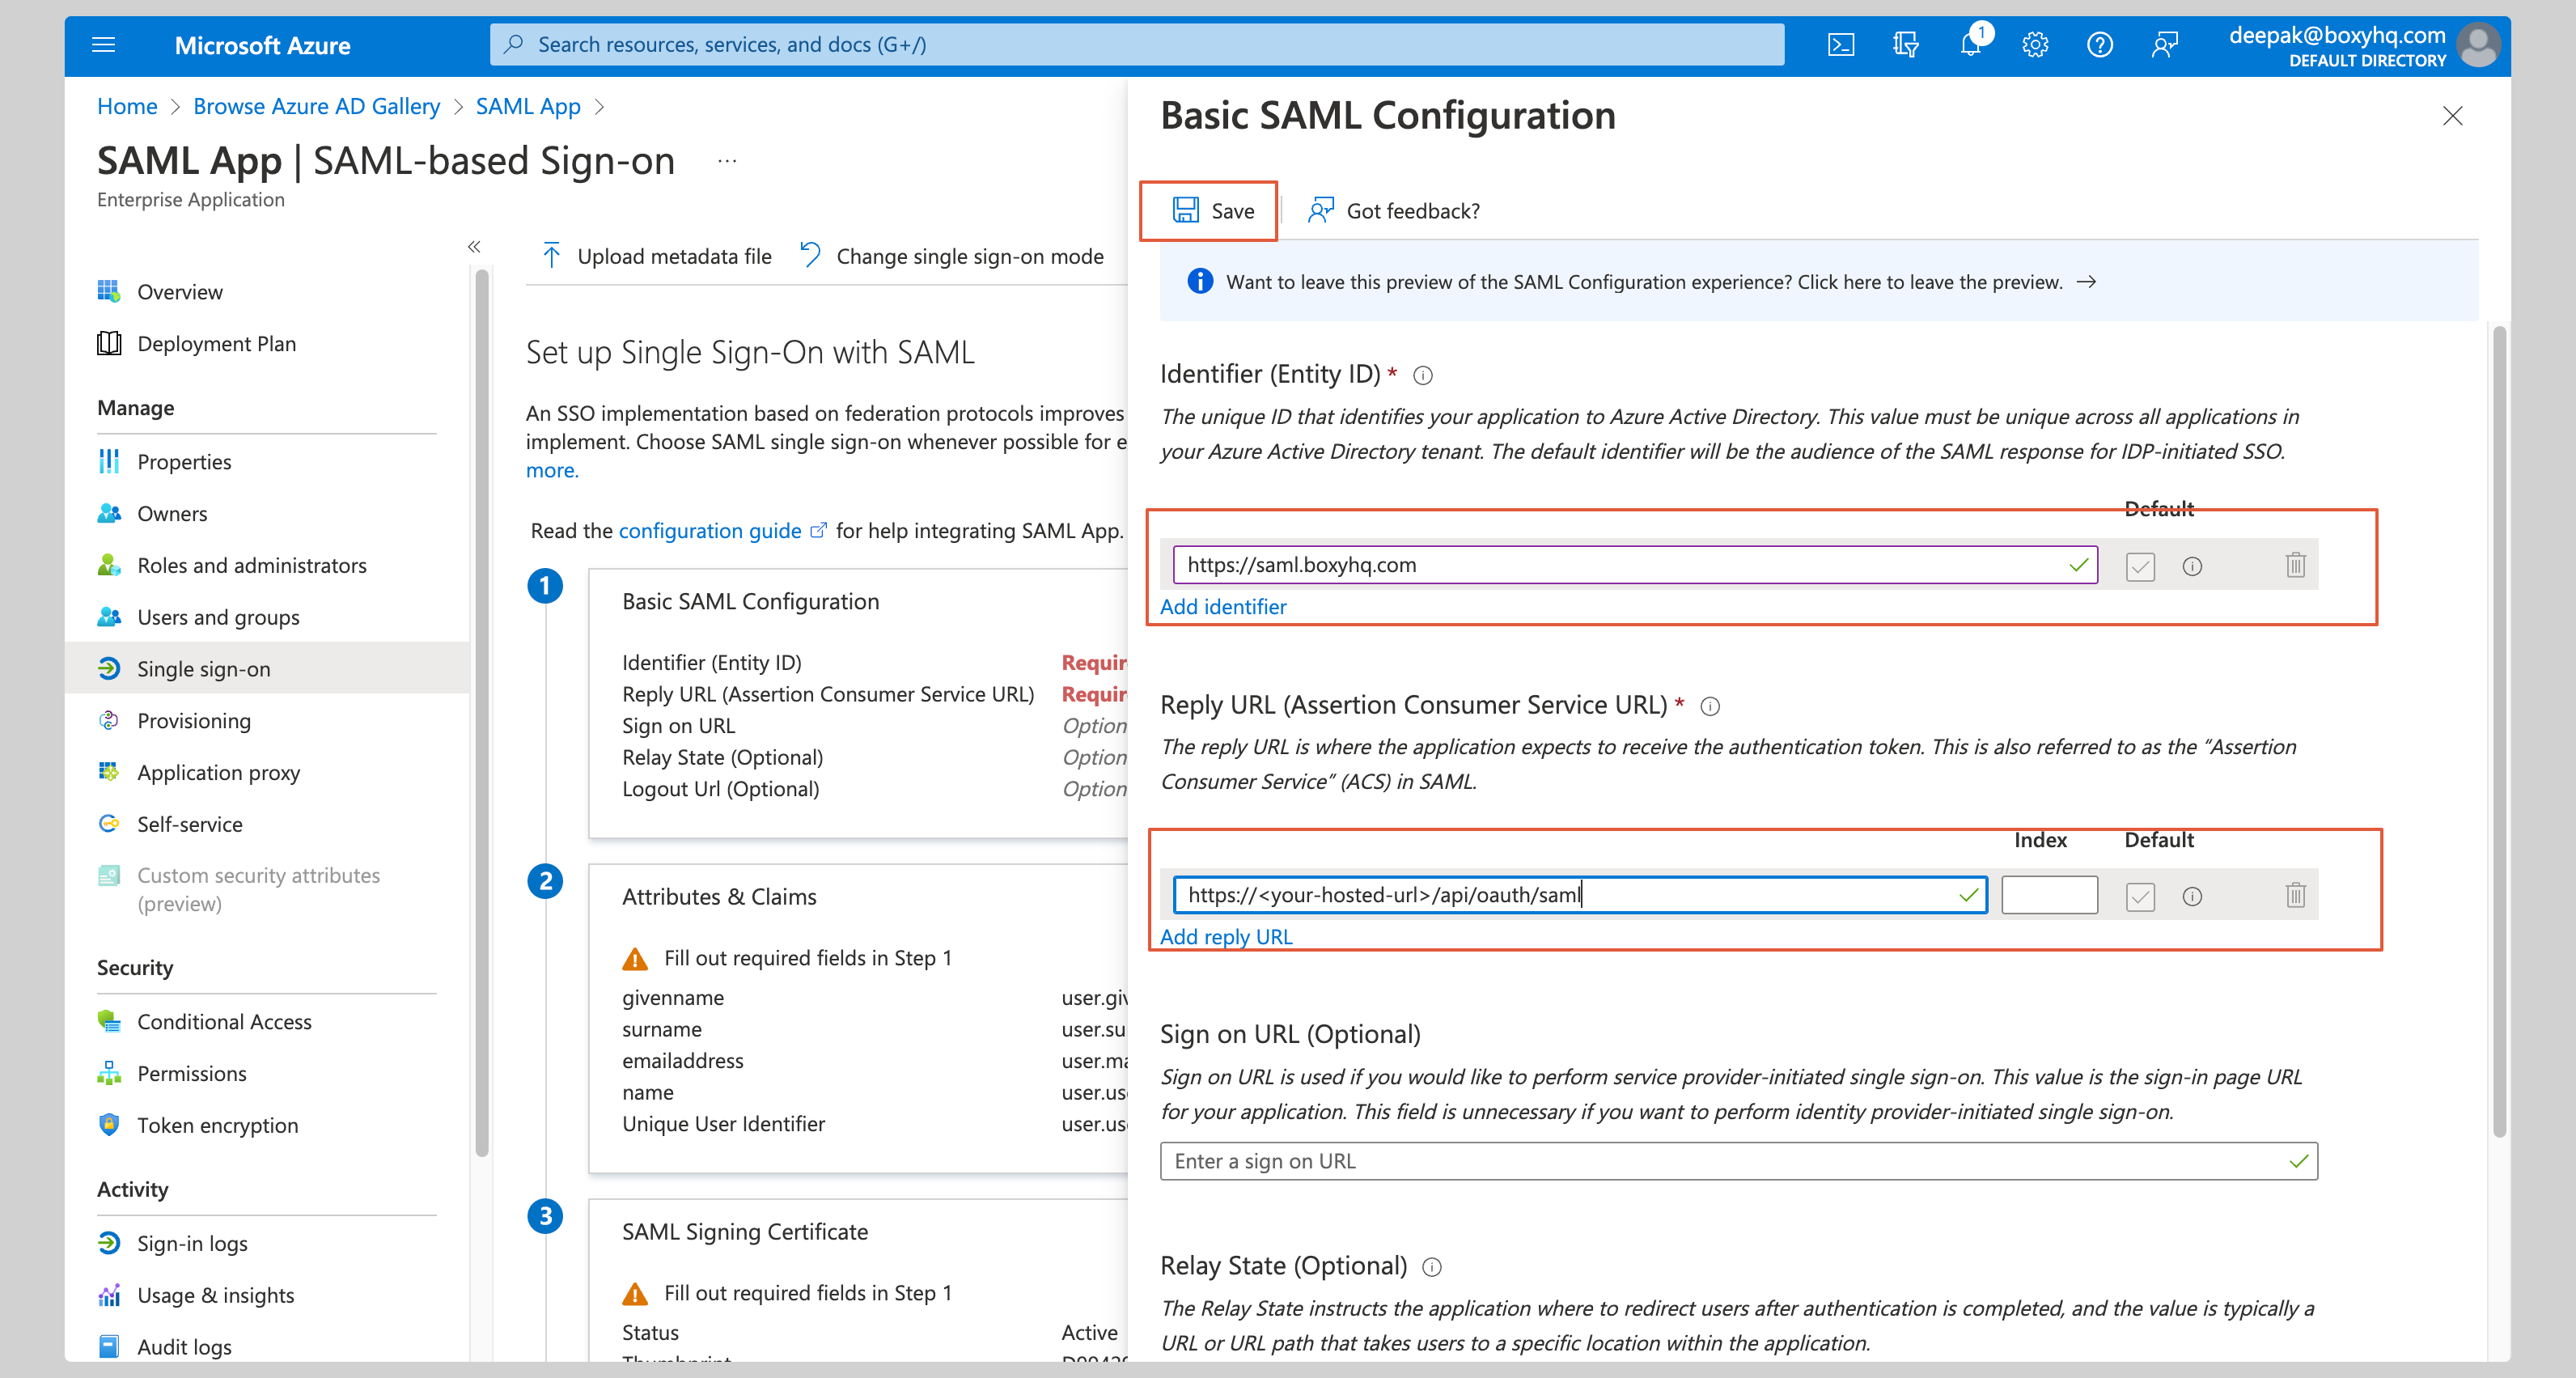
 Enter the following values in the **Basic SAML Configuration** section on the next screen:
* **Identifier (Entity ID)**
* **Reply URL (Assertion Consumer Service URL)**
Replace the values with the ones you have received from Aampe.
Click **Save** to save your changes.
Enter the following values in the **Basic SAML Configuration** section on the next screen:
* **Identifier (Entity ID)**
* **Reply URL (Assertion Consumer Service URL)**
Replace the values with the ones you have received from Aampe.
Click **Save** to save your changes.
 ## Attribute mapping
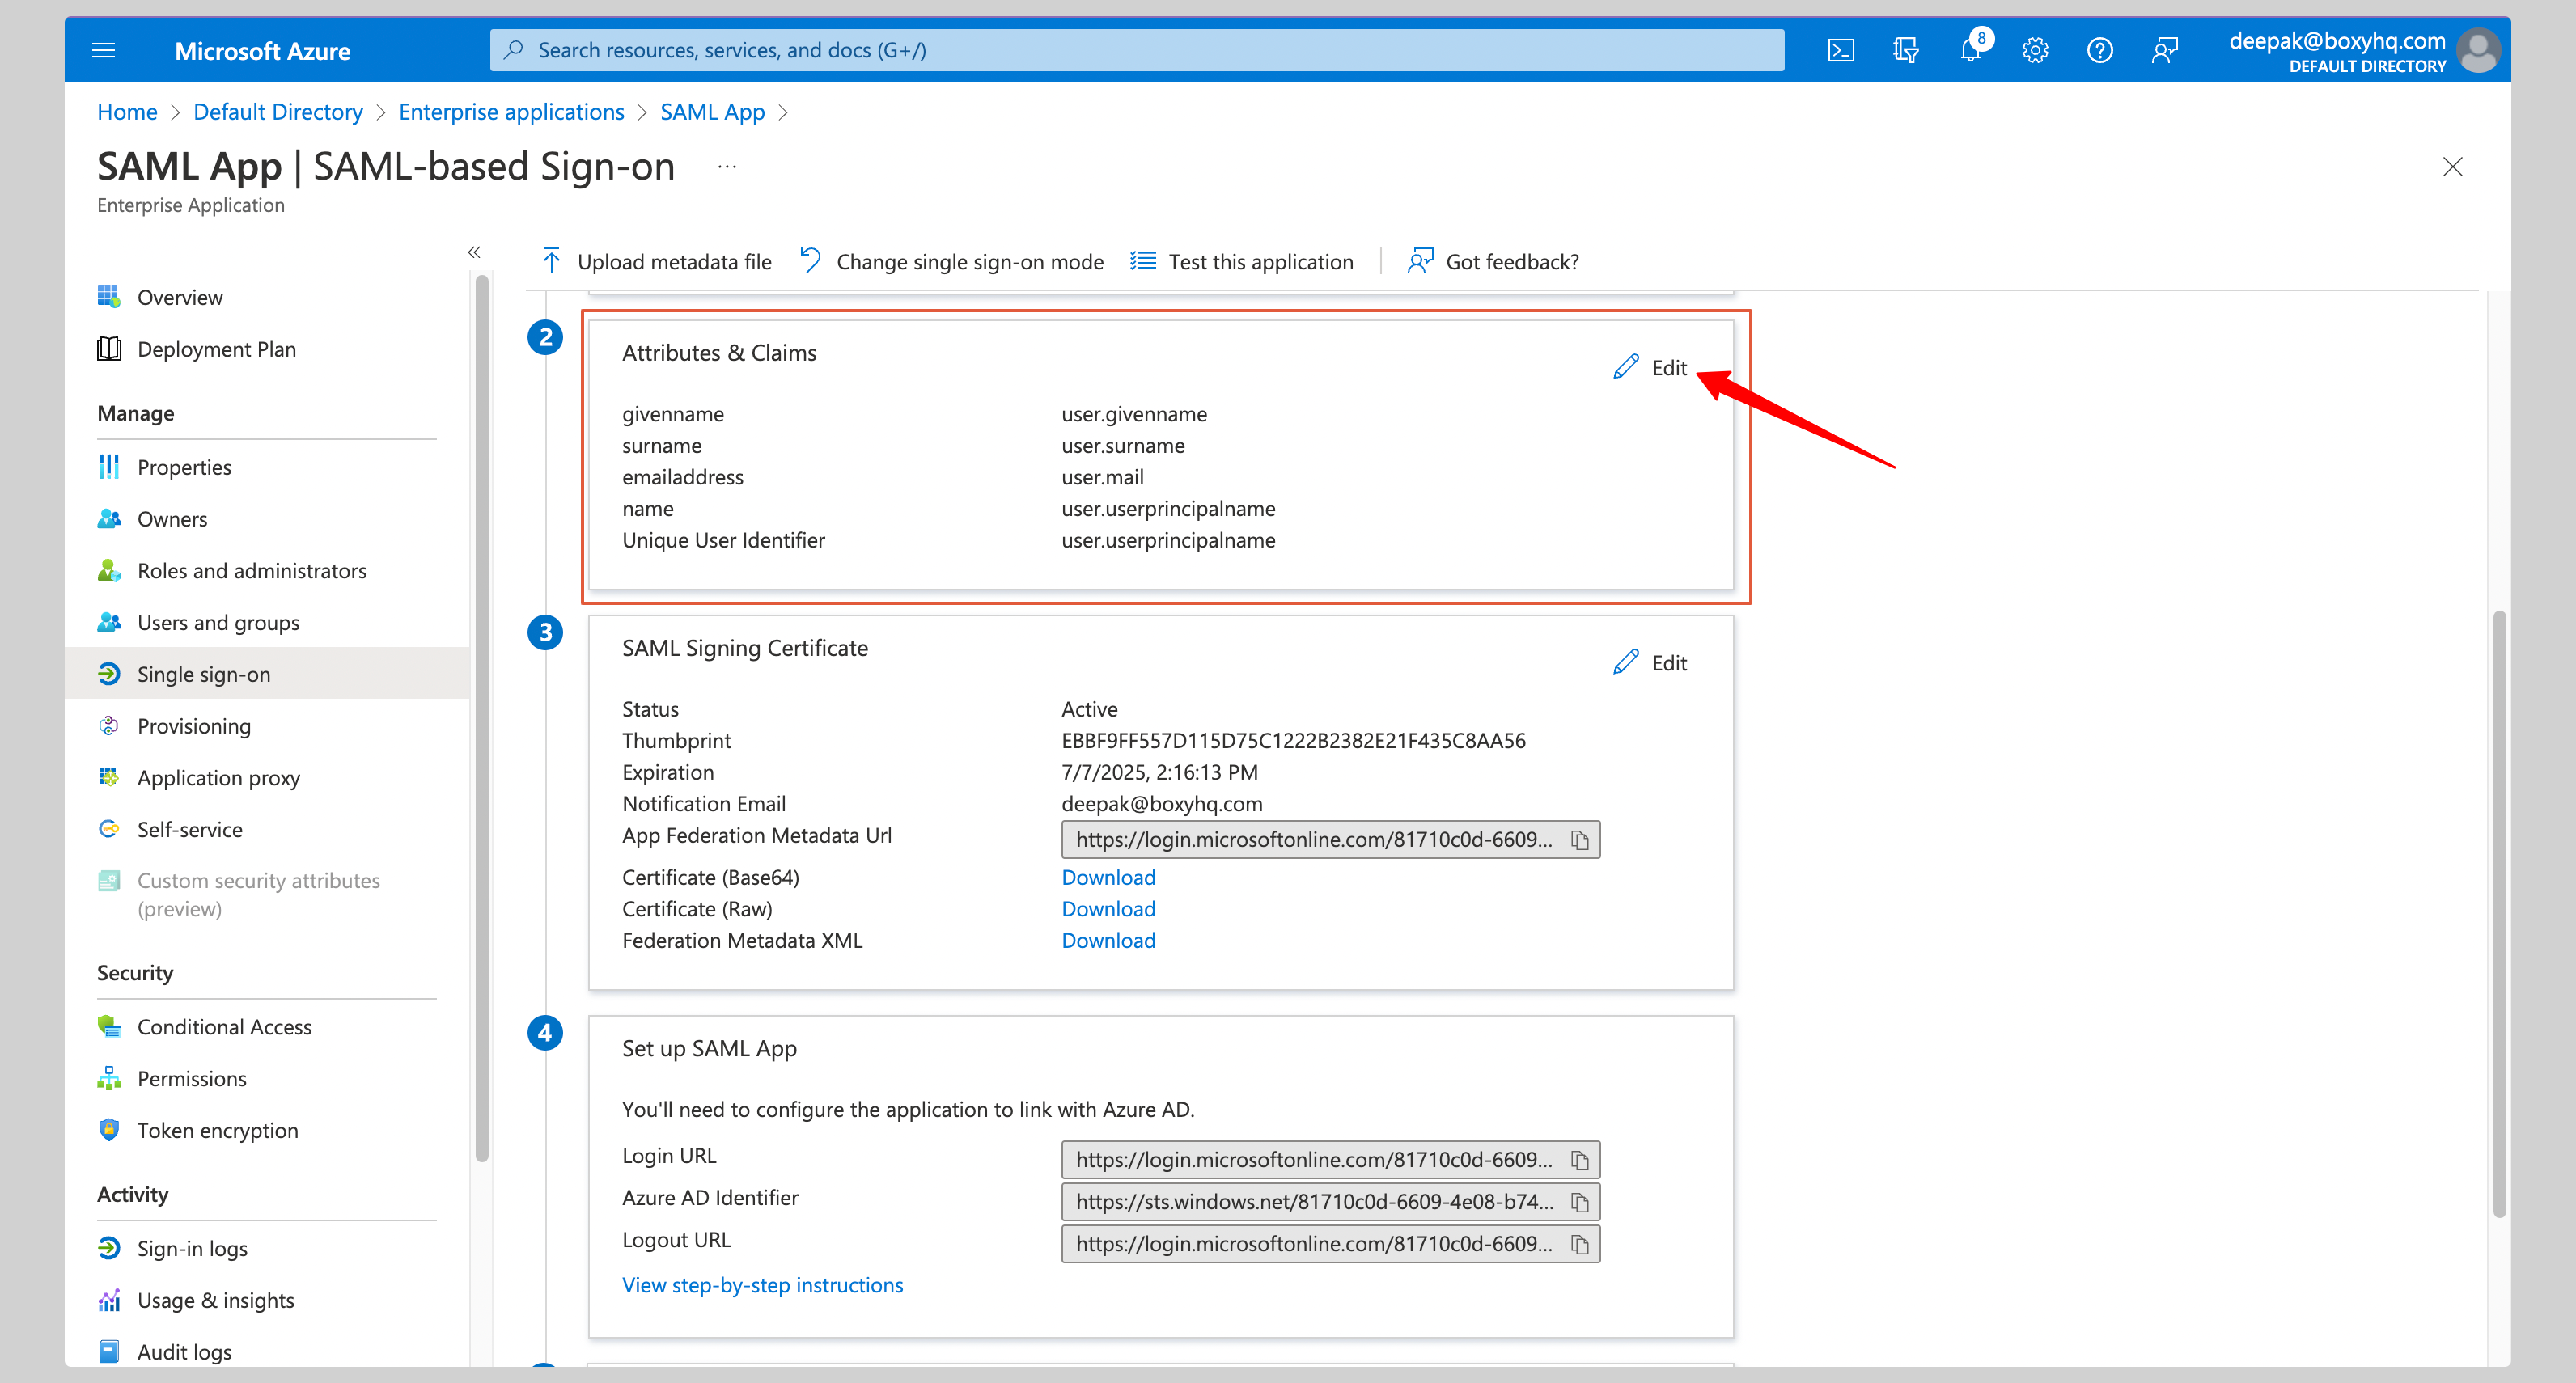
Click **Edit** on the **Attributes & Claims** section.
## Attribute mapping
Click **Edit** on the **Attributes & Claims** section.
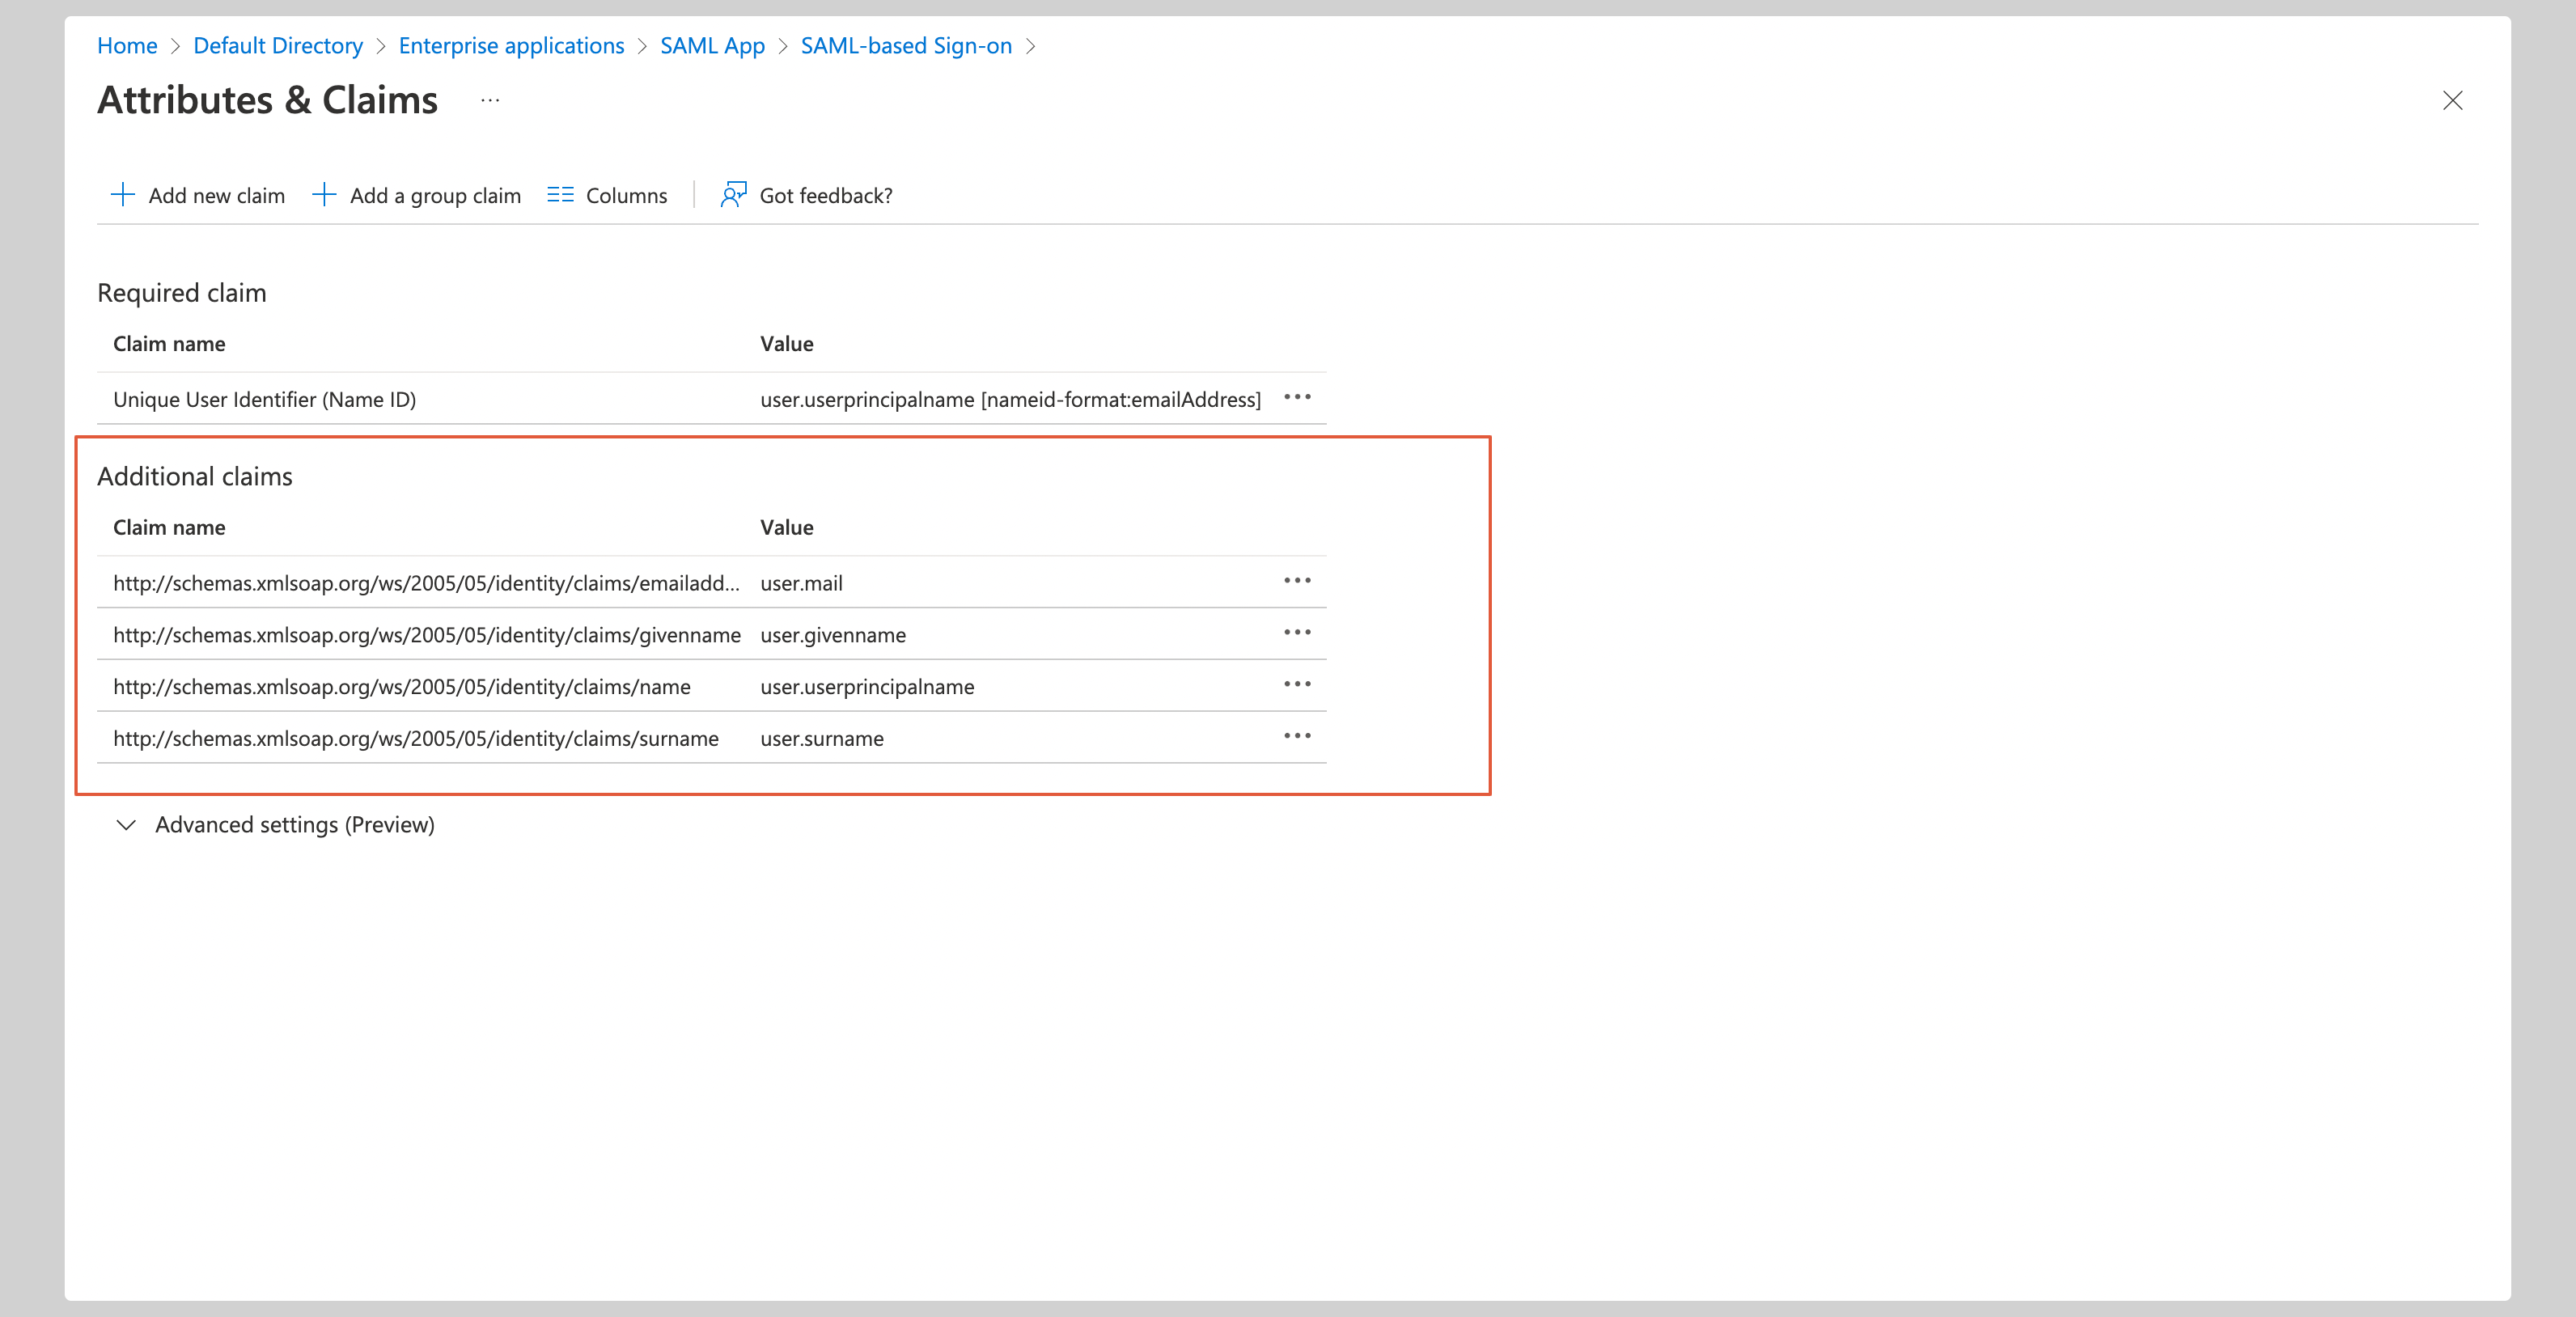
 You have to configure the following attributes under the **Attributes & Claims** section:
| Name | Value |
| :------------------------------------------------------------------- | :----------------------- |
| `http://schemas.xmlsoap.org/ws/2005/05/identity/claims/emailaddress` | `user.mail` |
| `http://schemas.xmlsoap.org/ws/2005/05/identity/claims/givenname` | `user.givenname` |
| `http://schemas.xmlsoap.org/ws/2005/05/identity/claims/name` | `user.userprincipalname` |
| `http://schemas.xmlsoap.org/ws/2005/05/identity/claims/surname` | `user.surname` |
See the screenshot below.
You have to configure the following attributes under the **Attributes & Claims** section:
| Name | Value |
| :------------------------------------------------------------------- | :----------------------- |
| `http://schemas.xmlsoap.org/ws/2005/05/identity/claims/emailaddress` | `user.mail` |
| `http://schemas.xmlsoap.org/ws/2005/05/identity/claims/givenname` | `user.givenname` |
| `http://schemas.xmlsoap.org/ws/2005/05/identity/claims/name` | `user.userprincipalname` |
| `http://schemas.xmlsoap.org/ws/2005/05/identity/claims/surname` | `user.surname` |
See the screenshot below.
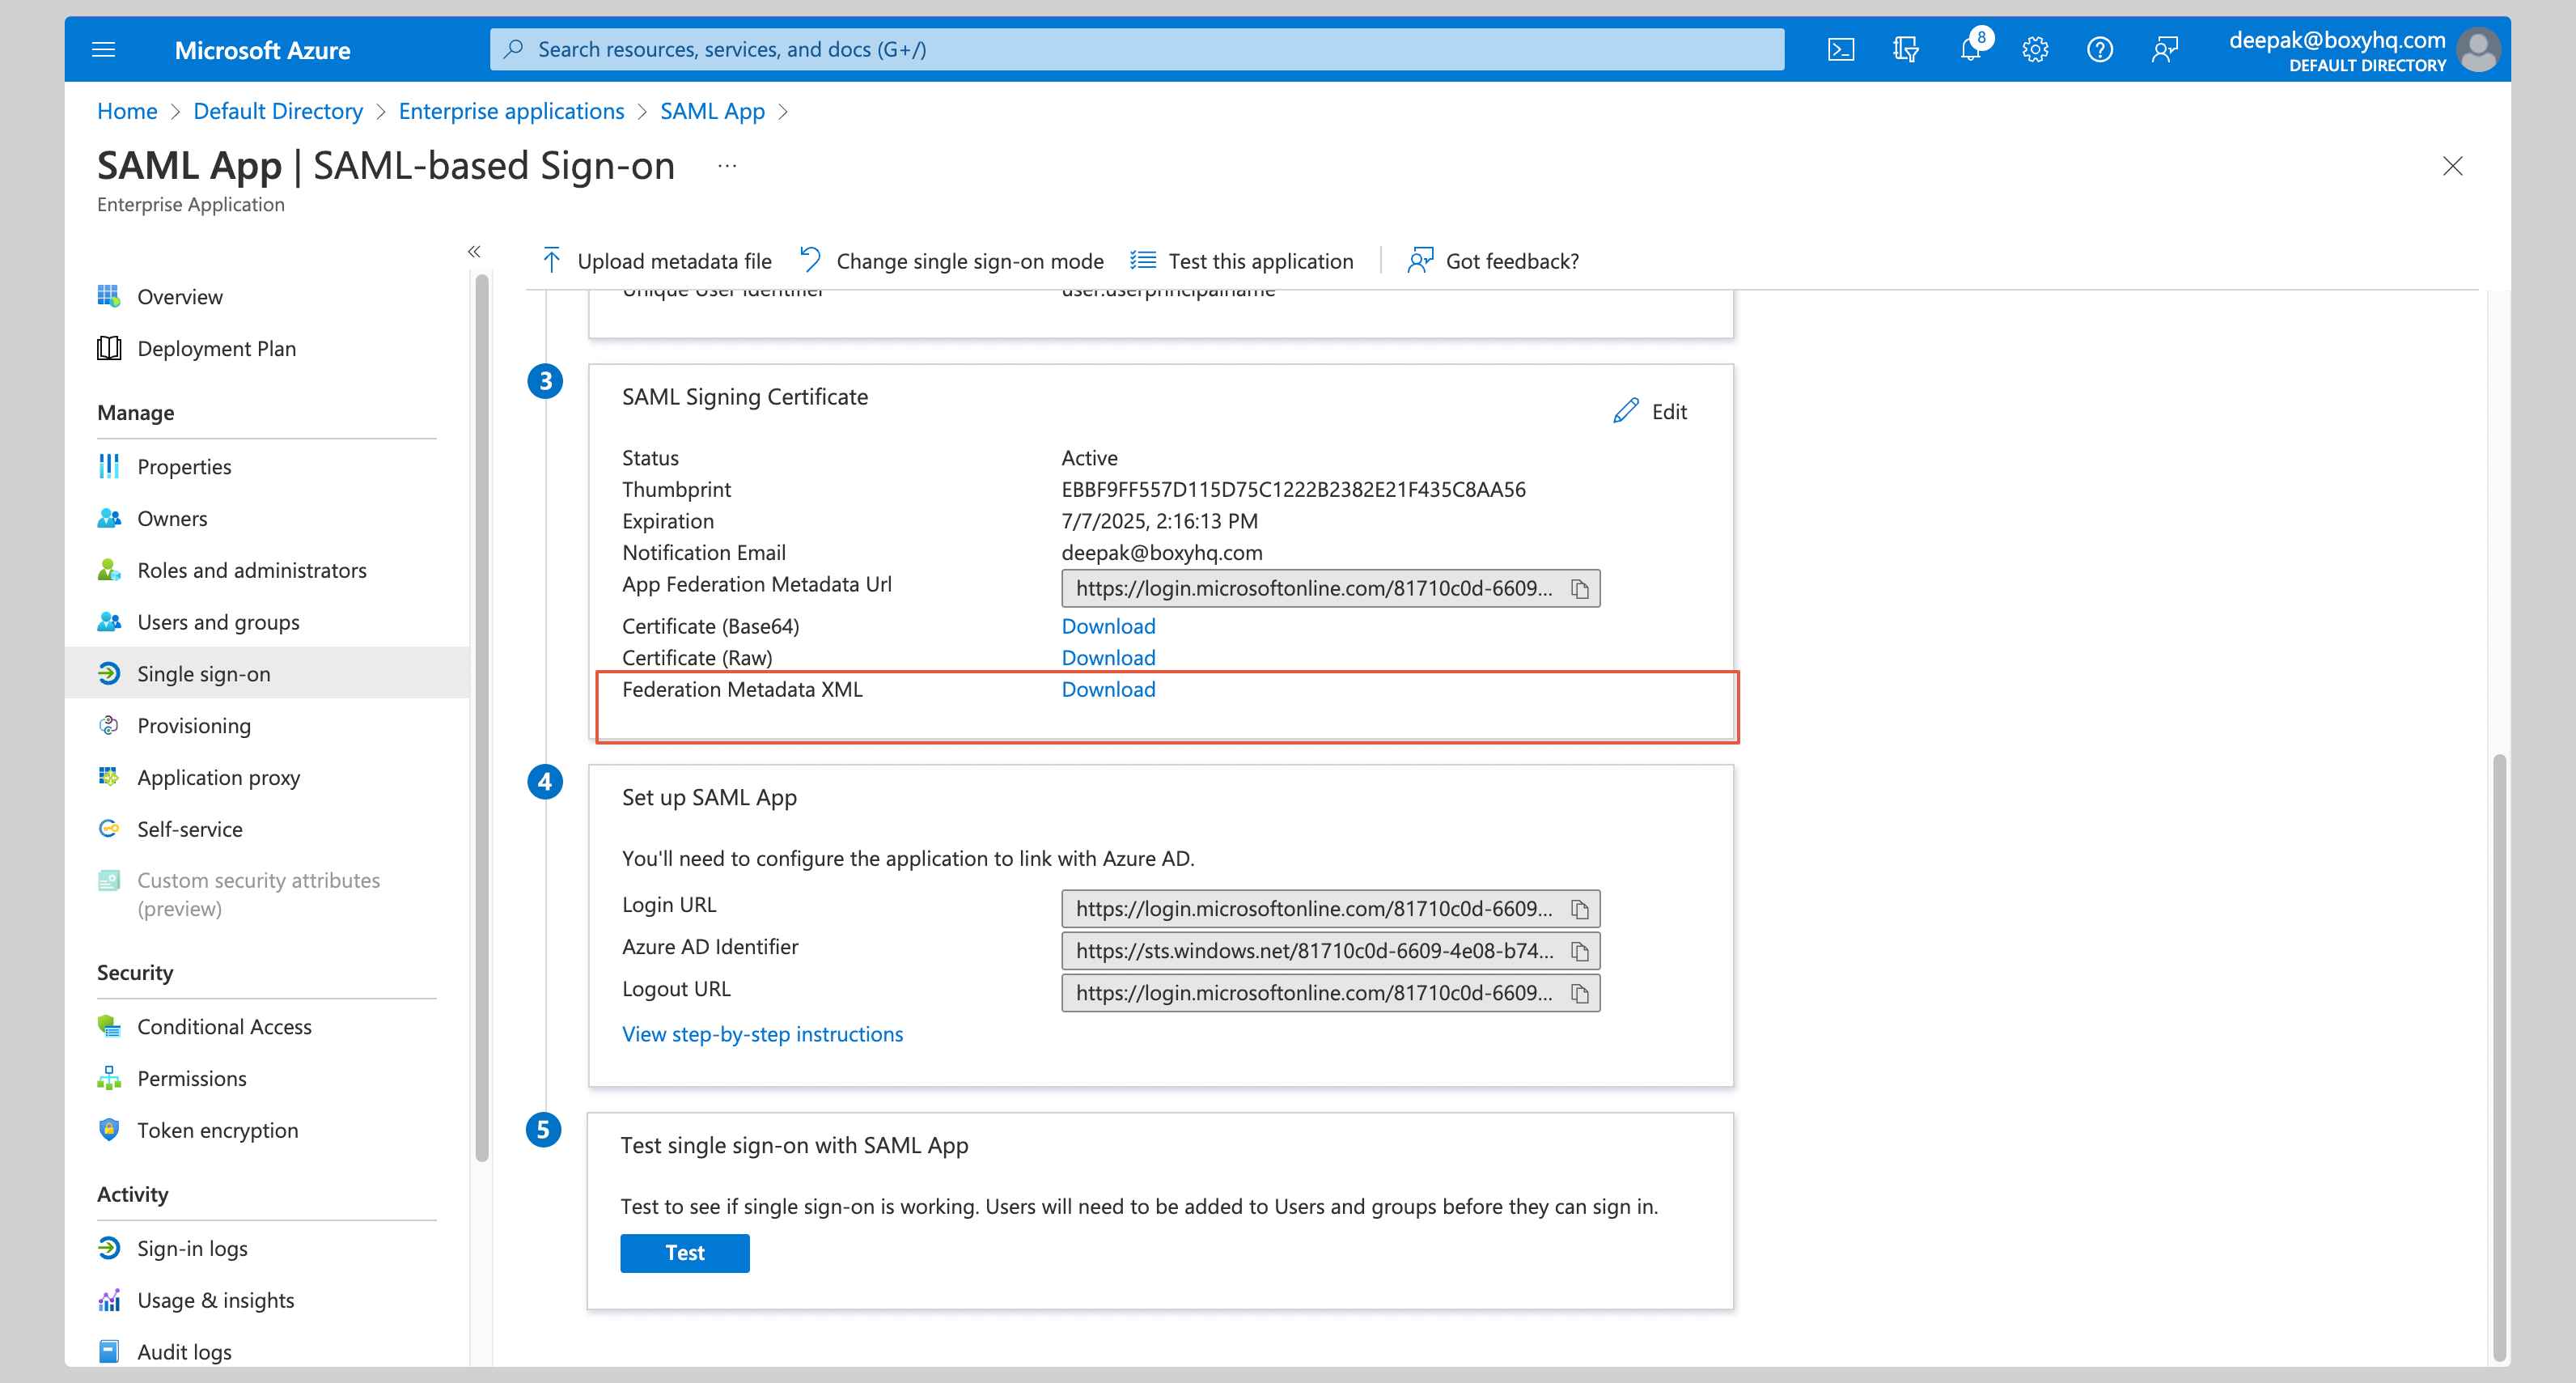
 Go to the **SAML Signing Certificate** section and download the **Federation Metadata XML**.
 ## Next steps
You've successfully configured your custom SAML application for Microsoft Entra ID SAML. At this stage, you can assign users to your application and start using it.
## Next steps
You've successfully configured your custom SAML application for Microsoft Entra ID SAML. At this stage, you can assign users to your application and start using it.