> ## Documentation Index
> Fetch the complete documentation index at: https://kb.aampe.com/llms.txt
> Use this file to discover all available pages before exploring further.
# Google SAML SSO
> In this section, we will show you how to set up your own custom SAML application for Google SAML
## Create application
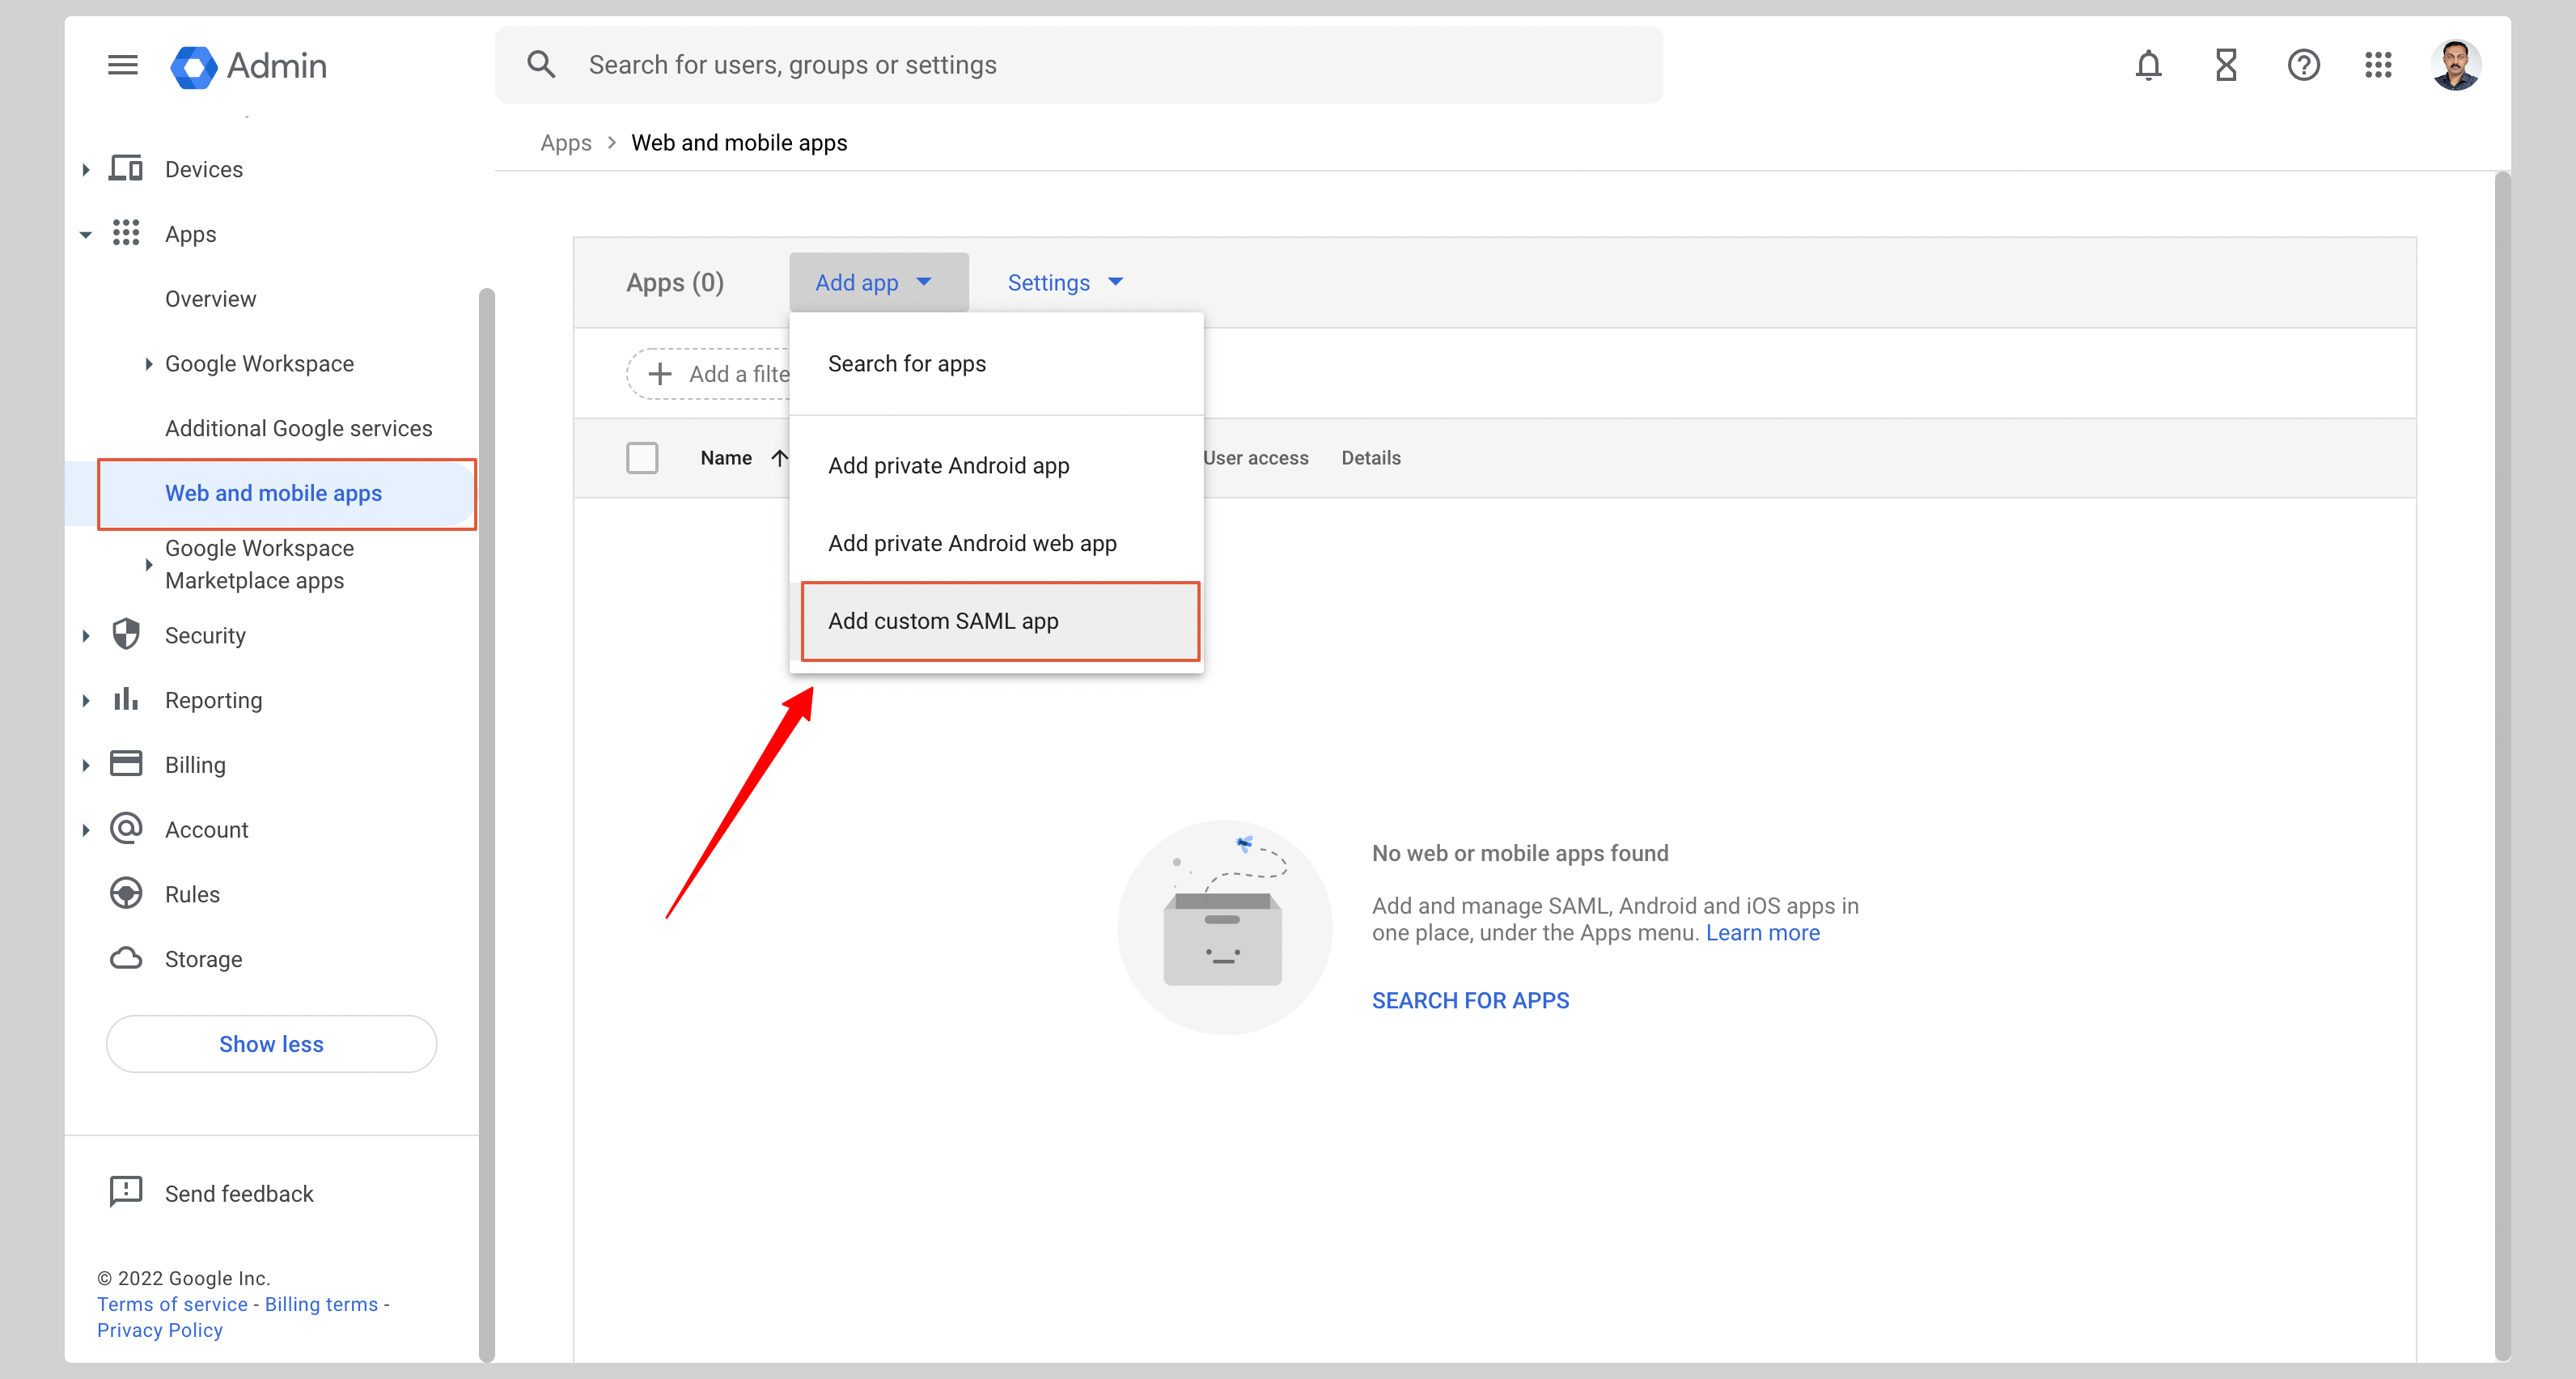
1. From your Google Admin console, click **Apps** from the sidebar then click **Web and mobile apps** from the list.
2. If your application is already created, choose it from the list and move to the section [Configure Application](#configure-application)
3. If you haven't created a SAML application, click **Add custom SAML app** from the menu.
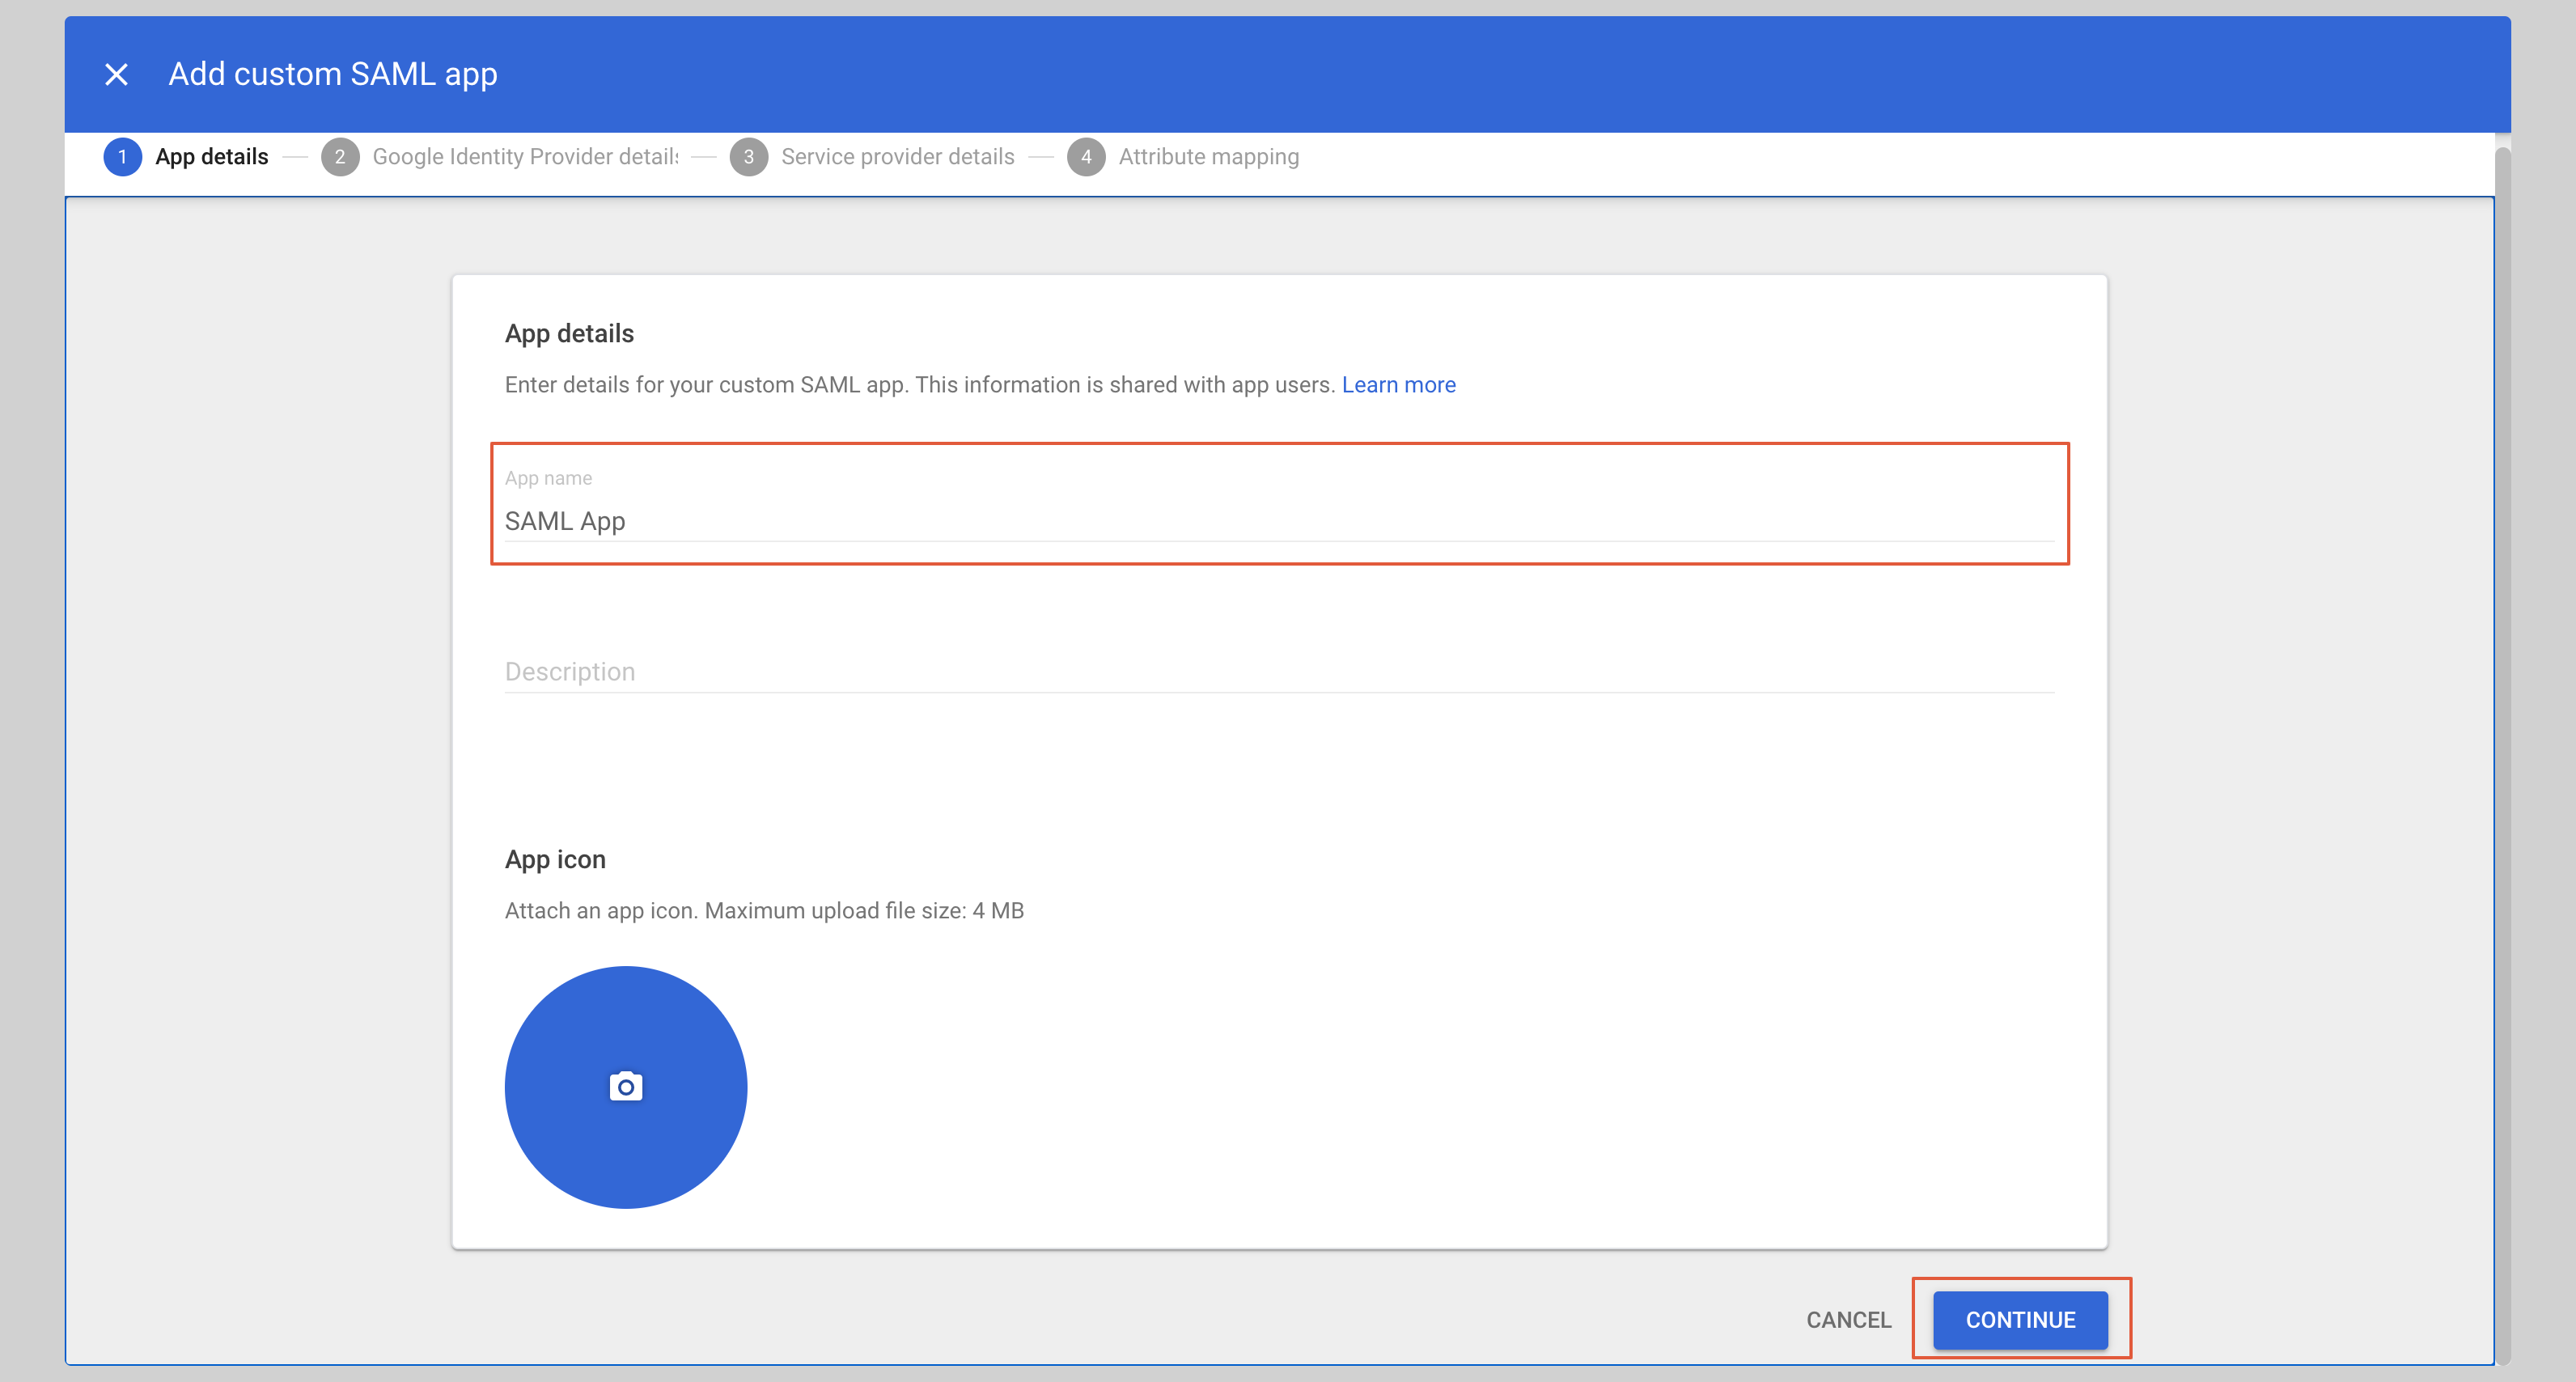
 4. Give your application an **App name** and click **Continue**.
 ## Configure application
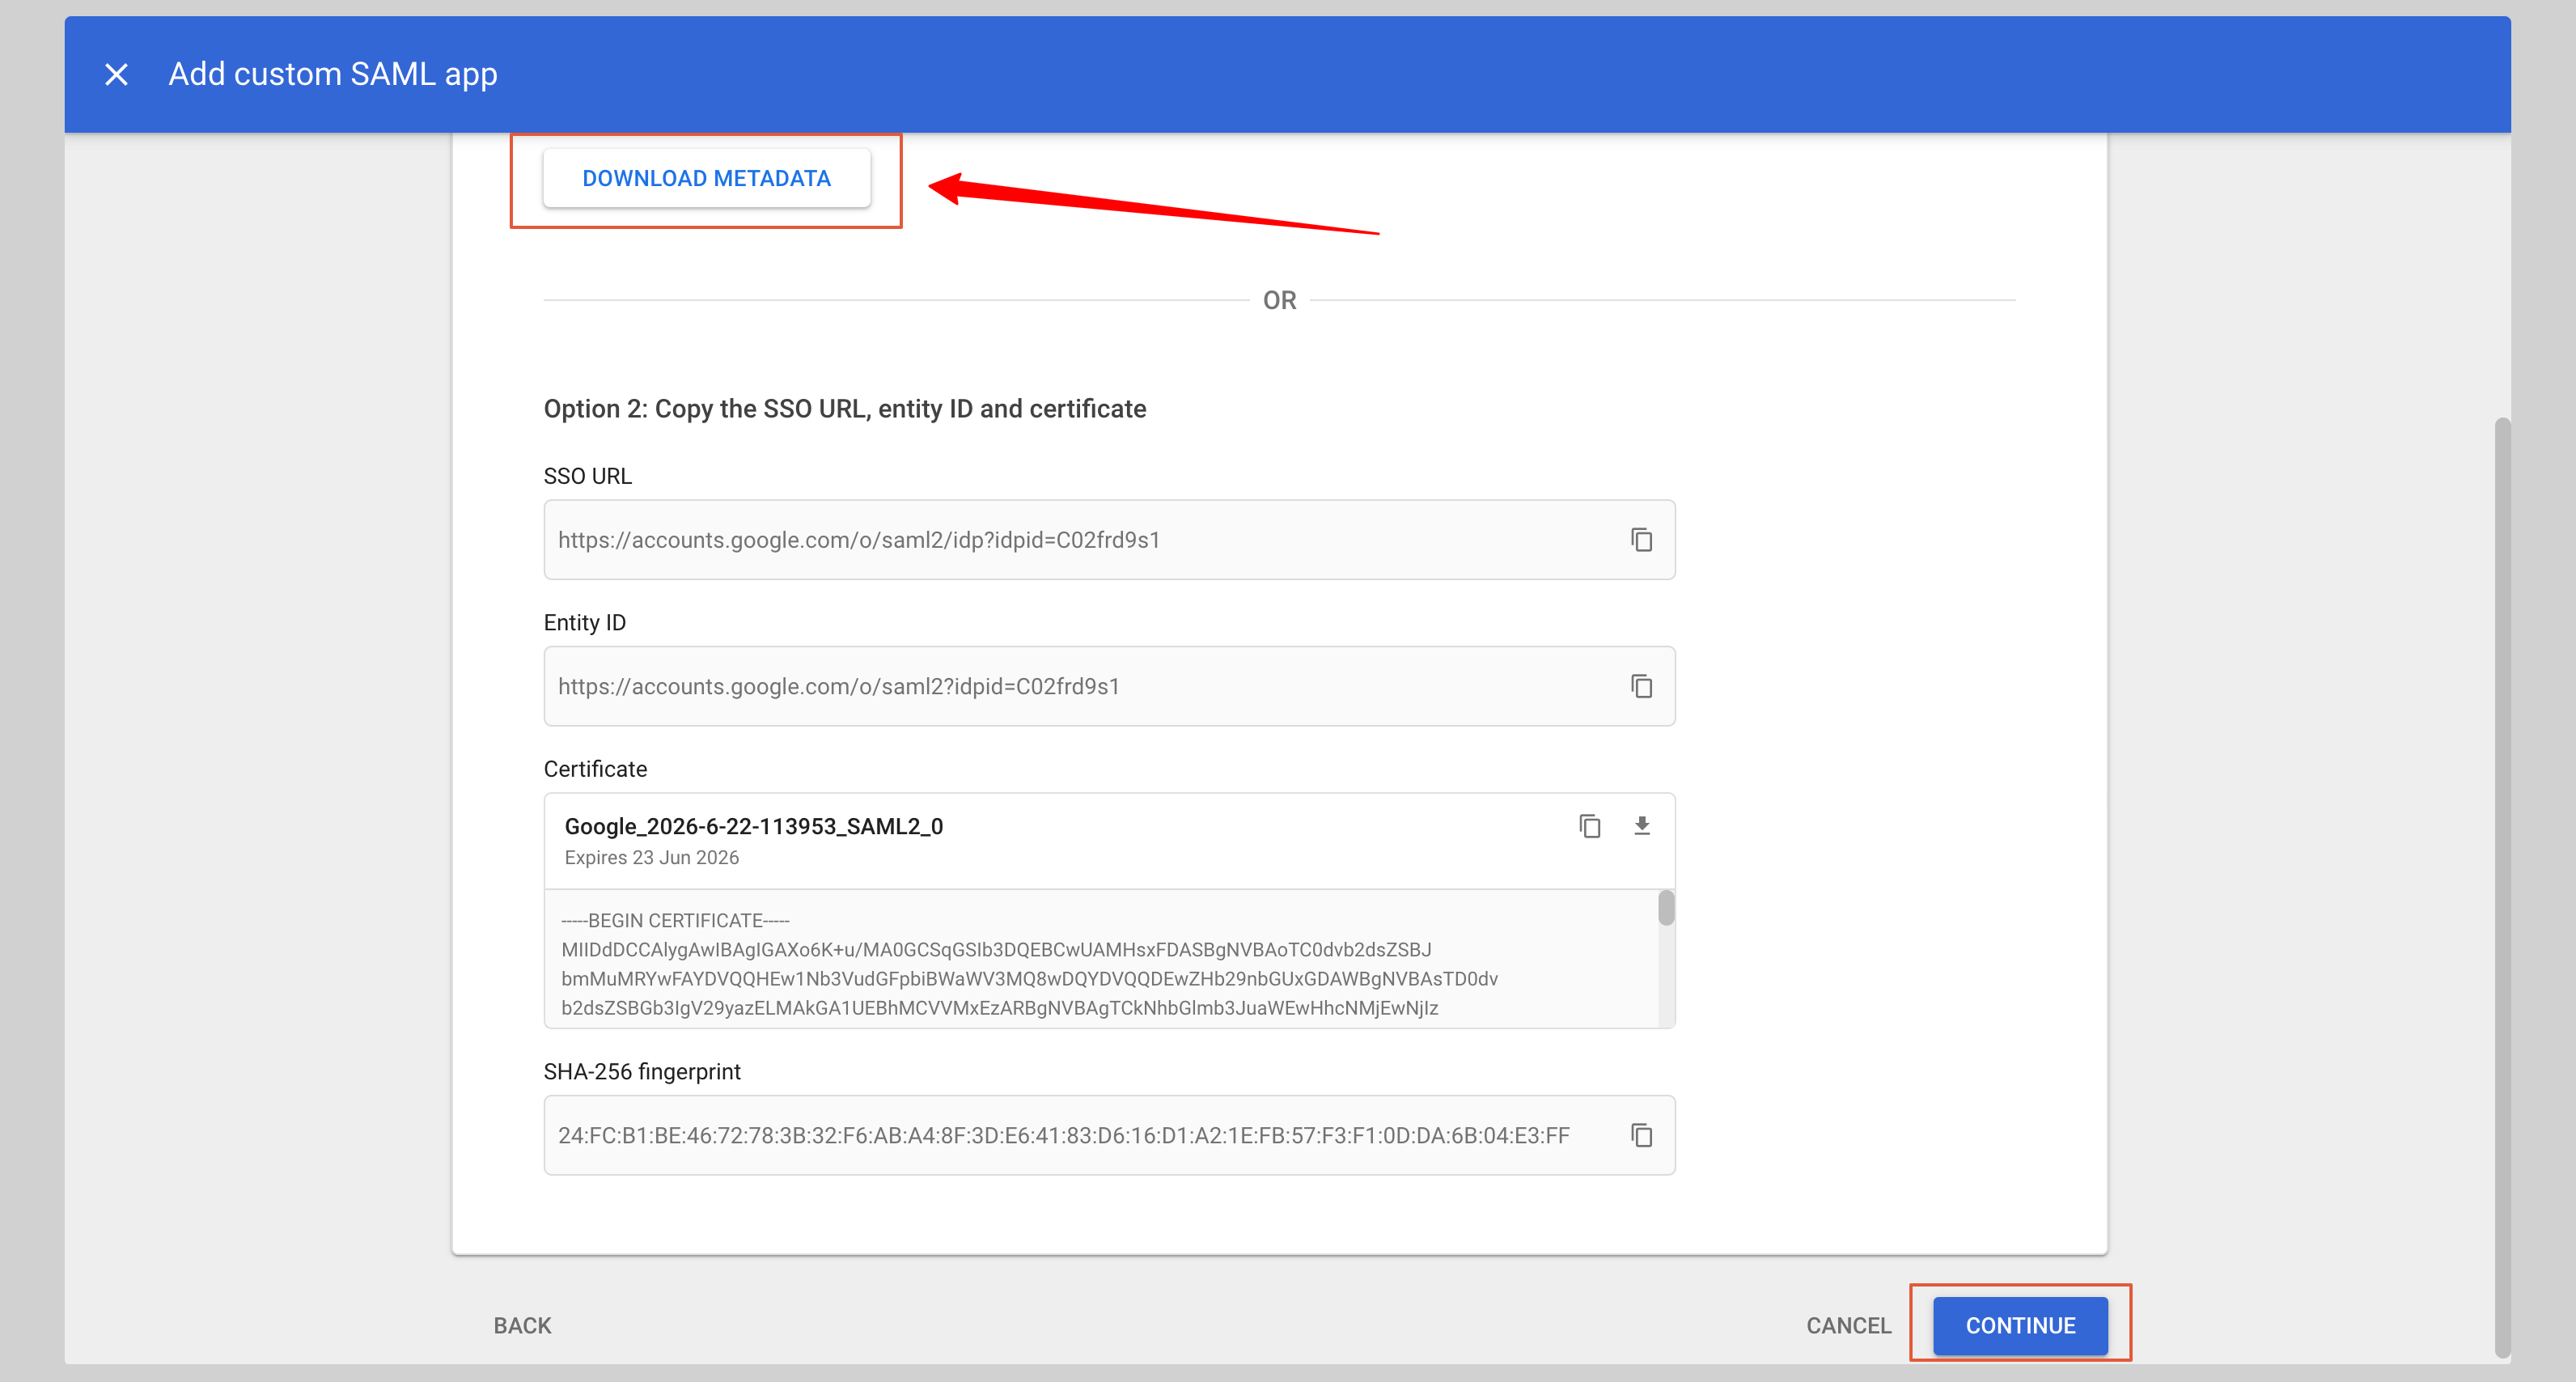
1. From the next screen, click **DOWNLOAD METADATA** to download the metadata XML file, then click **Continue**.
## Configure application
1. From the next screen, click **DOWNLOAD METADATA** to download the metadata XML file, then click **Continue**.
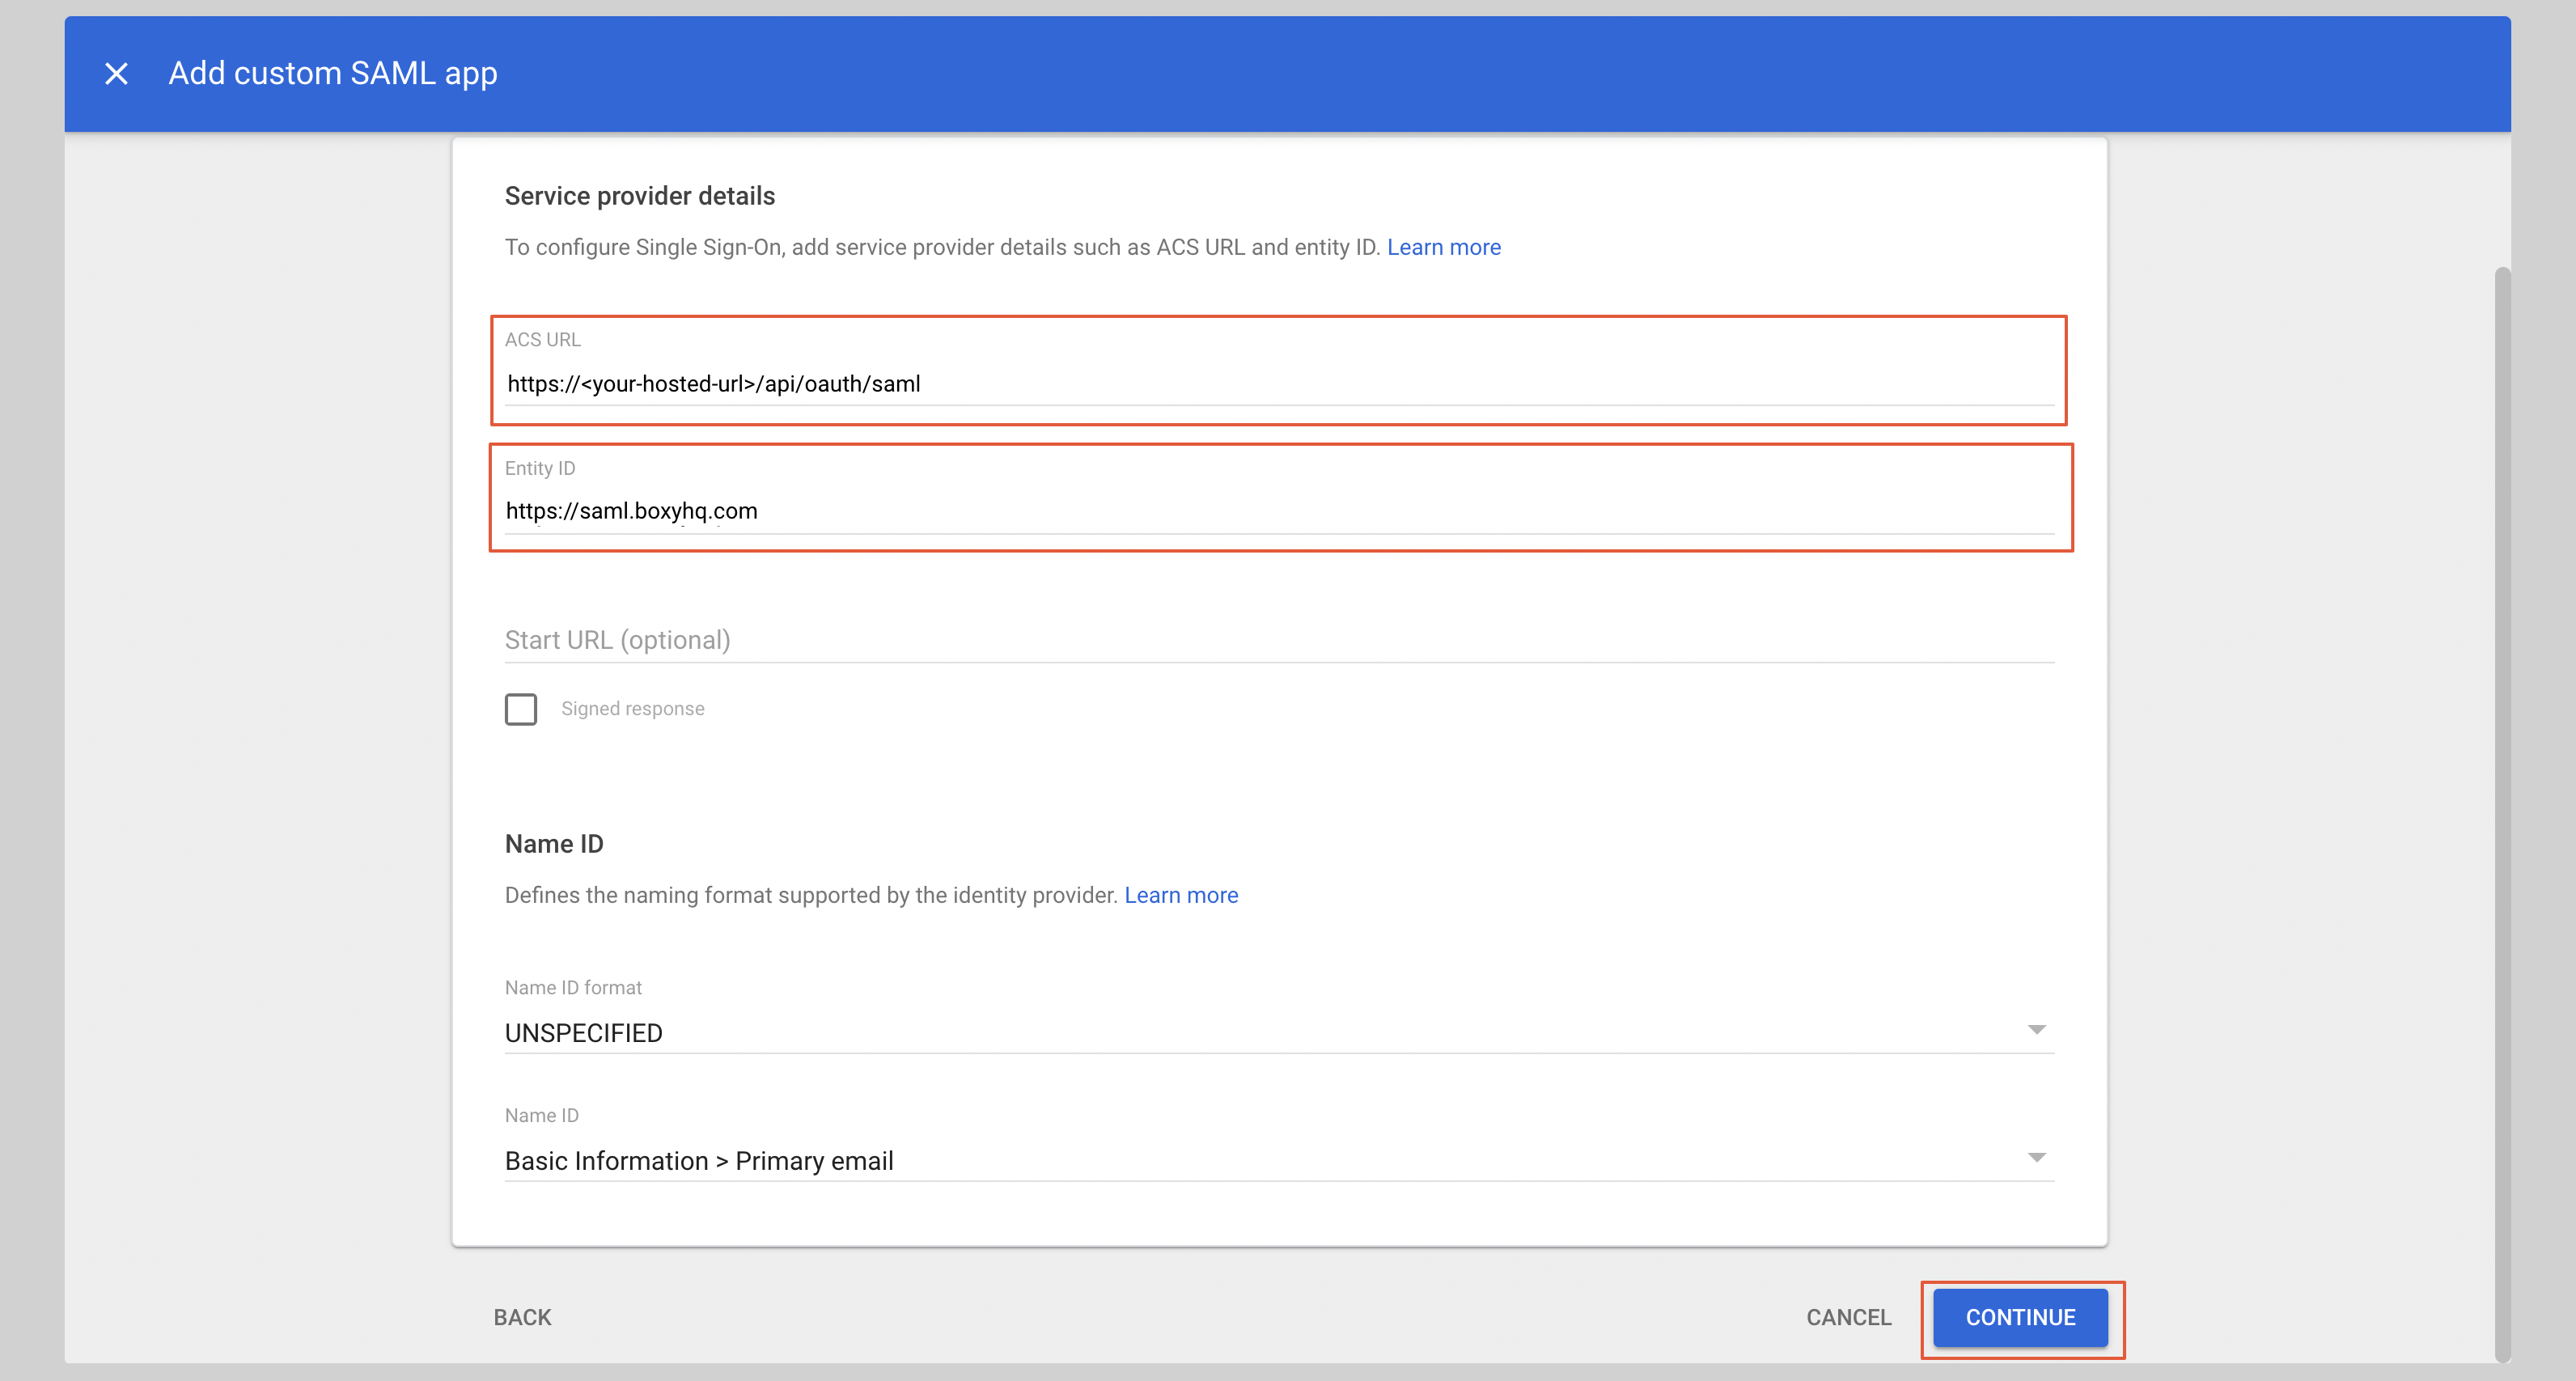
 2. Enter the following values in the **Service provider details** section:
* **ACS URL**
* **Entity ID**
Replace the values with the ones you have received from Aampe and click **Continue** to save the configuration.
2. Enter the following values in the **Service provider details** section:
* **ACS URL**
* **Entity ID**
Replace the values with the ones you have received from Aampe and click **Continue** to save the configuration.
 ## Attribute mapping
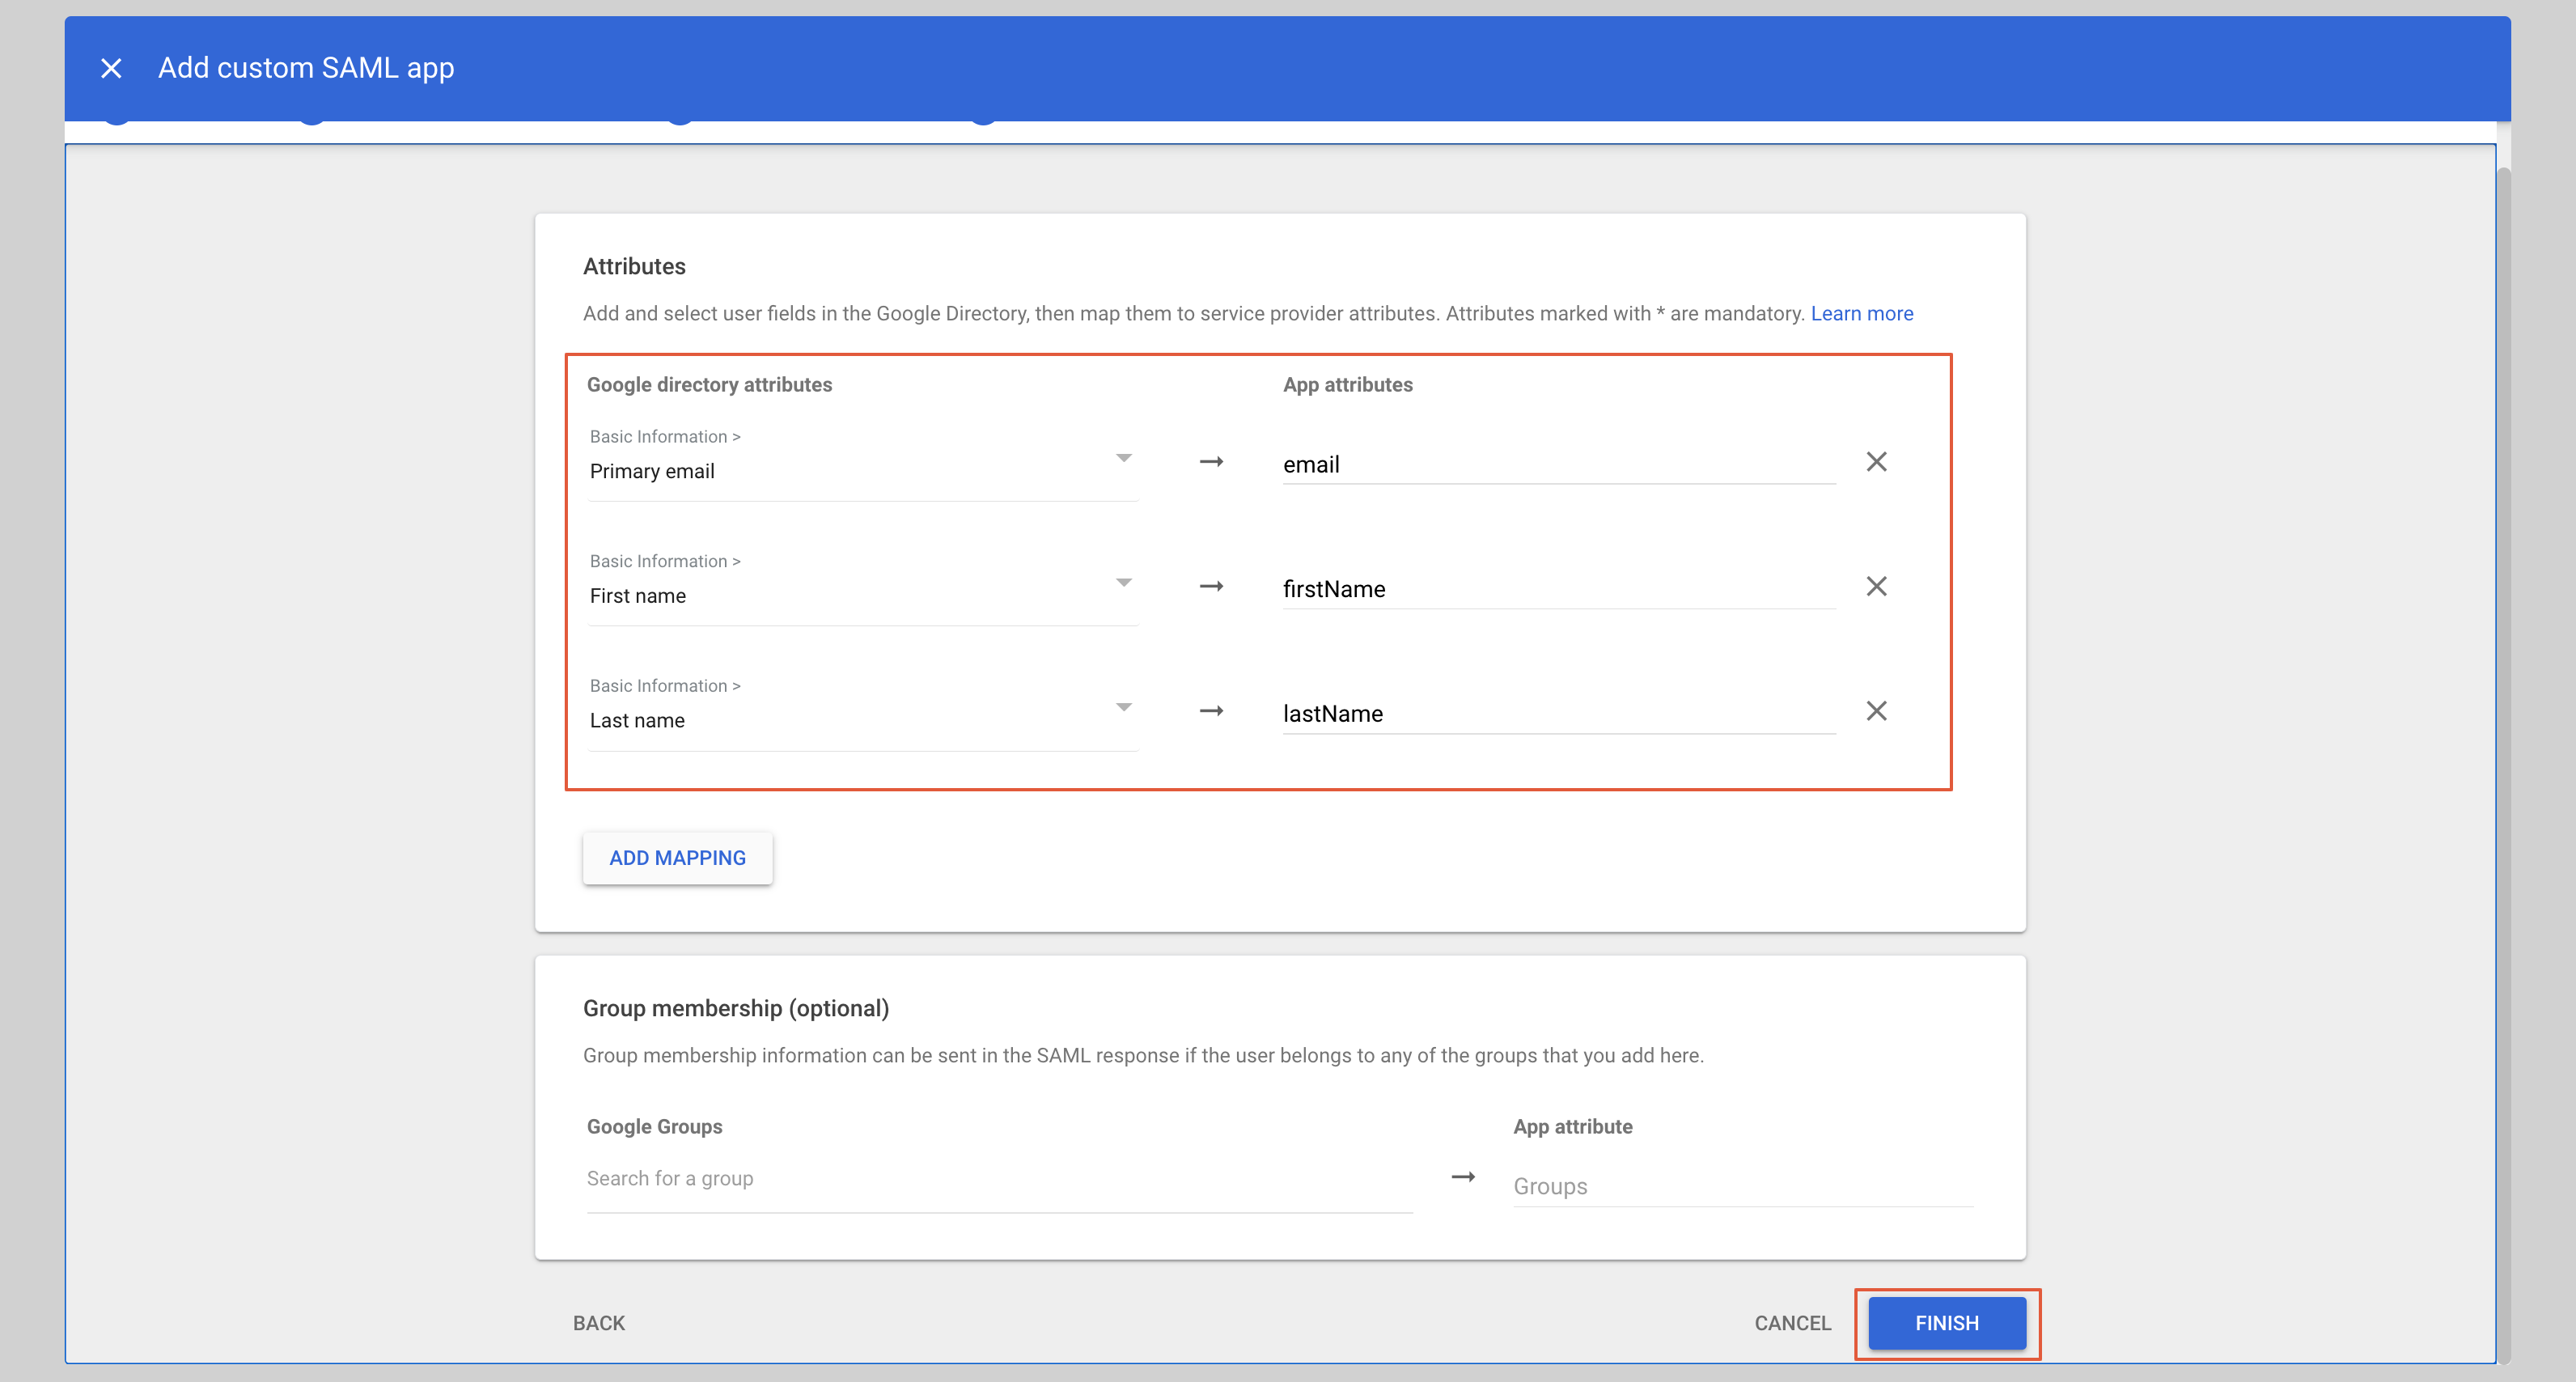
1. Under the **Attributes** section, you have to configure the following attributes:
| App attributes | Google directory attributes |
| :------------- | :-------------------------- |
| Primary email | |
| `firstName` | `First name` |
| `lastName` | `Last name` |
See the screenshot below.
2. After you have configured the attributes, click **Finish** to save the configuration.
## Attribute mapping
1. Under the **Attributes** section, you have to configure the following attributes:
| App attributes | Google directory attributes |
| :------------- | :-------------------------- |
| Primary email | |
| `firstName` | `First name` |
| `lastName` | `Last name` |
See the screenshot below.
2. After you have configured the attributes, click **Finish** to save the configuration.
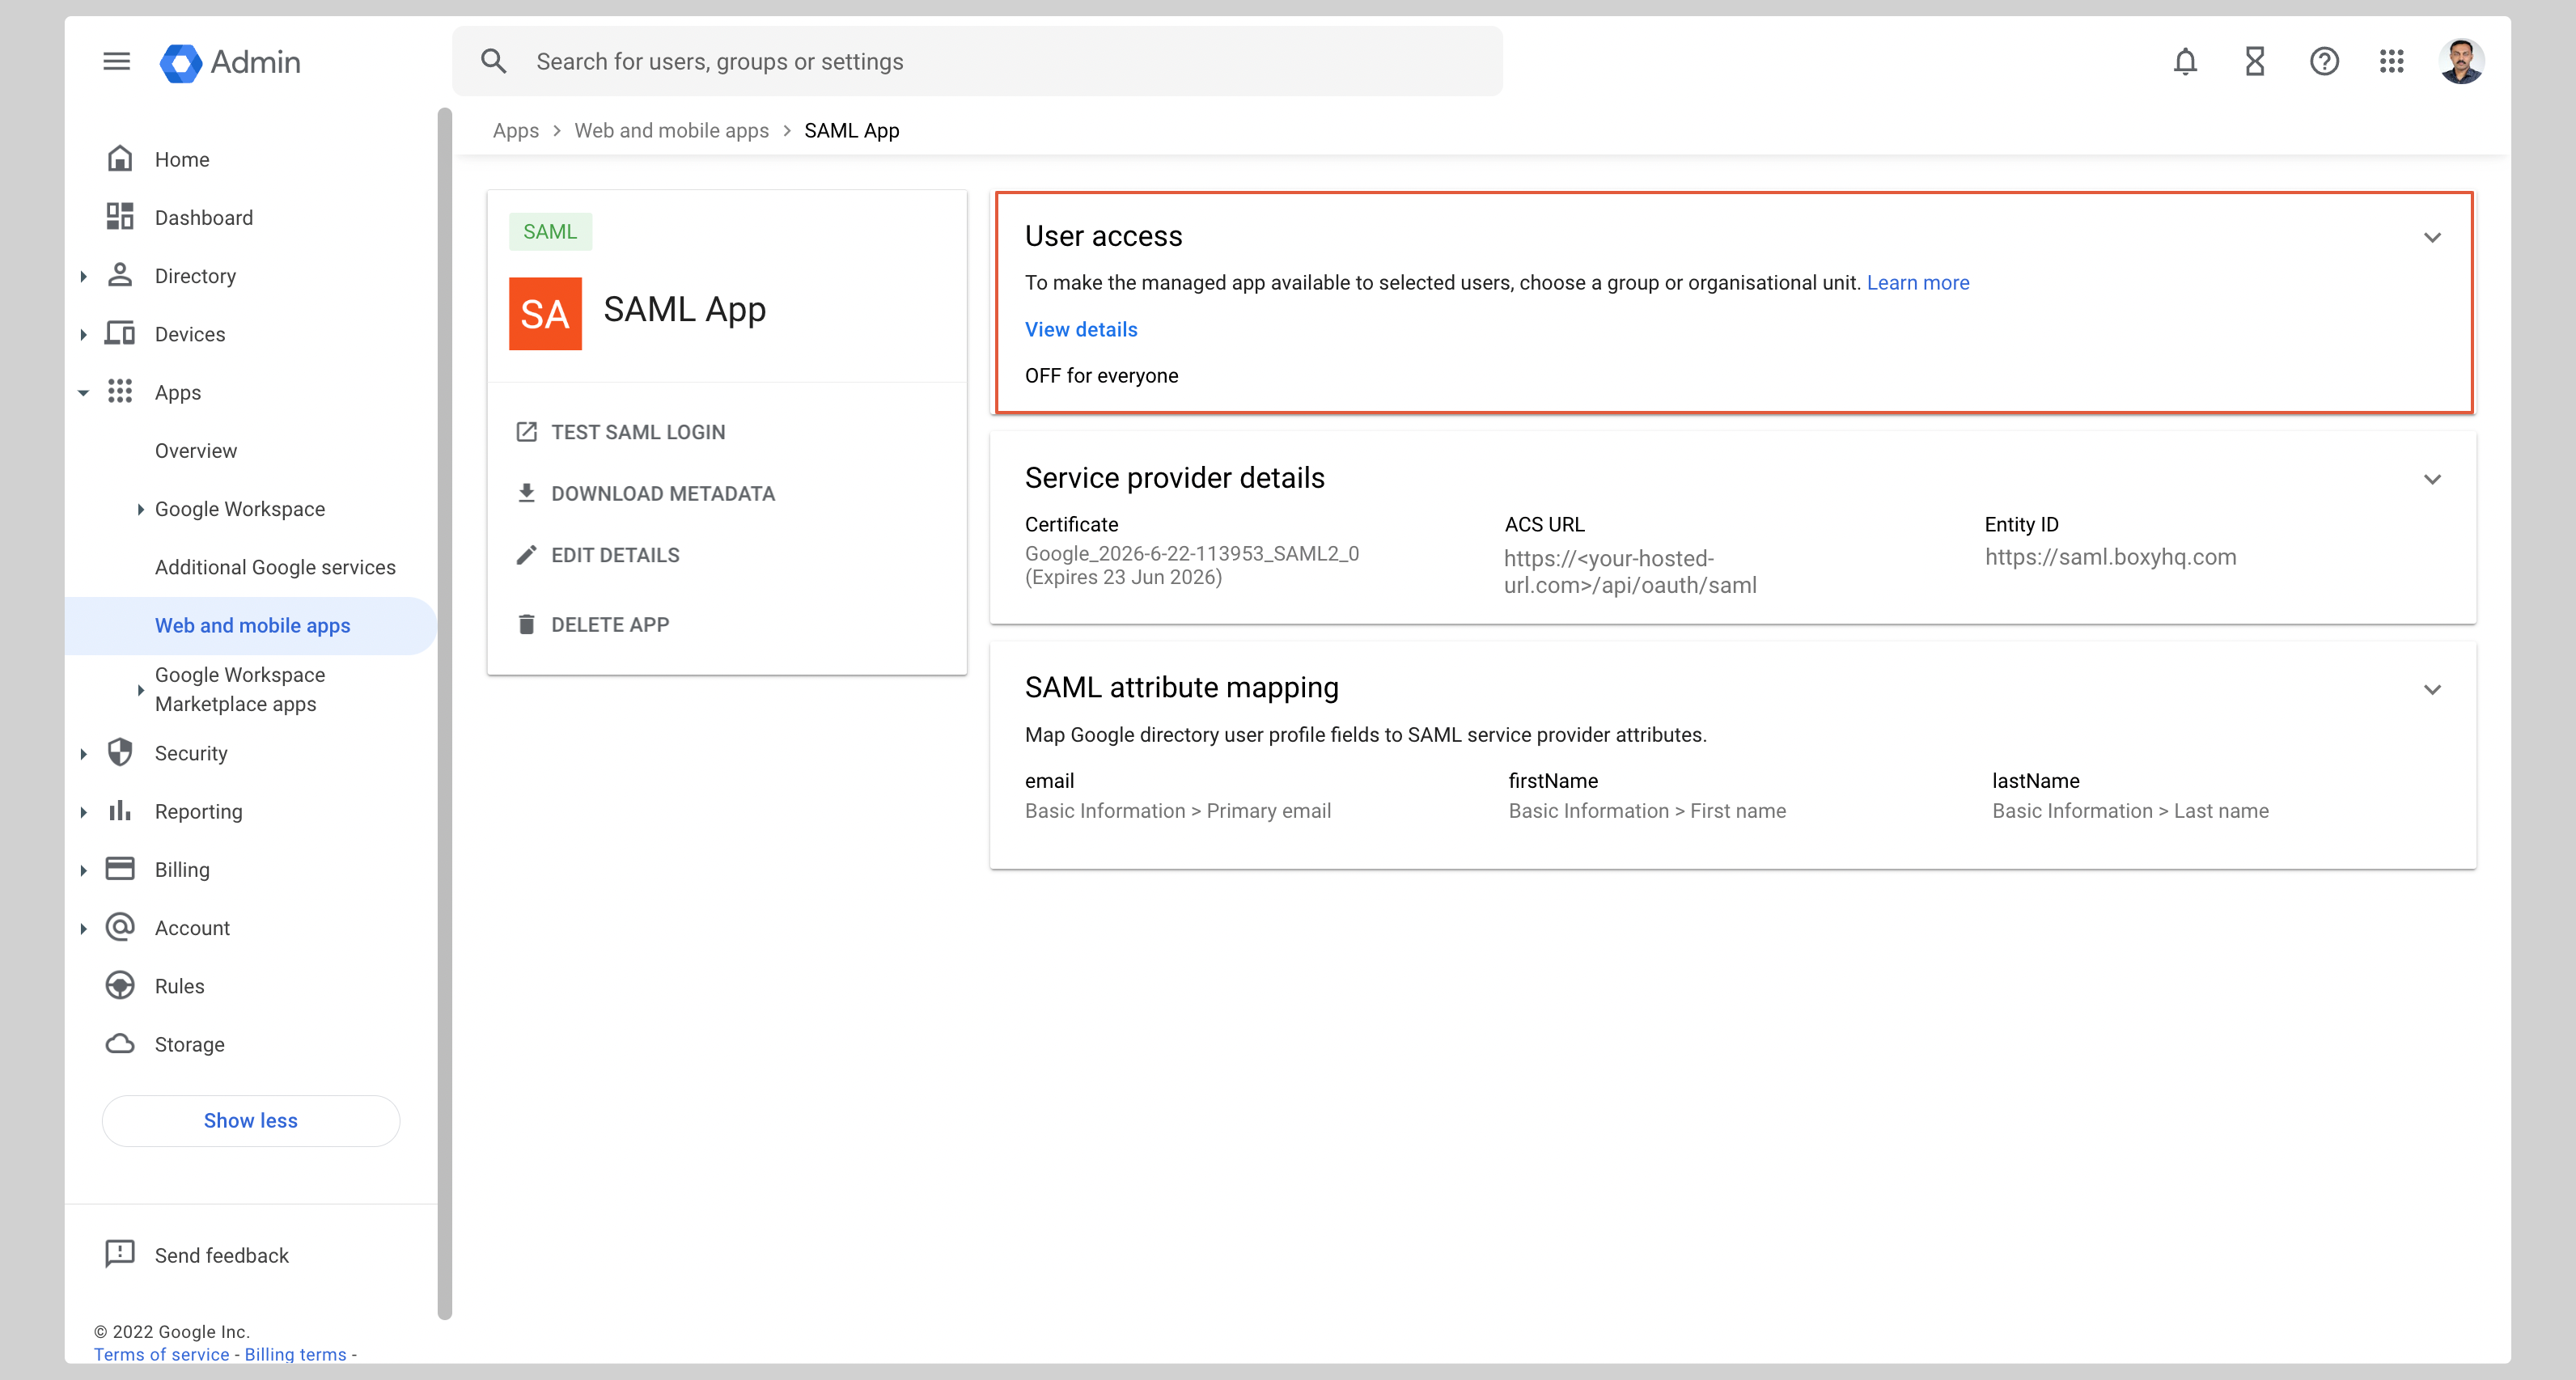
 3. From the next screen, click **User access** to configure the application to allow users to log in.
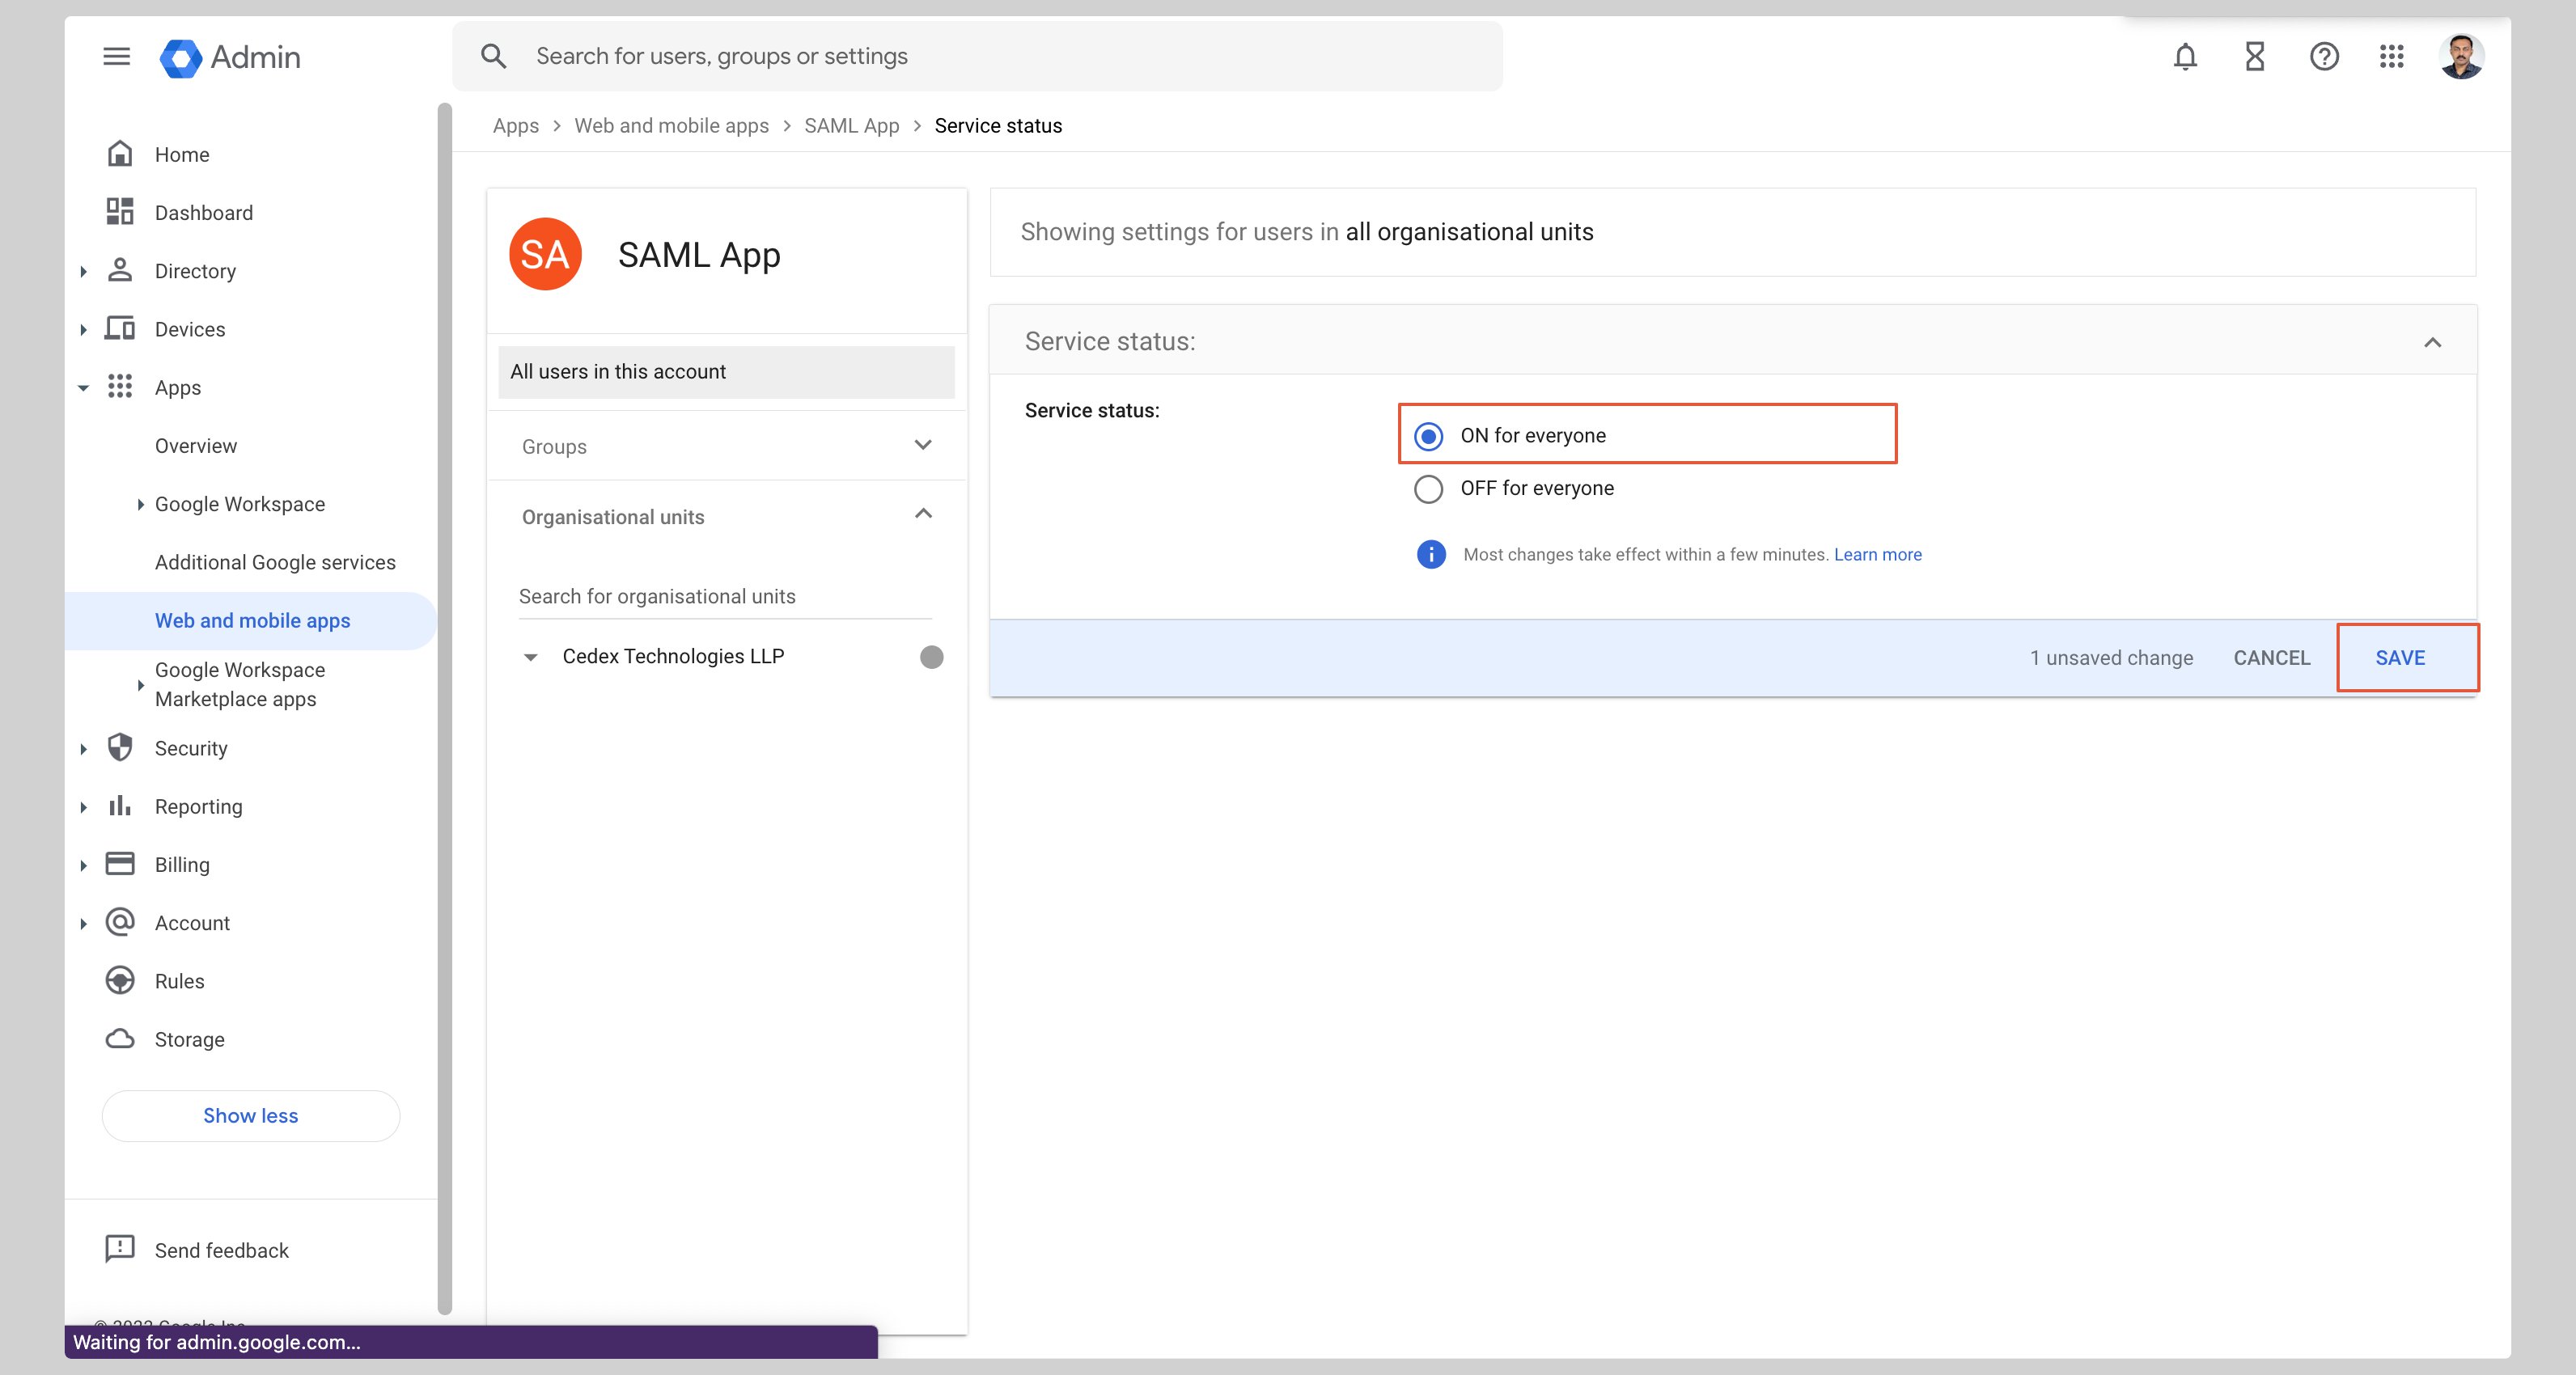
 4. Check the **ON for everyone** checkbox and click **Save**.
 ## Next steps
You've successfully configured your custom SAML application for Google SAML. At this stage, you can assign users to your application and start using it.
## Next steps
You've successfully configured your custom SAML application for Google SAML. At this stage, you can assign users to your application and start using it.