> ## Documentation Index
> Fetch the complete documentation index at: https://kb.aampe.com/llms.txt
> Use this file to discover all available pages before exploring further.
# Firebase Cloud Messaging
> Estimated setup time: 1 hour
## Requirements
* Your Firebase project ID
* Service account JSON credentials
Aampe will essentially call the Firebase [Cloud Messaging API](https://firebase.google.com/docs/reference/fcm/rest/v1/projects.messages/send) on your behalf.
Setting up Firebase Cloud Messages involves four steps:
1. Enable the Cloud Messaging API
2. Create a custom role for message creation
3. Create a service account
4. Generate a key
All the next steps assume that you start from your Google Cloud Platform console with your Firebase project selected.
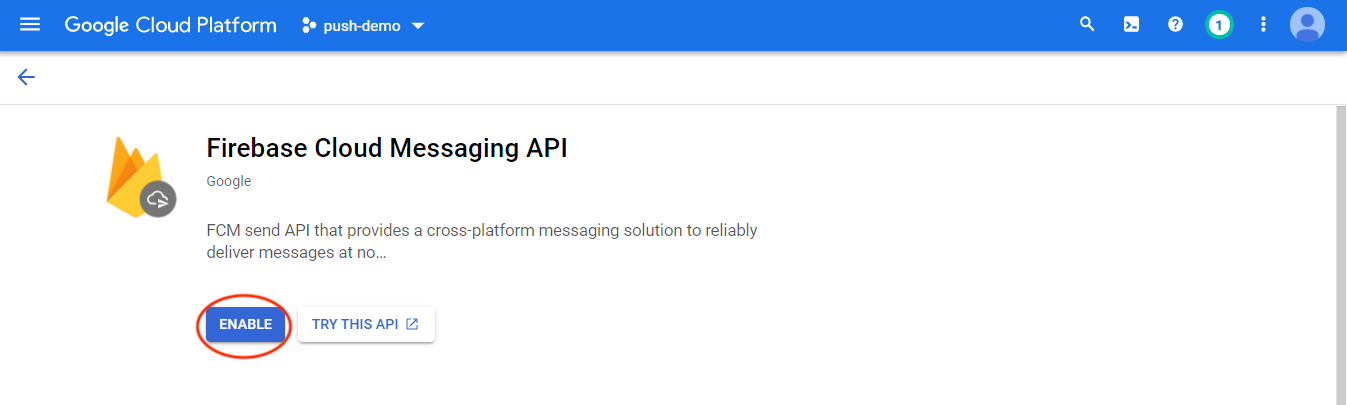
## Enable the Cloud Messaging API
1. Type "Firebase Cloud Messaging API" in the Search products and resources textbox.
2. Choose **Firebase Cloud Messaging API** from the list.
 3. Click on the blue **Enable** button.
 ## Create a Custom Role for Message Creation
A custom Role must be created in the system to allow Aampe to trigger notifications using the API because the default roles do not provide granular enough permissions.
1. Type "Roles" in the Search products and resources textbox and select the **Roles (IAM and Admin)** option. This will take you to the Roles page.
## Create a Custom Role for Message Creation
A custom Role must be created in the system to allow Aampe to trigger notifications using the API because the default roles do not provide granular enough permissions.
1. Type "Roles" in the Search products and resources textbox and select the **Roles (IAM and Admin)** option. This will take you to the Roles page.
 2. Click on **+ CREATE ROLE**
3. Fill in the role Title, Description and ID according to your conventions.
2. Click on **+ CREATE ROLE**
3. Fill in the role Title, Description and ID according to your conventions.
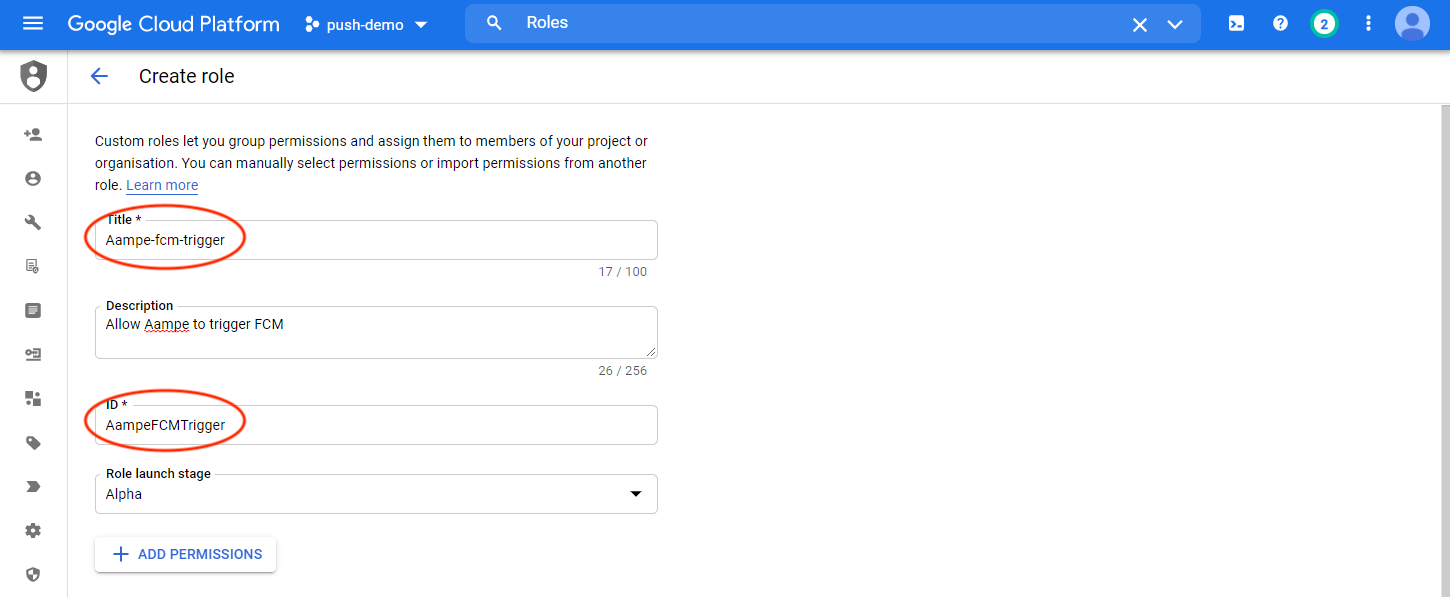 4. Click on **+ADD PERMISSIONS**
5. In the window that opens, search for `cloudmessaging.messages.create` using the textbox to the right of the Filter and select the cloudmessaging.messages.create entry that appears.
4. Click on **+ADD PERMISSIONS**
5. In the window that opens, search for `cloudmessaging.messages.create` using the textbox to the right of the Filter and select the cloudmessaging.messages.create entry that appears.
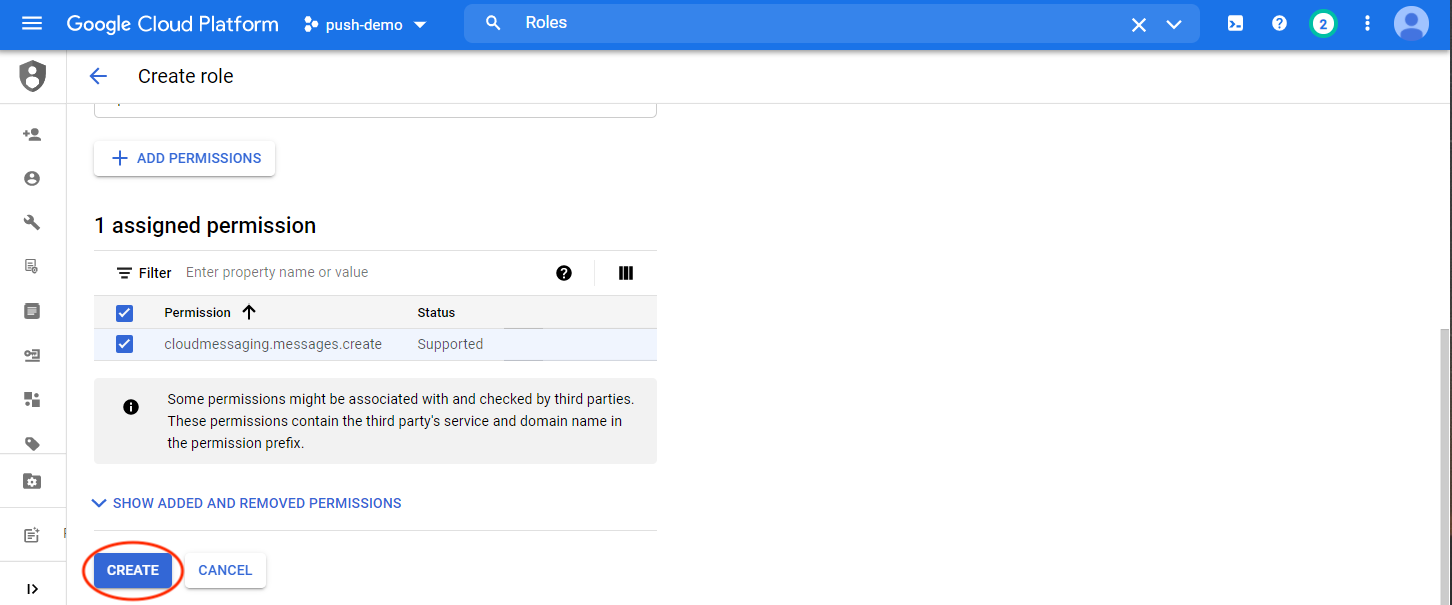
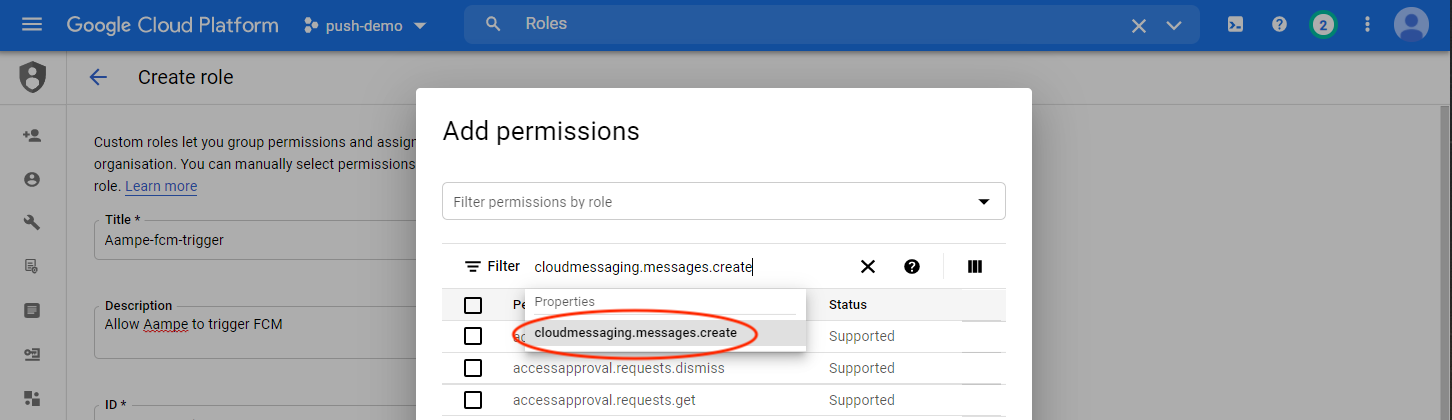 6. Tick the `cloudmessaging.messages.create` permission and click on **ADD**
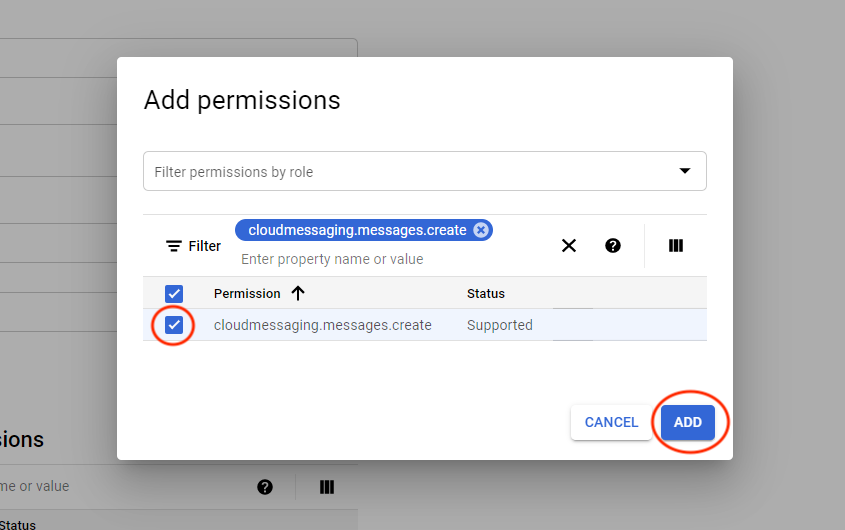 7. Once added, click on **CREATE** to complete the role creation.
 ## Create a Service Account
1. Type "Service accounts" in the Search products and resources textbox.
2. Choose **Service accounts (IAM and admin)** from the list. This will take you to the service account page.
## Create a Service Account
1. Type "Service accounts" in the Search products and resources textbox.
2. Choose **Service accounts (IAM and admin)** from the list. This will take you to the service account page.
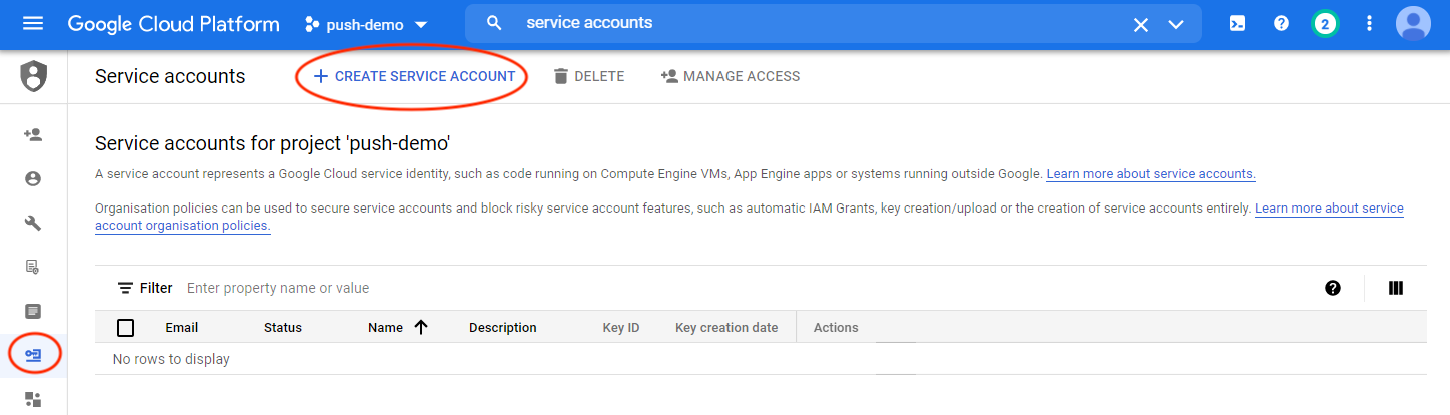
 3. Click on **+ CREATE SERVICE ACCOUNT**
 4. Fill in the Service account name, ID and description according to your conventions.
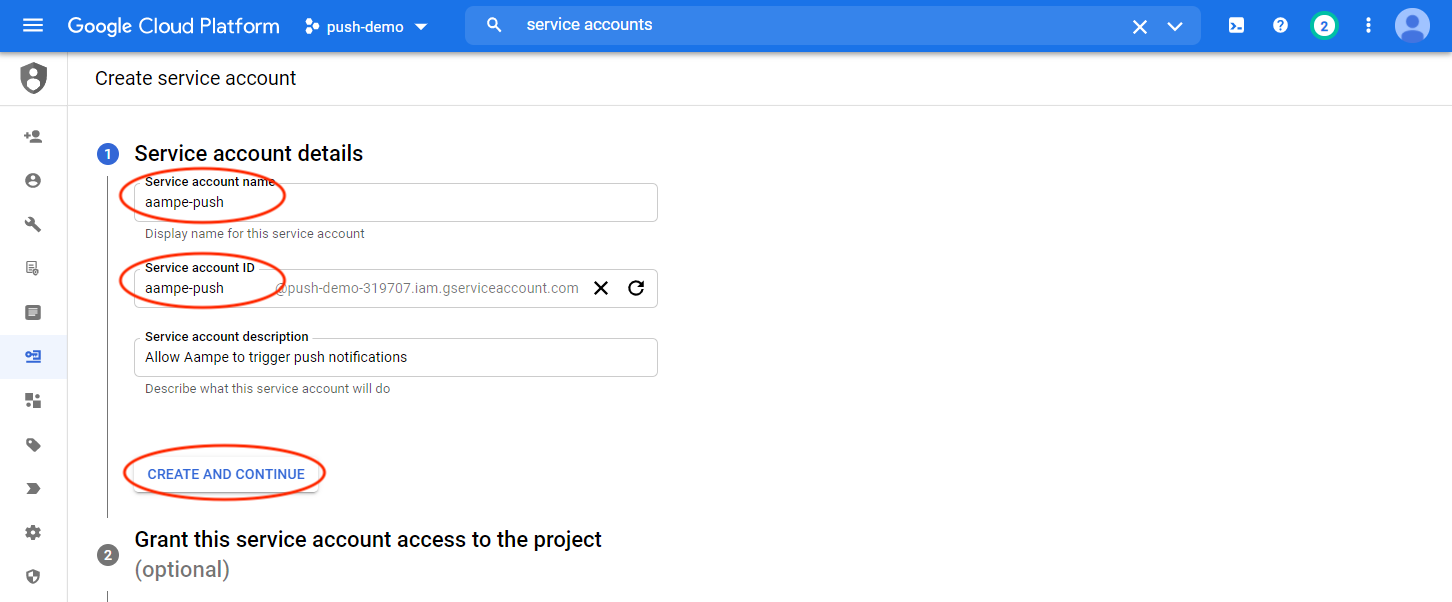 5. Click on **CREATE AND CONTINUE**
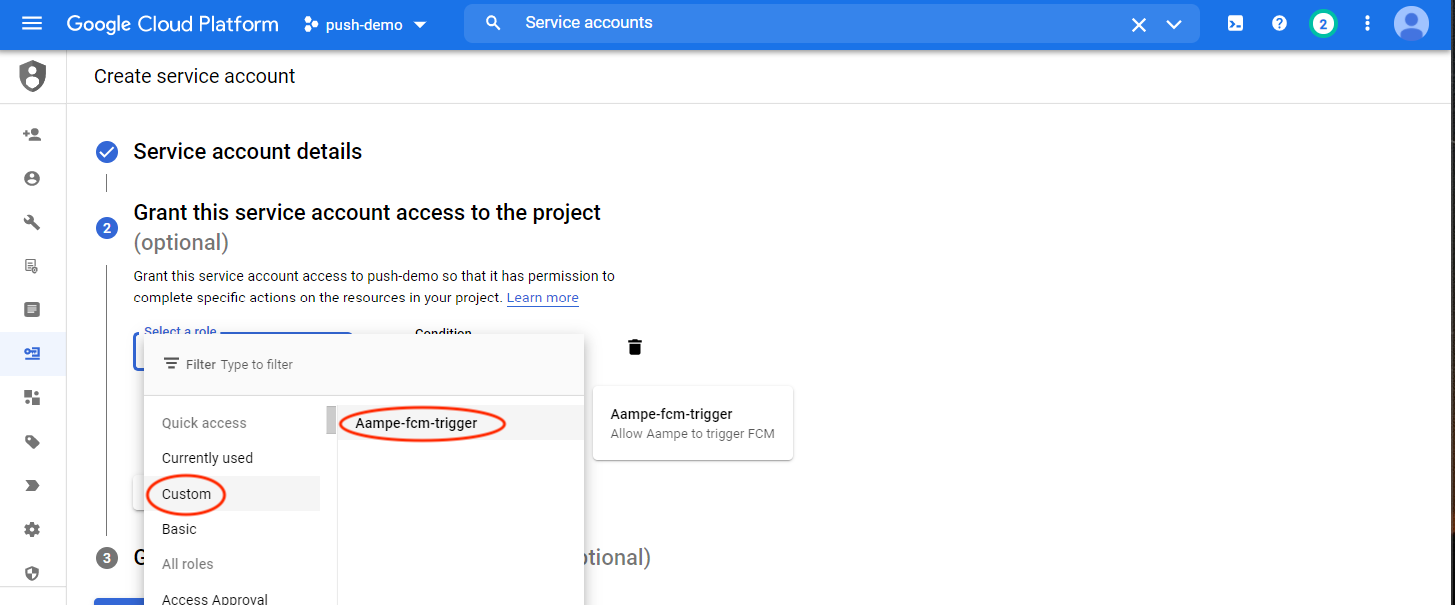
6. On the Grant this service account access to the project screen, click on the **Select a role** dropdown.
7. Under **Quick access > Custom**, select the custom role you created in the previous step.
5. Click on **CREATE AND CONTINUE**
6. On the Grant this service account access to the project screen, click on the **Select a role** dropdown.
7. Under **Quick access > Custom**, select the custom role you created in the previous step.
 8. Click on **+ ADD ANOTHER ROLE** and then on the **Select a role** dropdown.
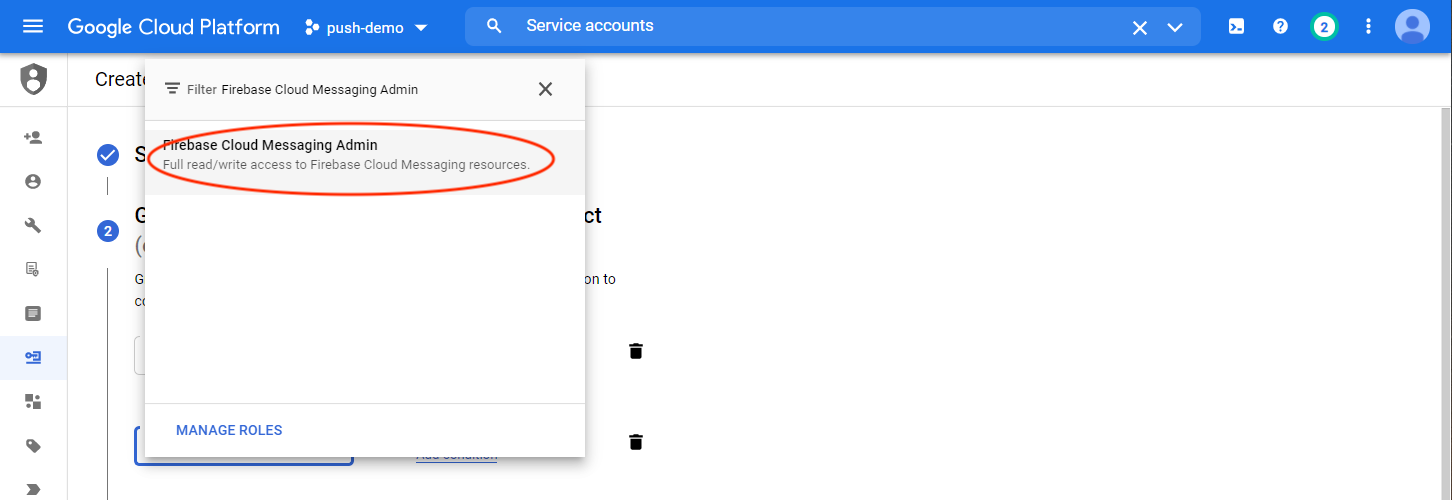
9. Type "Firebase Cloud Messaging Admin" in the box near the Filter.
10. Select the suggested **Firebase Cloud Messaging Admin** role.
8. Click on **+ ADD ANOTHER ROLE** and then on the **Select a role** dropdown.
9. Type "Firebase Cloud Messaging Admin" in the box near the Filter.
10. Select the suggested **Firebase Cloud Messaging Admin** role.
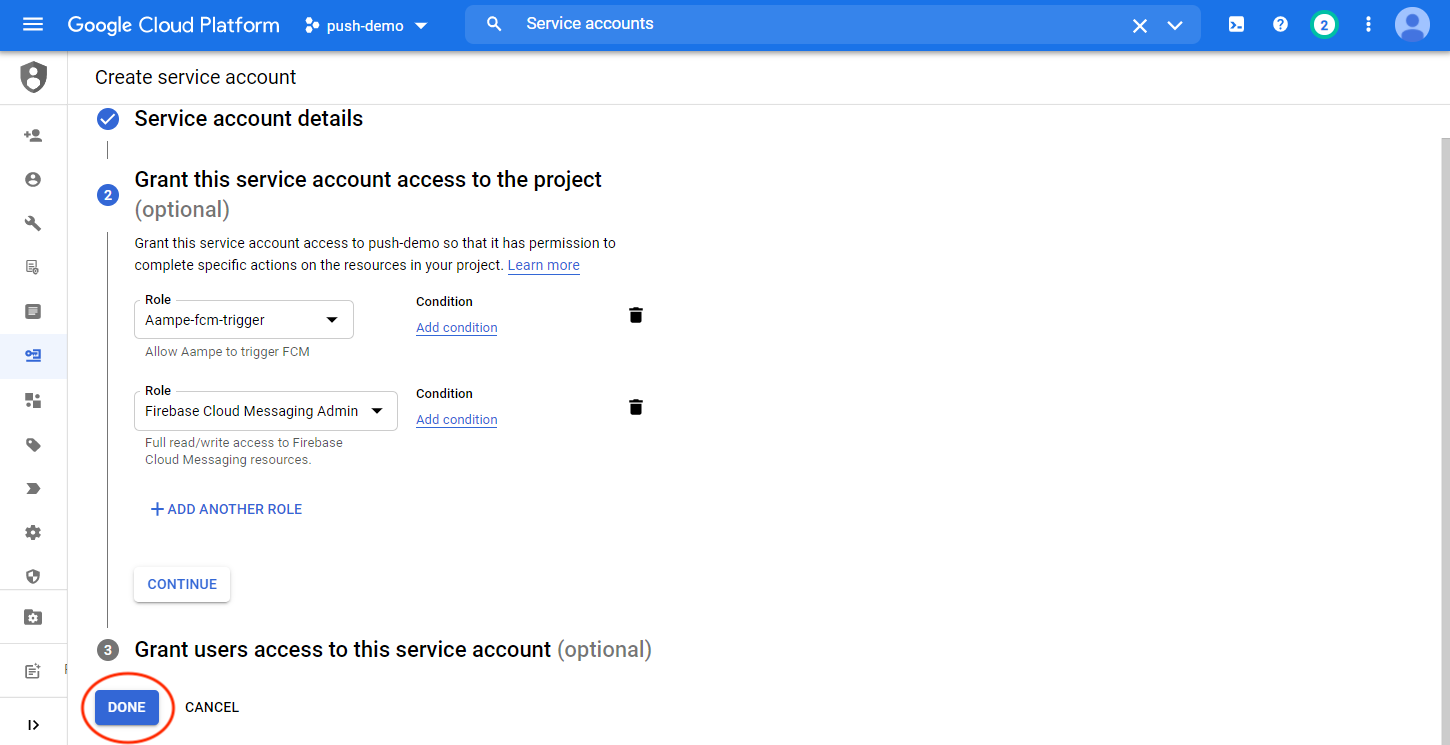
 11. Click on **DONE** to complete the service account creation.
 ## Generate a Key
This step assumes that you created a service account and assigned the "Firebase Cloud Messaging Admin" and custom message creation roles to it.
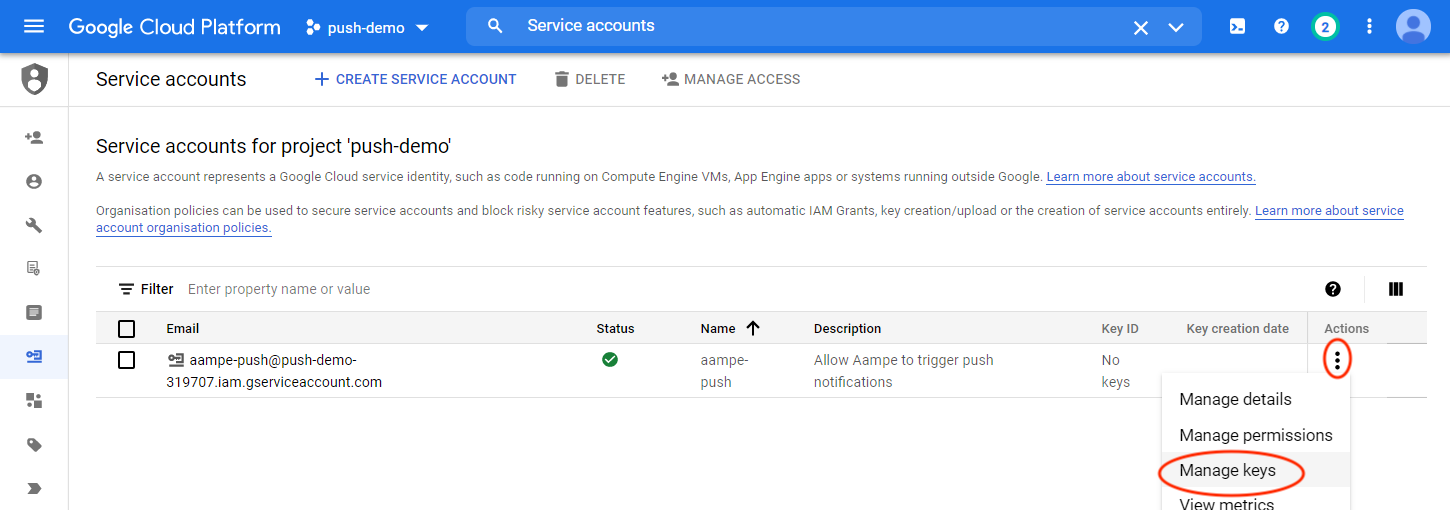
1. In your "Service accounts" page, find the service account you created for Aampe and click on the three dots in the Actions column and select **Manage keys**
## Generate a Key
This step assumes that you created a service account and assigned the "Firebase Cloud Messaging Admin" and custom message creation roles to it.
1. In your "Service accounts" page, find the service account you created for Aampe and click on the three dots in the Actions column and select **Manage keys**
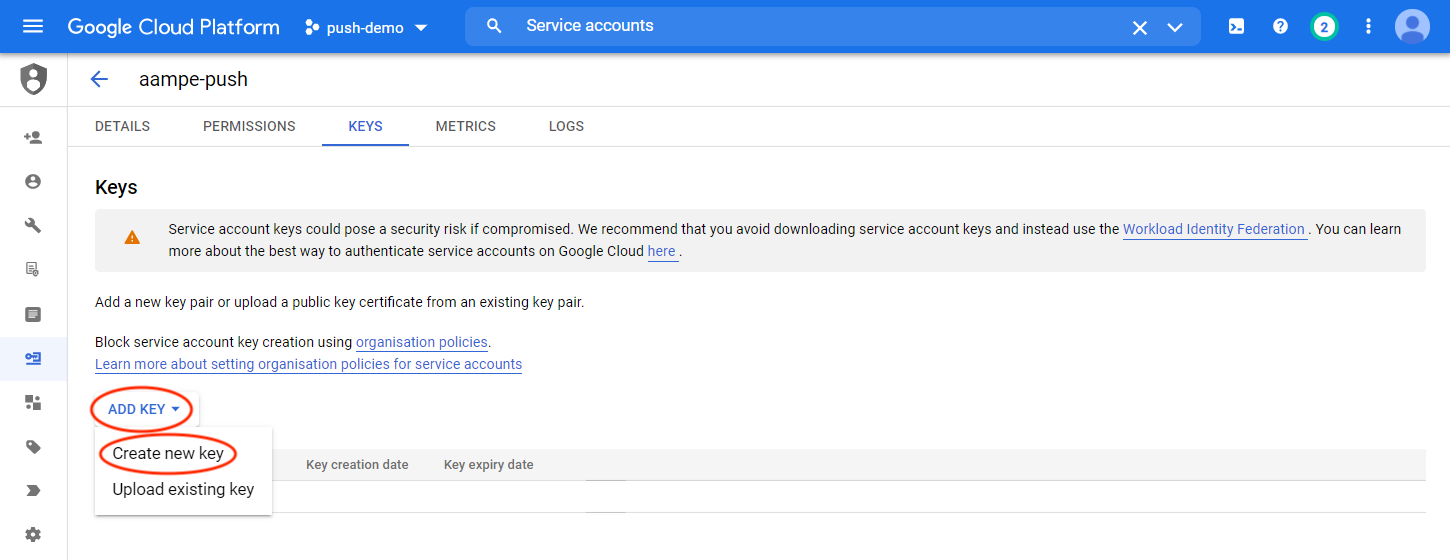
 2. Click on **ADD KEY** and select **Create new key**
 3. Select the **JSON** Key type and click on **CREATE**
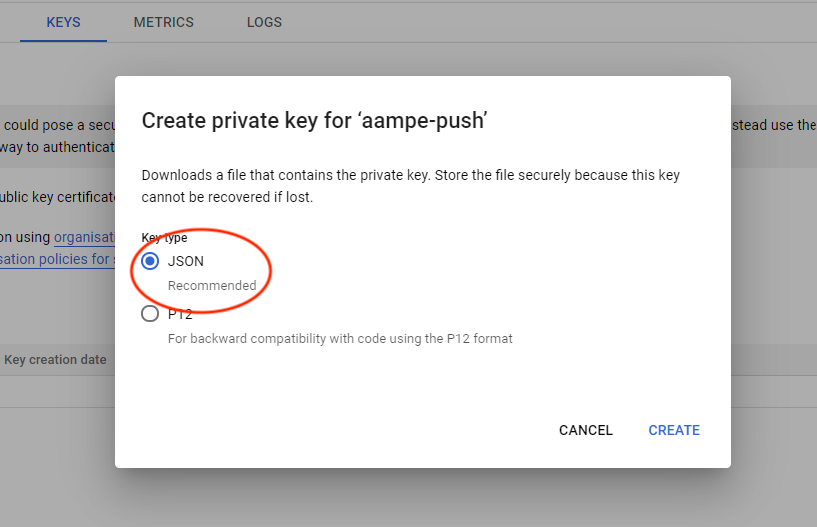 4. Your browser will download a `.json` file with the key needed by Aampe.
Congrats! Keep your json key secure and let your Aampe technical counterparts know it is ready. They will take it from here.
***
4. Your browser will download a `.json` file with the key needed by Aampe.
Congrats! Keep your json key secure and let your Aampe technical counterparts know it is ready. They will take it from here.
***