> ## Documentation Index
> Fetch the complete documentation index at: https://kb.aampe.com/llms.txt
> Use this file to discover all available pages before exploring further.
# Customer.io
> Estimated setup time: 15 minutes
## Requirements
* API Key created for Aampe
* Your Region of setup for [Customer.io](http://Customer.io)
## Steps
Aampe will call the [Customer.io](http://Customer.io)[ API](https://customer.io/docs/api/app/#operation/sendPush) on your behalf.
### Create API Key for Aampe
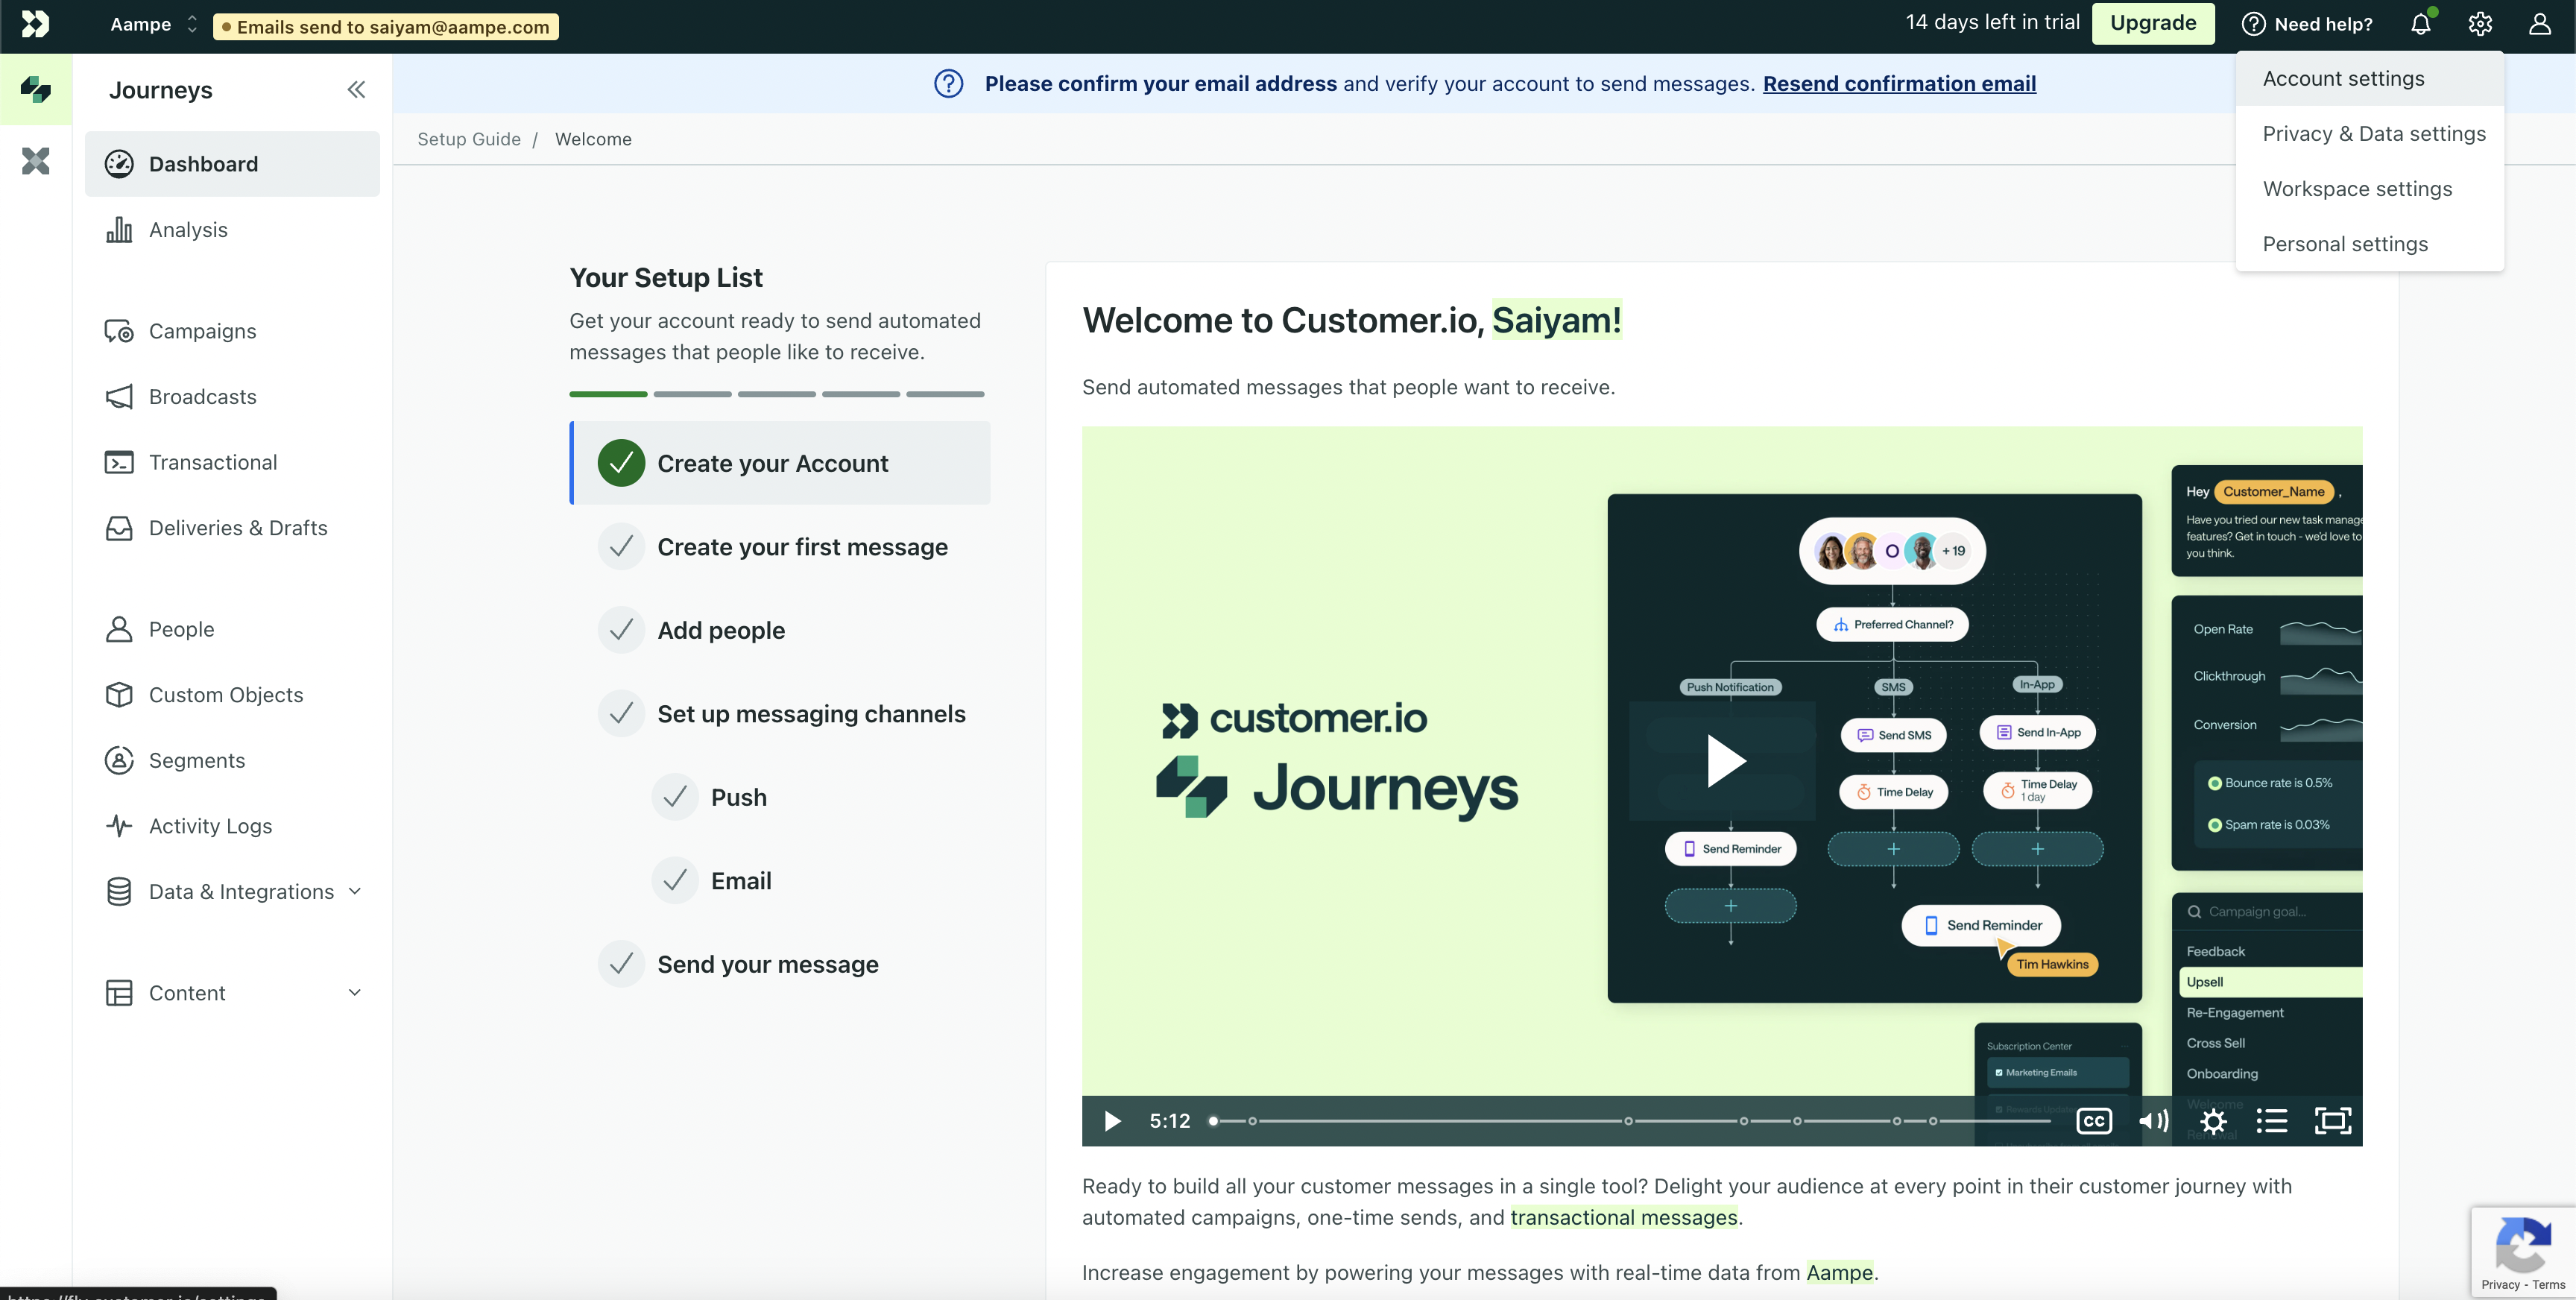
1. Once logged in to [Customer.io](http://Customer.io) account, navigate to **Settings Icon > Account Settings**
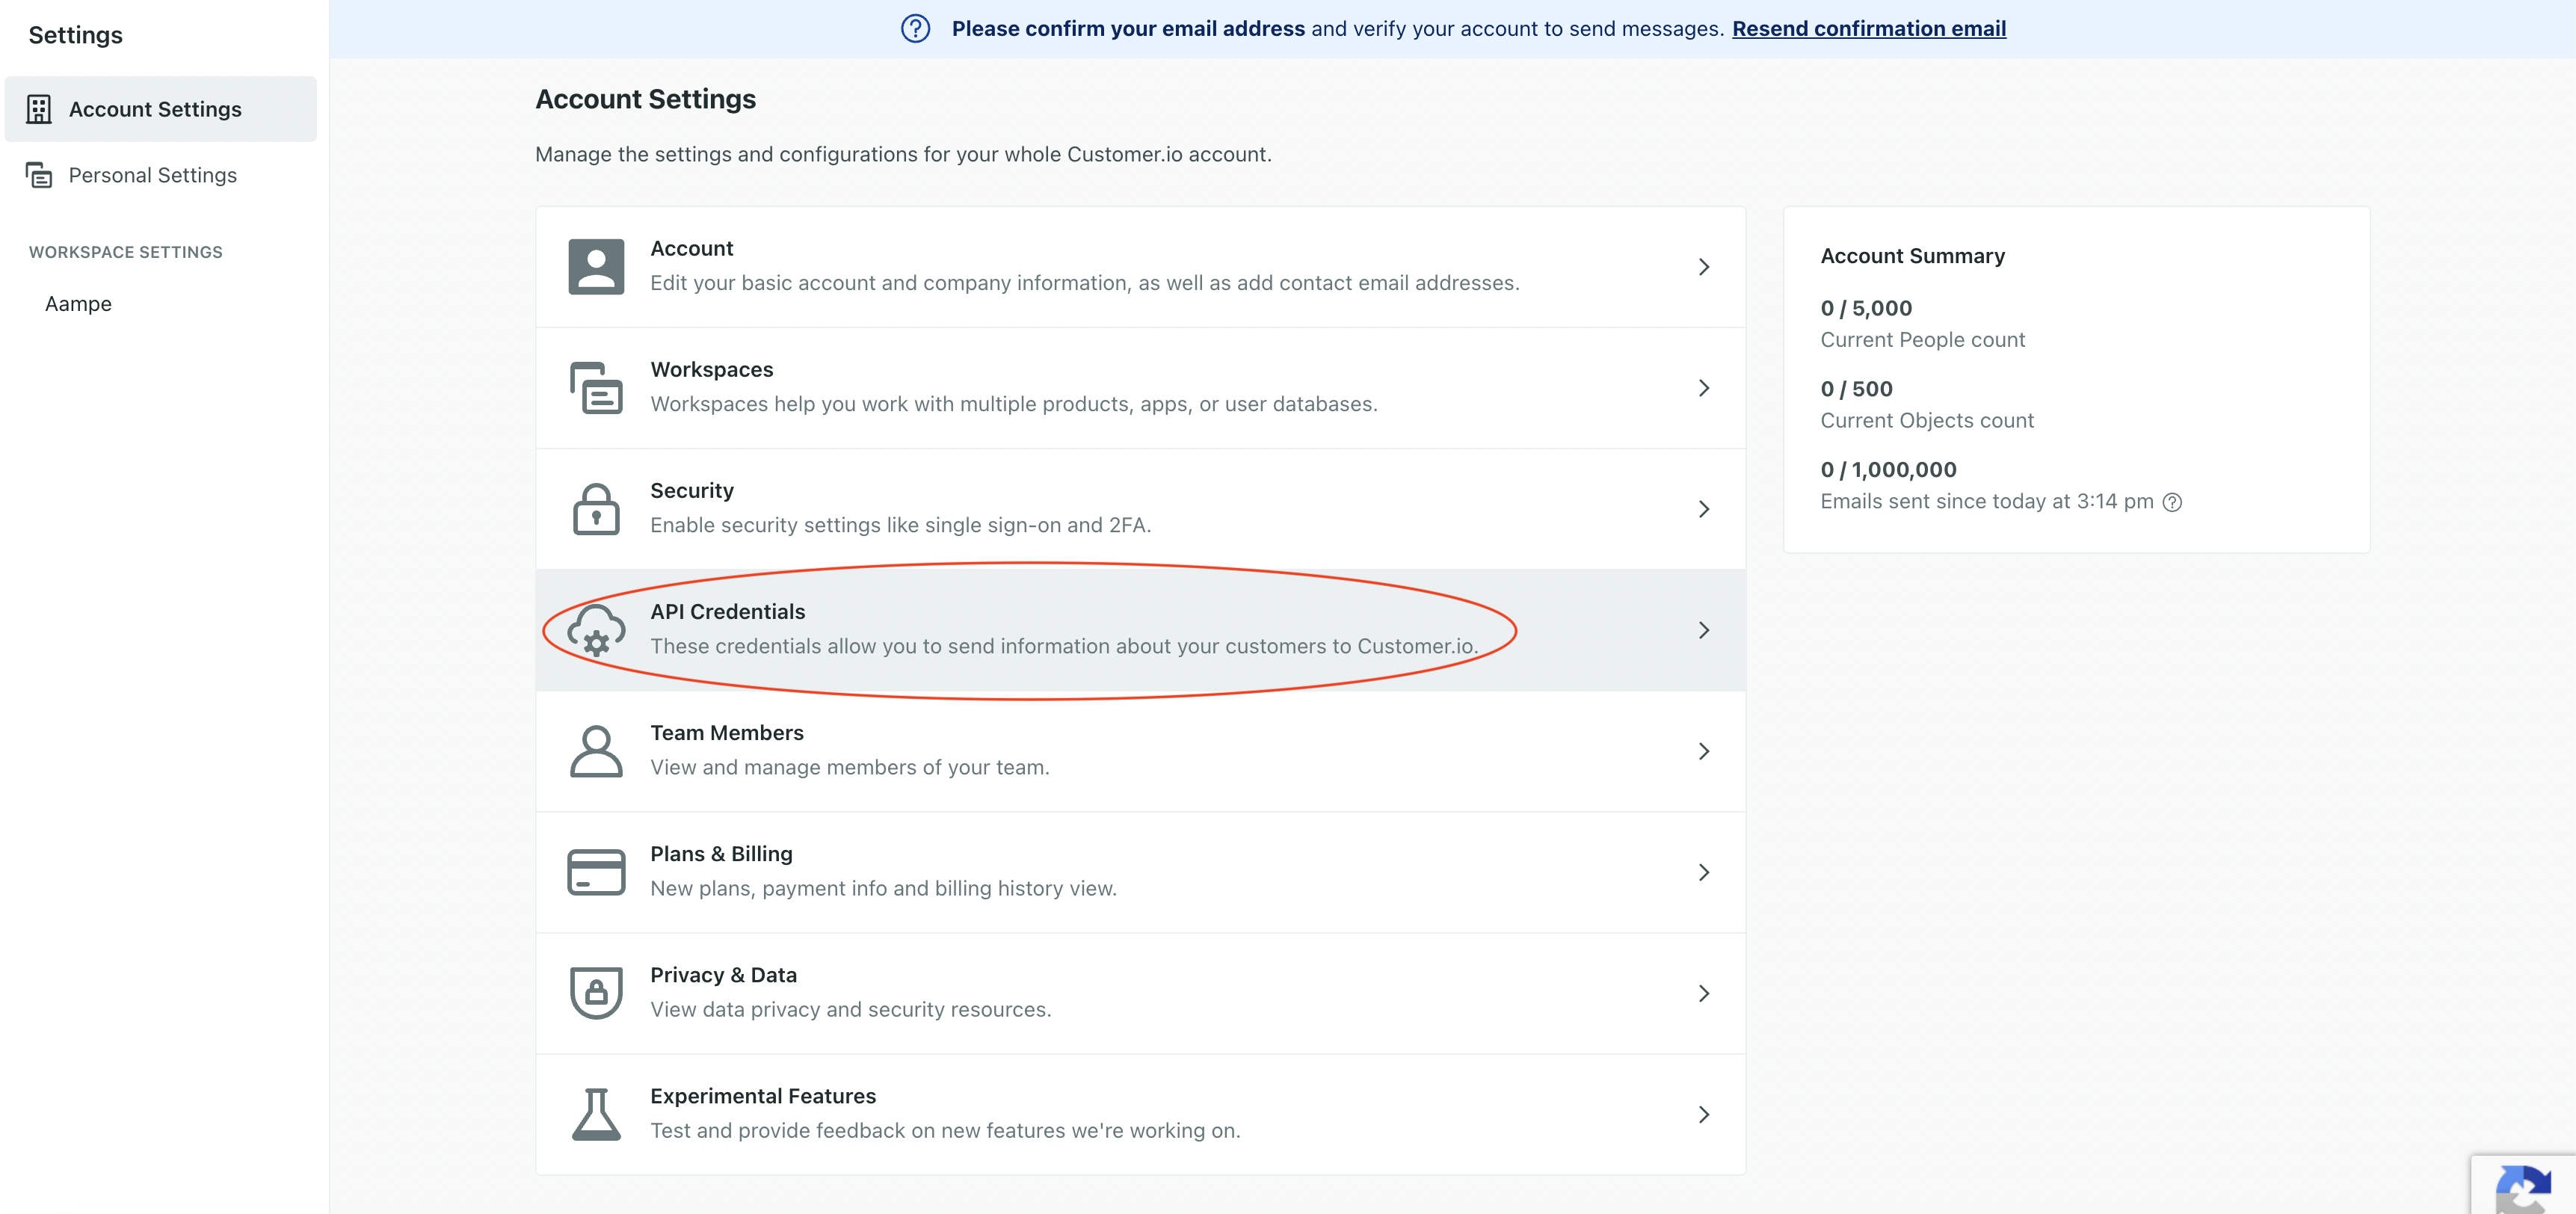
 2. Select **API Credentials** from the menu bar.
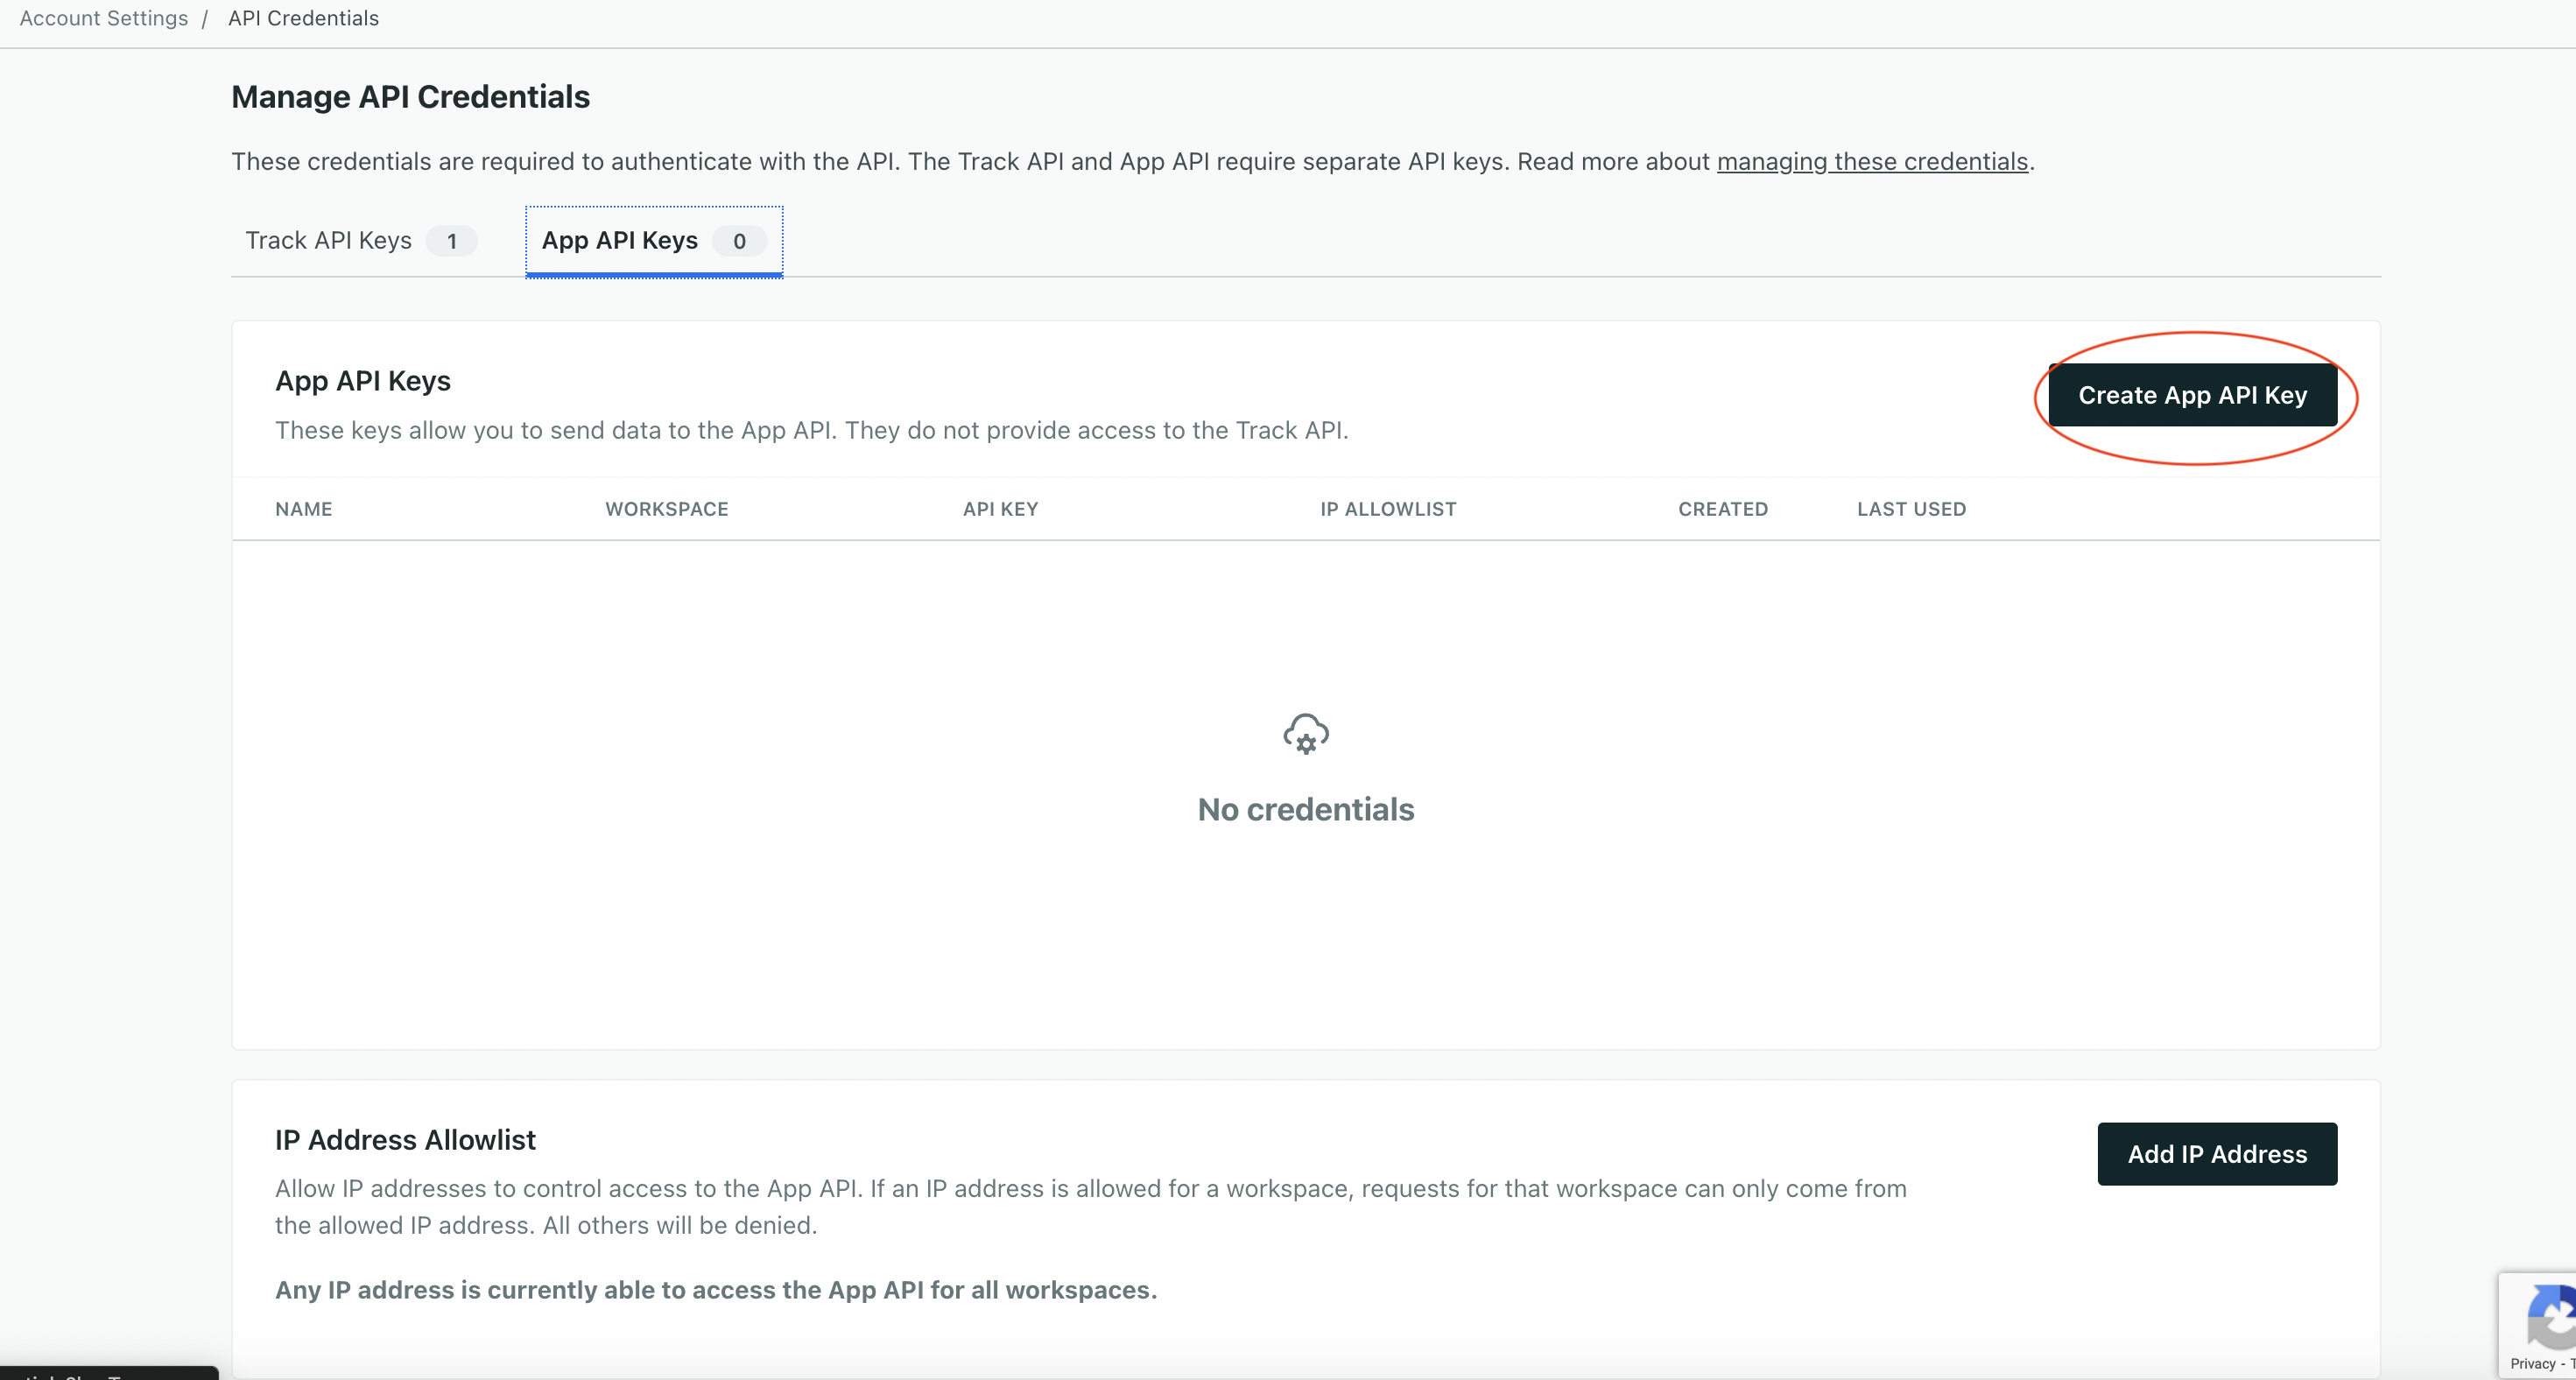
 3. Click on the 2nd tab i.e **Add API keys > Create App API Key**
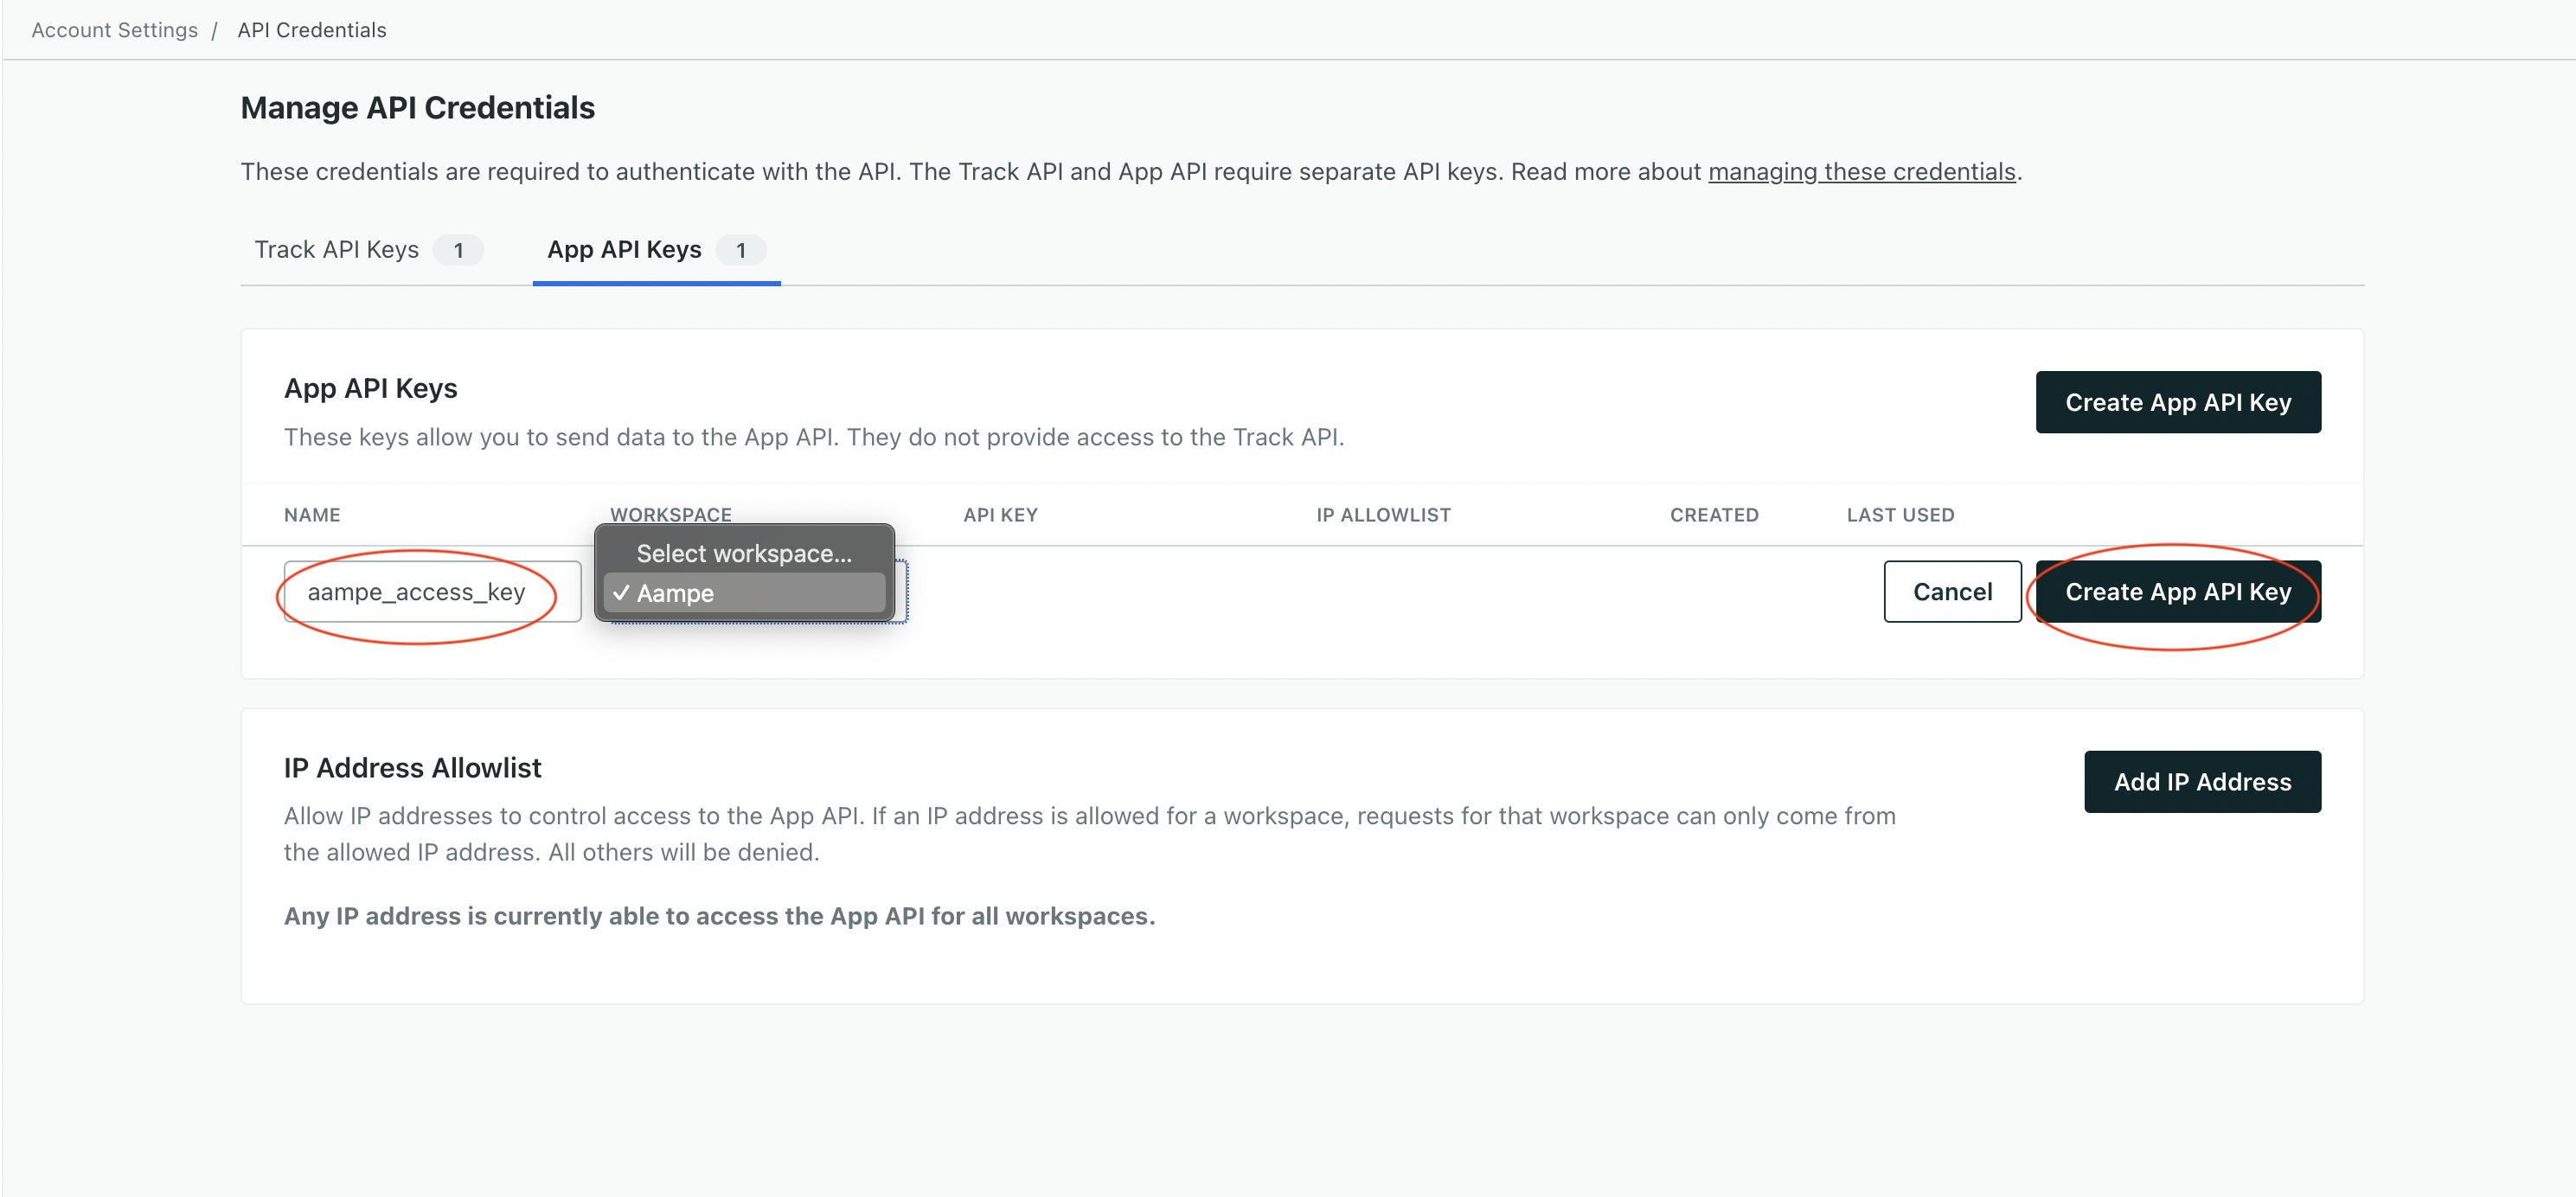
 4. Give it the name you like (e.g `aampe_push_access`) and select your prod workspace and then hit **Create App API Key**
 5. Copy the API Key shown on the prompt - you won't be able to access it again.
### Configure Your [Customer.io](http://Customer.io) Push Integration on Aampe
1. Go to [https://compose.aampe.com](https://compose.aampe.com) and login using your Aampe credentials
2. Navigate to **System setup > Integrations**
3. The **Messaging Provider** tab will open
5. Copy the API Key shown on the prompt - you won't be able to access it again.
### Configure Your [Customer.io](http://Customer.io) Push Integration on Aampe
1. Go to [https://compose.aampe.com](https://compose.aampe.com) and login using your Aampe credentials
2. Navigate to **System setup > Integrations**
3. The **Messaging Provider** tab will open
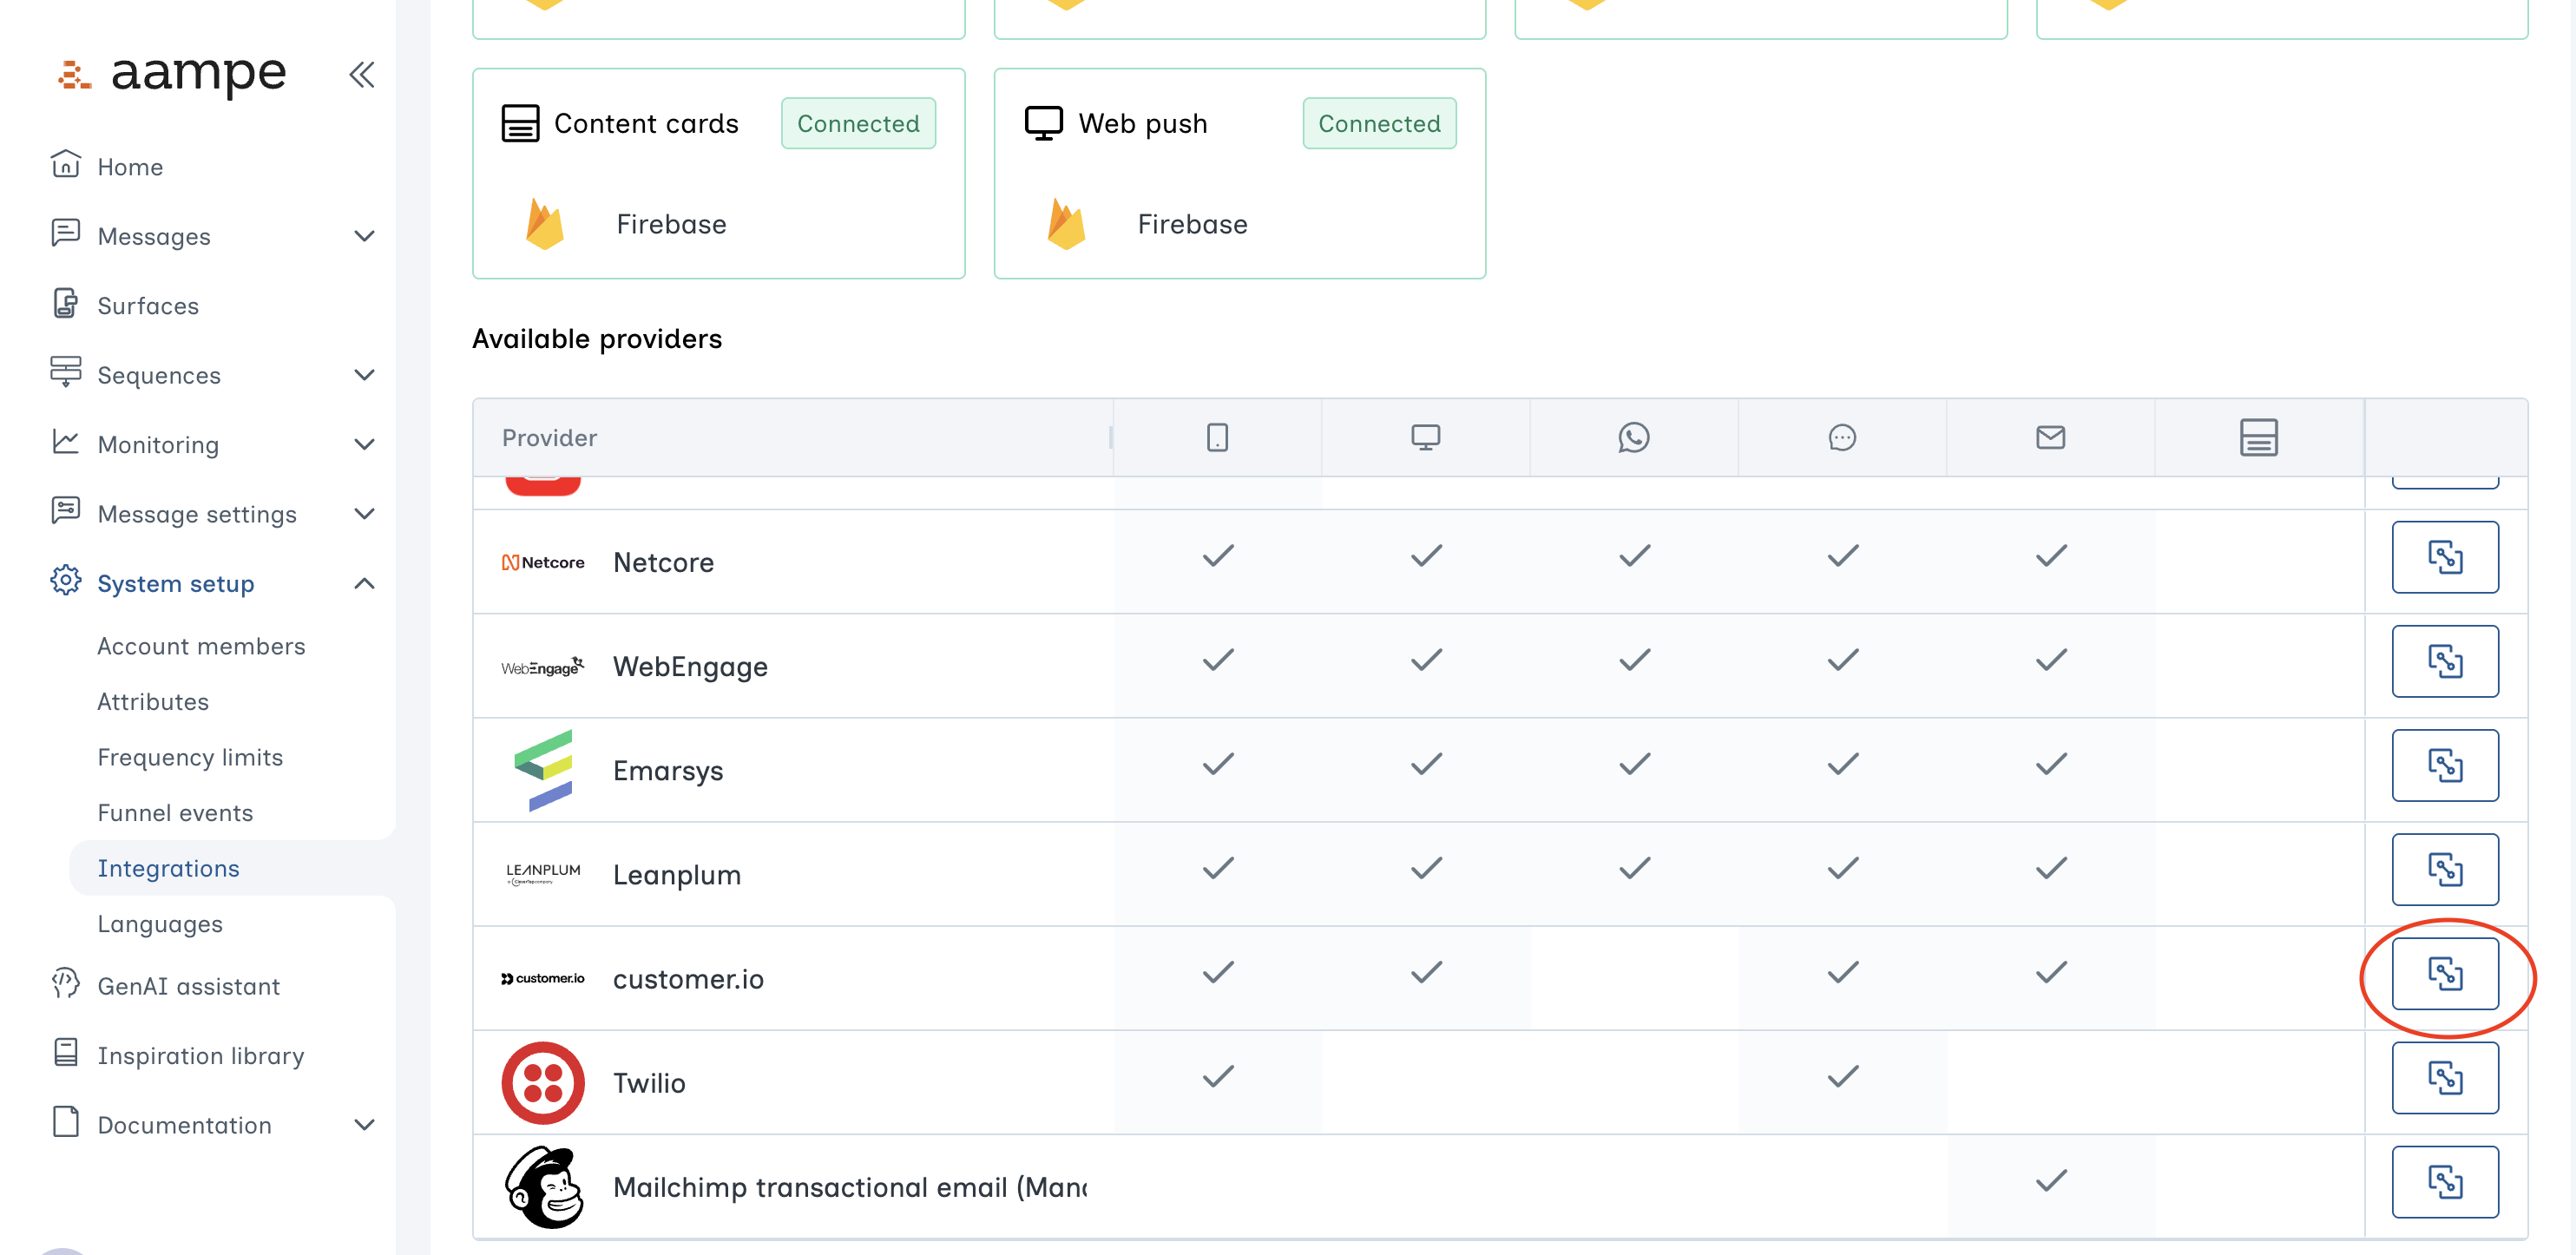 4. Click on [**Customer.io**](http://Customer.io)
5. Input the API Key, Region in the respective textboxes
* If you want to check your region you can go to **Settings -> Privacy and Data Settings** and check the **Data Center Region**
4. Click on [**Customer.io**](http://Customer.io)
5. Input the API Key, Region in the respective textboxes
* If you want to check your region you can go to **Settings -> Privacy and Data Settings** and check the **Data Center Region**
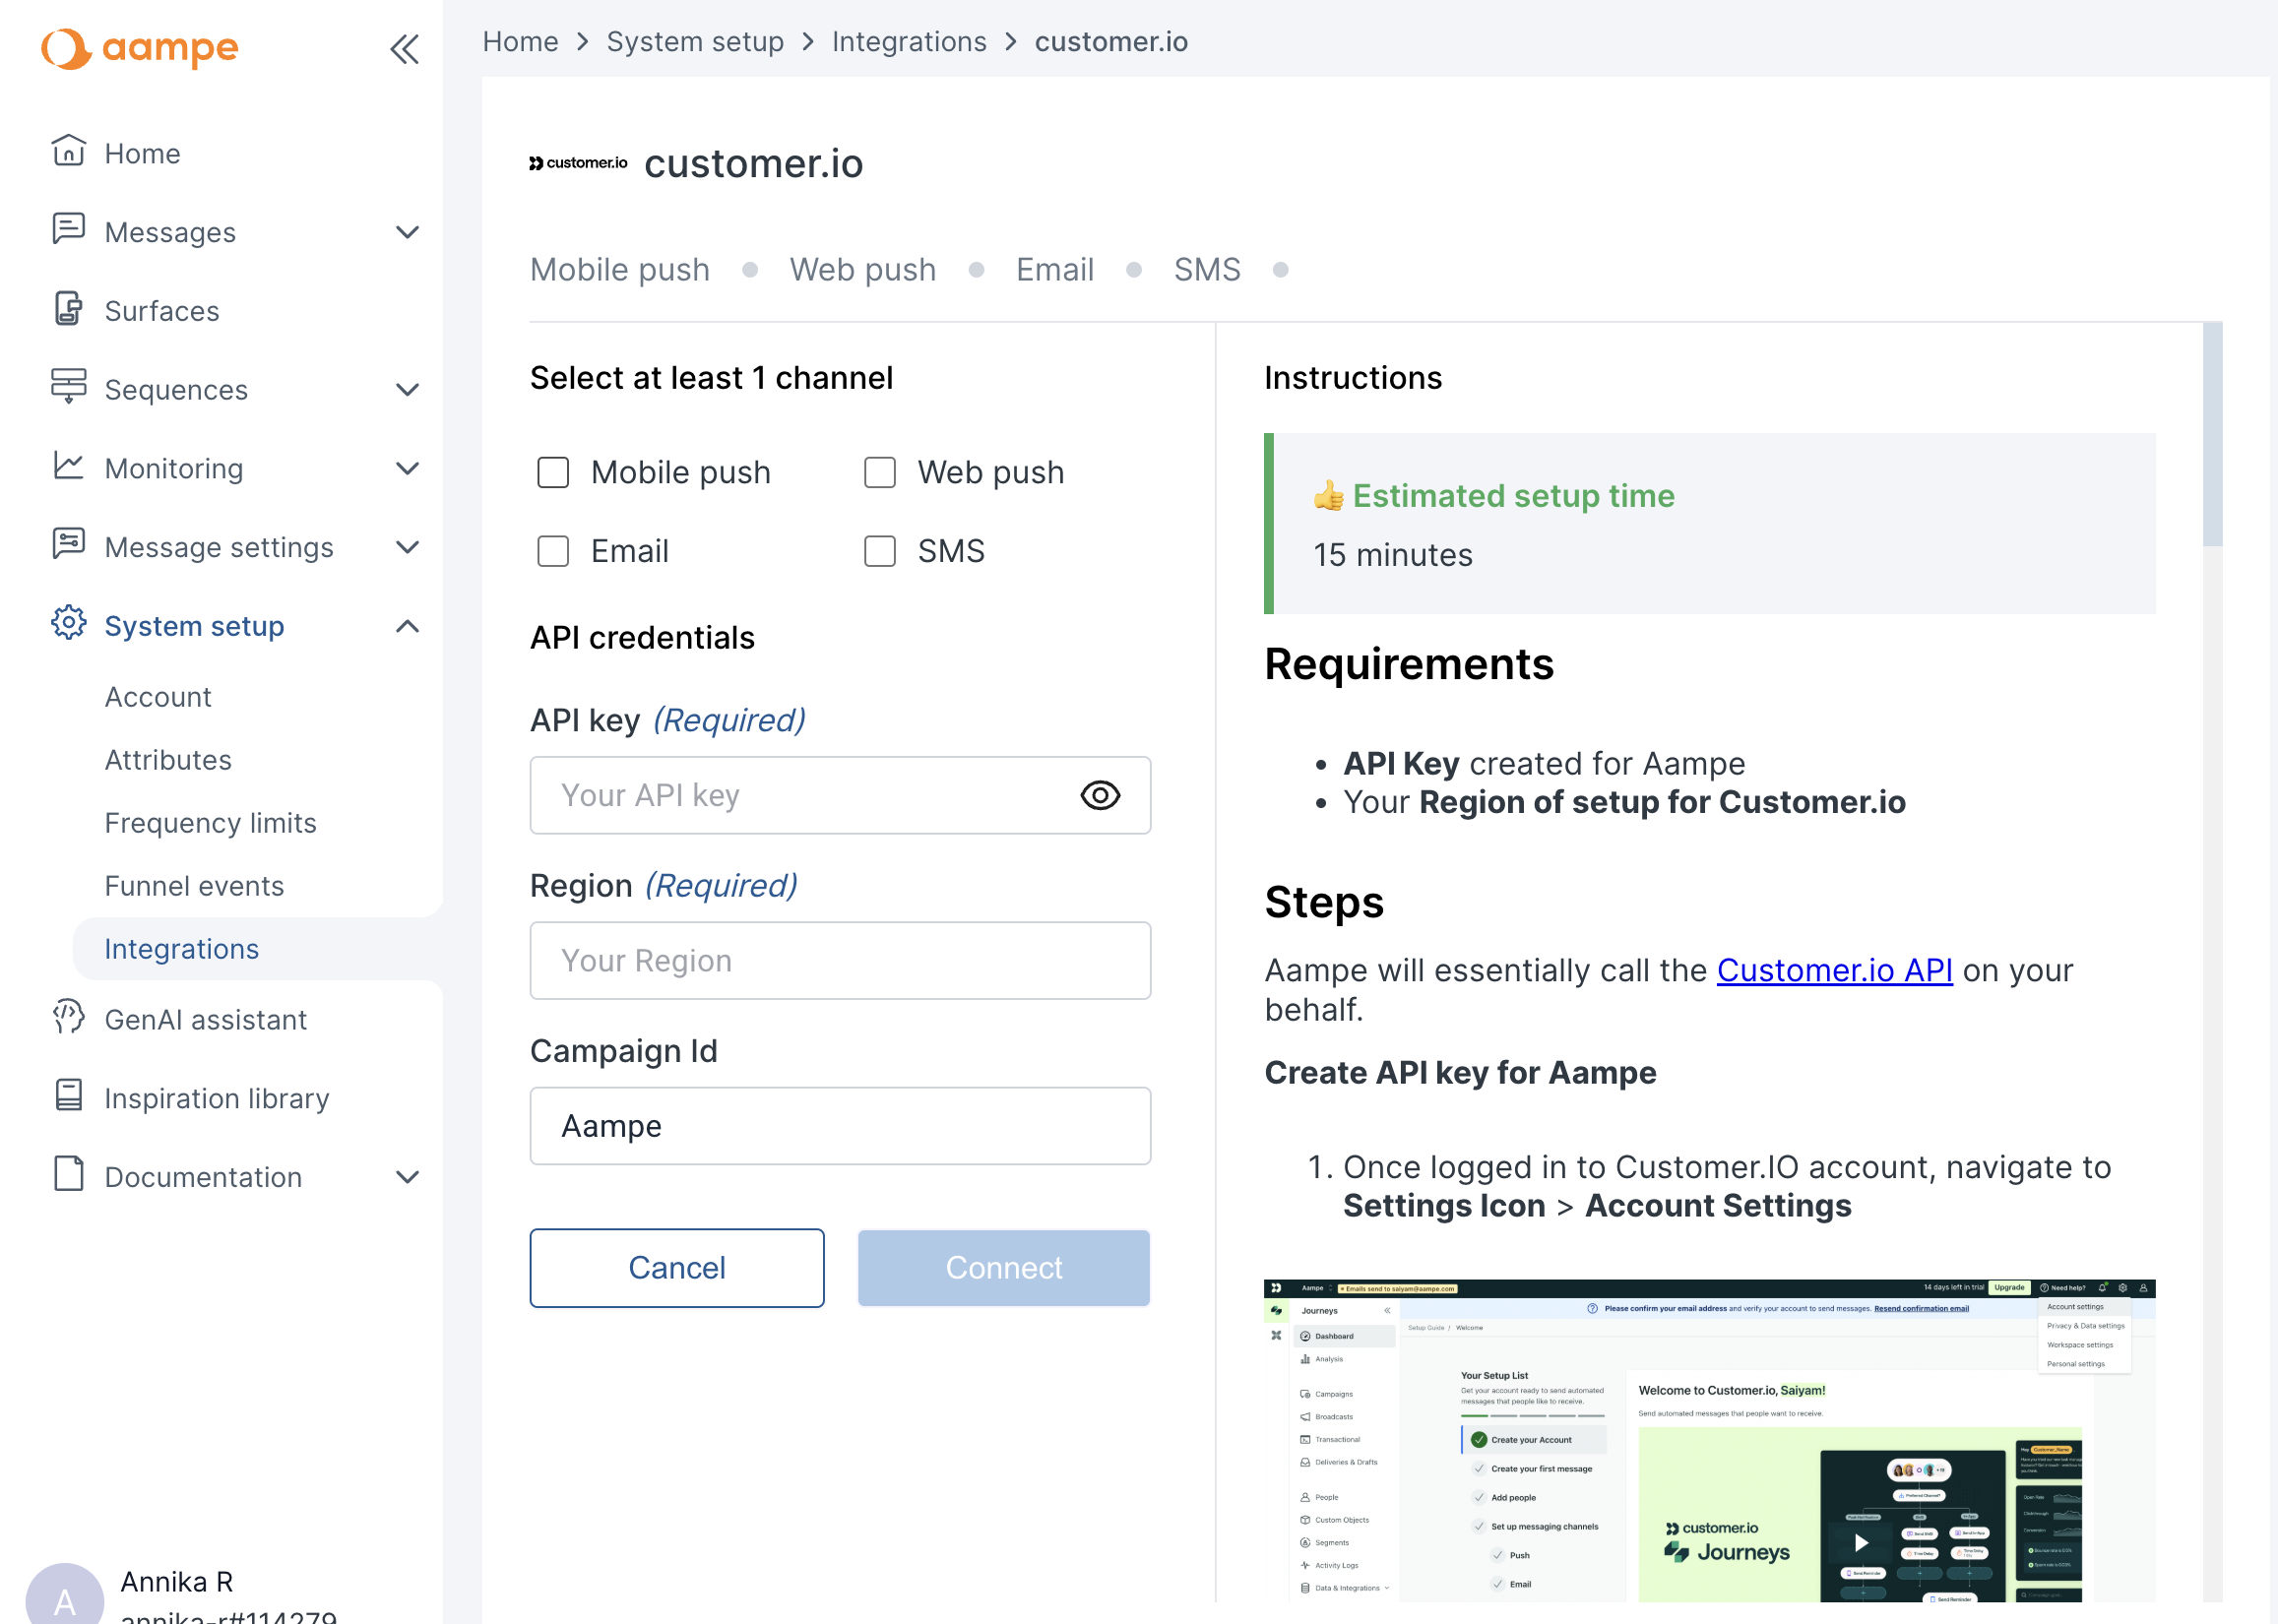 6. Click on **Connect**
### Step 2: Create Campaign for Aampe
1. Go to **Transactional** in the navigation bar
6. Click on **Connect**
### Step 2: Create Campaign for Aampe
1. Go to **Transactional** in the navigation bar
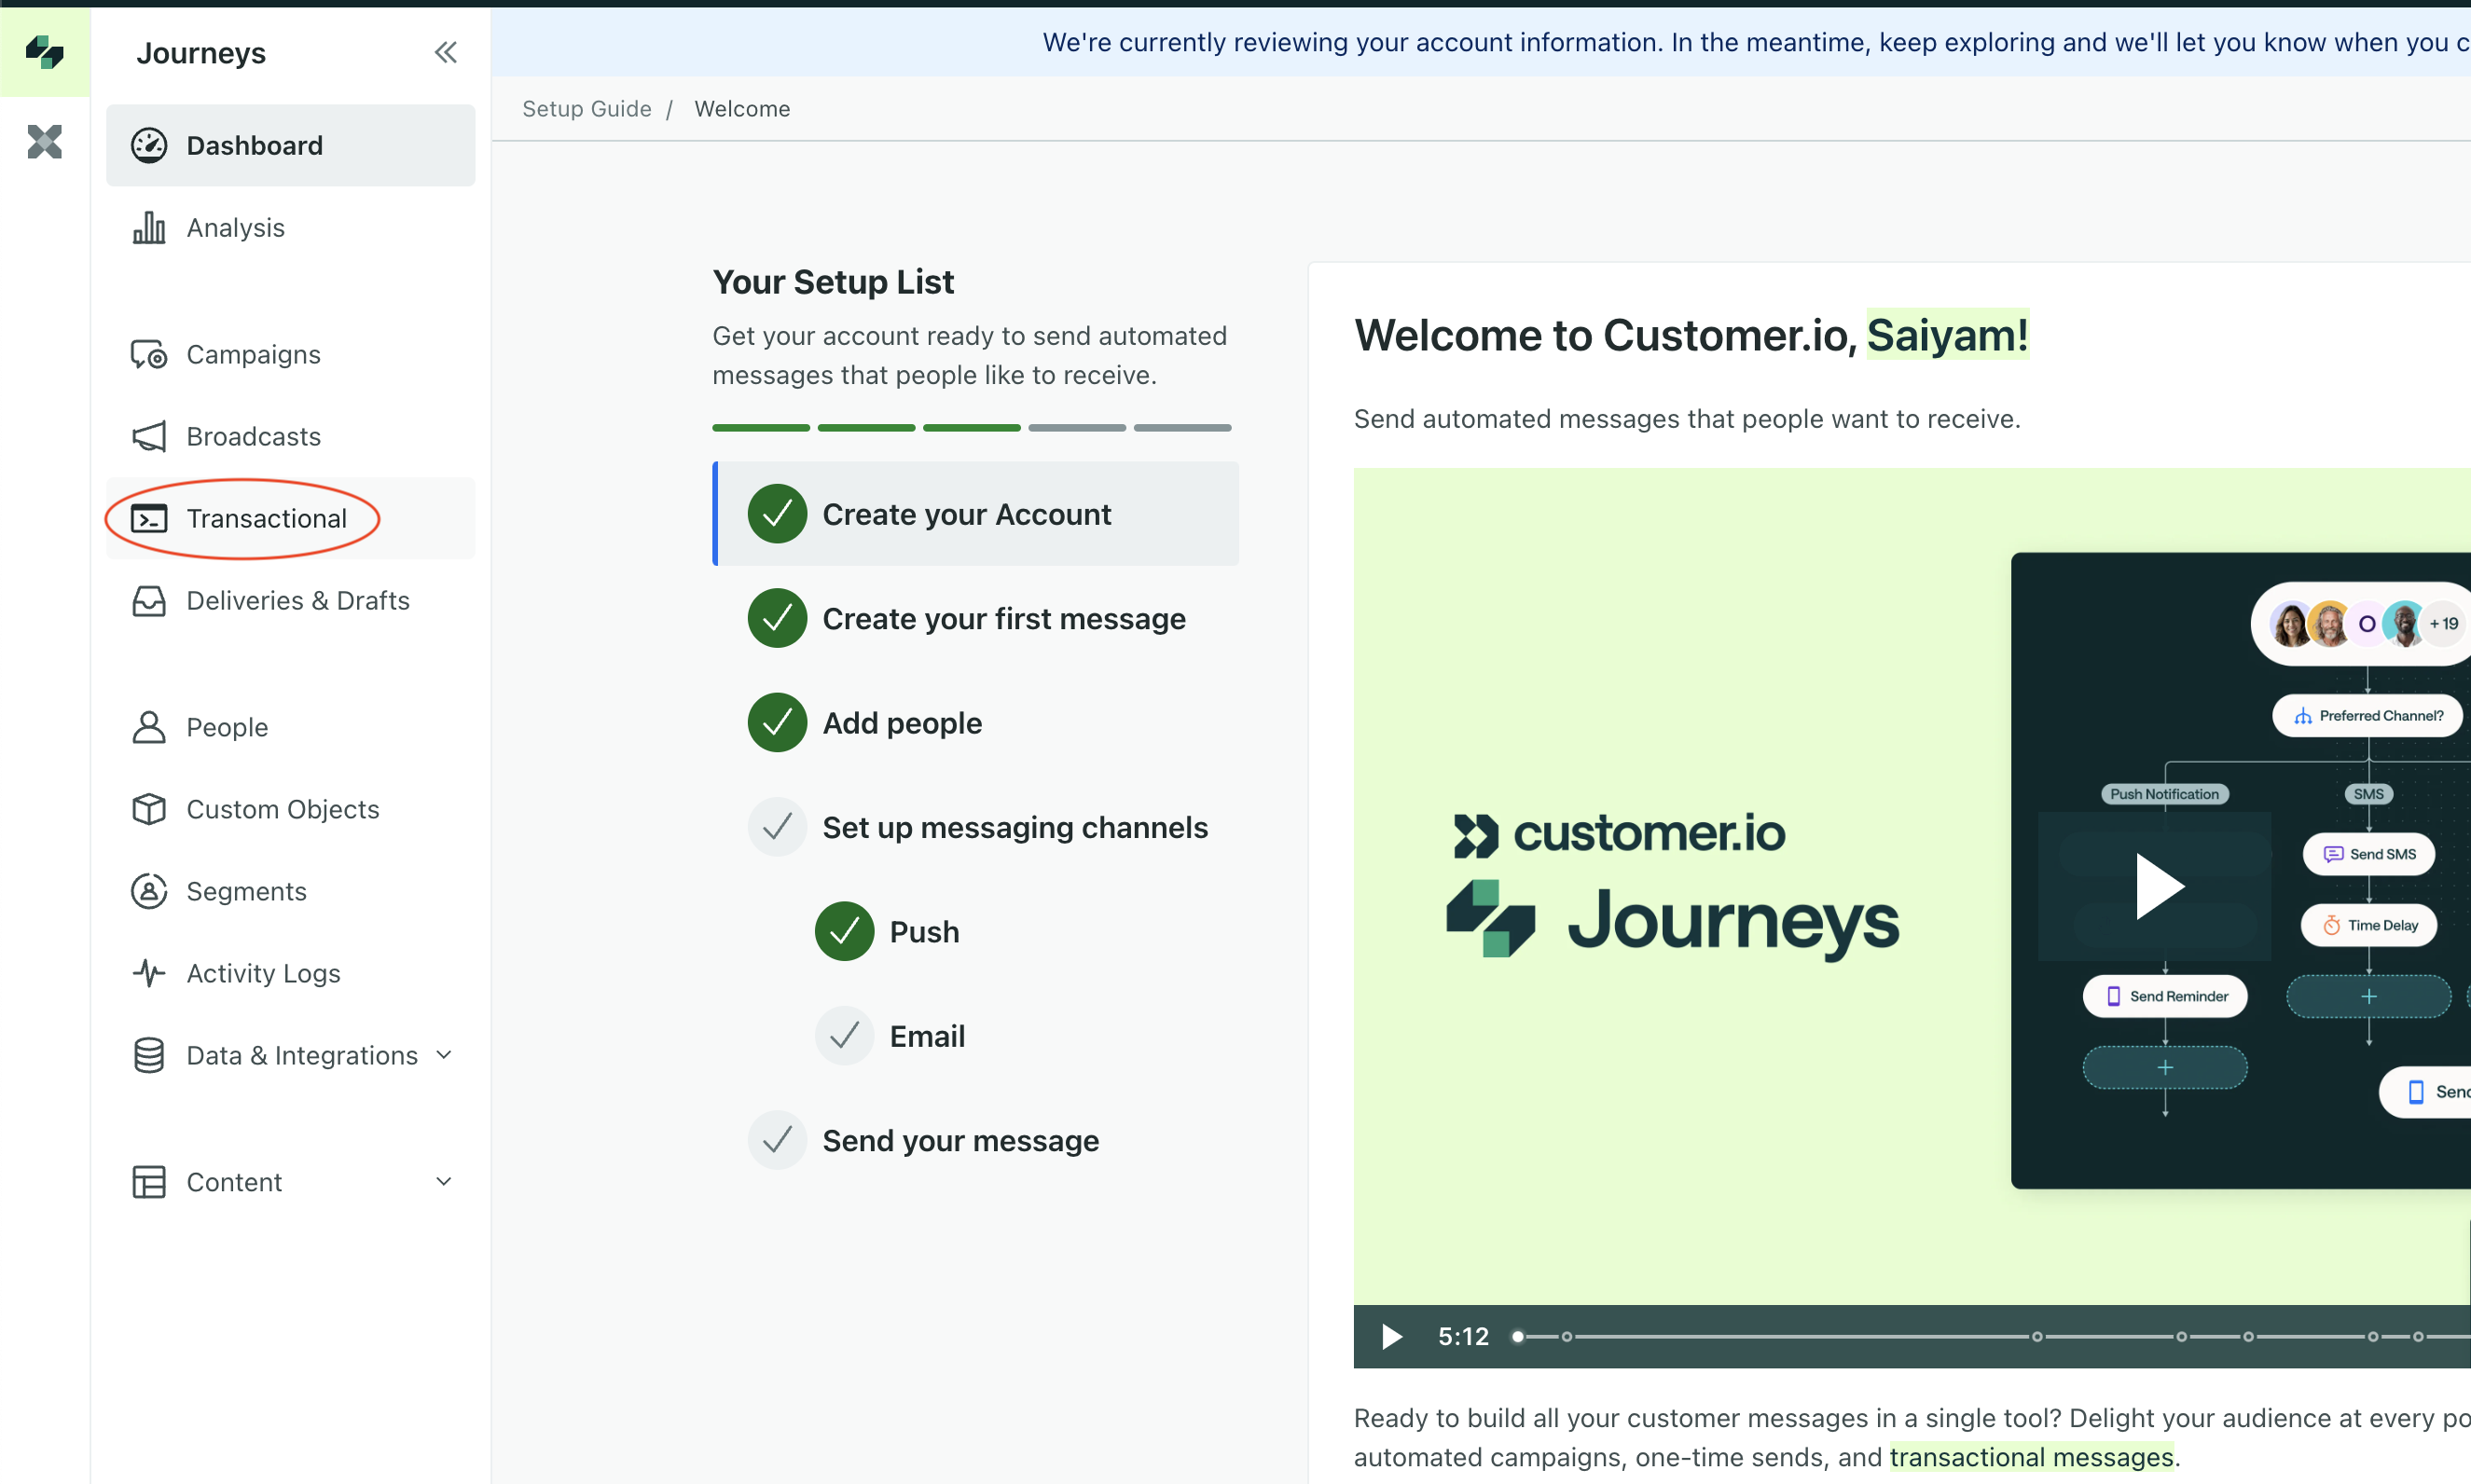 2. On Transactional, select **Create a Message**
3. Feed in the title and description for Aampe message and click on **Add Content**
2. On Transactional, select **Create a Message**
3. Feed in the title and description for Aampe message and click on **Add Content**
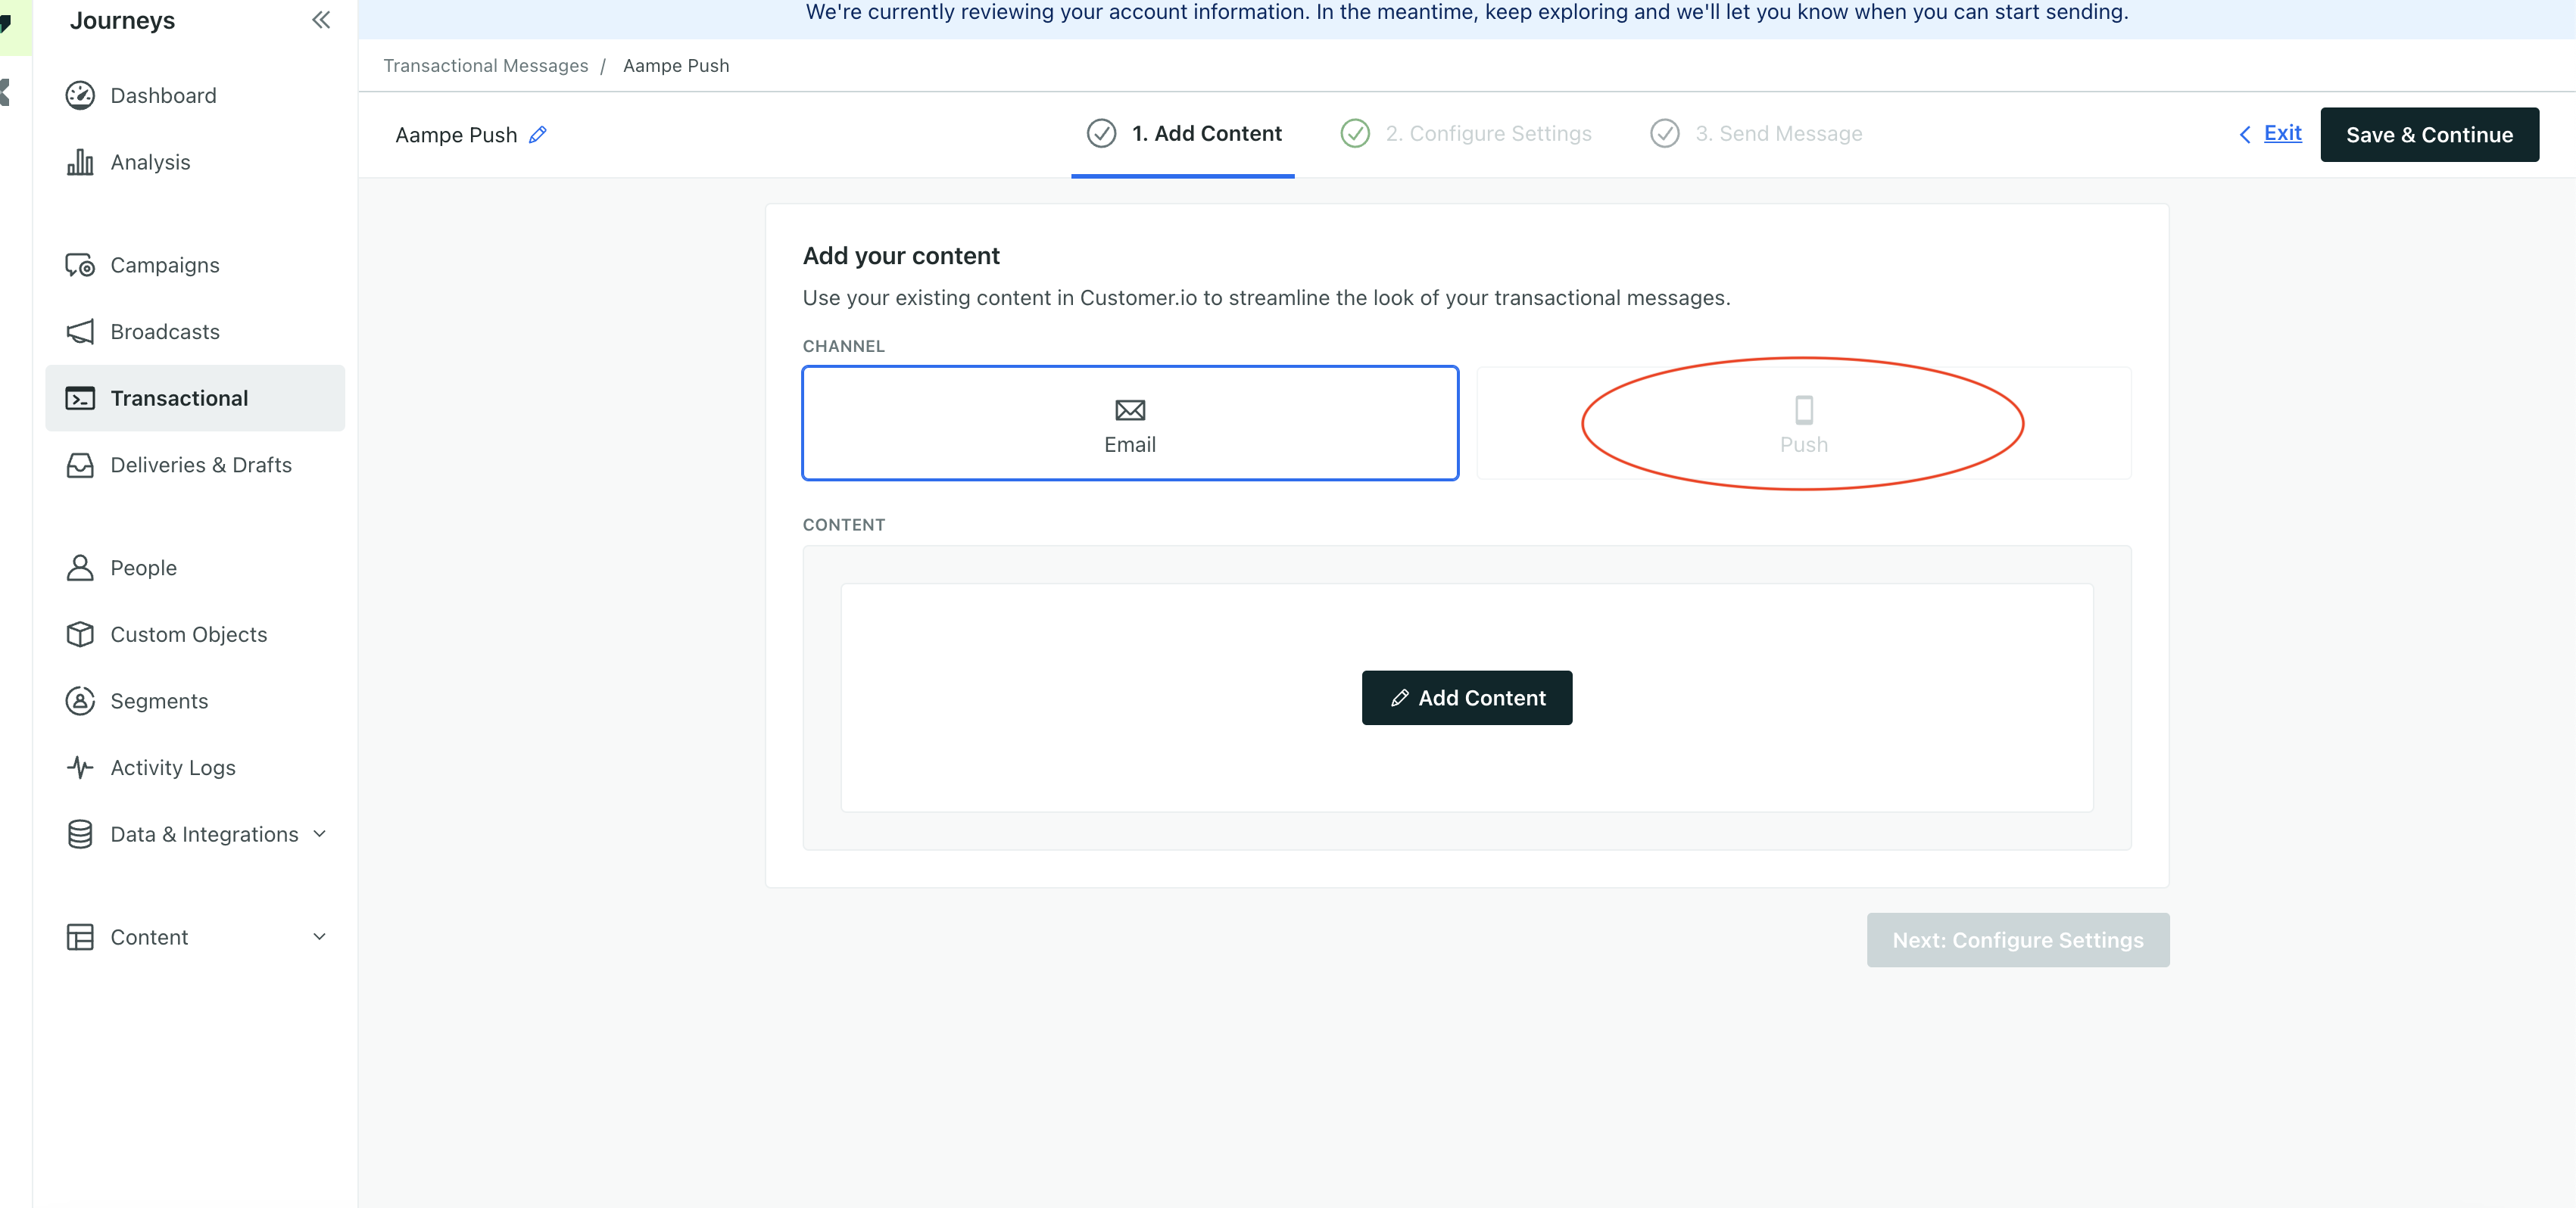
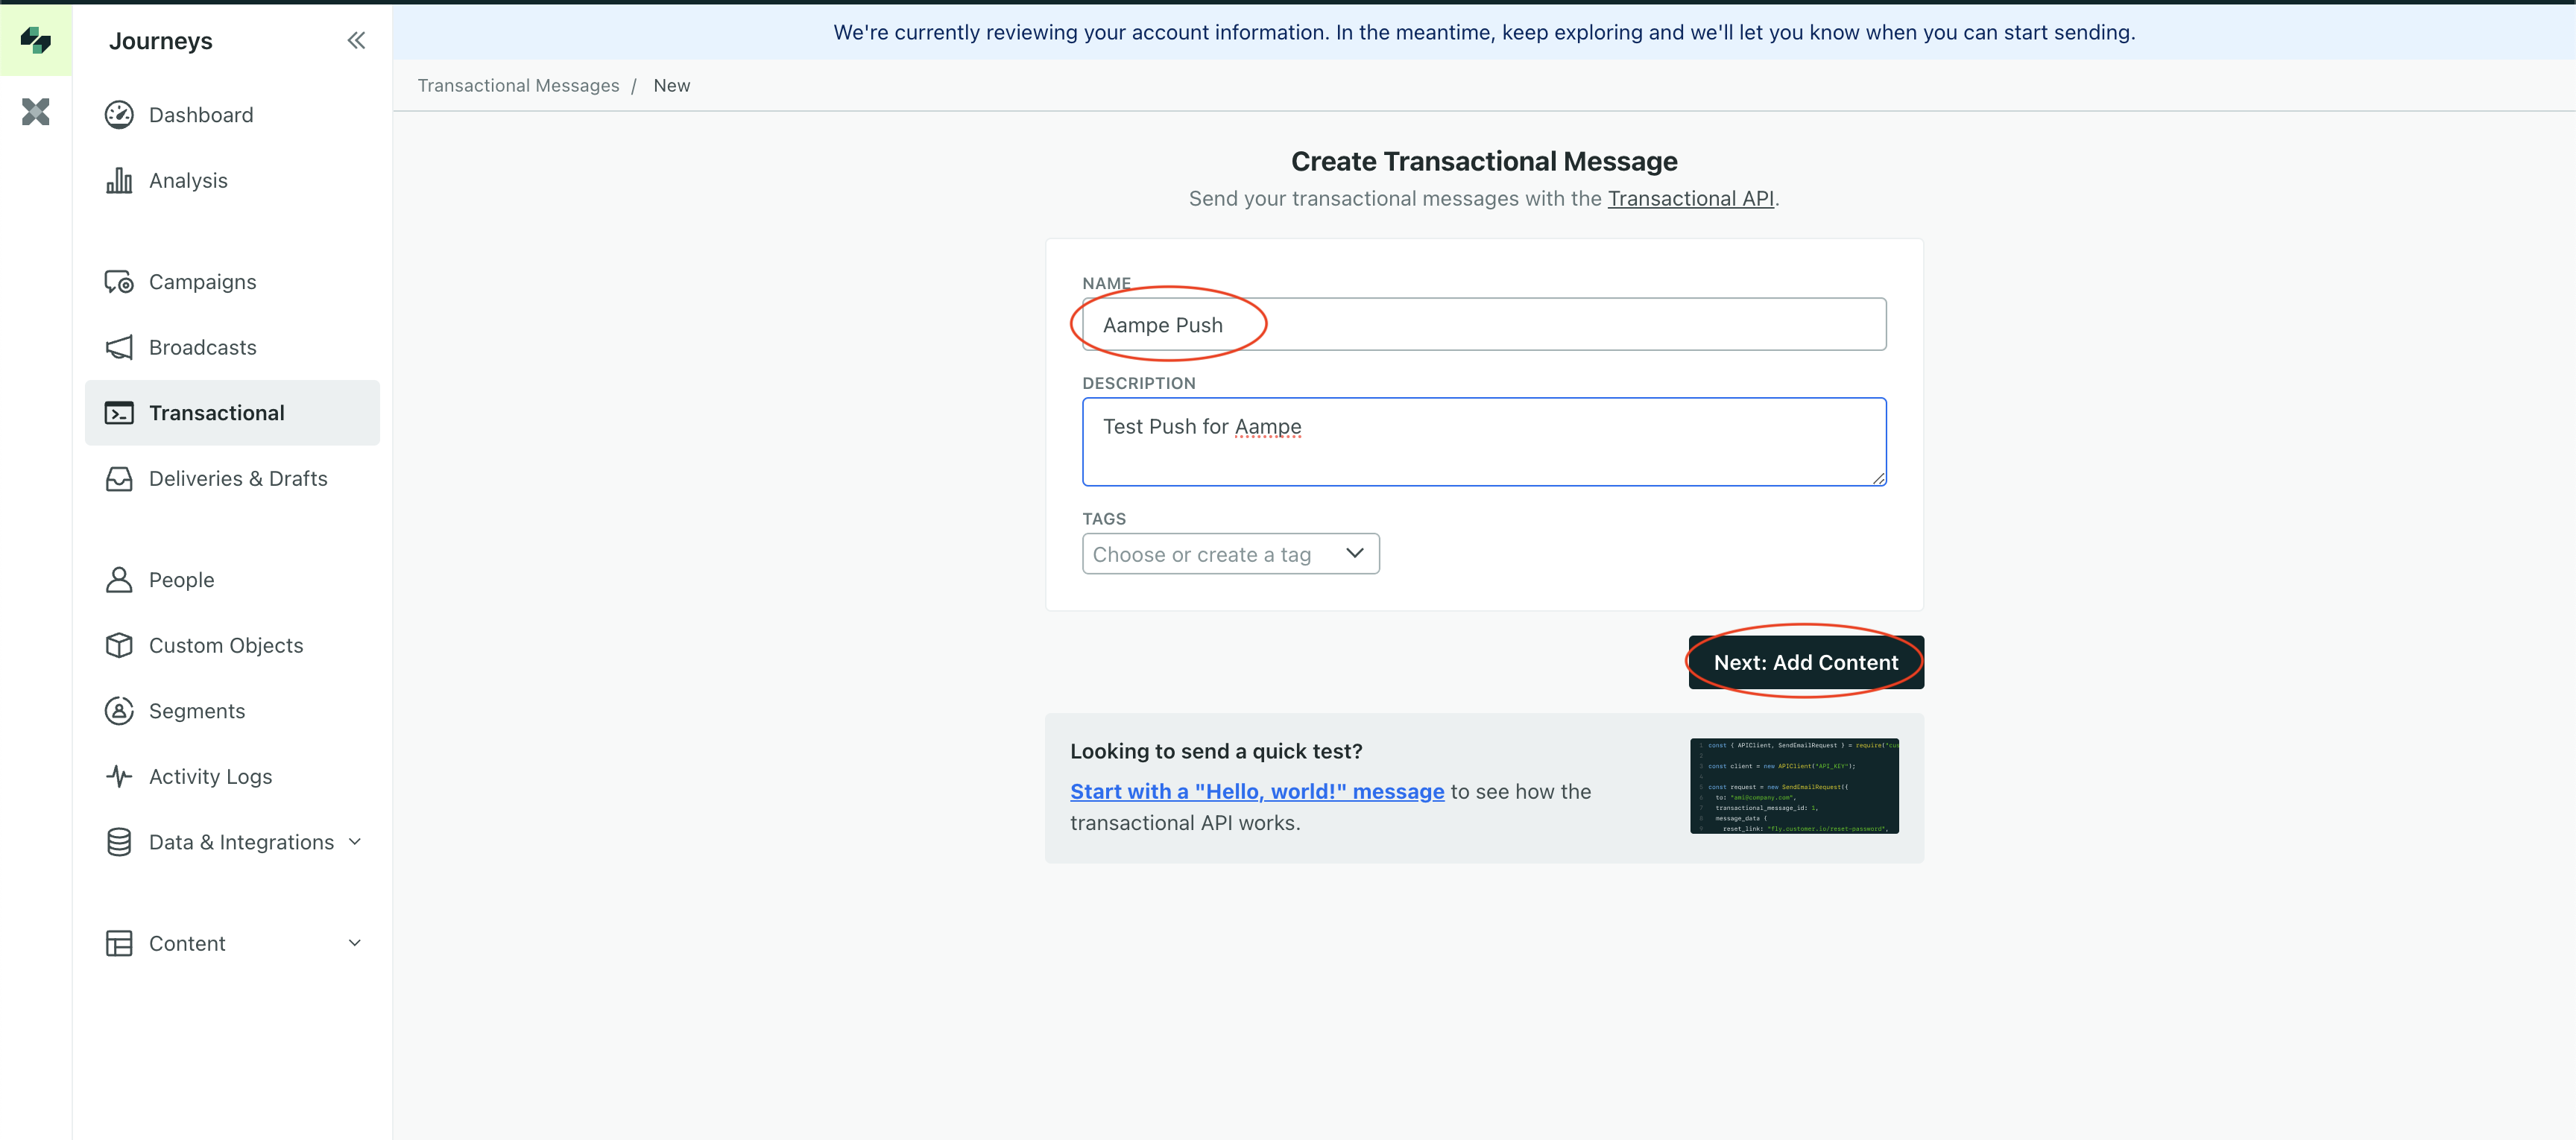 4. Select **Push** or **Email** as appropriate. No need to add content -> Click on **Save & Continue**
 5. Keep the default settings and launch the message
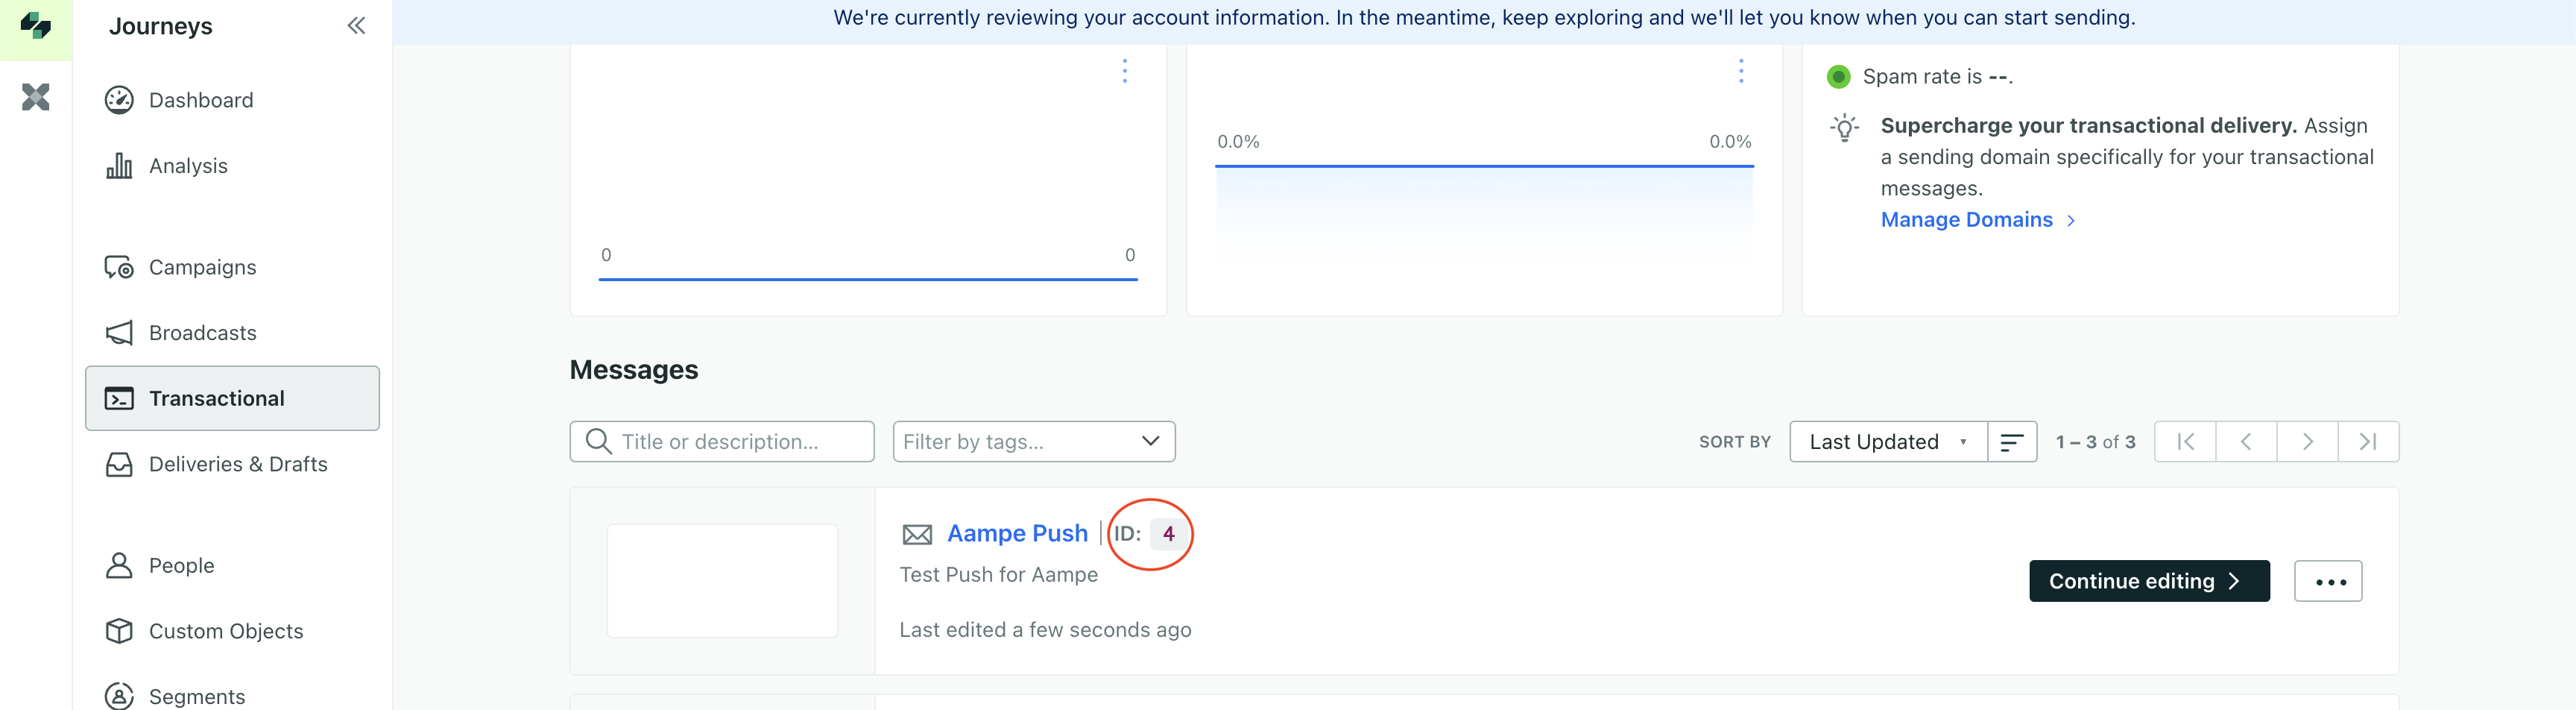
6. On the Transactional messages dashboard you will get an ID for the new message you created. Send the ID to Aampe.
5. Keep the default settings and launch the message
6. On the Transactional messages dashboard you will get an ID for the new message you created. Send the ID to Aampe.
 Congrats! You're all set with integrating Aampe and Customer.io.
***
Congrats! You're all set with integrating Aampe and Customer.io.
***