> ## Documentation Index
> Fetch the complete documentation index at: https://kb.aampe.com/llms.txt
> Use this file to discover all available pages before exploring further.
# AWS SNS Integration
> Estimated setup time: 1 hour
## Requirements
* A pair of Access Key ID and Secret Access Key with SNS Publish credentials
* The message format that you use
Aampe will call the [AWS SNS Publish API](https://docs.aws.amazon.com/sns/latest/api/API_Publish.html) on your behalf.
Configuring SNS for Aampe includes two steps:
* Create an SNS Publish Policy
* Create an IAM User for Aampe
## Create an SNS Publish Policy
1. In your AWS console, go to the **Identity and Access Management (IAM)** service.
2. Select **Policies** in the navigation menu.
3. Click on **Create Policy**
4. Click on **Choose a service**
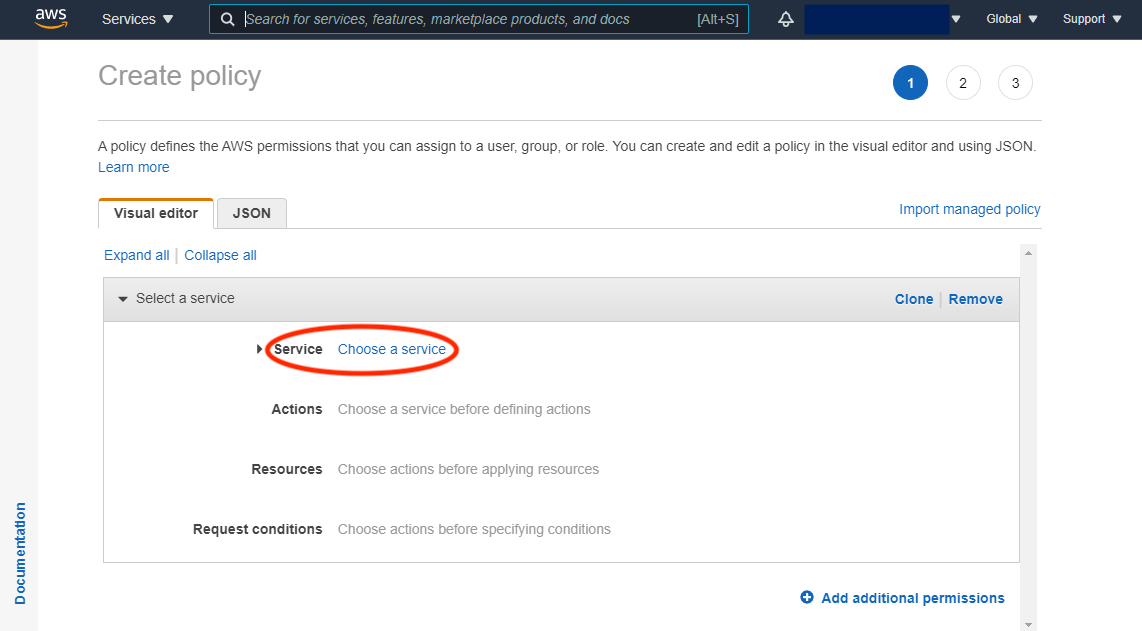 5. Select **SNS**
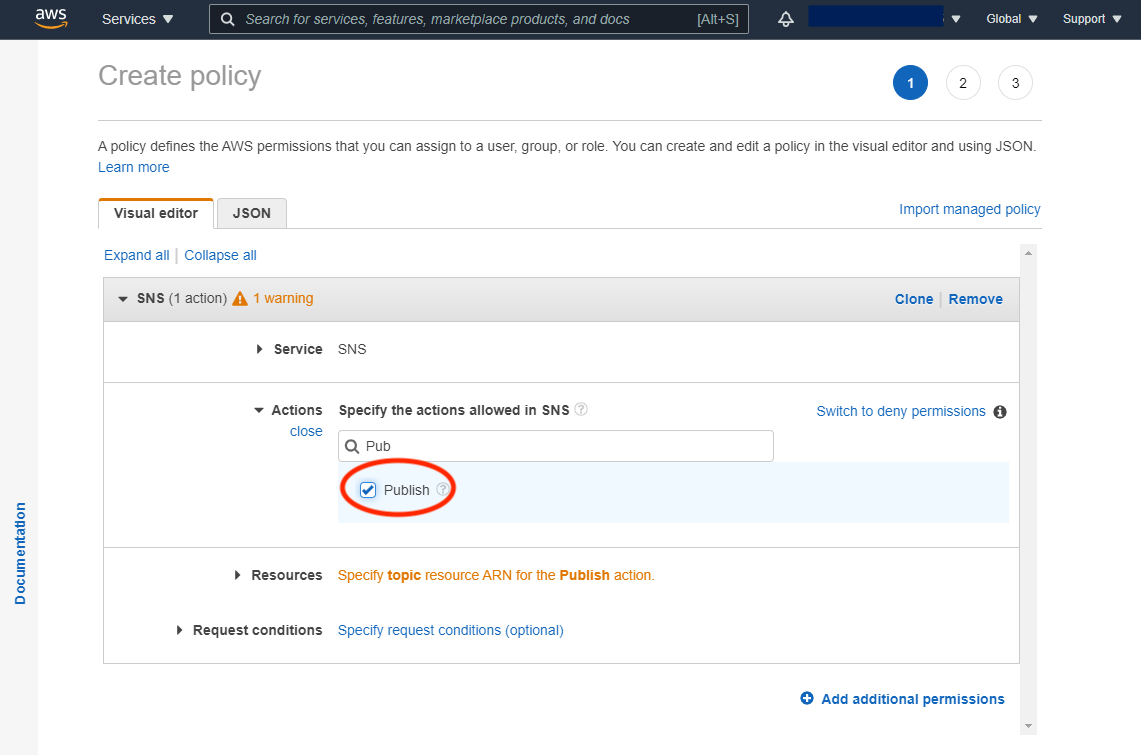
6. In the **Actions** field, type **Publish** then select the Publish action that appears
5. Select **SNS**
6. In the **Actions** field, type **Publish** then select the Publish action that appears
 7. Click on **Resources**, keep the **Specific** radio button selected and tick the **Any in this account** checkbox
8. Click **Next: Tags** and then **Next: Review**
9. Choose a name for your policy, such as `SNSPublish`
10. Click on **Create Policy**
## Create an IAM User for Aampe
1. In your AWS console, go to the **Identity and Access Management (IAM)** service.
2. Select **Users** in the navigation menu.
3. Click on **Add users**
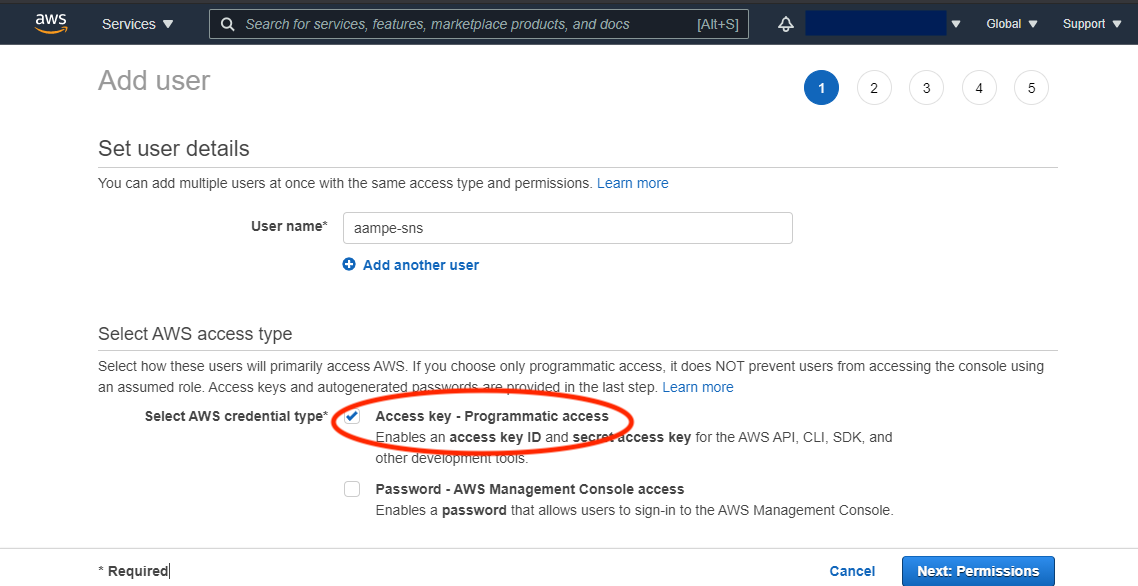
4. Choose a username, such as `aampe-sns`
5. Tick the **Access key - Programmatic access** checkbox
7. Click on **Resources**, keep the **Specific** radio button selected and tick the **Any in this account** checkbox
8. Click **Next: Tags** and then **Next: Review**
9. Choose a name for your policy, such as `SNSPublish`
10. Click on **Create Policy**
## Create an IAM User for Aampe
1. In your AWS console, go to the **Identity and Access Management (IAM)** service.
2. Select **Users** in the navigation menu.
3. Click on **Add users**
4. Choose a username, such as `aampe-sns`
5. Tick the **Access key - Programmatic access** checkbox
 6. Click on **Next: Permissions**
7. Click on the **Attach existing policies directly** button
6. Click on **Next: Permissions**
7. Click on the **Attach existing policies directly** button
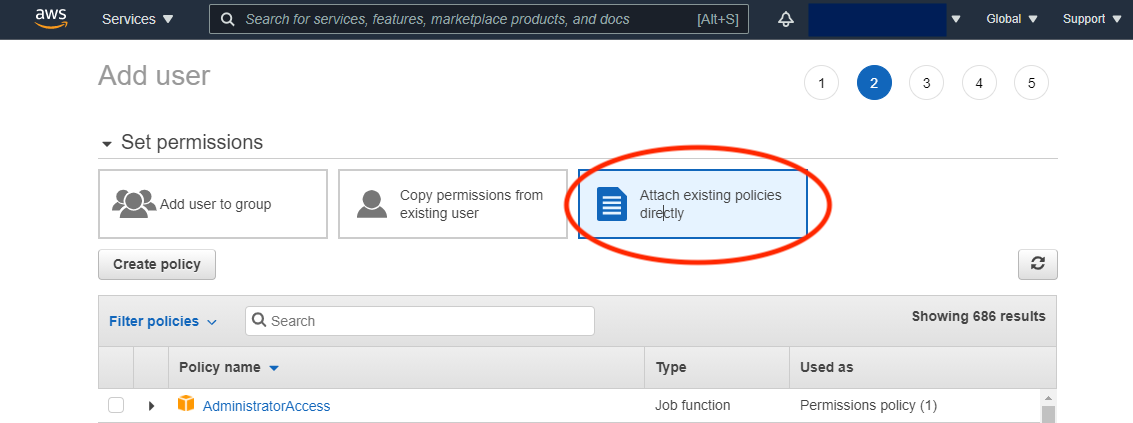 8. In the **Search** text field, type the name of the policy you created in the previous step and select it when it appears in the list under Policy name.
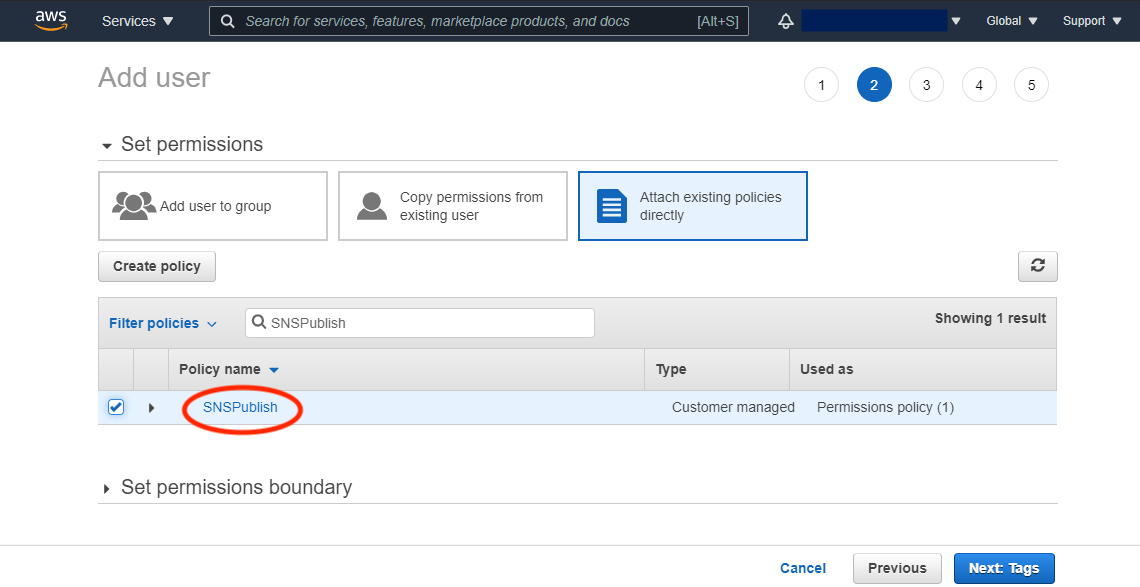 9. Click on **Next: Tags** and **Next: Review**
10. Review your choices and click on **Create user**
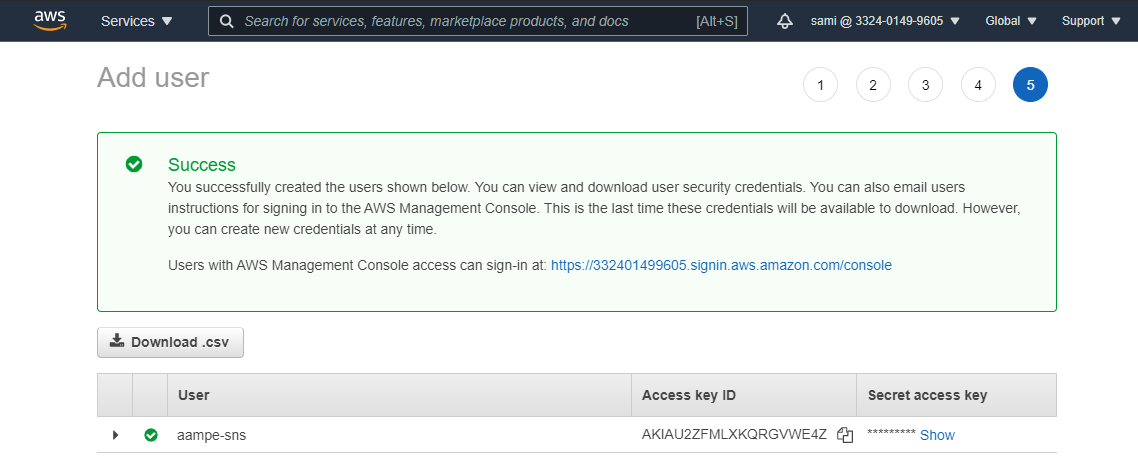
11. You will then be led to a success screen, from which you can copy your **Access key ID** and **Secret access key**
9. Click on **Next: Tags** and **Next: Review**
10. Review your choices and click on **Create user**
11. You will then be led to a success screen, from which you can copy your **Access key ID** and **Secret access key**